Page History
...
| Table of Contents | ||
|---|---|---|
|
Overview
Yellowfin offers a way to save your transformed data into a database table via the SQL database output step. To configure this step, you will need to configure a number of different settings in relation to the target database, target table, the type of update that is required, and the fields that will be mapped. This guide explains how to do all of this.
...
| Warning |
|---|
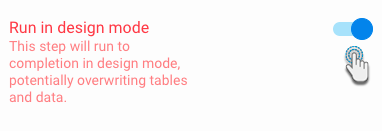
Warning: Extra caution should be taken when configuring the output step so that any existing source data does not get accidentally overwritten. The output to database step has a variety of options such as dropping tables, truncating (deleting) data, adding new rows, and updating existing data. It is recommended that a test database is used when developing transformation flows. Further, the output step is disabled by default when in edit mode (see Run in Design mode option). |
Understanding the Options
| Anchor | ||||
|---|---|---|---|---|
|
Table Creation Options
Table Creation Type | Description |
|---|---|
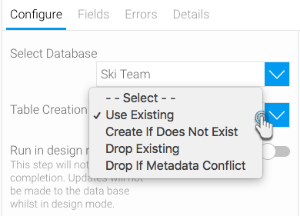
Use Existing | With this selection, the data will be written into an existing table that you select. |
Create If Not Exists | If the specified table doesn’t exist in the database, then create a new one, but if it does (or once it has been created) save content into it. |
Drop Existing | Always delete the existing table and create a new one. Only use this option when you know that the old data does not need to be retained. |
Drop If Metadata Conflict | If there is a metadata conflict between the data in the flow and the table (such a conflict could refer to different number of fields/columns in the flow file than in the table or possibly a different data type), then delete the table and create a new one to store data; otherwise if the metadata matches without there being a conflict, use the existing table. Only use this option when you know that the old data does not need to be retained. |
...
| Note |
|---|
In rarer circumstances, the target tables may not exist in advance. In these cases Yellowfin can create the table for you, provided you have the right security access. The Create if Not Exists option will create the table if it does not exist. Typically this will only happen the first time a flow is run, after which the existing table will be used. The Drop Existing will always delete and re-create the table, thus deleting any data that may have been stored in that table - and should be used with caution. Similarly the Drop if Meta-Data Conflict will drop and re-create the table if there is a mismatch between the table structure and the data contained in the flow. This option is also destructive to data and should be used with caution. |
| Styleclass | ||
|---|---|---|
| ||
| Anchor | ||||
|---|---|---|---|---|
|
Update Type
Update Type | Description |
|---|---|
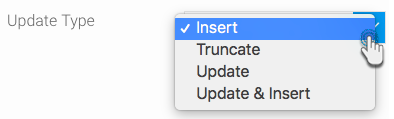
Insert | To append or add data to the end of the existing data. |
Truncate | To replace all the existing data with the new values. This should be used with caution as it will delete any existing data. |
Update | Update the value of fields in the database table where a matching row exists in the transformation flow. This option overwrites existing data and should be used with caution. |
Update & Insert | Update the value of fields in the database table where a matching row exists in the transformation flow. This option overwrites existing data and should be used with caution. If no matching row exists then insert a new row. |
| Styleclass | ||
|---|---|---|
| ||
topOutput |
Step Configuration
How to Configure an Output Step
Once you are ready to store your transformed data into an SQL output step, follow the instructions below:
- Click on the Output Steps button on the left side of the Transformation Flow builder, to view a list of output steps.
- Drag the Output to SQL Database step from the list.
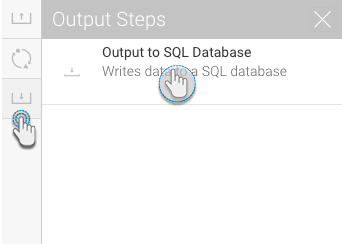
- Click on the step to bring up in configuration details in the Transformation Flow panel.
- Then select a Choose database from the list. Only writeable data sources will be shown.
- Choose a table creation option. Click here to understand the table creation options.
- Continue with the selected process:
- If Use Existing was selected, select a pre-existing table to write data into. Then skip to step 4.
- If Create If Not Exists was selected, then enter a new table name. You can optionally select any table fields that you would like to index (note: indexes are used to improve query performance. If in doubt about this option, please contact your system administrator). Move on to step 4.

- If Drop Existing was selected, then enter a new table name. Skip ahead to step 5.
- If Drop if Metadata Conflicts was selected, then enter a new table name, also specify whether the existing table is to be dropped in case there are more fields in the transformation flow than in the table. Then skip to step 4.
Choose an update type to indicate how the table will be updated. Click here to understand all the options.
Note For Update and Update & Insert options, additional row matching is required. This is done by choosing Join for the identifier or matching field, and then Set to indicate which field to update. If no option is selected, the field will not be used in the join or be updated as part of the flow.
- Switch on the toggle to run this output step in design mode. SEE WARNING NOTE.
- Once the configuration is done, click on the Apply button to save these changes.
| Styleclass | ||
|---|---|---|
| ||