Page History
...
- Type 1. in either an empty line, or at the start of existing text, and then press the space key. Note that this will not work if the above key combination is added in the middle of a text.
- The text line will be transformed to a numbered list.

- After providing text, press Enter to move to the next numbered item in the list. You can repeat this to add multiple items to this list.
- To end the list, simply press the Enter key once again without providing providing any text.
Start a bulleted list
The steps to create or edit a bullet point list are the same as above. However, the keyword combination to activate an unordered list could either be the hyphen key and then the space key, or the asterisk key and space.
Copying text into your story
...
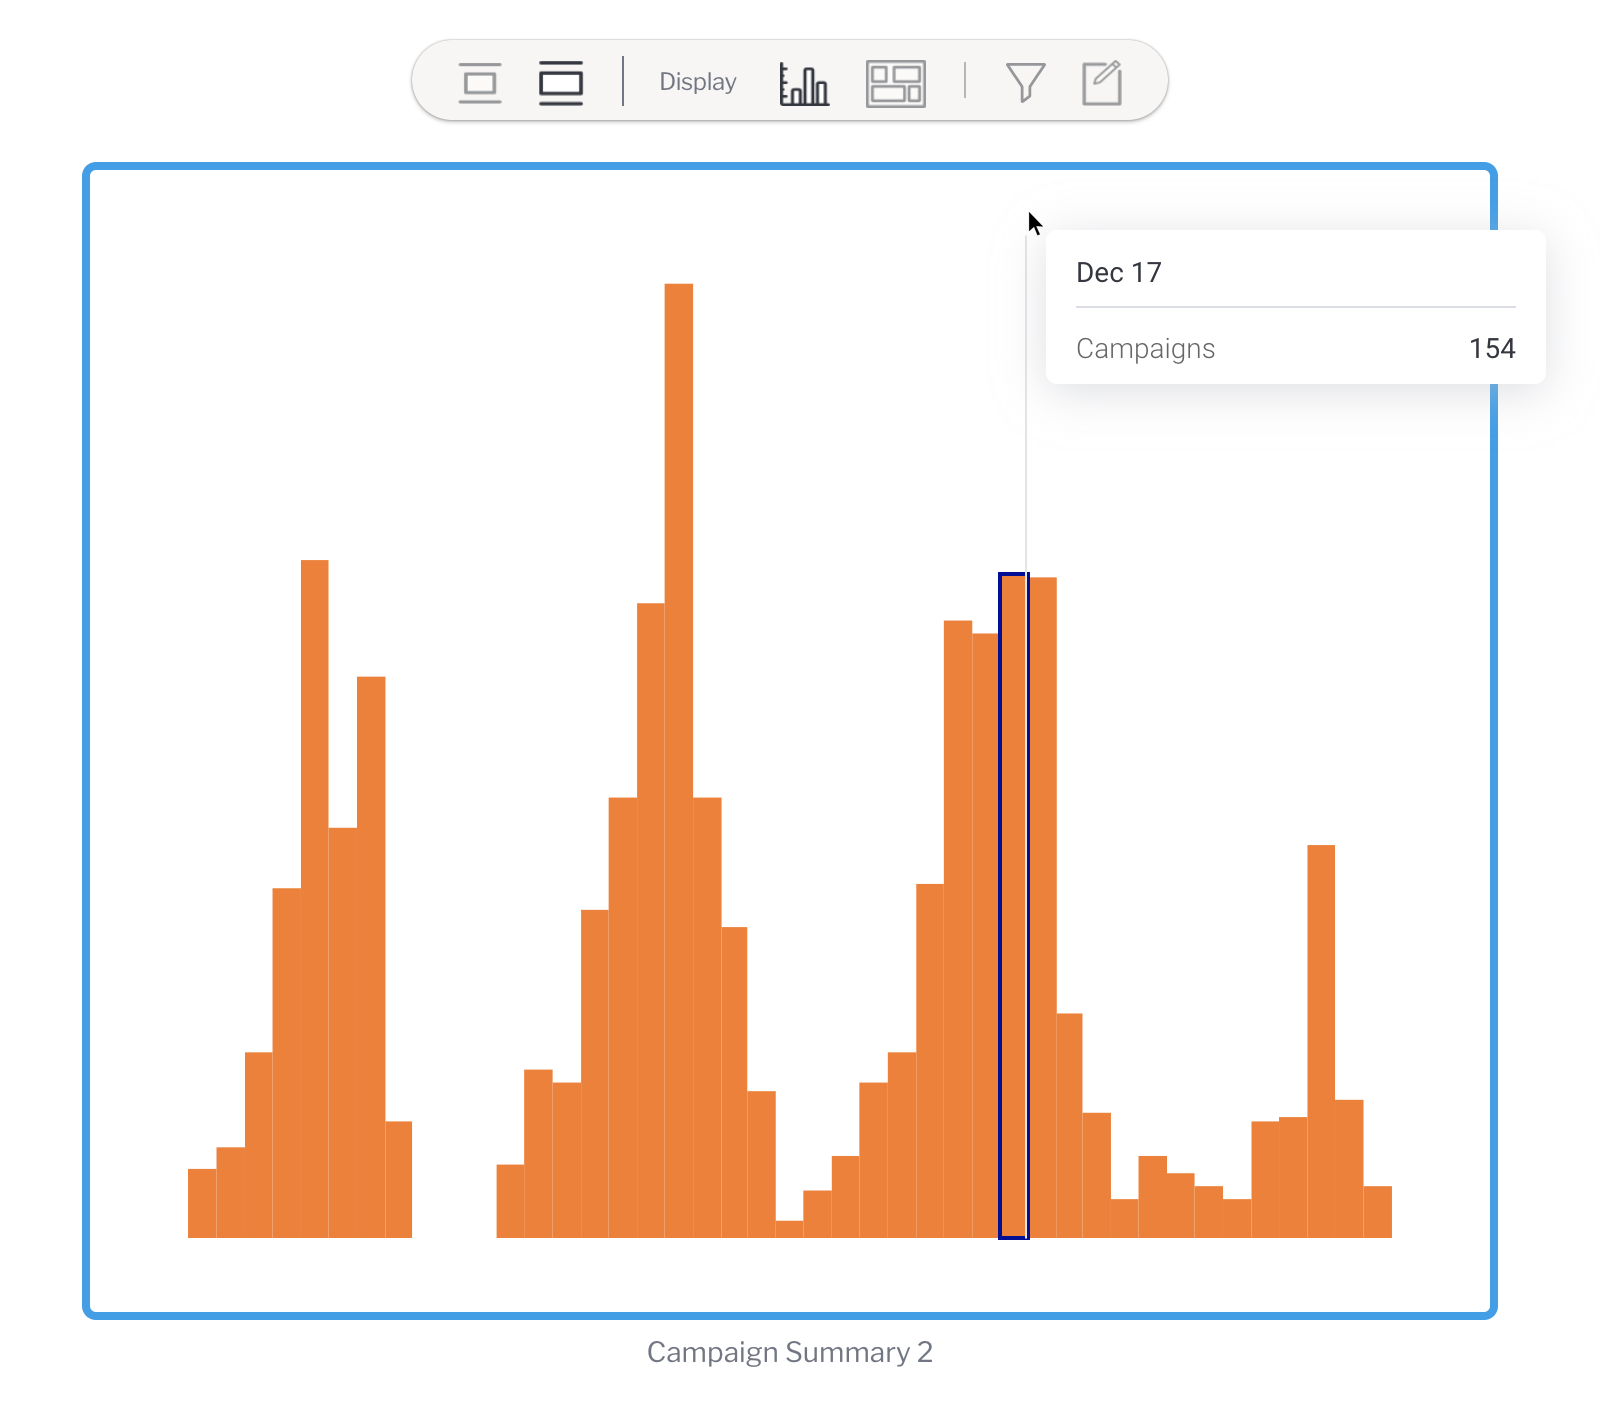
Hovering over a report will display a pop-up menu. From the menu, you can resize the report's display size, switch between report views to display in the story, (chart, table or canvas, depending on what content is available), open any available user prompt filters to adjust the content of the report, and view the report in the Report Builder. The toolbar typically looks like this, although some options may alter depending on the content of your report.
For paired buttons such as the display width or type, the active option is dark. Clicking on a gray button activates its functionality and deactivates the paired functionality. For example, clicking on the first gray button shown above would reduce the size of the report, darken the button, and lighten the button next to it. See the table below for further information on the tools available.
Button | Name | Description |
|---|---|---|
| Original size | This button resizes the report to a smaller size. You can switch between the small or big size of the report. |
| Fit size | This button increases the displayed size of the report (enabled by default). |
| Display chart | This button displays only the report chart. In the case of multiple charts, a popup will appear allowing you to select from the available charts to be displayed. Click here for more details. |
| Display table | This button displays the report table. Fits to the size of the placeholder, and can be scrolled horizontally and vertically if required. |
| Display canvas | This button displays the report canvas (disabled by default, and only available if the added report has a canvas). Size limit: 700 pixels wide x 600 pixels long. |
| Filters | If your report contains user prompt filters, you can create filtered reports directly from your story with this button. Read more about these reports in the content earlier on this page. |
| Maximize | This button redirects you to the report output page, where you can edit the report and re-publish it, if required. The changes will be reflected in a live report added to the story. You can also use this to replace the report with a snapshot or bookmark, or add another item from the same report to your story. Closing the report output page takes you back to editing your story. Learn more here. |
...
- Ensure your embedded report or chart has at least one user prompt filter activated
- Hover over your report to display the pop-up menu for embedded reports
- Click on the Filters button on the pop-up menu
Any available user prompt filters will be displayed on a scrollable panel on the right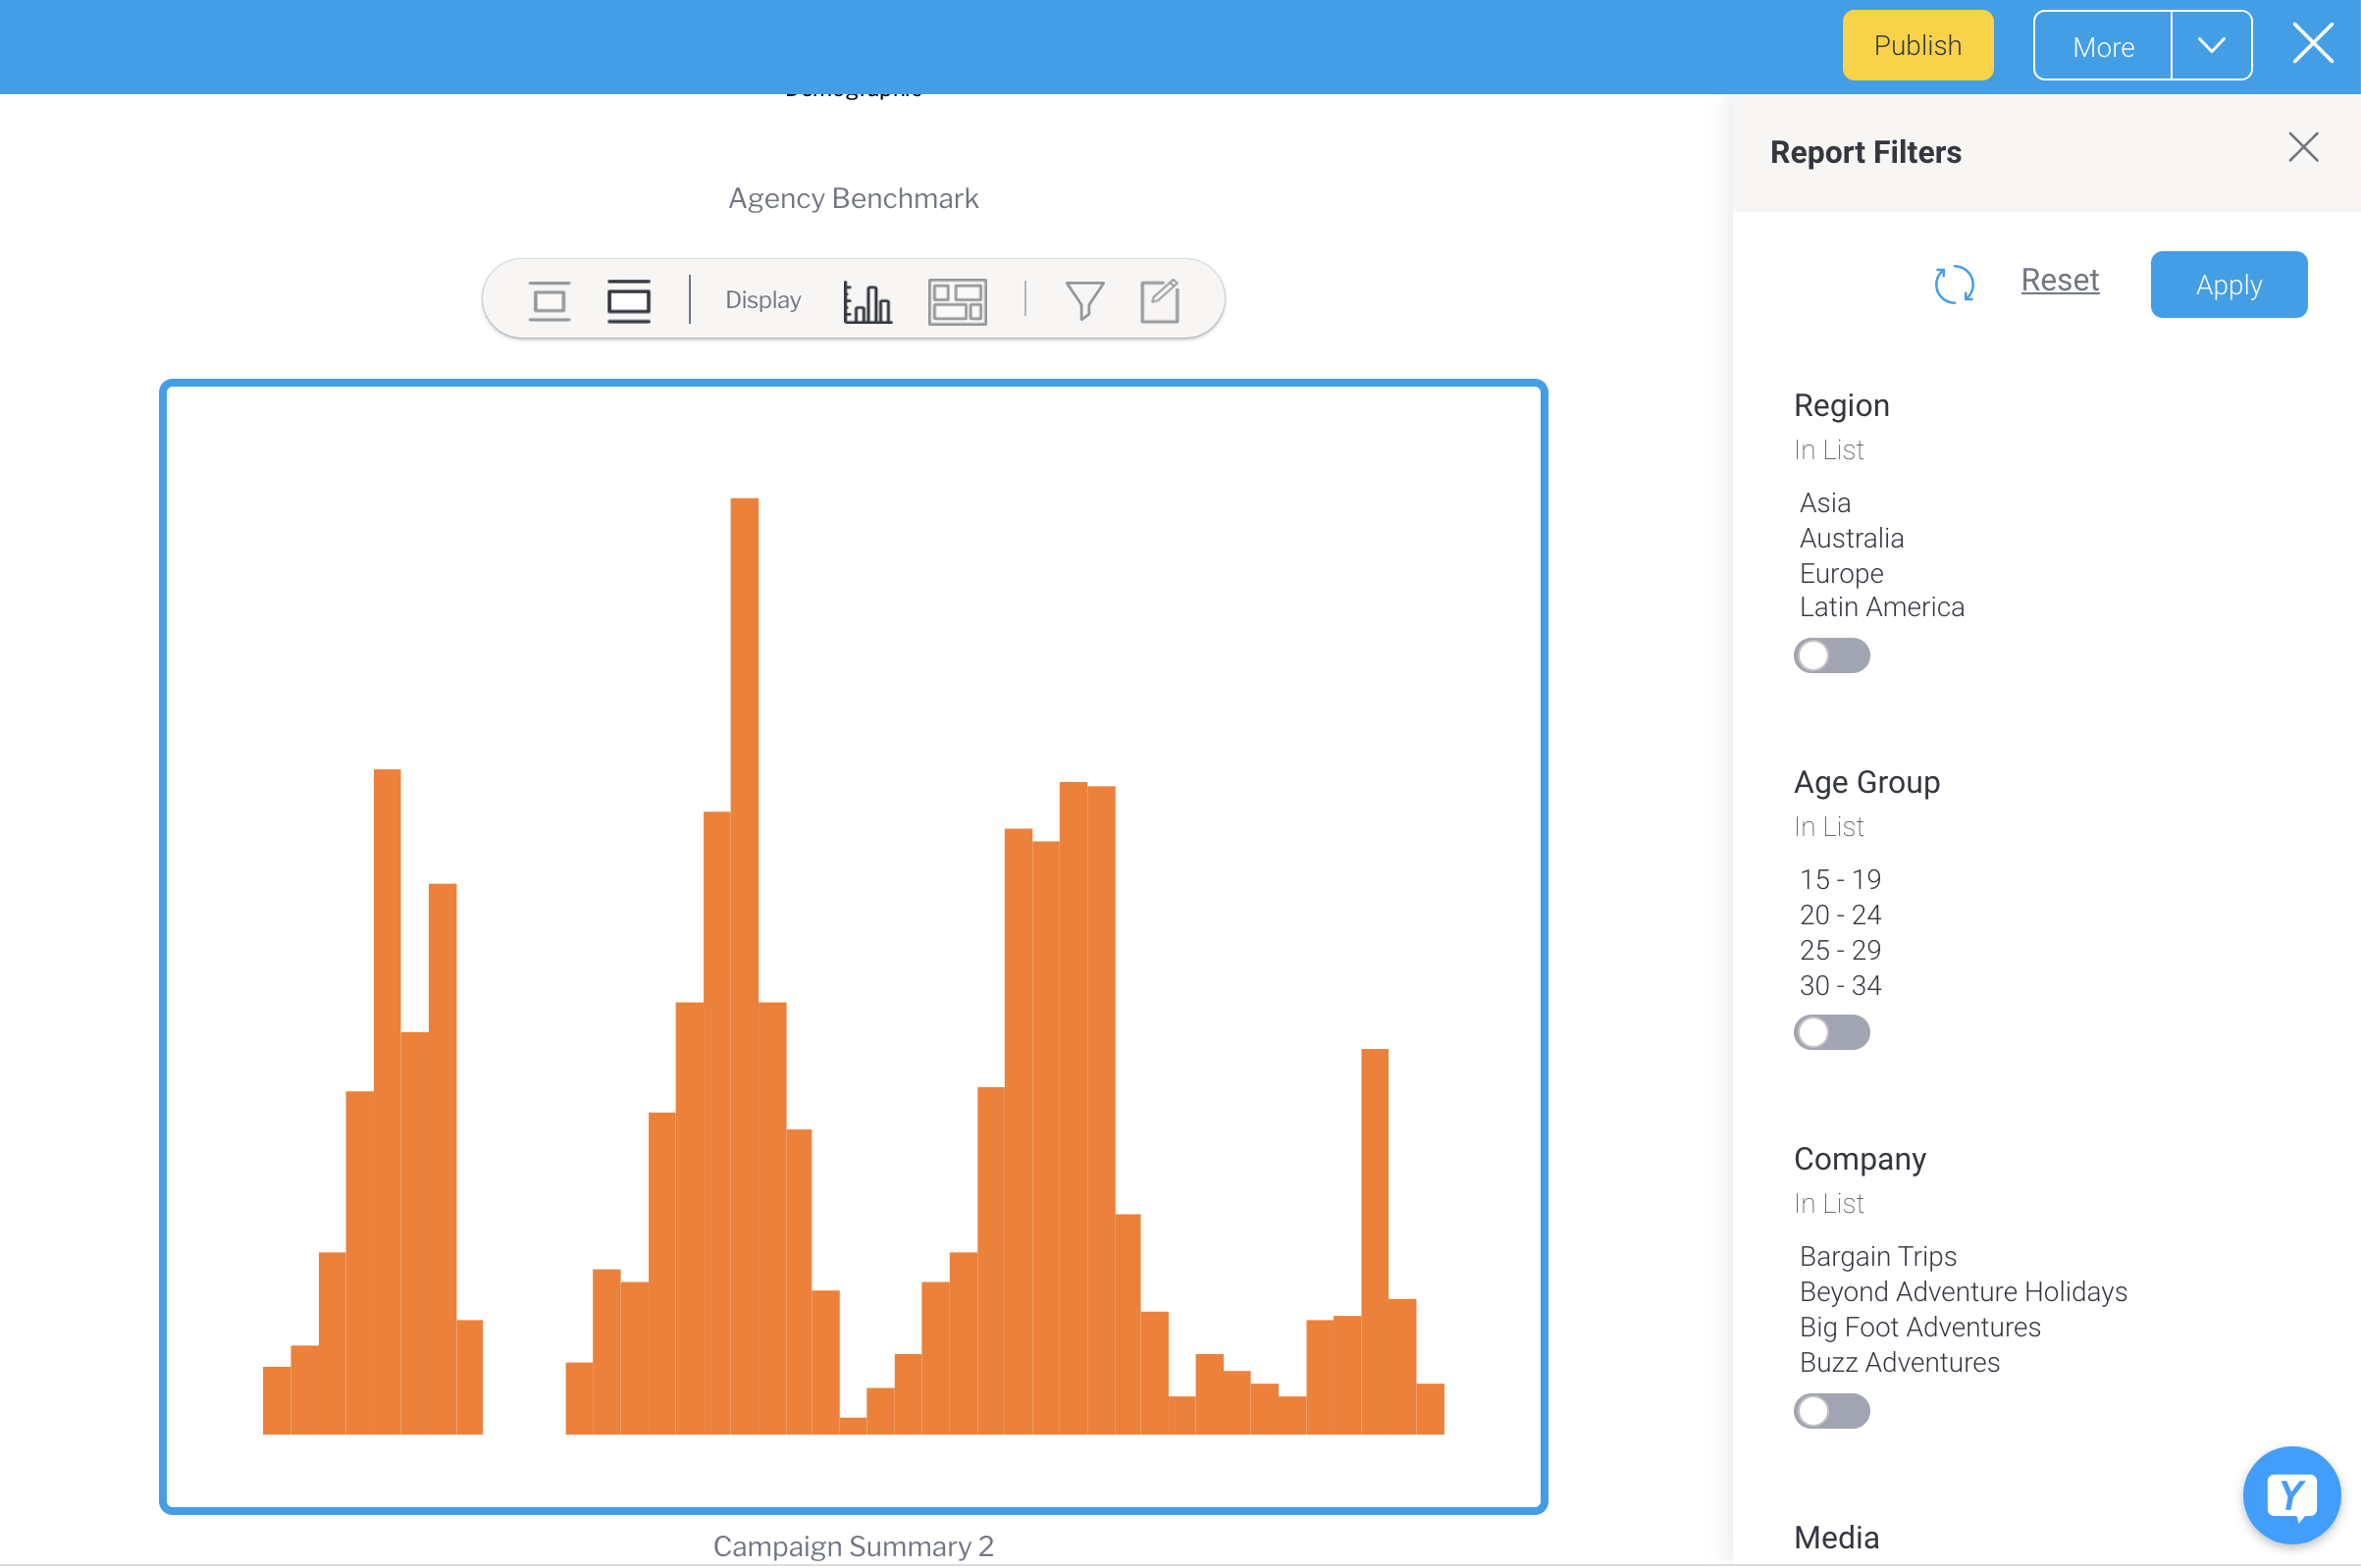
- Adjust one of the report filters to see the effect on your chart, then click on the Apply button
In the example below, we've selected just the age group of 20-24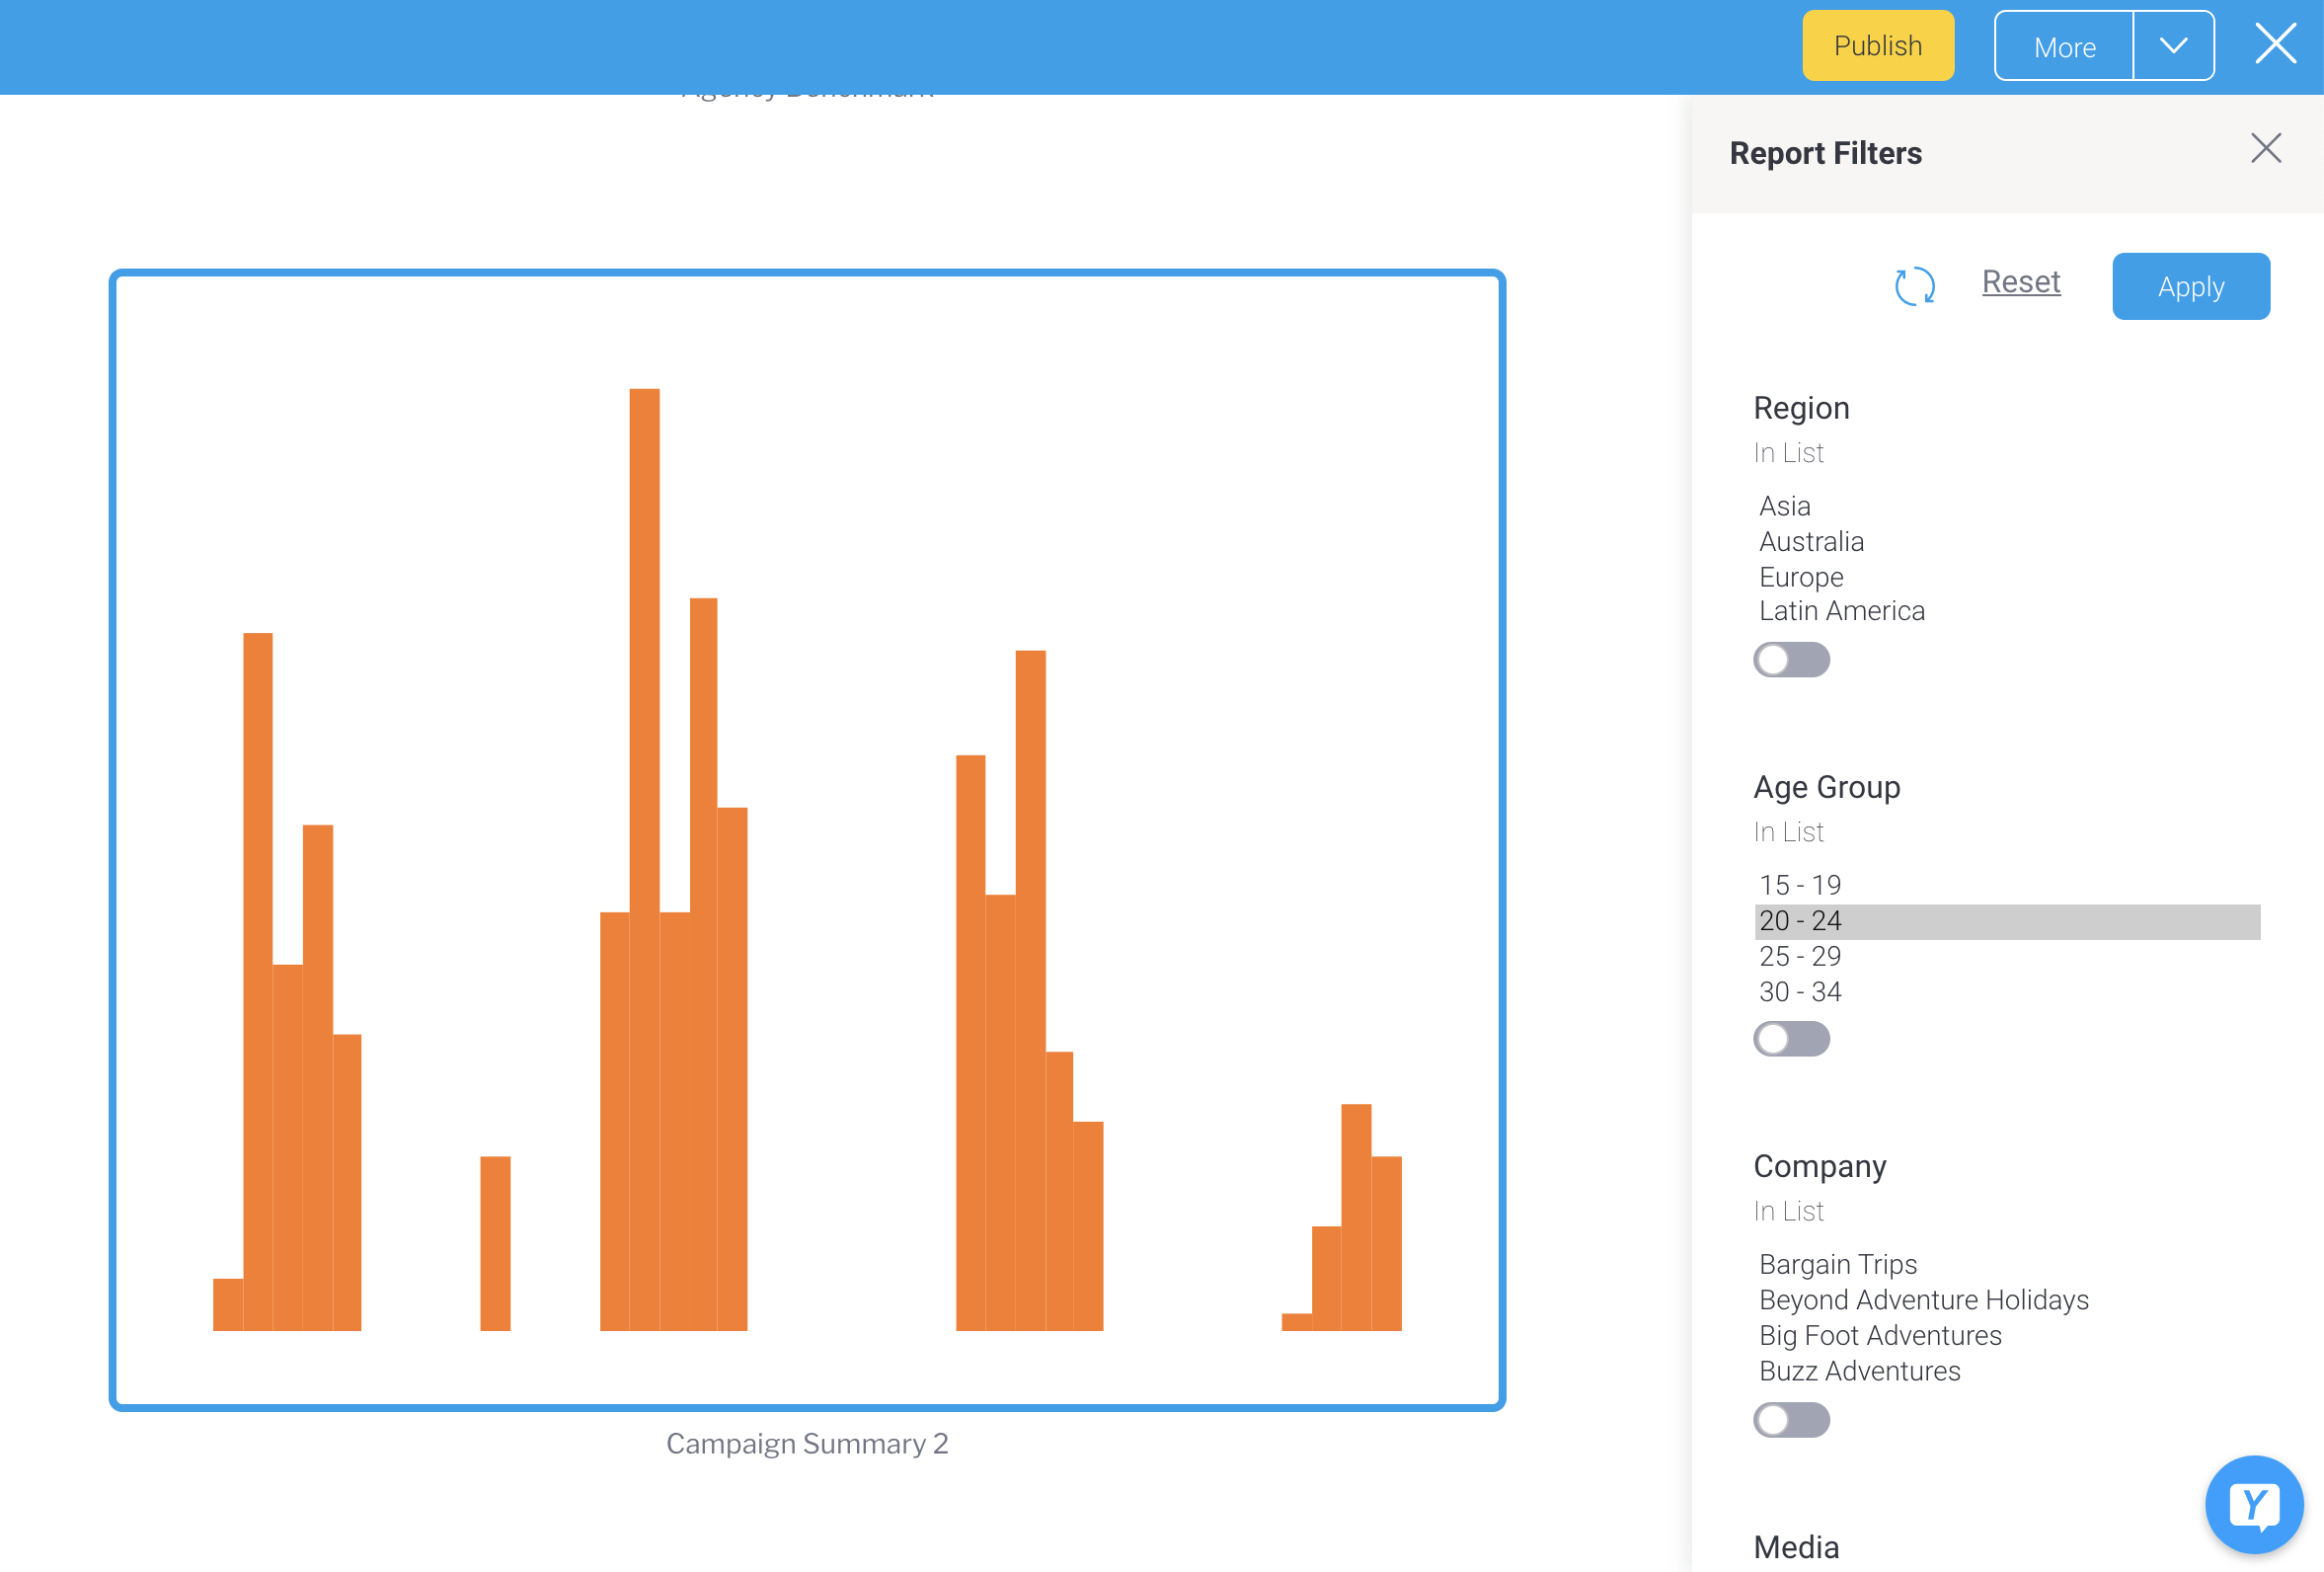
Even if you change the default filter values in the original report, the display of the report embedded in your story will retain the values of any filters you have already set using these steps.
...
| Anchor | ||||
|---|---|---|---|---|
|
...
- Place your cursor over the report item you wish to replace
- Click on the Maximise button
 , which will redirect you to the report's output page
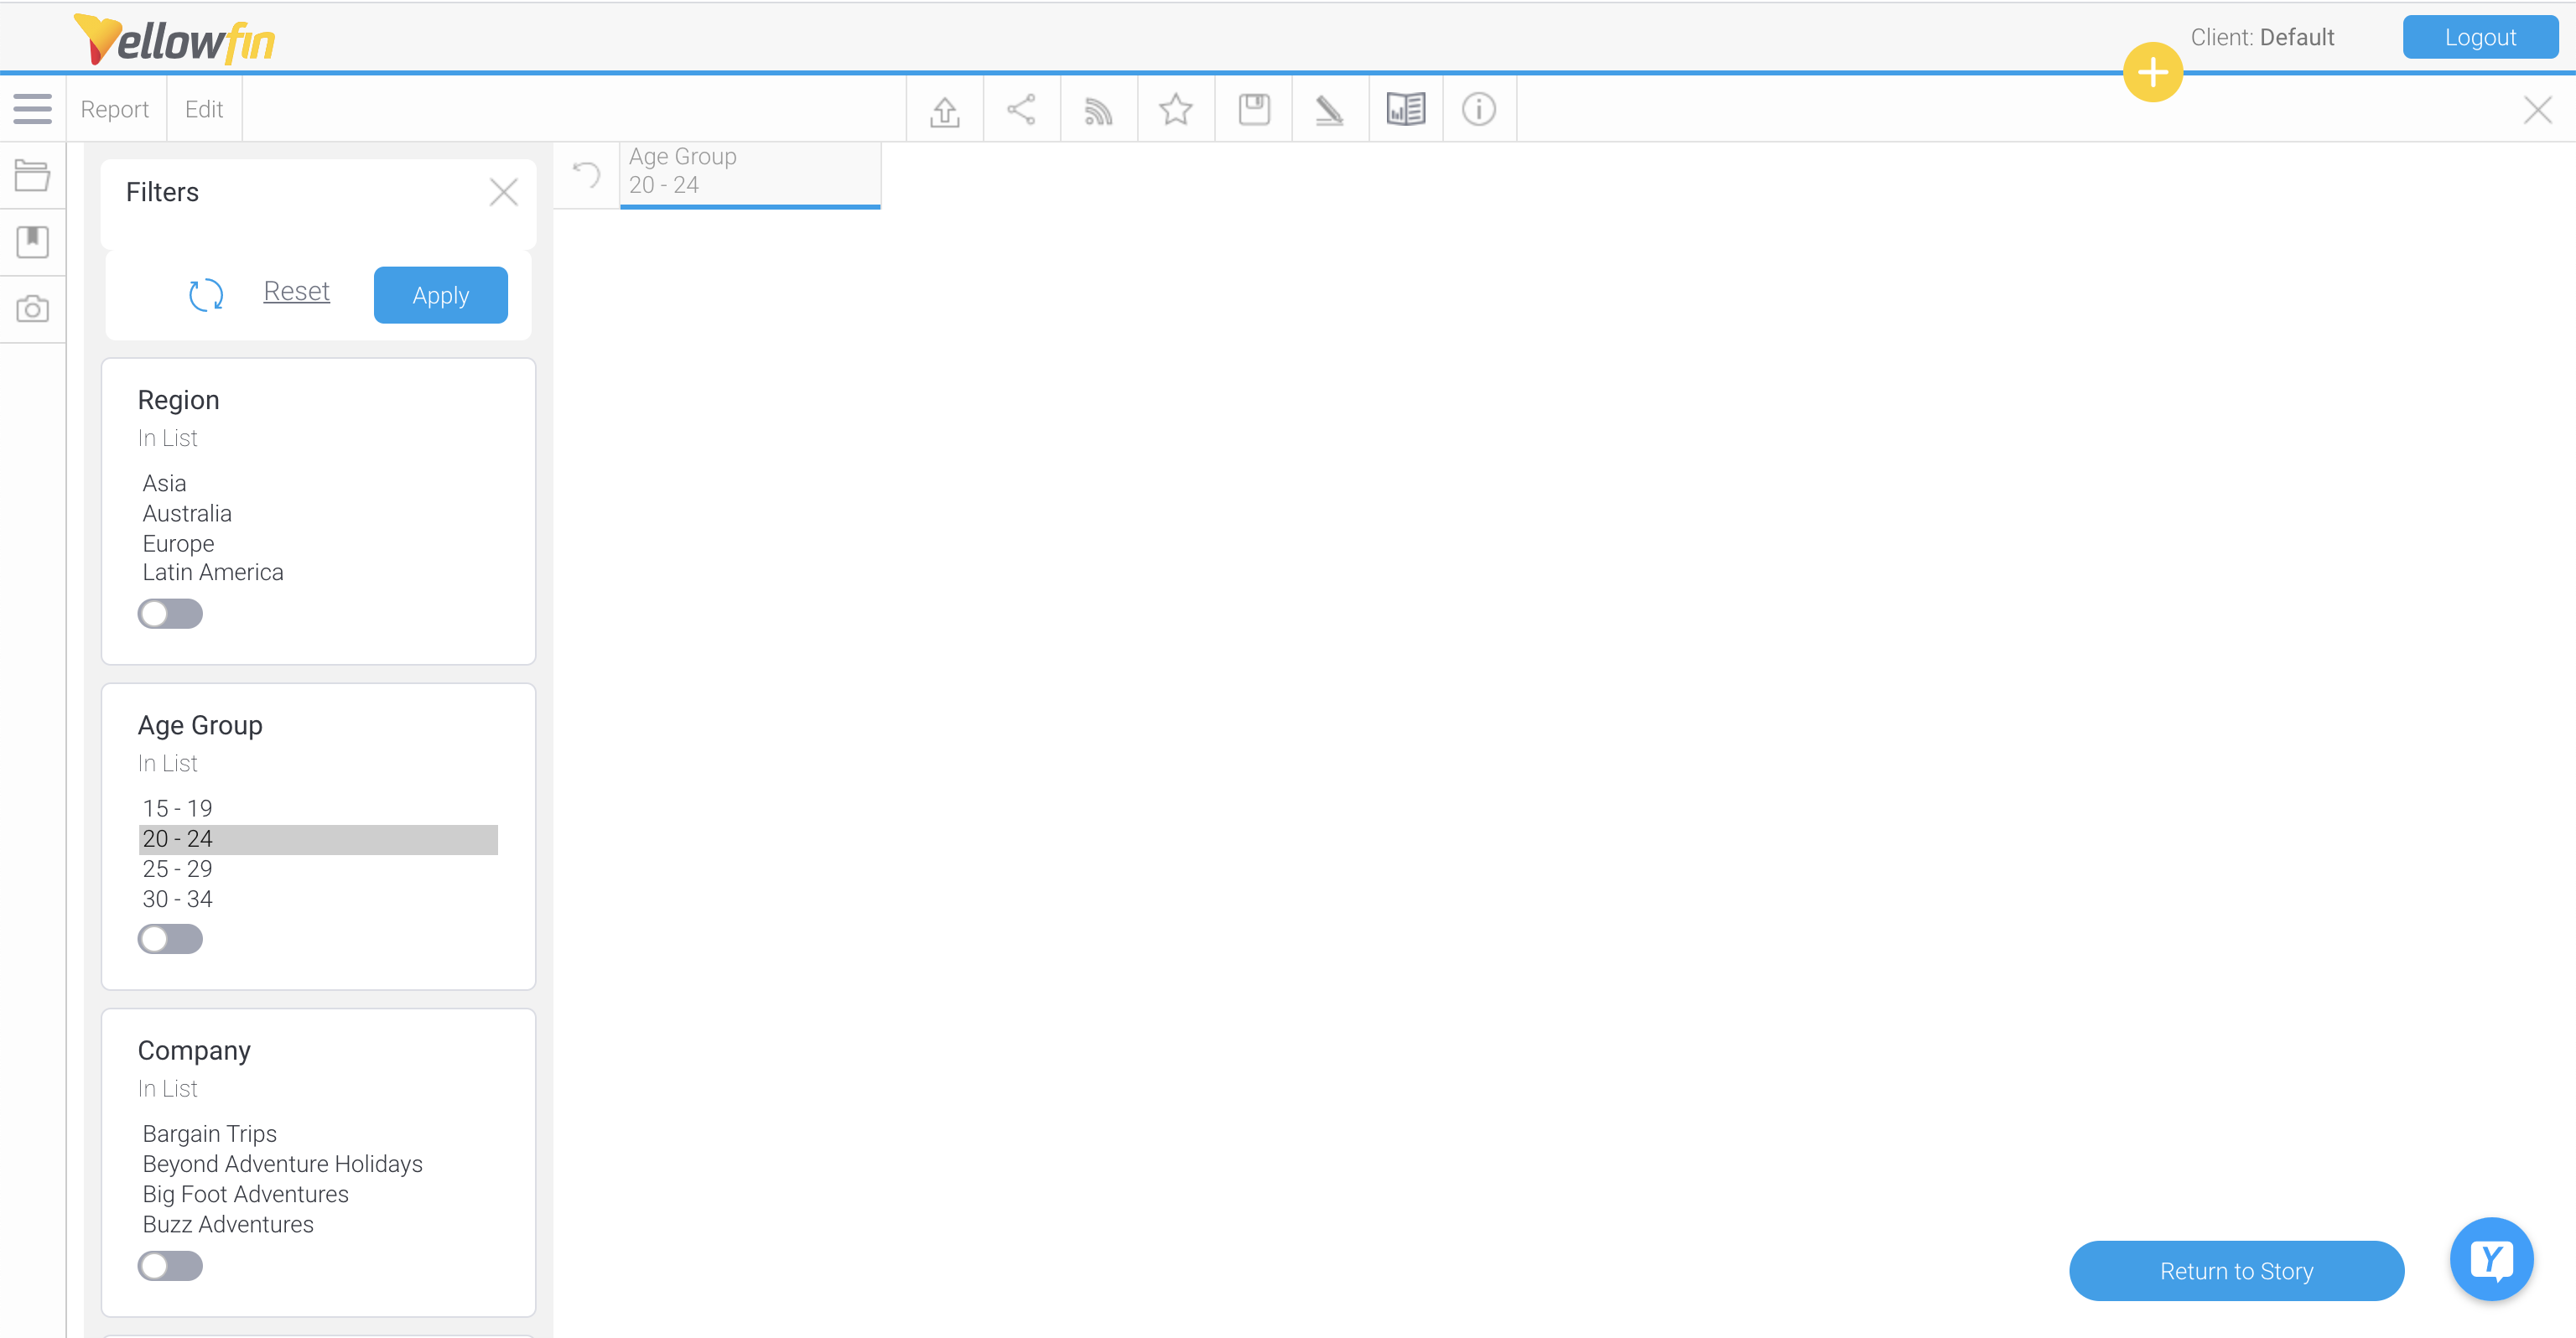
- From here, you can replace the existing report item with a snapshot, bookmark or report by choosing an existing one or creating a new one
- For example, to replace the current chart with an existing snapshot, click on the Snapshot button, then hover over the snapshot to be added, then click on the +Story button
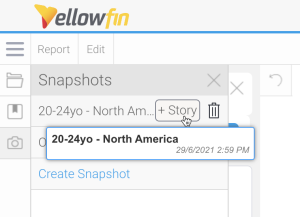
You will be prompted to either replace the existing content or add the snapshot to the end of your story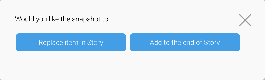
- Click on the Replace item in Story button to replace the existing item in the story with this snapshot, or click on Add to the end of Story to add the snapshot to the bottom of the story (without replacing the existing report item)
- Repeat the steps above to add any other items from this report that you wish to include in your story
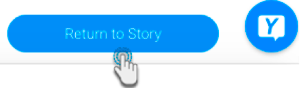
- Once done, click on the Return to Story button to exist the report's output page and return to your story
Your new report item will now be displayed in your story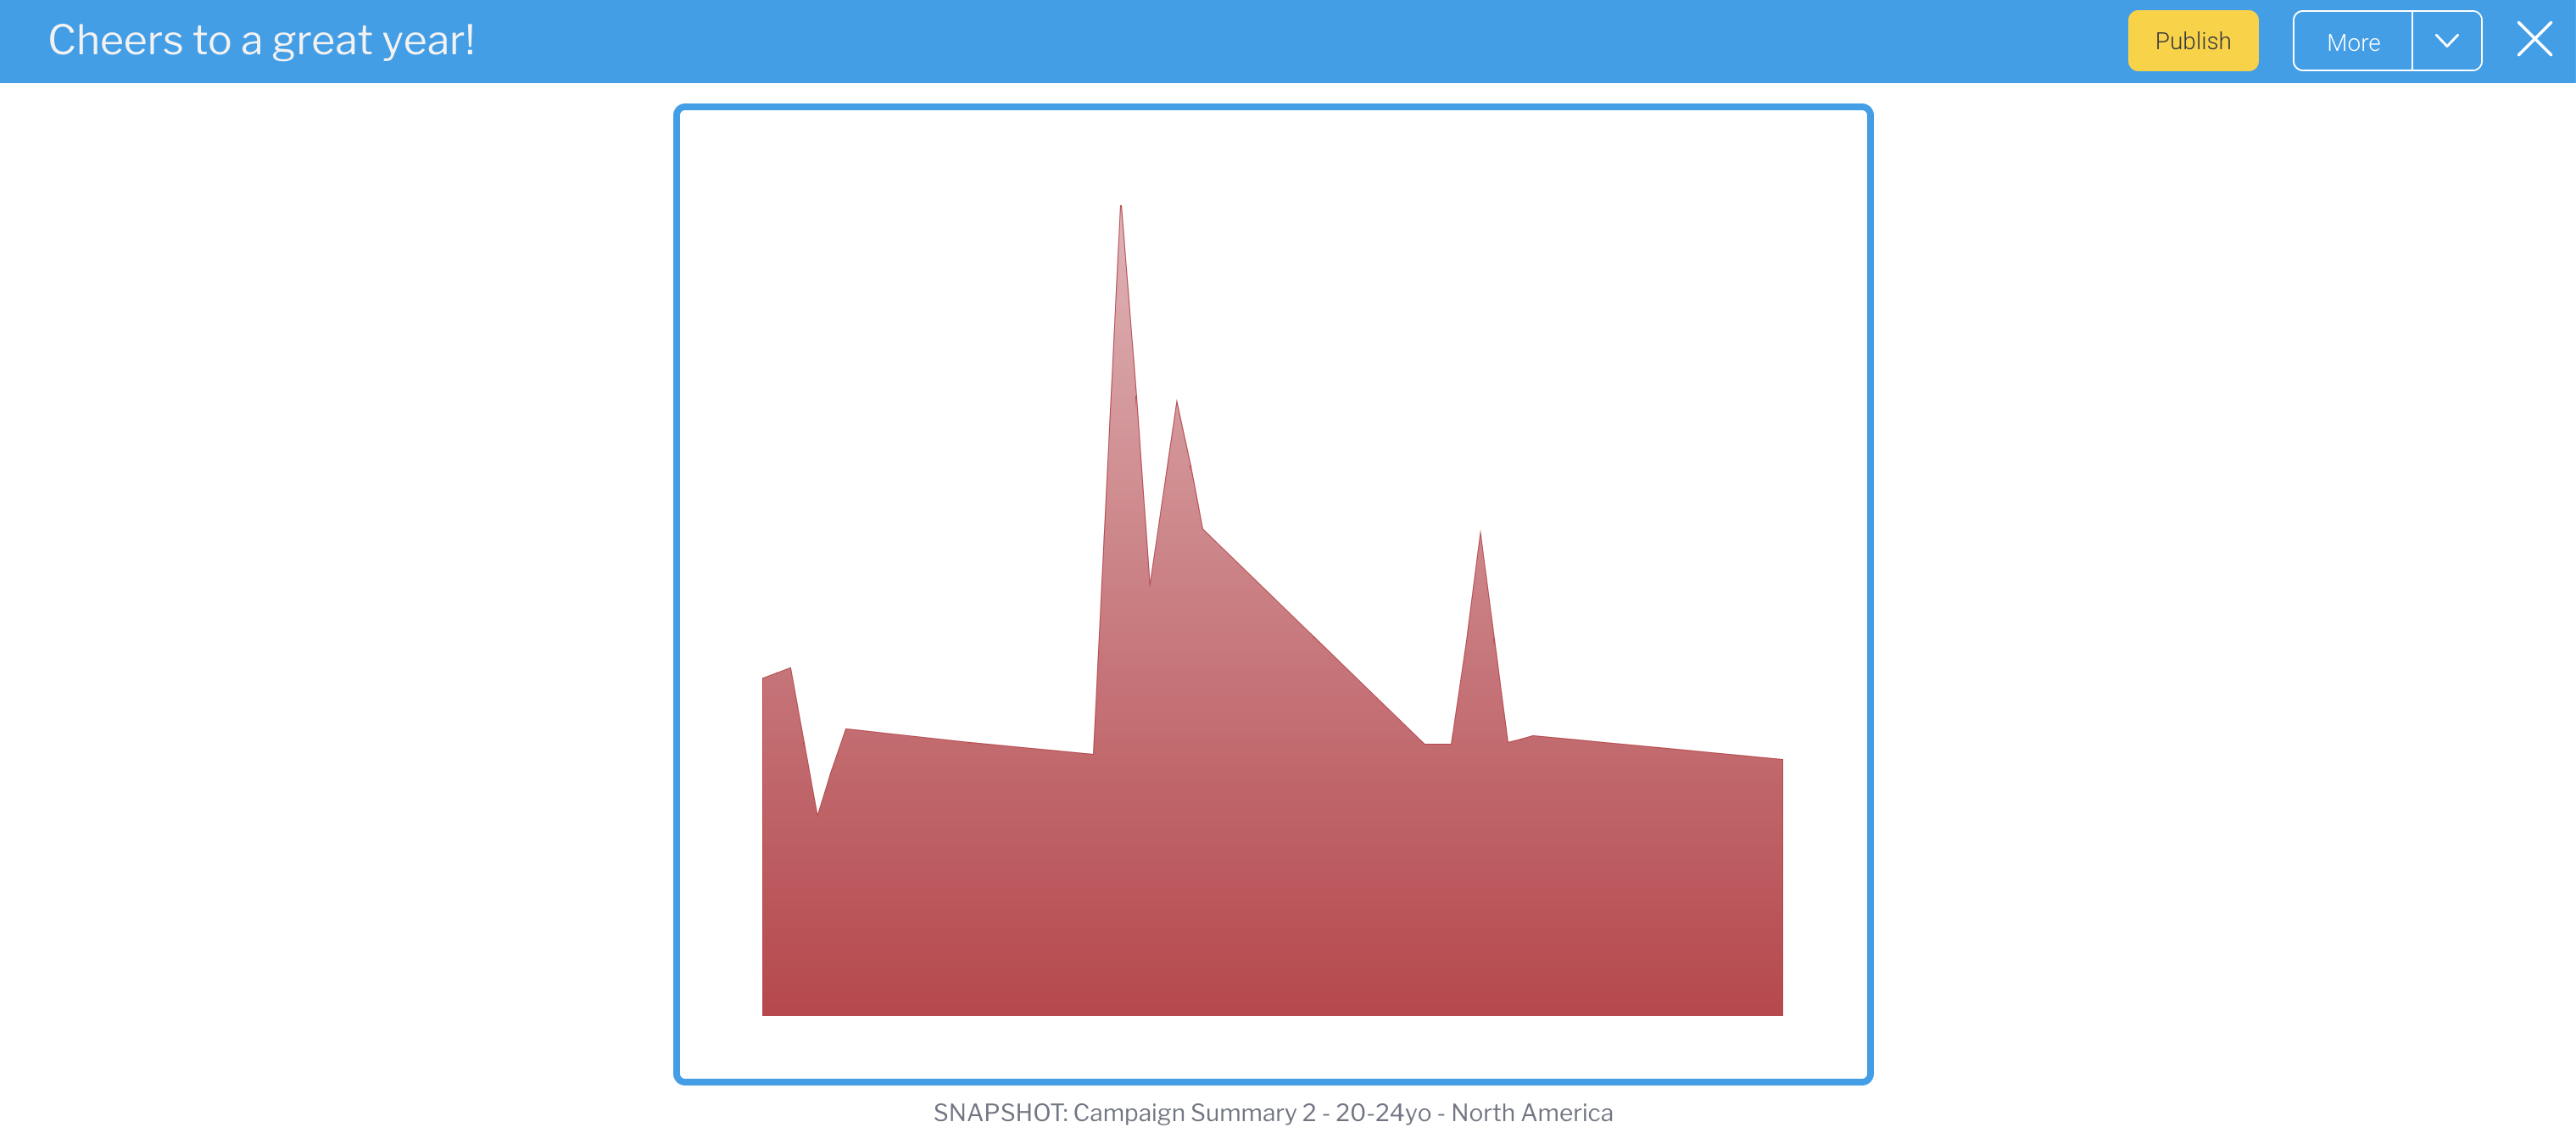
...
| Anchor | ||||
|---|---|---|---|---|
|
...
- Click on the plus button at the start of a new line. If you can't see the button, click on a new line: the button will only appear if there is no text already entered.

- From the pop-up menu that appears, click on the Add an image button.

The The Image Manager dialog box will appear. From here, you can select an existing image, upload a new image, manage corporate images and your own images, sort and search for images and much more.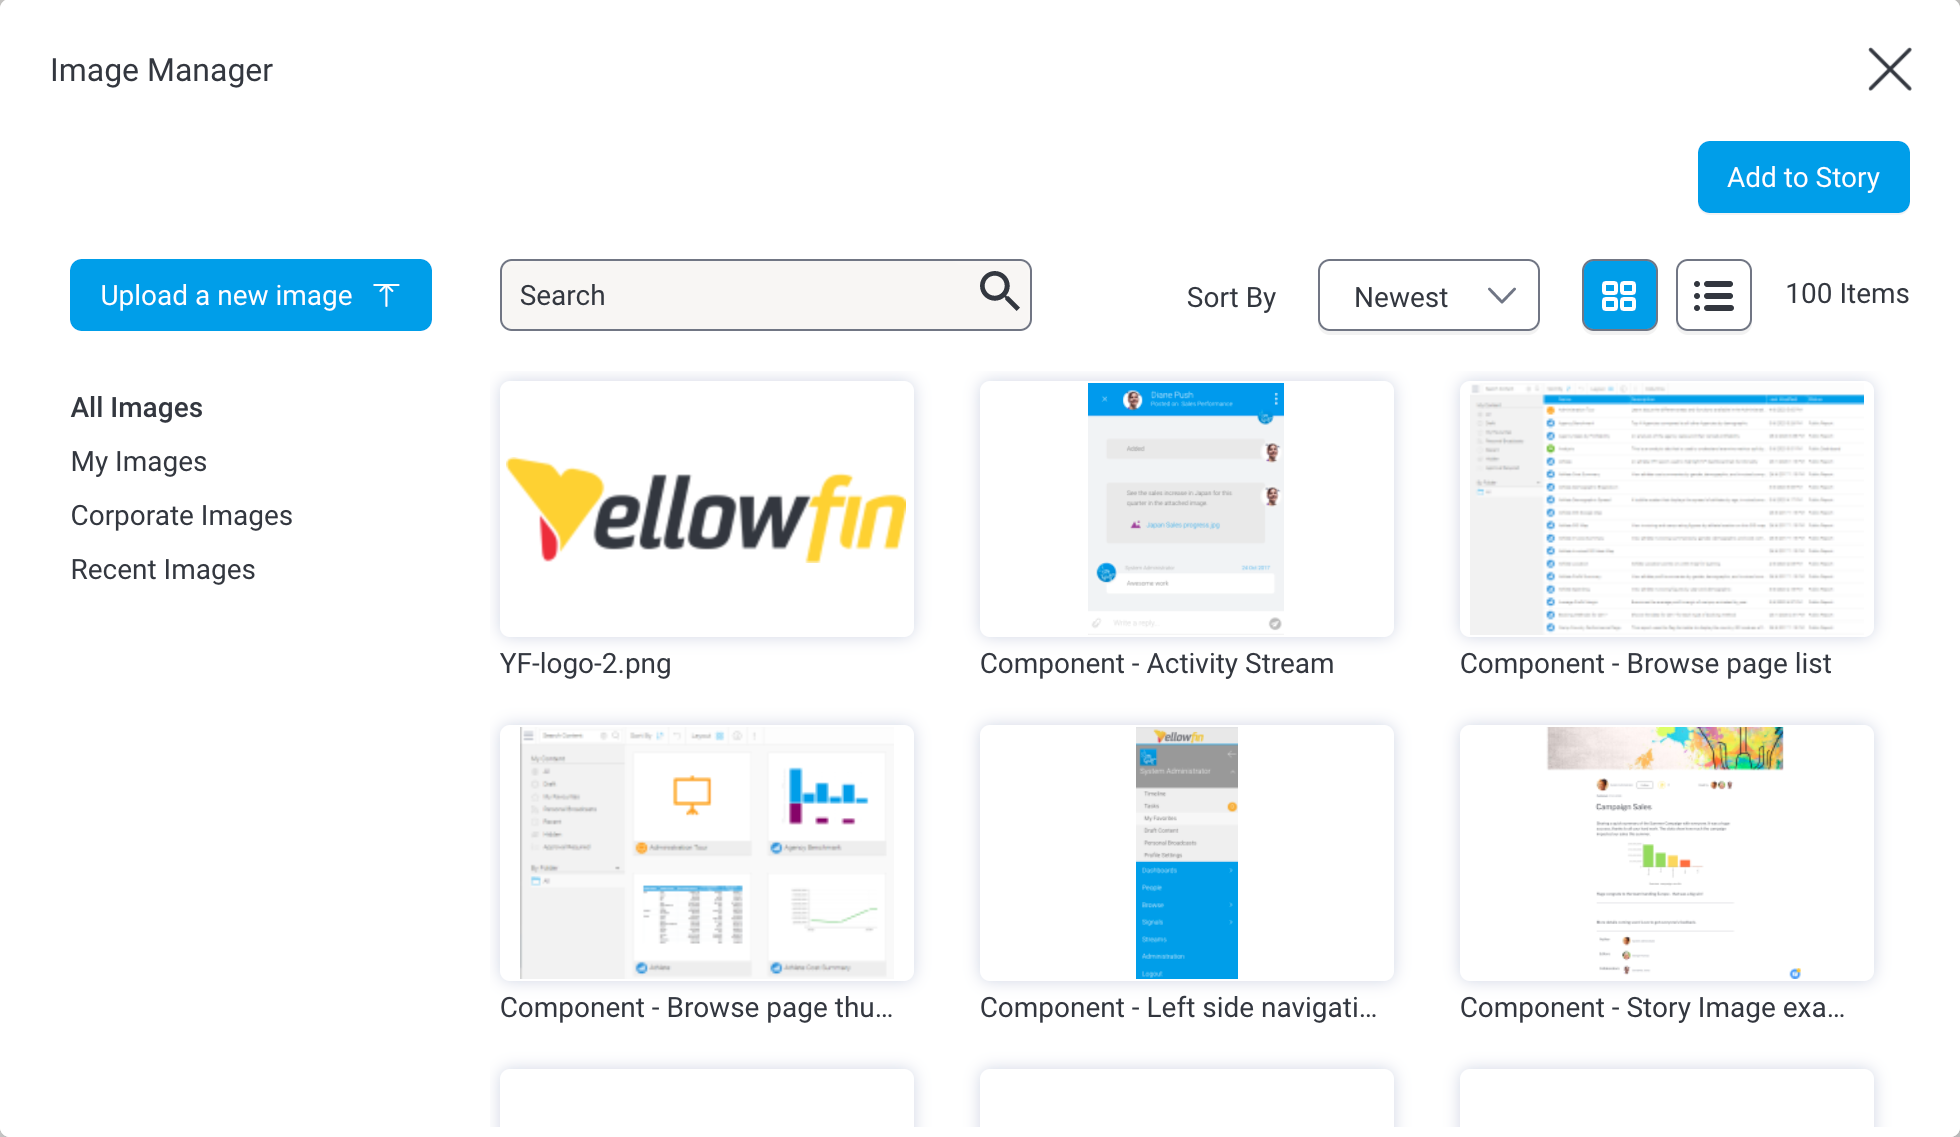
- Locate the image you wish to add and click on it, then click on the Add to Story button.
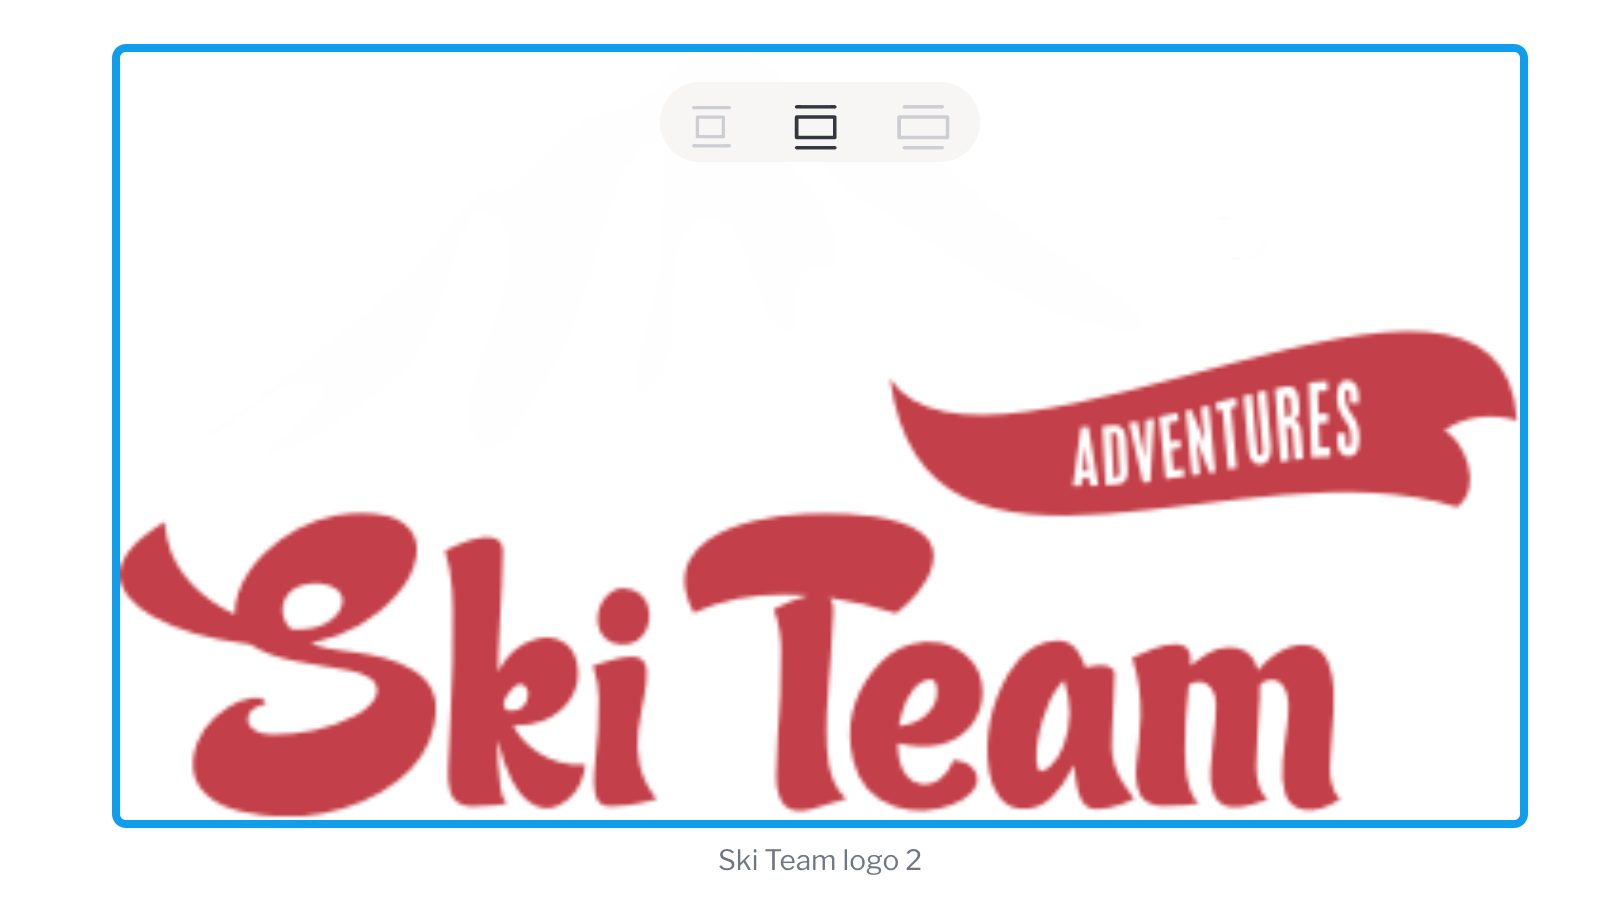
- Once added, resize the image using the options displayed at the top of the image. See the chart below for a description of the options available.
- If you wish to edit or remove the caption that appears below the image, click on the text to edit it.
...
- Click on the plus button at the start of a new line. (Note if you do not see this button, simply click on a new line. The button will only appear if no text gets entered.)
- Select the video icon.

- Copy the link from either video platform, and paste it in the area specified. Press the Enter key.
- The video will be displayed, and captioned with the link. You can edit or remove the caption.
- To delete the video, simply select it and press the Delete key.
...
- Click on the plus button at the start of a new line (if you do not see this button, click on a new line: the button will only appear if no text is entered)
- Click on the Divider button

- A horizontal line will appear in your story
...
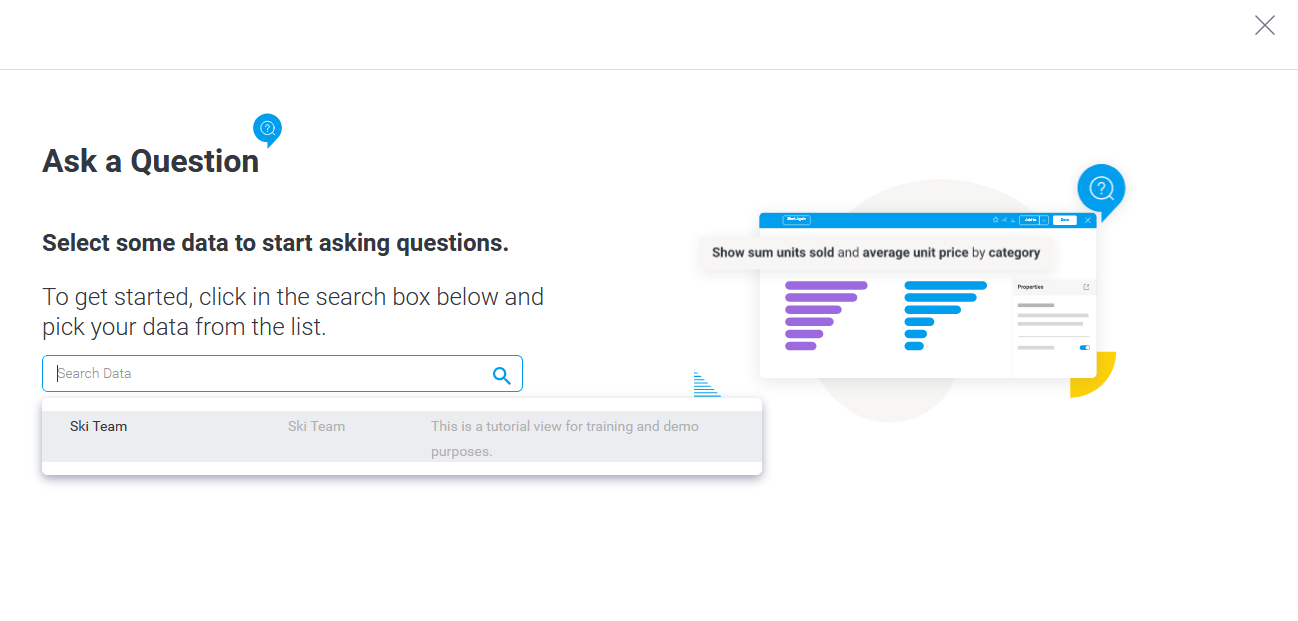
3. Use NLQ to ask a question and create a report or chart. Once finished, the data will be added into your Story. Read about how to use NLQ here.
...
Restructuring story content
...