Page History
| Table of Contents | ||
|---|---|---|
|
Overview
| Styleclass | ||
|---|---|---|
| ||
Yellowfin's export and import modules let you migrate your content between multiple Yellowfin instances, saving you time and effort from creating the same data in each environment individually. Unlike the previous versions, Yellowfin 7.3+ tracks and compares each file you transfer through its universally unique identifiers (or UUID), to restrict multiple copies of the same reports and data from existing in an environment. Therefore, even if the same files have different names, Yellowfin will be able to detect that they a are match and warn you from copying them, saving you from an overload of redundant data from existing in your system.
An important concept to know about here is content dependencies, which we will learn about next.
What are content dependencies?
Dependencies are any content that the main or primary content is dependent on to function properly in a Yellowfin environment. For example, a report is dependent on a view, and the view on a data source. Therefore, for the report to work in a Yellowfin instance, it relies on that view and data source to be present in that instance.
Yellowfin's content dependency structure is illustrated below.
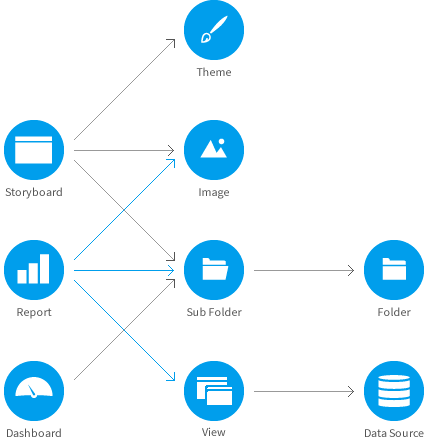
However, transferring dependencies is fairly easy with Yellowfin 7.3+, where you don't need to worry about mapping each content with your data; Yellowfin will detect if the correct items are already present in the destination environment. If they aren't, you will receive warnings of the missing data and be asked to assign replacements.

How do I transfer content from one Yellowfin instance into another?
You can do this by exporting your content into an external file (such as a yfx file) and then importing that yfx file into the destination system.
Why do I need to export content?
If you have a multiple environment infrastructure, this functionality allows you to transfer content from one instance to another (such as from QA to production).
Who can export or import content? Can any user do it?
Only Yellowfin users and administrators who have special rights and permissions to export and import content, can carry out these tasks.
How do I export content?
| Styleclass | ||
|---|---|---|
| ||
Follow the steps below to export content:
| Note |
|---|
This procedure is only for users who have permission to access this module |
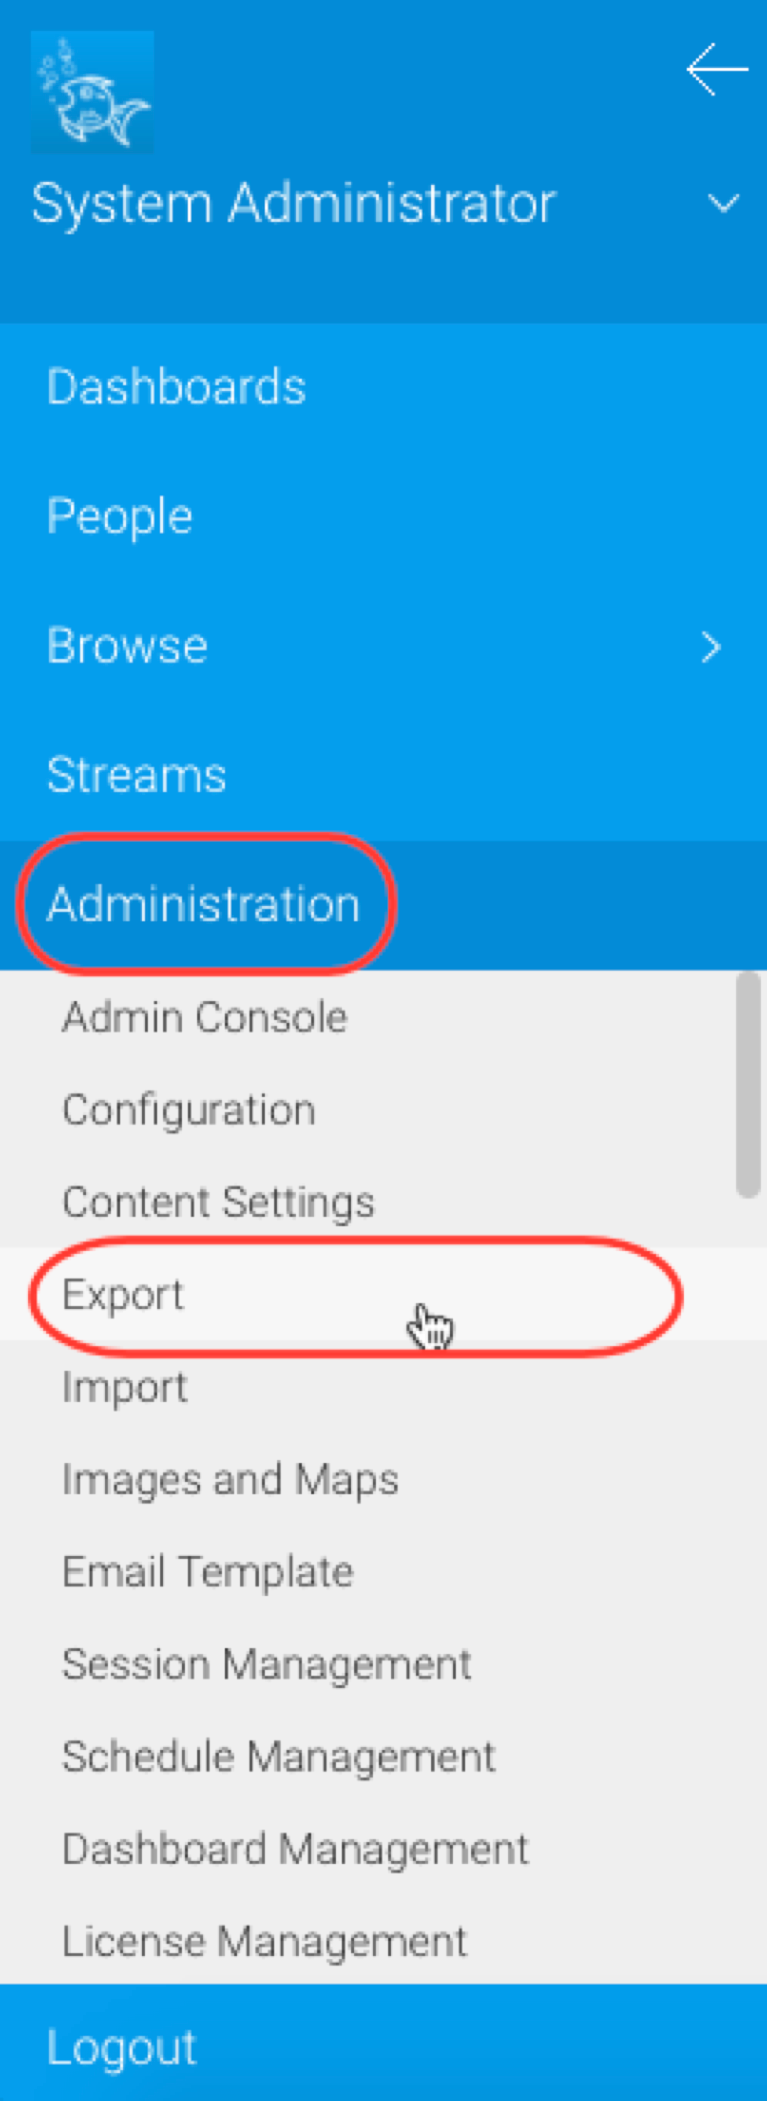
1. Expand the left side navigation menu by clicking on its icon

2. Go to Administration > Export
| Expand | ||||||||||||||
|---|---|---|---|---|---|---|---|---|---|---|---|---|---|---|
| ||||||||||||||
|

3. Once on the Export screen, use the Search panel on the bottom left to search for the content that you want to add to the file. (To better understand how to operate this search panel, click here.)
4. Drag and drop the chosen content across to the export list panel
5. You can view the status bar for a quick glimpse into the content you have selected from the file. (Click here to discover each of the features of this status bar in detail.)
6. If you want to delete anything from the export list, simply select and drag it out of the export panel.
Or hover over the content item you want to remove until a delete icon appears at the end, and then click on it
Import Process
| Styleclass | ||
|---|---|---|
| ||
| Section | ||||||||||
|---|---|---|---|---|---|---|---|---|---|---|
|

| Section | ||||||||||
|---|---|---|---|---|---|---|---|---|---|---|
|

| Section | ||||||||||
|---|---|---|---|---|---|---|---|---|---|---|
|

| Section | ||||||||||
|---|---|---|---|---|---|---|---|---|---|---|
|

| horizontalrule |
|---|
| Styleclass | ||
|---|---|---|
| ||
Yellowfin’s export and import modules let you to migrate your content between multiple Yellowfin instances, saving you time and effort from creating the same data in each environment individually.
Unlike the previous versions, Yellowfin 7.3+ tracks and compares each file you transfer through its universally unique identifiers (or UUID), to restrict multiple copies of the same reports and data from existing in an environment. Therefore, even if the same files have different names, Yellowfin will be able to detect that they’re a match and warn you from copying them, saving you from an overload of redundant data from existing in your system.
Click here to for a step-by-step workflow on how to export content.
How do I import content?
You can learn more about importing content through this procedure.
On this page (links) On this page ???
Related links (to other YF pages) ??
latest release updates?