Like what you see? Have a play with our trial version.

Error rendering macro 'rw-search'

null

Versions Compared

Key

  • This line was added.
  • This line was removed.
  • Formatting was changed.
Comment: Migration of unmigrated content due to installation of a new plugin

Anchor
top
top

Table of Contents
classcontents

Overview

Styleclass
ClasstopLink

top

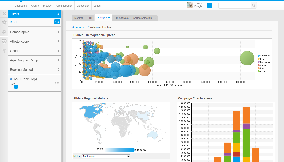
Standard Tabs can be used if you wish to create relationships between multiple reports on a single tab by using Analytic linking.

The benefits of this style of tab include:

  1. Data is easy to slice and dice - users can quickly drill down on multiple dimensions and views of their data
  2. Multiple related reports can be displayed on a single tab for quick access

    Styleclass
    Classhide

    See also: Standard Tab with Analytic Links


Linking Reports

Styleclass
ClasstopLink

top

First set up a new Standard Tab by following these steps: Creating a Standard Tab


Link Filters

HTML
<iframe width="700" height="394" src="https://www.youtube.com/embed/HpZSNmgt3tU?color=white" frameborder="0" allowfullscreen></iframe>

Expand
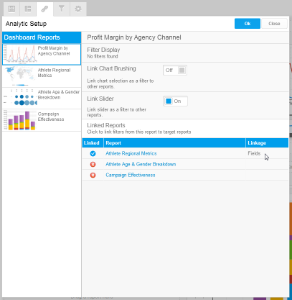
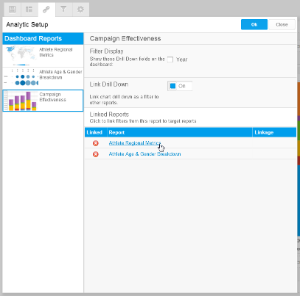
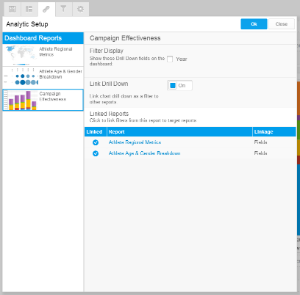
  1. Click on the Analytic Setup menu item
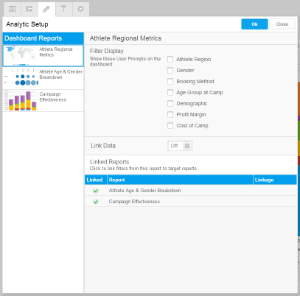
  2. From here you will see a list of Dashboard Reports on the left side of the setup menu, the first selected.
    Click on the report that contains the filters you wish to display on the dashboard.
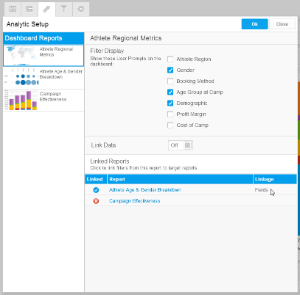
  3. Once you've selected a report, you will see a list of available User Prompt Filters to the right of the report list, under the Filter Display title.
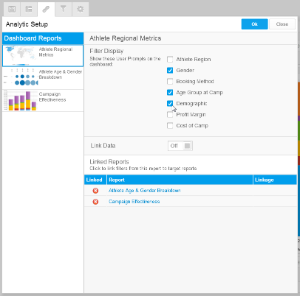
    Enable the filters you wish to display on the dashboard.
  4. With filters defined you now need to create links to other reports so the filter values can be passed from your Selected report, to the others.
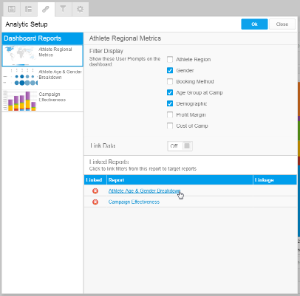
    Click on a report you wish to pass the filter values to in the Linked Reports list at the bottom of the page.
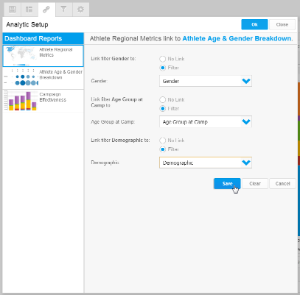
  5. You now have the choice of linking all or some of the filters to the selected report.
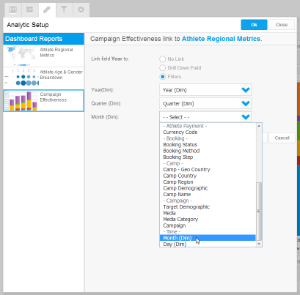
    Define which filters to link by changing the selection from No Link to Filter on each filter you wish to link.
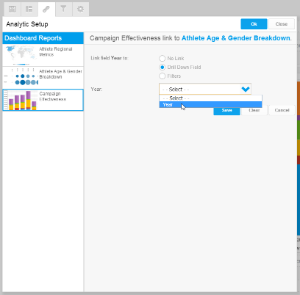
  6. Now you need to define which field available to the linked report matches the field used as a filter in the main report. The fields available will be from the view the linked report was created on.
    Select the equivalent field in each of the drop down lists available, you need to ensure you select a field that contains the same data as the original filter. For example, you should not link a Year filter to a Month filter.
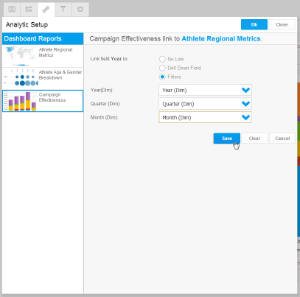
  7. Once you've linked all the filters, click the Save button at the bottom of the list. This will return you to the previous screen. You will now notice that the icon next to the linked report is now a tick, identifying that it has been set up.
  8. You now need to repeat steps 4 to 7 for the other reports you wish to link. Click Ok to complete the process.

See Filter Values for more information.


Link Time Slider

HTML
<iframe width="700" height="394" src="https://www.youtube.com/embed/IihT-BZYMxI?color=white" frameborder="0" allowfullscreen></iframe>

Expand
  1. Click on the Analytic Setup menu item
  2. From here you will see a list of Dashboard Reports on the left side of the setup menu, the first selected.
    Click on the report that contains the time slider you wish to use on the dashboard.
  3. Once you've selected a report, you will need to enable linked slider.
    Set Link Slider to On.
  4. With the slider enabled you now need to create links to other reports so the date/time values can be passed from your Selected report, to the others.
    Click on a report you wish to pass the slider values to in the Linked Reports list at the bottom of the page.
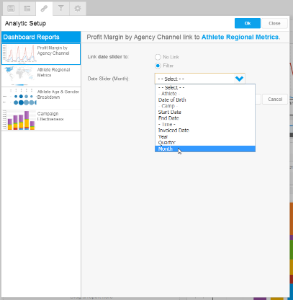
  5. Define your filter by changing the selection from No Link to Filter.
  6. Now you need to define which field available to the linked report matches the field used as a date slider in the main report. The fields available will be from the view the linked report was created on.
    Select the equivalent field in each of the drop down lists available, you need to ensure you select a field that contains the same data as the original slider. For example, you should not link a Year slider to a Month filter.
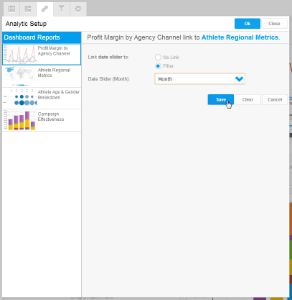
  7. Once you've linked all the filters, click the Save button at the bottom of the list. This will return you to the previous screen.

    You will now notice that the icon next to the linked report is now a tick, identifying that it has been set up.
  8. You now need to repeat steps 4 to 7 for the other reports you wish to link. Click Ok to complete the process.

See Time Series for more information.


Link Chart Brushing

HTML
<iframe width="700" height="394" src="https://www.youtube.com/embed/koFm2Rv0rnw?color=white" frameborder="0" allowfullscreen></iframe>

Expand
  1. Click on the Analytic Setup menu item
  2. From here you will see a list of Dashboard Reports on the left side of the setup menu, the first selected.
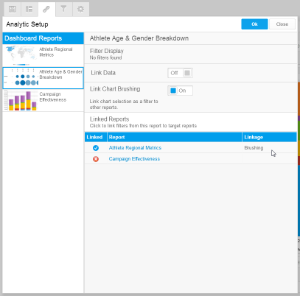
    Click on the report that you want to brush and link to other reports.
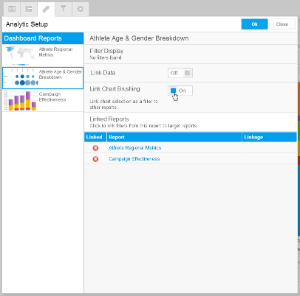
  3. Once you've selected a report, you will need to enable linked brushing.
    Set Link Chart Brushing to On.
  4. You now need to create links to other reports so the brushing values can be passed from your Selected report, to the others as filters.
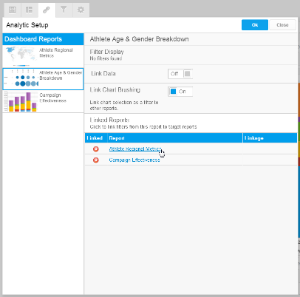
    Click on a report you wish to pass the brushing values to in the Linked Reports list at the bottom of the page.
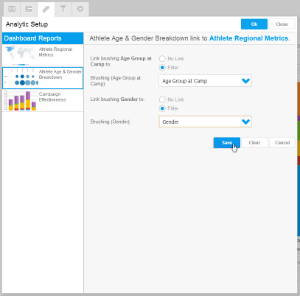
  5. You now have the choice of linking all or some of the filters to the selected report.
    Define which filters to link by changing the selection from No Link to Filter on each filter you wish to link.
  6. Now you need to define which field available to the linked report matches the field used for brushing in the main report. The fields available will be from the view the linked report was created on.
    Select the equivalent field in each of the drop down lists available, you need to ensure you select a field that contains the same data as the original brushing field. For example, you should not link a Year brushing field to a Month filter.
  7. Once you've linked all the filters, click the Save button at the bottom of the list. This will return you to the previous screen.

    You will now notice that the icon next to the linked report is now a tick, identifying that it has been set up.
  8. You now need to repeat steps 4 to 7 for the other reports you wish to link. Click Ok to complete the process.

Note: Linked Brushing cannot be used at the same time as Linked Drill Down. When one option is enabled, the other becomes unavailable.


Link Data

HTML
<iframe width="700" height="394" src="https://www.youtube.com/embed/OncGg81k0VA?color=white" frameborder="0" allowfullscreen></iframe>

Expand
  1. Click on the Analytic Setup menu item
  2. From here you will see a list of Dashboard Reports on the left side of the setup menu, the first selected.
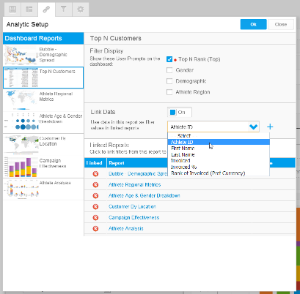
    Click on the report that you want to use data from to filter other reports.
  3. Once you've selected a report, you will need to enable linked data.
    Set Link Data to On.
  4. You now need to select the field from the report to be taken from the result set and used to filter other reports.
  5. You now need to create links to other reports so the data can be passed from your Selected report result set, to the others as filters.
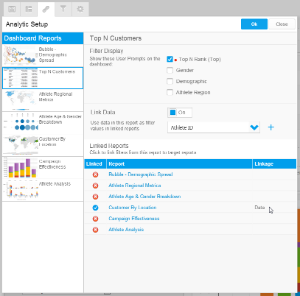
    Click on a report you wish to pass the values to in the Linked Reports list at the bottom of the page.
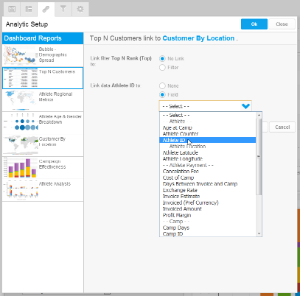
  6. Define the link by changing the selection from No Link to Filter on the linked data field.
  7. Now you need to define which field available to the linked report matches the field used in the main report. The fields available will be from the view the linked report was created on.
    Select the equivalent field in each of the drop down lists available, you need to ensure you select a field that contains the same data as the original field. For example, you should not link a Year field to a Month filter.
  8. Once you've linked all the filters, click the Save button at the bottom of the list. This will return you to the previous screen.

    You will now notice that the icon next to the linked report is now a tick, identifying that it has been set up.
  9. You now need to repeat steps 4 to 8 for the other reports you wish to link. Click Ok to complete the process.


Link Drill Down

Expand
  1. Click on the Analytic Setup menu item
  2. From here you will see a list of Dashboard Reports on the left side of the setup menu, the first selected.
    Click on the report that you want to use drill hierarchies from to filter other reports.
  3. Once you've selected a report, you will need to enable linked drill down.
    Set Link Drill Down to On.
  4. You now need to create links to other reports so the data can be passed from your Selected report result set, to the others as filters.
    Click on a report you wish to pass the values to in the Linked Reports list at the bottom of the page.
  5. Identify if your report is going to be linked by filters or if it contains a matching hierarchy.
    1. If you are linking by filters define the link by changing the selection from No Link to Filter on the linked data field.
    2. If you are linking by a drill down hierarchy change the selection from No Link to Drill Down Field on the linked data field.
  6. Now you need to define which field available to the linked report matches the field used in the main report. The fields available will be from the view the linked report was created on.
    1. Either select the top of a matching hierarchy...
    2. Or match each level of the hierarhcy to an equivalent field to use as a filter.

      Select the equivalent field in each of the drop down lists available, you need to ensure you select a field that contains the same data as the original field. For example, you should not link a Year field to a Month filter.
  7. Once you've linked all the filters, click the Save button at the bottom of the list. This will return you to the previous screen.

    You will now notice that the icon next to the linked report is now a tick, identifying that it has been set up.
  8. You now need to repeat steps 4 to 7 for the other reports you wish to link. Click Ok to complete the process.

Note: Linked Drill Down cannot be used at the same time as Linked Brushing. When one option is enabled, the other becomes unavailable.

See Drill Down Hierarchies and Drill Down Reports for more information.


Formatting Filters

Styleclass
ClasstopLink

top

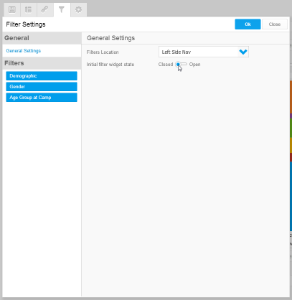
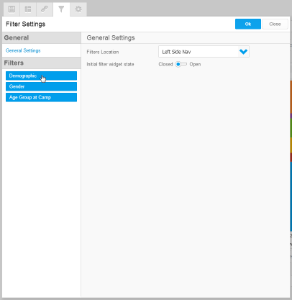
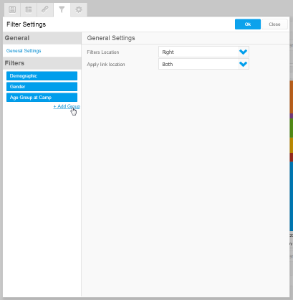
Click on the Filter Settings menu item . From here you will see a list of Dashboard Filters on the left side of the setup menu, with General Settings currently selected.


General Settings

This allows you to define the location of the filters. Depending on what you select you will provided with additional options such as the location of the Apply button, or the initial status of the panel.


Filter Settings

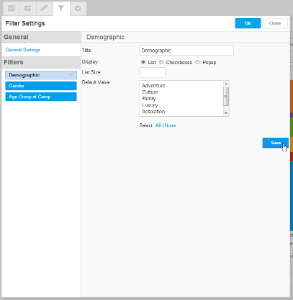
Clicking on a filter in the list of the left of the panel allows you to customise the display of the filter.

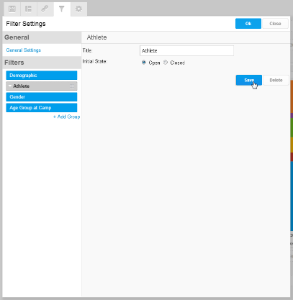
Click Save to apply changes


Filter Grouping

This is only available if you have your filters set to display outside of the left navigation panel.

  1. Click + Add Group
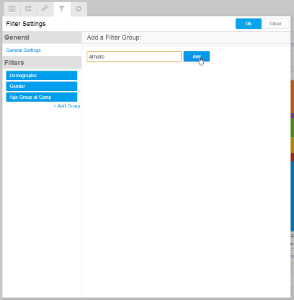
  2. Enter a name for the grouping and click Add
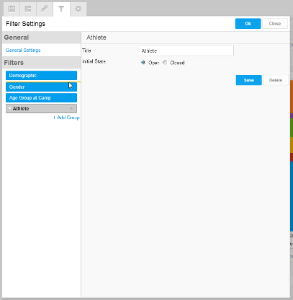
  3. Drag the group into place. Any filters below the group will be contained within it.
  4. Click on the group to format it


horizontalrule
Styleclass
ClasstopLink

top