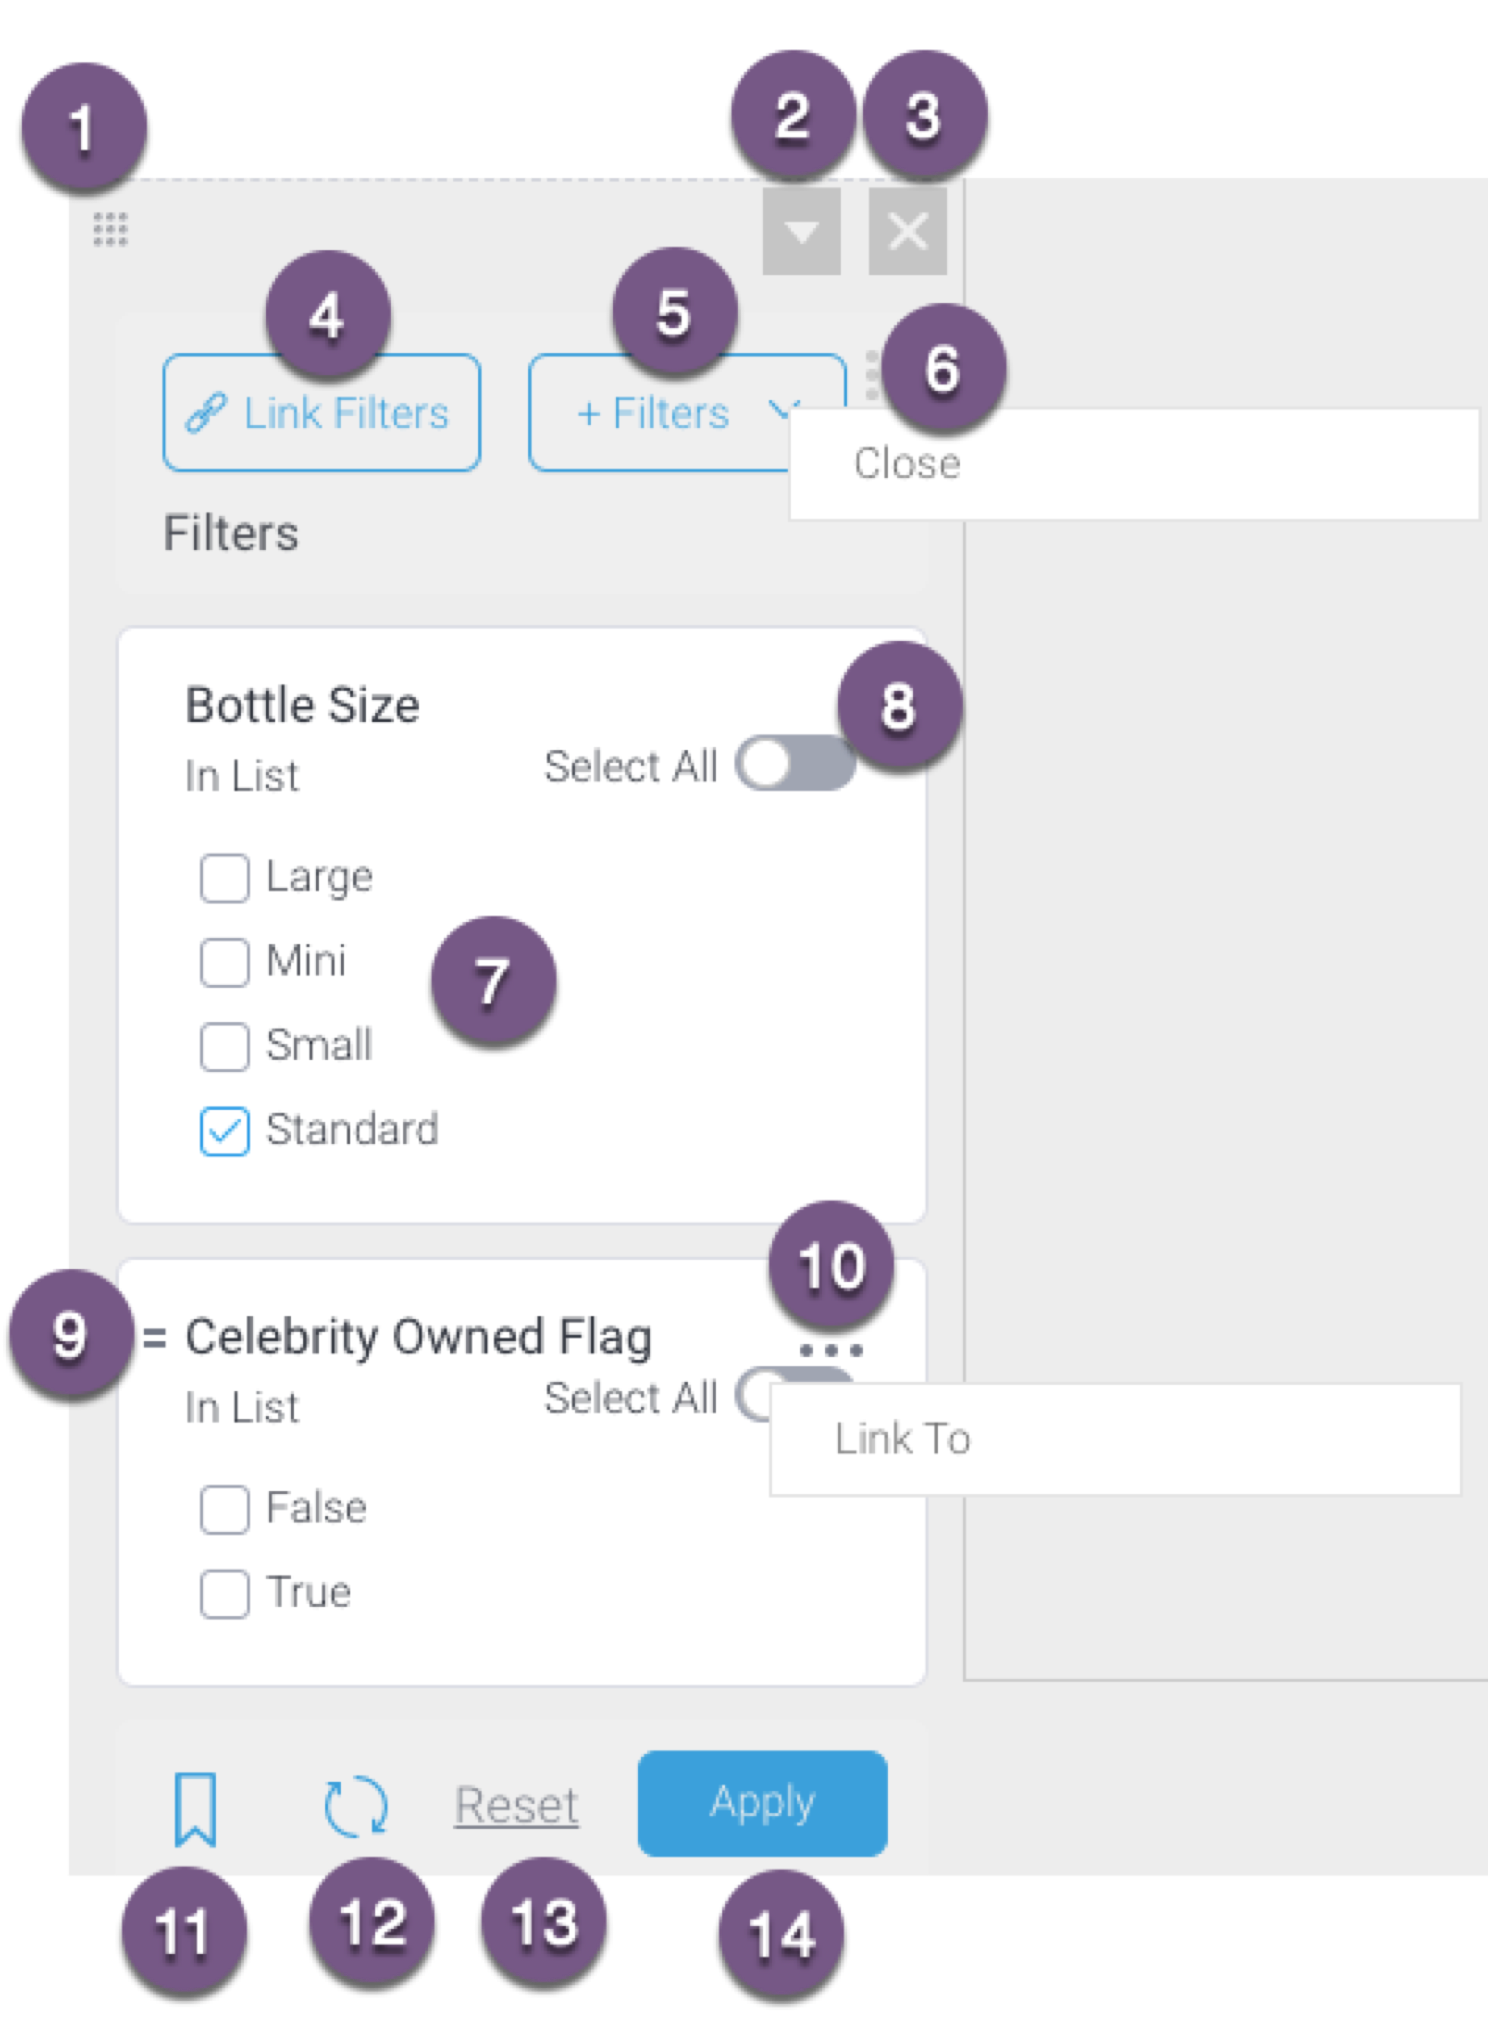
Click and drag this icon to move the filter panel to another location.
2
Filter properties panel
This button brings up the filter properties panel. Learn more.
3
Remove filter panel
Click on this button to delete the filter panel.
4
Link Filters
This button allows you to open set up for manually linking all or multiple filters. (A separate option is available to link individual filters.) Learn more.
Click on this menu option to perform actions on this filter panel. Option includes:
Close: this option allows you to collapse the filter panel, maximising the amount of room allocated to the display of your report. The filters can always be accessed again by clicking on the left side navigation filter button.
7
Filter
The filter(s) added to this panel. Select a filter value or ‘all’ using the toggle (see below).
8
Select all
Enables users to select all filter options in a list filter. This appears only if you have a list.
9
Re-order filter
Use the icon to drag and move a filter above or below another.
10
Individual filter menu
Brings up a menu for the selected filter. Option includes:
Link To: allows you to manually link an individual filter to other reports on the dashboard.
11
Dashboard filter bookmarks
Allows you to bookmark a filtered dashboards, or apply a saved bookmark. Learn more.
12
Refresh cached filters
The button allows you to refresh cached filter values. Note that this button will only appear if your filter contains cached values.
13
Reset filter
Removes selected filter values to reset filters to their default values or no selection.
14
Apply
Allows you to apply selected filter values.
Note: Features 11, 12, 13, and 14 together make up the filter control. These always appear at the end of a filter panel, for the use of dashboard users.
...
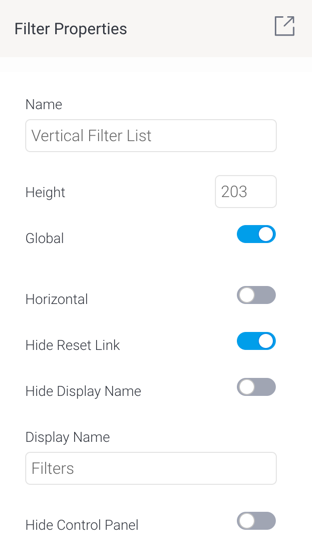
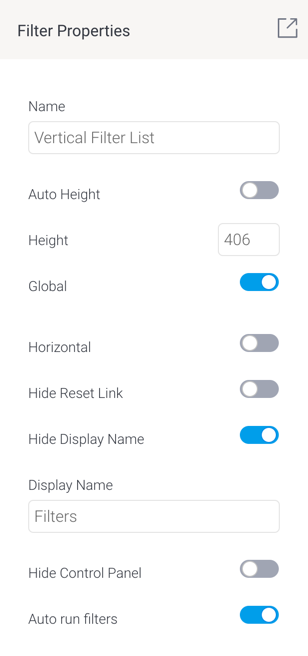
The filter properties panel lets you configure the following settings.
Section
Column
Image RemovedImage Added
Column
Property name
Description
Name
Name of the filter. This can be edited. This name appears in the dashboard code mode, making it easy to edit the filter code.
Auto height
Automatically adjusts the height of a filter widget according to the items in it. Turn off to manually define the filter height in a textbox. This option is only available if a filter widget is added to a static container. Note that the widget heights can also be changed by manually dragging the widget border, in which case this option will get switched off.
Height
Height of the filter in pixels. This is available if the Auto Height option is turned off.
Global
Enable this toggle to make your filter lists globally available. Global filters are present for all sub tabs in the dashboard. So if disabled, this filter will only be available for a specific sub tab.
Note that this only works for left or right container filters, not filters added to a dashboard content area.
Horizontal
Enable this to display your filter in a horizontal alignment. By default filters are vertically aligned.
Hide reset link
Allows you to hide the filter reset option.
Hide display name
Allows you to hide the filter display name.
Display name
Display name of the filter, that appears on the filter panel. This can be edited.
Hide control panel
Allows you to hide control buttons on a filter panel for the end user. These include bookmark, reset, and apply buttons. Dashboard users will not be able to use these filter features.
Auto run filters
Enable this toggle to automatically run reports when filter values are selected or changed, without using the ‘Apply’ button. Note: Administrators can also set a time delay, where the reports are run after a specified time once values are selected. This is done through the Content Settings > Report Settings > Builder Setting > Filter Run Delay setting.