Page History
...
| Section | ||||||||||||||||||||||||||||||||||||||||||||||||||||
|---|---|---|---|---|---|---|---|---|---|---|---|---|---|---|---|---|---|---|---|---|---|---|---|---|---|---|---|---|---|---|---|---|---|---|---|---|---|---|---|---|---|---|---|---|---|---|---|---|---|---|---|---|
| ||||||||||||||||||||||||||||||||||||||||||||||||||||
...
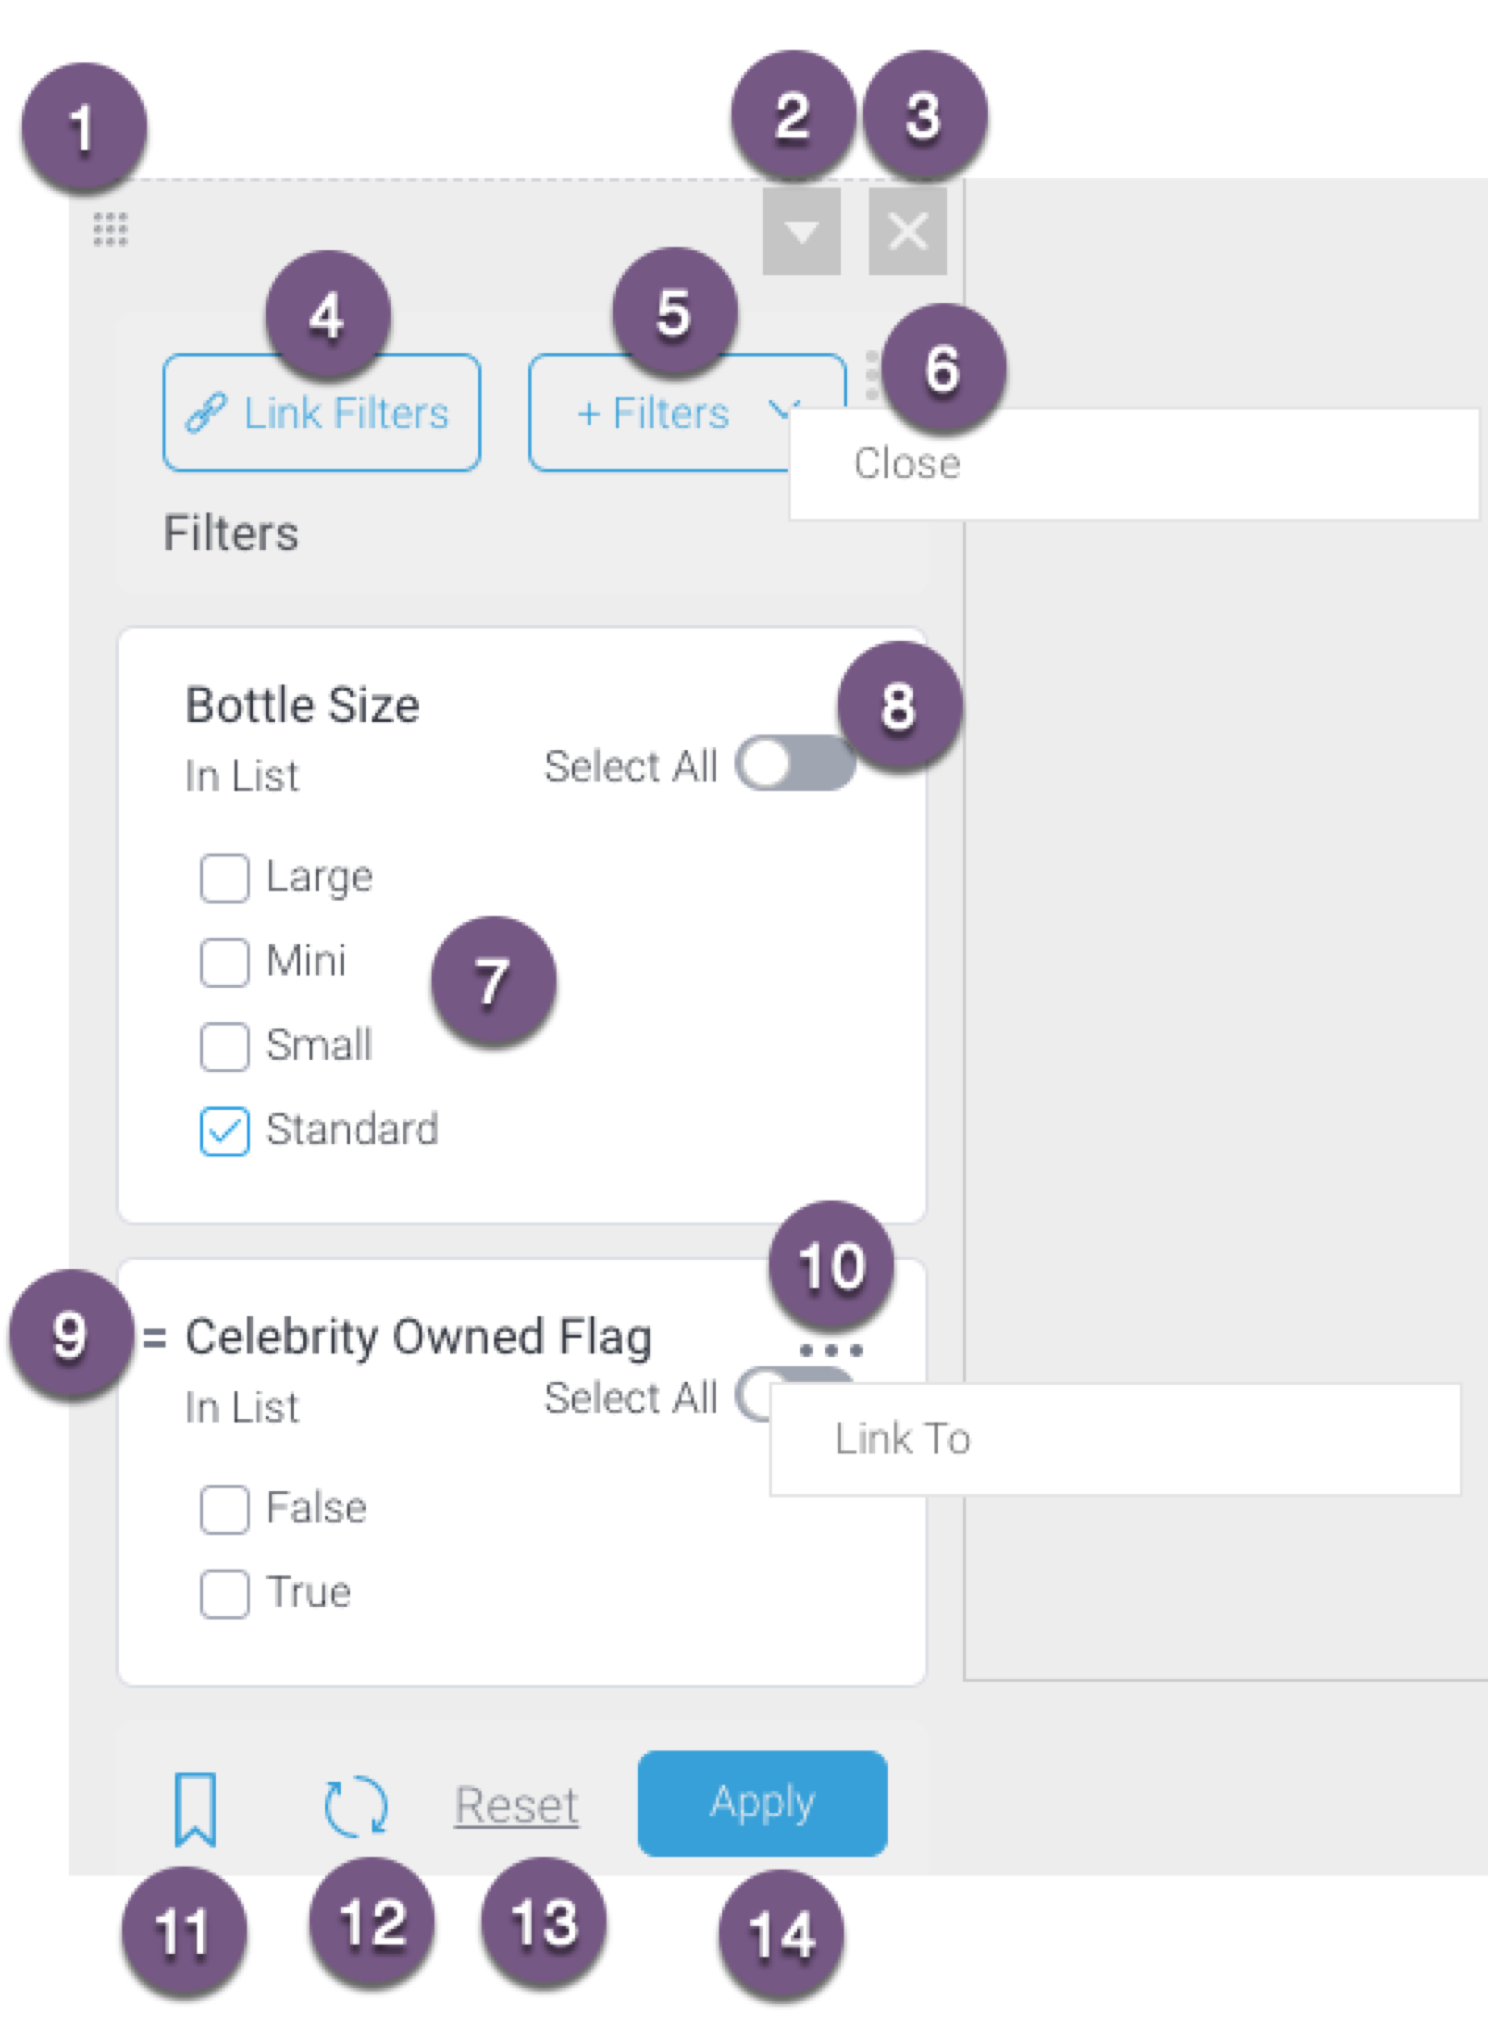
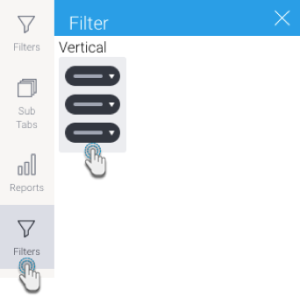
- Click on the Filters icon on your dashboard builder to bring up the Filter Widget list.
- Then drag a Filter Widget onto the dashboard at the exact location you would like to display the filter. This includes anywhere on the dashboard canvas, or within any of the global content containers (essential for global filter lists).
- A filter panel will appear on the location it was dropped. (Side note: click here for an overview of this filter panel).
- Add report filters to this panel by clicking on the + Filters button.
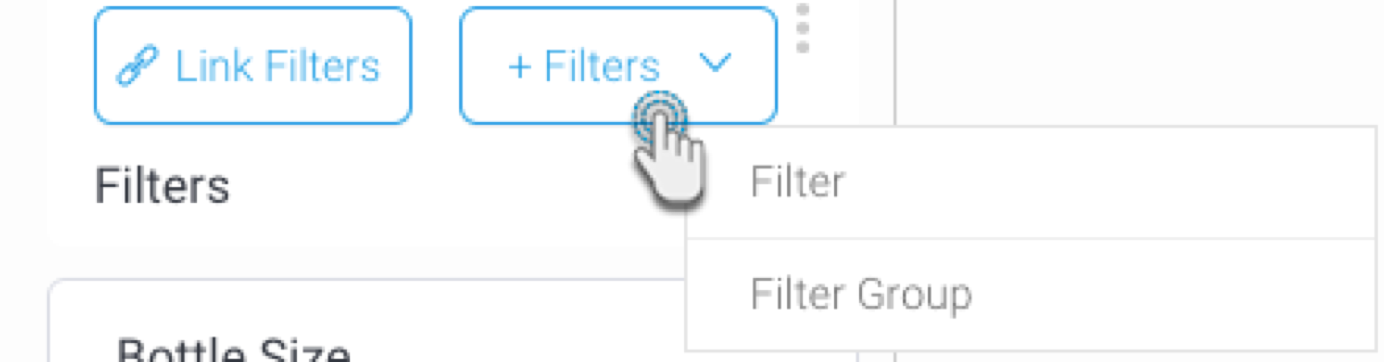
- Choose Filter to add individual filters (you can add multiple as well), or Filter Group to add a filter group. (In our example, we will choose Filter.)
- A pop up displaying available report filters will appear. This allows you to choose which filters to add from any of the reports.
Note: The filters in this popup are categorized, first according to the dashboard sub tab, and then reports within the tab.
Note 2: If none of the reports contain any filters, then the following notification will appear on this popup. Click on the Add a report link to open the Reports tab on the left side.
- Click on one or more filter checkboxes to select those that you want to add. Alternatively, enable the Select All toggle to select all the filters on this pop up. You can undo this selection by choosing the Clear All.
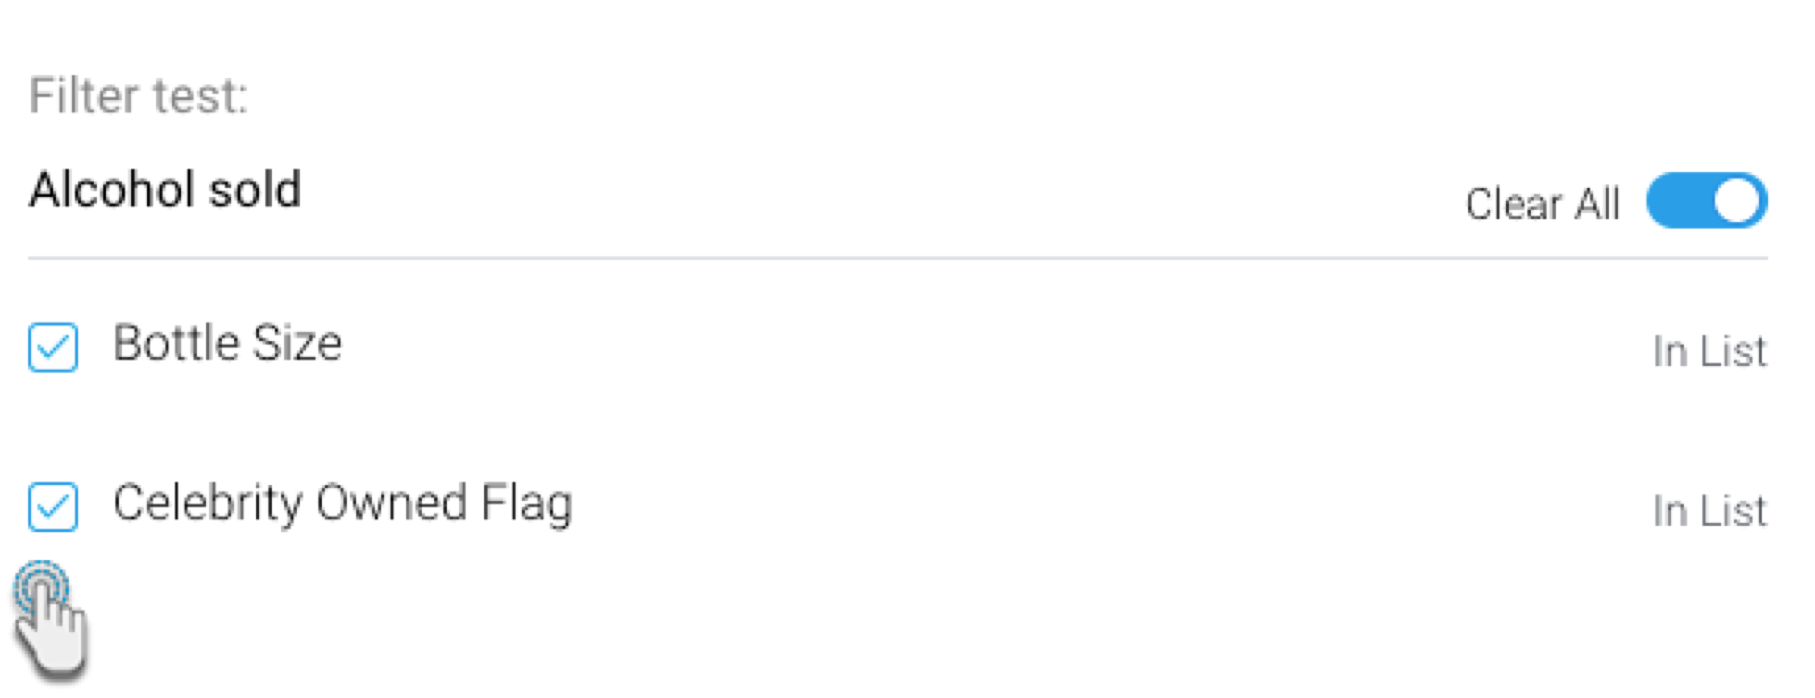
- Click on the Add Filters button on the bottom of this pop up to add the filters.
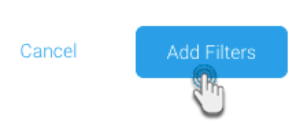
- The filters will then appear in the filter panel on the dashboard, as shown in the example below.

- Tip: To set default filter values, refer to this section.
Add filter default values
You can set default values for your dashboard filters. refer to this section.
| Anchor | ||||
|---|---|---|---|---|
|
Change filter entry display
Filter entries or values will appear on dashboards with the display style applied on them in the report. However, the entry display type of certain filters can be changed in the Dashboard builder, without having to change it in the report first. Entry styles can be changed to checkboxes, lists, pop-ups, drop downs or radio buttons, depending on the filter type.
This is possible if the report filter meets all of the following criteria:
- The filter is formatted to display its values in the form of a list. Ensure that the Value Entry Method of the filter is selected as ‘Value List Selection’ in the report.
- The filter is not a date filter with predefined or cached values.
How to change:
- Add the filters using the Filter Widget.
- Click on the ellipses
 button on an individual filter to bring up its menu, and select the Entry Style option.
 - Choose the new entry style from the list of options.
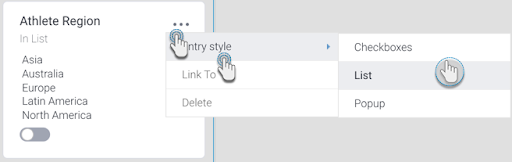
- The filter entries will be instantly updated.
...
| Anchor | ||||
|---|---|---|---|---|
|
...