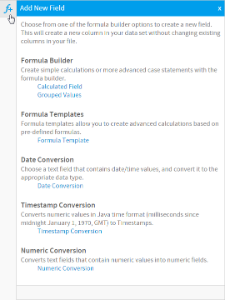
1. Click on the New Function button on the left of the CSV Data page. This will open a menu displaying all the functions that can be built into your file.
Note:this screenshot is from the Report Builder CSV Import, if using the View Builder CSV Import not all of these options will be available, as they are available in later stages of the standard View Builder process instead.
Column
width
70%
...
Section
Column
width
30%
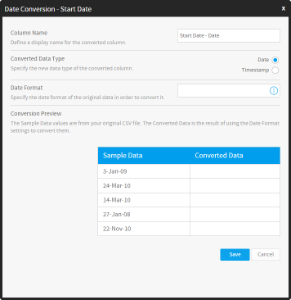
5. From here, the Date Conversion window will be displayed. First, you can provide a name for the converted version of the field. Note:this will be a new field, the original unconverted field will remain. You may wish to rename the original field as well.
6. Next, you will need to select which Converted Data Type you wish the field to be stored as. If the field contains time components and you wish to use them in reporting, select Timestamp, otherwise select Date.
Last, you will need to define the Date Format the CSV field is currently stored in. Yellowfin will always convert to the format specified in Administration > Configuration > Regional Settings, which is dd/MM/yyyy by default, what you have to do is tell it how to read the original field. In this example, the Start Date field is displaying as 3-Jan-09, which means it's formatted as dd-MMM-yy.