Page History
| Anchor | ||||
|---|---|---|---|---|
|
| Table of Contents | ||
|---|---|---|
|
Overview
| Styleclass | ||
|---|---|---|
| ||
The two major steps in creating a view include:
- Relationship Entity Diagram - selecting the tables you need from your database and defining how data in these tables are joined
- View Field Selection - defining which fields you wish to make available from these tables and providing metadata for them.
See Views for more information.
Create
| Styleclass | ||
|---|---|---|
| ||
1. Start the View creation process by using one of these methods:
- Left Side Nav - open the left side navigation panel, click on Create, select the View option
- Top Right Button - click on the create button, select the Viewoption.
- Toolbar - click on the Create link in the toolbar, select the View option.
- Toolbar - click on the Create link in the toolbar, select the View option.
- Admin Console - navigate to the Admin Console, open the Views section, click on the Add button.
You will now see the New VIew lightbox.
| Left Side Navigation | Top Right (with |
|---|---|
| Location | Preview |
| Left Side Navigation enabled) | |
 Top Right Button Top Right Button |  |
| Toolbar | Admin Console | |
|---|---|---|
 |  |
2. From here you will need to either;
- Select your data source, or
- Select your data source, or
- Create a new source
- Create a new source
We're going to select Ski Team from the source type list.

3. You will now see the basic parameters required for your view. We are going to look at a more complex view, so select the Multiple Tables option.

4. Click on the Edit View option in order to access the main view builder.

5. The view builder page will now open. You will see a list of tables in the Database Tables panel on the left hand side and the View Options on the right hand side of the canvas.
![]()
6. Update the view Name on the View Options panel as shown on the right. Call this view Tutorial View.
7. Enter the Business Description: This will be used to learn about Yellowfin.

Entity Relationship
| Styleclass | ||
|---|---|---|
| ||
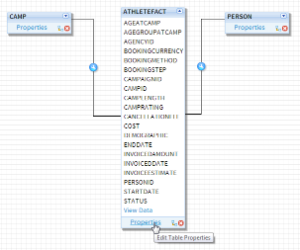
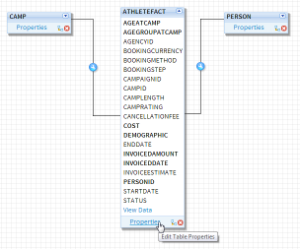
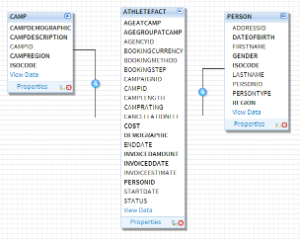
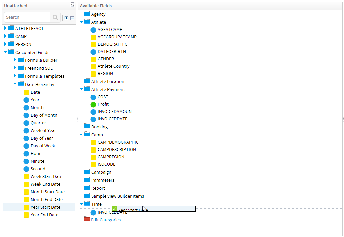
1. From the table list on the left of the screen, drag the following tables onto your canvas:
AthleteFact, Person, and Camp
You should now have three tables on your canvas as displayed on the right.

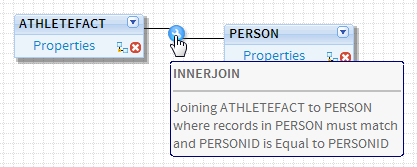
2. On the AthleteFact table click the  join link. This will open the join pop-up. Create a join between the AthleteFact Table and the Person Table.
Join From: AthleteFact
Join Type: Inner Join
Join To: Person
Join logic: PersonID Equal to PersonID
3. Click the Add button to add to the join list. You should now see the join logic as depicted on the right.

| Expand | ||||||||||||||||||||||||
|---|---|---|---|---|---|---|---|---|---|---|---|---|---|---|---|---|---|---|---|---|---|---|---|---|
| ||||||||||||||||||||||||
|

See Drag & Drop View Builder for more information.
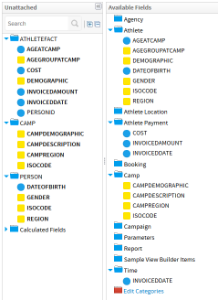
Selecting Fields
| Styleclass | ||
|---|---|---|
| ||
| Expand | ||||||||||||||||||||||||||||||||||||||||||||||||||||||||||||
|---|---|---|---|---|---|---|---|---|---|---|---|---|---|---|---|---|---|---|---|---|---|---|---|---|---|---|---|---|---|---|---|---|---|---|---|---|---|---|---|---|---|---|---|---|---|---|---|---|---|---|---|---|---|---|---|---|---|---|---|---|
| ||||||||||||||||||||||||||||||||||||||||||||||||||||||||||||
|


See Table Properties for more information.
Field Categories & Meta Data
| Styleclass | ||
|---|---|---|
| ||
| Expand | ||||||||||||||||||||||||||||||||||||||||||||||||||||||||||||||||||||||||
|---|---|---|---|---|---|---|---|---|---|---|---|---|---|---|---|---|---|---|---|---|---|---|---|---|---|---|---|---|---|---|---|---|---|---|---|---|---|---|---|---|---|---|---|---|---|---|---|---|---|---|---|---|---|---|---|---|---|---|---|---|---|---|---|---|---|---|---|---|---|---|---|---|
| ||||||||||||||||||||||||||||||||||||||||||||||||||||||||||||||||||||||||
|


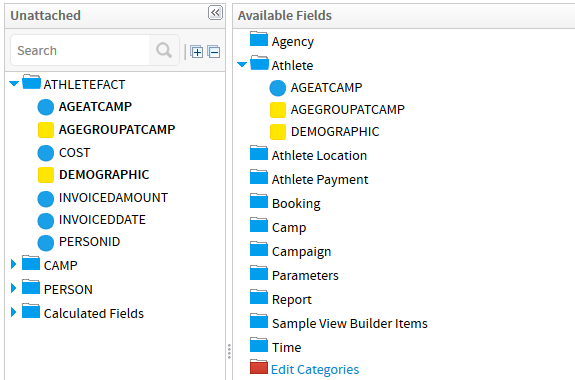


See View Fields for more information.
Field Format
| Styleclass | ||
|---|---|---|
| ||
| Expand | ||||||||||||
|---|---|---|---|---|---|---|---|---|---|---|---|---|
| ||||||||||||
|
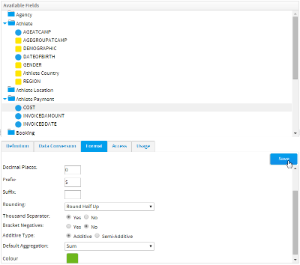
See Field Format for more information.
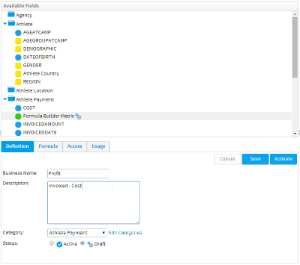
Calculated Fields
| Styleclass | ||
|---|---|---|
| ||
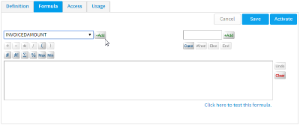
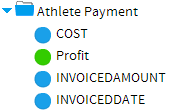
Calculated Metric
This type of calculated field allows you to build a calculation that will return a numeric value as the result. In this example we will aim to calculate profit by subtracting cost from invoice figures.
| Expand | ||||||||||||||||||||||||||||||||||||||||||||||||||||||||||||
|---|---|---|---|---|---|---|---|---|---|---|---|---|---|---|---|---|---|---|---|---|---|---|---|---|---|---|---|---|---|---|---|---|---|---|---|---|---|---|---|---|---|---|---|---|---|---|---|---|---|---|---|---|---|---|---|---|---|---|---|---|
| ||||||||||||||||||||||||||||||||||||||||||||||||||||||||||||
|

See View Calculated Fields for more information.
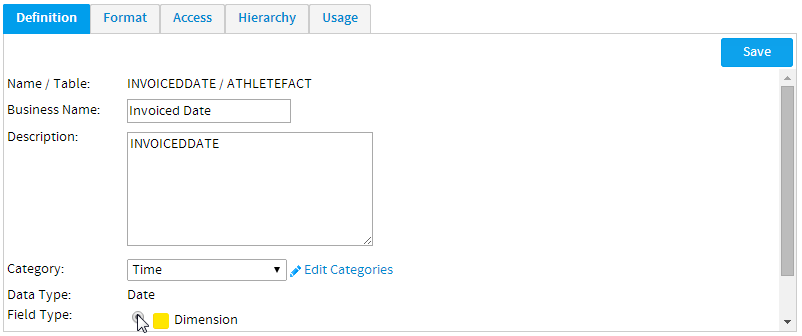
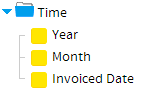
Date Hierarchy Fields
Date Hierarchy calculated fields allow you to build levels of a hierarchy based on a single date field in your database. This can then be used to define Drill Down hierarchies, or for other purposes in reports.
| Expand | ||||||||||||||||||||||||||||||||||||
|---|---|---|---|---|---|---|---|---|---|---|---|---|---|---|---|---|---|---|---|---|---|---|---|---|---|---|---|---|---|---|---|---|---|---|---|---|
| ||||||||||||||||||||||||||||||||||||
|

Drill Down Hierarchy
| Styleclass | ||
|---|---|---|
| ||
| Expand | ||||||||||||||||||||||||||||||||||||||||||||||||
|---|---|---|---|---|---|---|---|---|---|---|---|---|---|---|---|---|---|---|---|---|---|---|---|---|---|---|---|---|---|---|---|---|---|---|---|---|---|---|---|---|---|---|---|---|---|---|---|---|
| ||||||||||||||||||||||||||||||||||||||||||||||||
|
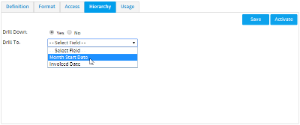

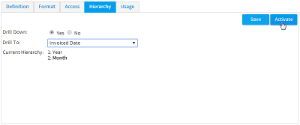
See Drill Down Hierarchies for more information.
View Summary & Saving
| Styleclass | ||
|---|---|---|
| ||
| Expand | ||||||||||||||||||||||||
|---|---|---|---|---|---|---|---|---|---|---|---|---|---|---|---|---|---|---|---|---|---|---|---|---|
| ||||||||||||||||||||||||
|


See View Summary for more information.
Further Information
| Styleclass | ||
|---|---|---|
| ||
| horizontalrule |
|---|
| Styleclass | ||
|---|---|---|
| ||