Page History
...
| Table of Contents | ||
|---|---|---|
|
Overview
| Styleclass | ||
|---|---|---|
| ||
| Tip |
|---|
Approval workflow is only applied to public reports. If you save a private report it will not be routed to an approver. |
Setting up approval rules
| Styleclass | ||
|---|---|---|
| ||
Setting up approval rules
For the report approval workflow to take effect you must define the approval experts on the Report Sub Category. In the Report Category edit page the Publish Access and Approvals section allows you to determine which users can publish public reports to the category.
- If you select 'Users with Functional Access' then all users with the public report function can write to this folder
- If you select a person or expert group – then only specified users can publish reports into that folder. If a user does not have access to publish to that folder the report will be routed to an Expert for approval.

Once approval is required you will see the approval icon in the Report Categories list.

Triggering Approval
first create a sub folder to store reports. Once a sub folder is created, you can define the approval experts for that sub folder in the Admin Console.
| Styleclass | ||
|---|---|---|
| ||
Triggering approval
If you are a user with ‘Public’ report content publish rights you will be able to create a public report. However, if you content, but will require approval if you would like to publish the content in a sub folder with approval rules applied.
- Create a report and click Publish to save the report
- Select the content folder you would like to publish your report to
If you are not the designated expert approver for the
...

You will now see the following message on the report until it is approved:

...
- sub folder, the 'This report requires expert approval' message will be shown
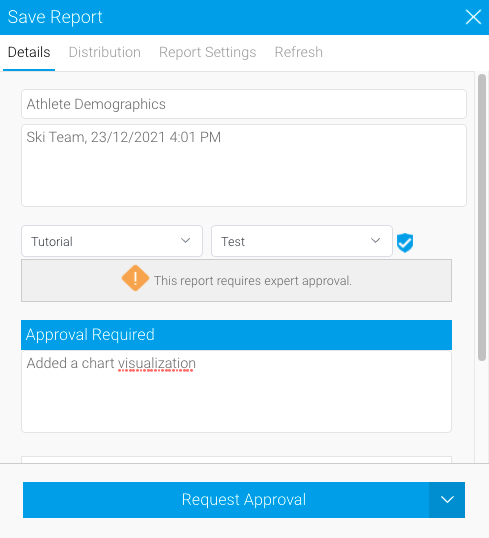
- Add a description into the What's changed and why? field to inform the approver of the details of the report
- Click Request Approval to send the report to an expert approver
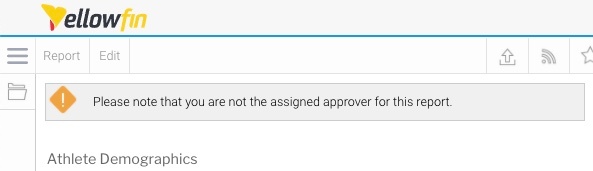
The report will be routed
...
- for approval, and the following message will be displayed on the report output page until the report has been approved
| Styleclass | ||
|---|---|---|
| ||
Approving content
As the expert approver you , content pending approval will be able to login and see reports awaiting approval in your timeline – open the item to review and approve the report. You can also view this from the content page's activity stream.
Note: advanced users with "Approval Admin" role permissions are able to perform the same functions as approvers without having to be specified in the content folder as an approver.

From here you will have the option to:
- Approve
- Reply
- Edit
- Reject
- Close & Delete Report

Once approved, the user will see a notification in their timeline feed:

...
displayed in your Timeline and on the Tasks page.
To approve content, follow the steps below.
- Click on your user profile and navigate to the Tasks page
A badge will display the number of tasks requiring your attention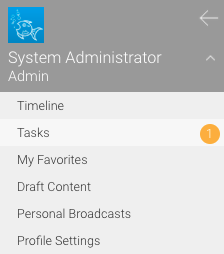
- Click on the New tab to display approval request that require approval, or the All Time filter to display all approval requests if none are visible
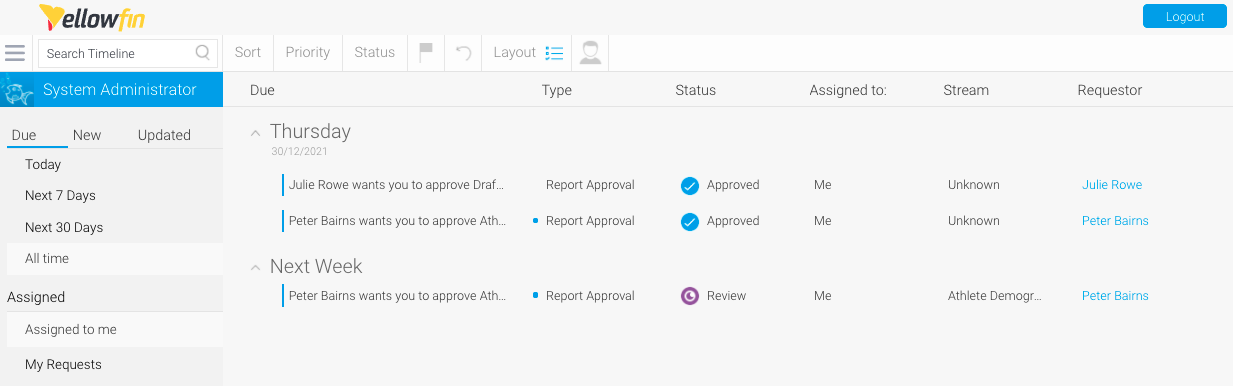
- Click an approval request requiring Review
A panel will be displayed on the right hand side of the screen showing the Review status next to the Approve button, and the user's content description 'Added a chart visualization'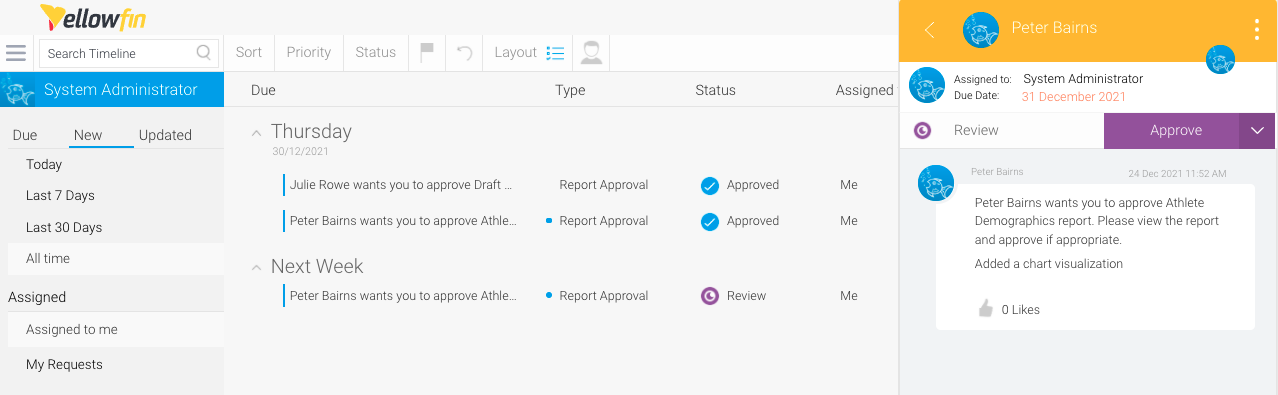
- Click the Approve button dropdown to display the available options for this request
You can approve the request, view and edit the content, reject the request or close and delete the content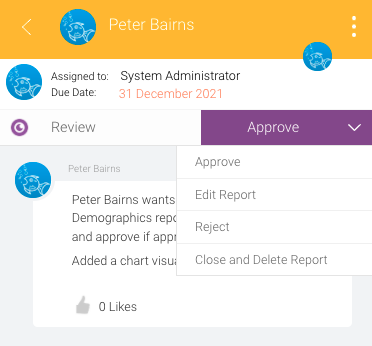
- Click on Approve to approve the content and publish it in the restricted sub folder
The status of the request will be changed to Approved, and the content will be published in the sub folder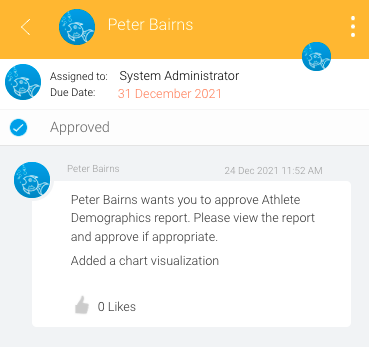
The user who made the request will also see a notification in their Timeline, with Approved displayed on the bottom of the tile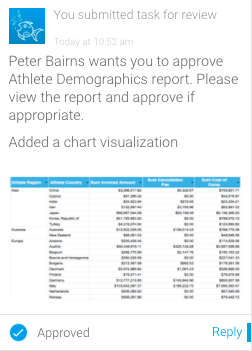
| Tip |
|---|
Advanced users with the Approval Admin role permissions can perform the same functions as approvers without being selected in the content folder as an approver. |
| Styleclass | ||
|---|---|---|
| ||
...