Page History
...
| Styleclass | ||
|---|---|---|
| ||
- To edit a view click the edit link from the view summary page. This link is only visible if the view is ACTIVE.
- Select if you wish to ‘clone’ or ‘edit the existing’ view.
If you edit the existing view then no users will be able to run reports against that view until you have activated it. Any changes you make to the view may impact existing reports and corruption may occur. You will also not be given the option to rollback the view to its previous state.

If you clone a view then the changes are made independently of report users. On activation the view will replace the previous version.

- Edit the view as required. Save and activate once changes have been completed.

- When activating the view you will be prompted to update the view name and add a description of the changes made. This information will be available when rolling back the view.

Rollback
| Styleclass | ||
|---|---|---|
| ||
- Click on the Rollback link found on the View Summary page. This will only be enabled if a clone has been saved.

- You will now notice there is an extra option on the Edit View page allowing you to view the change description of the current view version and Rollback those changes.

Deleting
| Styleclass | ||
|---|---|---|
| ||
- To delete a view select the view from the views list by ticking the checkbox. Click the Delete link.
- You will have to confirm your deletion. The confirm page will show you how many active reports are currently attached to the view. If you delete the view all these active reports will be deleted as well.
- Click delete to confirm deletion

Copying
| Styleclass | ||
|---|---|---|
| ||
...
- On the Cache tab of the view summary page, click on the Create a cached copy of this view link.

- You will now have a series of options to configure. Select the name of the data store you have setup.

- Decide if you wish the caching to be incrementally loaded. If Yes, you will be prompted to select an incremental load key from the view. This field must be an incrementing column as it will be used to determine which records are new since the previous refresh.

- Once you have set the refresh schedule, click Save. The view is now set to regularly cache its data, but will wait for the scheduled date to populate the first set of data. If you wish to populate the data manually click the Populate Data Now link.

- Yellowfin will now populate the data. Depending on the number of records and the complexity of the view logic, this task may take several minutes.
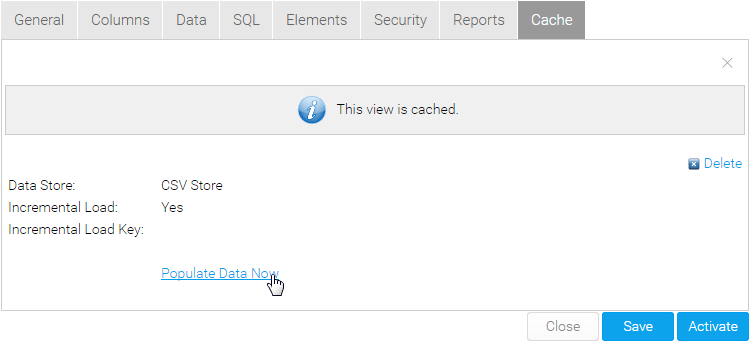
- You can now click on the data tab to view a snapshot of the data.

| horizontalrule |
|---|
| Styleclass | ||
|---|---|---|
| ||
...