Page History
...
| Styleclass | ||
|---|---|---|
| ||
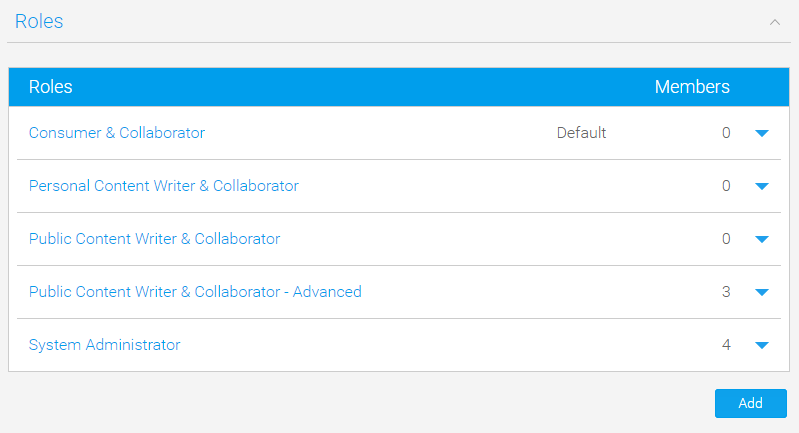
Sample Yellowfin Roles
...
...
- Click on the Add button located at the bottom of the Roles list in the Admin Console
- You will now be taken to the Role Details page and will need to define these components:
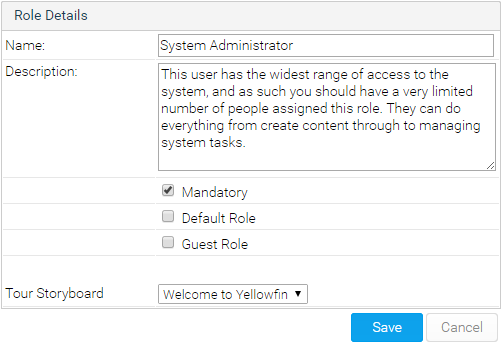
- Provide a meaningful Name and Description that outlines the purpose or use of the role
Enable the role as Mandatory, Default, or Guest as required. (Optional)
Mandatory
This means that once this role has been created, and at least one user assigned the role, when users are deleted Yellowfin will check the role to ensure there is always at least one user with this role in the system. So if you try to delete the only user assigned the Mandatory role you will experience the following error:

Default Role
This means that when a user is created in Yellowfin, either by an Administrator, or through LDAP, they will be assigned this role unless otherwise specified
Guest Role
Guest roles are used for accessing external content.
- Select an existing public storyboard to present to new users from the Welcome page. (Optional)
- Enable/Disable functions as required. A description of each function is available by hovering over the info icon on the right hand side.
Note: See Available Security Functions for a full list.
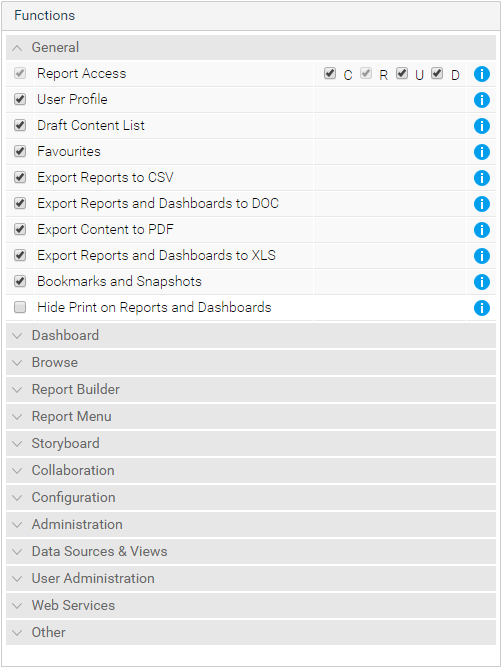
Define the CRUD permissions where required. Some functions will have a C R U D check list as part of the settings. The acronym CRUD refers to all of the major functions that need to be implemented. Each letter in the acronym can be mapped to a standard SQL statement:
Create
INSERT new records
Read
SELECT records from the database
Update
UPDATE records in the database
Delete
DELETE records in the database
One example of CRUD access is for dashboards. If a user only has R selected they will be able to read dashboard but not create new dashboard tabs or add reports to their tabs. Whilst a user with CRUD will be able to create and delete dashboard tabs.
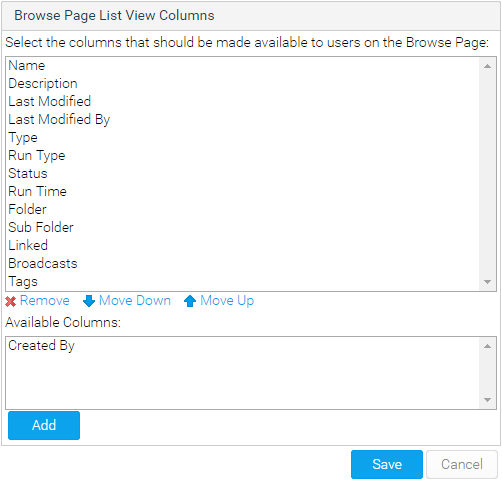
- The last option you have in the role settings is to specify what columns should be made available to users when viewing the report list.
- Click Save when you have completed editing to make your role available.
Note: Yellowfin will do a function check to ensure you do not breach your license agreement.
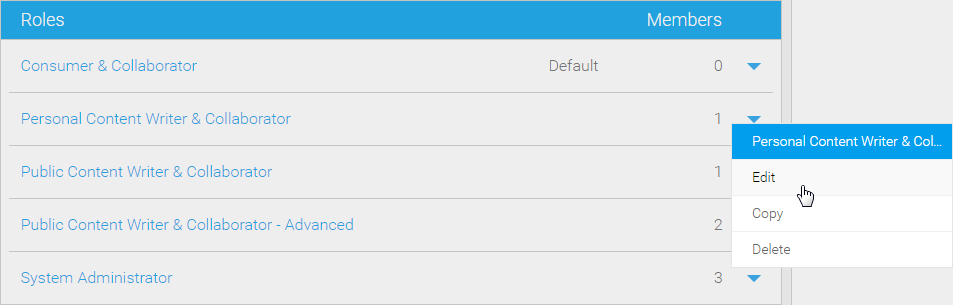
Edit/Copy Role
| Styleclass | ||
|---|---|---|
| ||
Delete Role
| Styleclass | ||
|---|---|---|
| ||
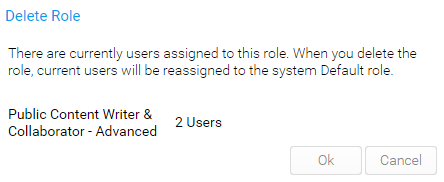
Note: if there are users attached to a role you choose to delete, the users will also be removed from the system.
...