Page History
...
| Table of Contents | ||
|---|---|---|
|
Prerequisites
| Styleclass | ||
|---|---|---|
| ||
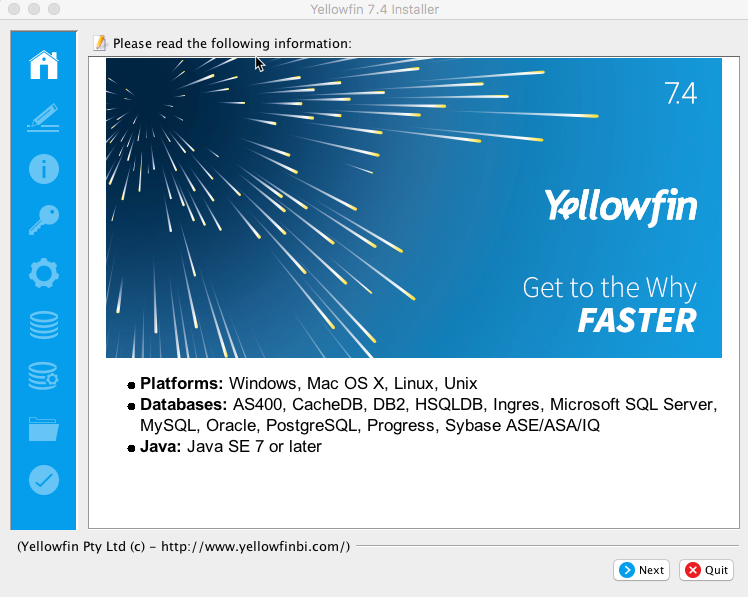
Yellowfin requires that the customer has installed the following products prior to installing the Yellowfin product:
...
The server hosting the Yellowfin application MUST have Java 7 or higher installed on it. The Java JRE is sufficient for this purpose. Refer to the Sun Oracle web site for download and installation instructions (http://www.java.sun.com)oracle.com/technetwork/indexes/downloads/index.html#java).
Database
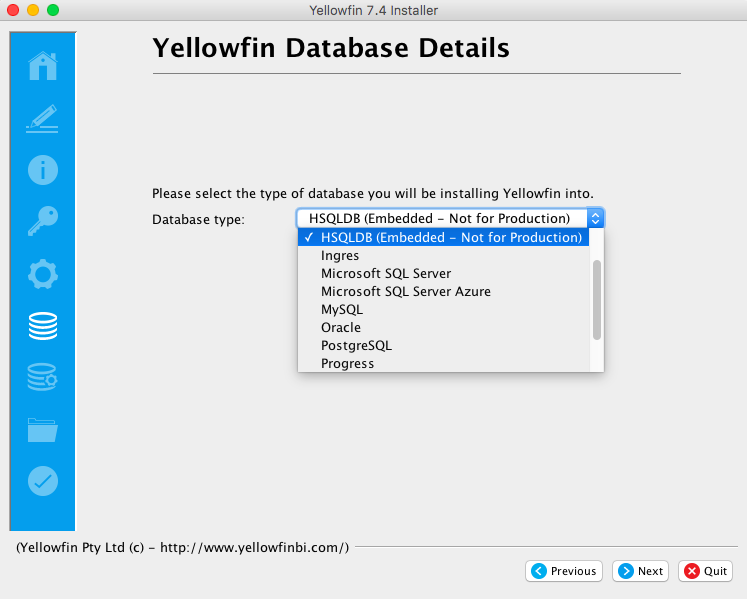
The database software which will contain the Yellowfin database should already be installed. Suitable jdbc JDBC drivers to enable the database to communicate with the Yellowfin application should also be installed. It is not necessary for the database server to reside on the same machine as the Yellowfin application.
Installation Steps
| Styleclass | ||
|---|---|---|
| ||
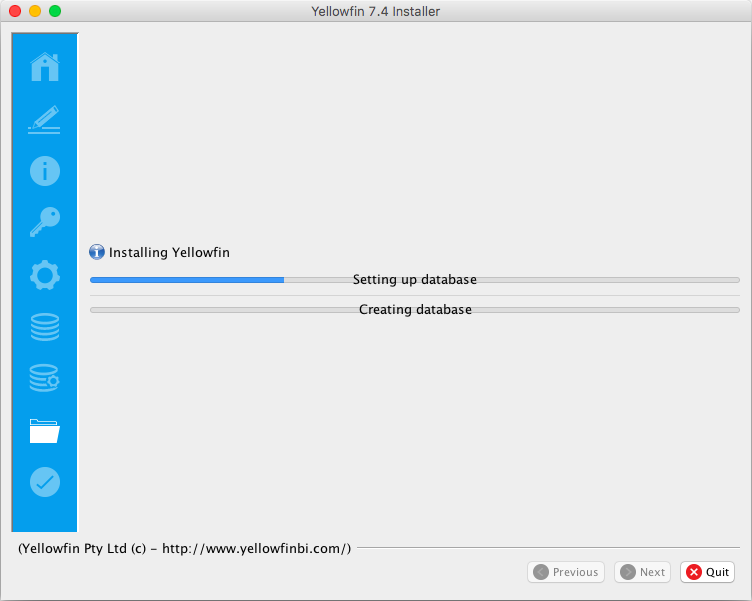
Yellowfin is provided as a java Java archive file called Installer.jar. Copy the file to a temporary directory on the server onto which the application is to reside.
...
| Section | ||||||||||
|---|---|---|---|---|---|---|---|---|---|---|
|

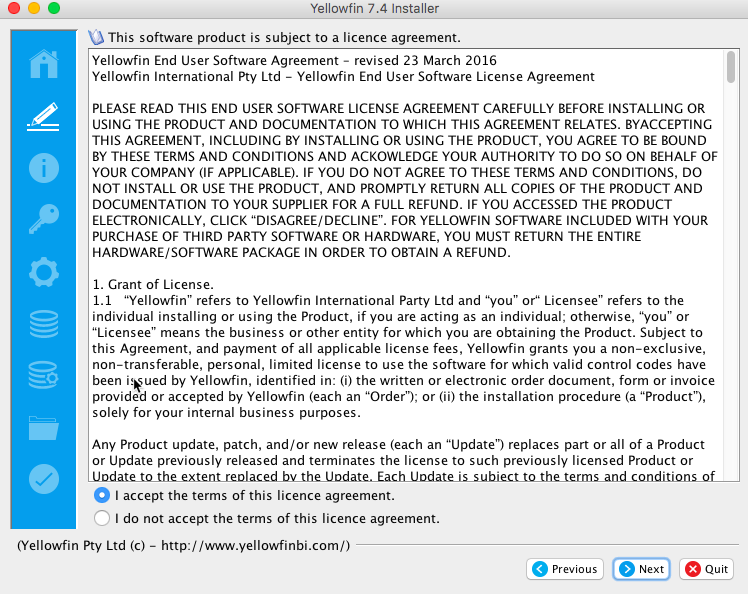
Terms & Conditions
| Section | ||||||||||
|---|---|---|---|---|---|---|---|---|---|---|
|
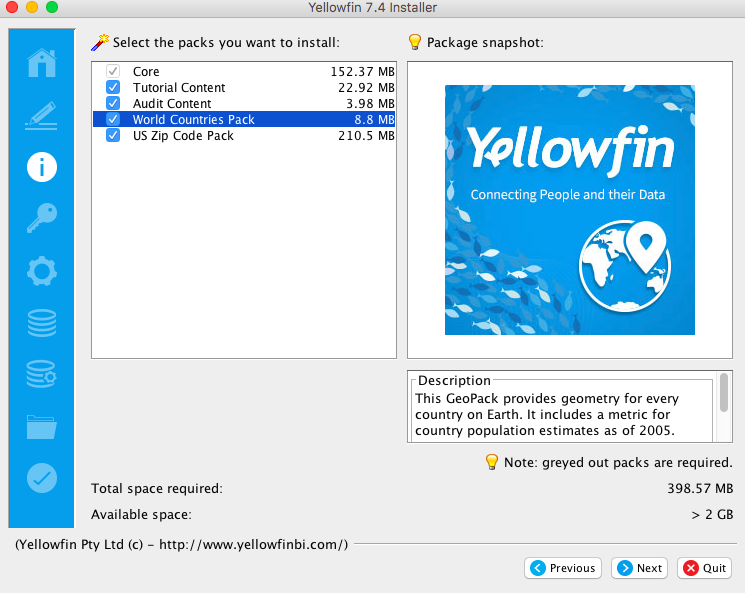
Required Components
| Section | ||||||||||
|---|---|---|---|---|---|---|---|---|---|---|
|

...
License File
| Section | ||||||||||
|---|---|---|---|---|---|---|---|---|---|---|
|

...
| Section | ||||||||||
|---|---|---|---|---|---|---|---|---|---|---|
|
...
| Section | ||||||||||
|---|---|---|---|---|---|---|---|---|---|---|
|
...
| Section | ||||||||||
|---|---|---|---|---|---|---|---|---|---|---|
|

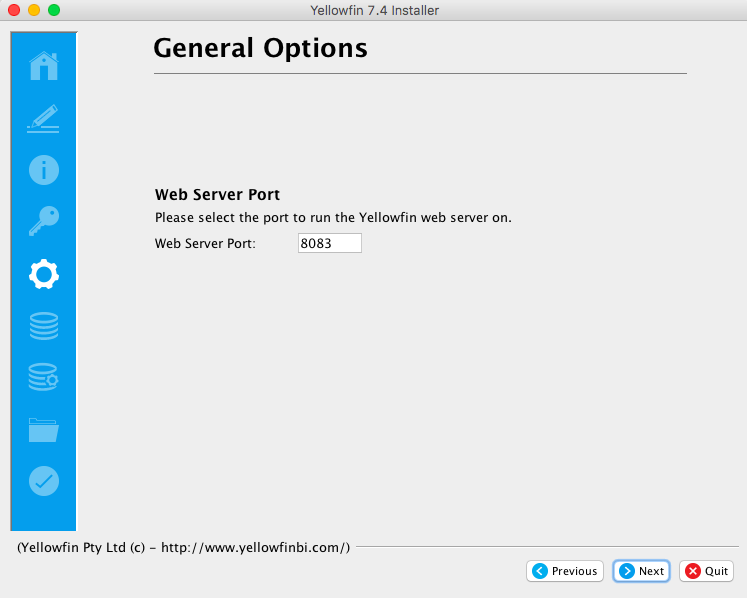
Installation Path
| Section | ||||||||||
|---|---|---|---|---|---|---|---|---|---|---|
|


...
| Section | ||||||||||
|---|---|---|---|---|---|---|---|---|---|---|
|
...
| Section | ||||||||||
|---|---|---|---|---|---|---|---|---|---|---|
|
...
Directory Structure
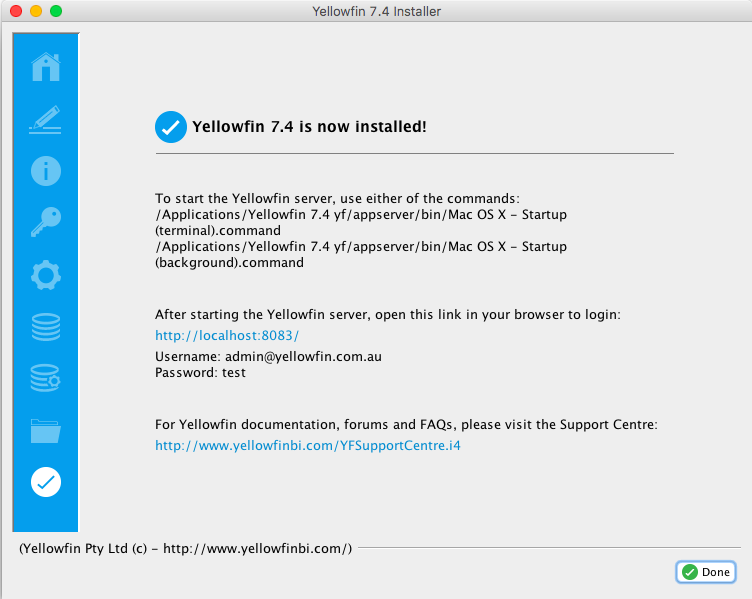
Click here to learn about the folders and files present in your Yellowfin directory structure.
Troubleshooting
Most problems related to the Yellowfin application server installation relate to database connectivity and administration issues.
...
- SQL Server is stopped on the server you are trying to connect to.
- The connection details you entered were incorrect.
- You have a network problem that stops the computer you're running the installer on from connecting to the SQL server host (Unlikely unlikely if you are connecting to your localhost).
Verify these settings on the Configuration DB Parameters screen on the installer.
- Database Server Name - : This will probably be the "localhost".
- Database Server Port - : This should be 1433.
- Database Name - : This is the name of the database you want Yellowfin to install to. This should be "yellowfin". This is used for Yellowfin configuration and operational data. It is not the database you wish to report off.
- Create Database - : Click this to create the new Yellowfin database. We suggest removing the Yellowfin database if your installation failed previously.
- DBA User: This could be "sa".
- DBA Password: This could be "sa".
- Reports UserId: Set this to "yellowfin_user".
- Reports UserId password: Set this to "yellowfin_user" or whatever you prefer.
- Create user id - : Check this checkbox.
Additional Resources
...
- Screenshots (if applicable)
- YellowfinInstallLog-date.log (this can be found in the Yellowfin directory)
- All log files found in Yellowfin\appserver\LOGS (if you have any)
...
| horizontalrule |
|---|
| Styleclass | ||
|---|---|---|
| ||
...