Page History
...
This section is related to the active directory federation services (AD FS) configurations required for your Yellowfin SAML bridge.
AD FS Public Key
You will need to obtain a valid public keyfrom AD FS (.cer file) to sign SAML requests coming from Yellowfin. This key is then set in the onelogin.saml.properties, in the form of a text. For example:
onelogin.saml2.idp.x509cert =MIIC2DCCAcCgAwIBAgIQfdRAAWmWko1IsimA004o3TANBgkqhki…
Download signing certificate from AD FS:
- Find the certificate in the AD FS
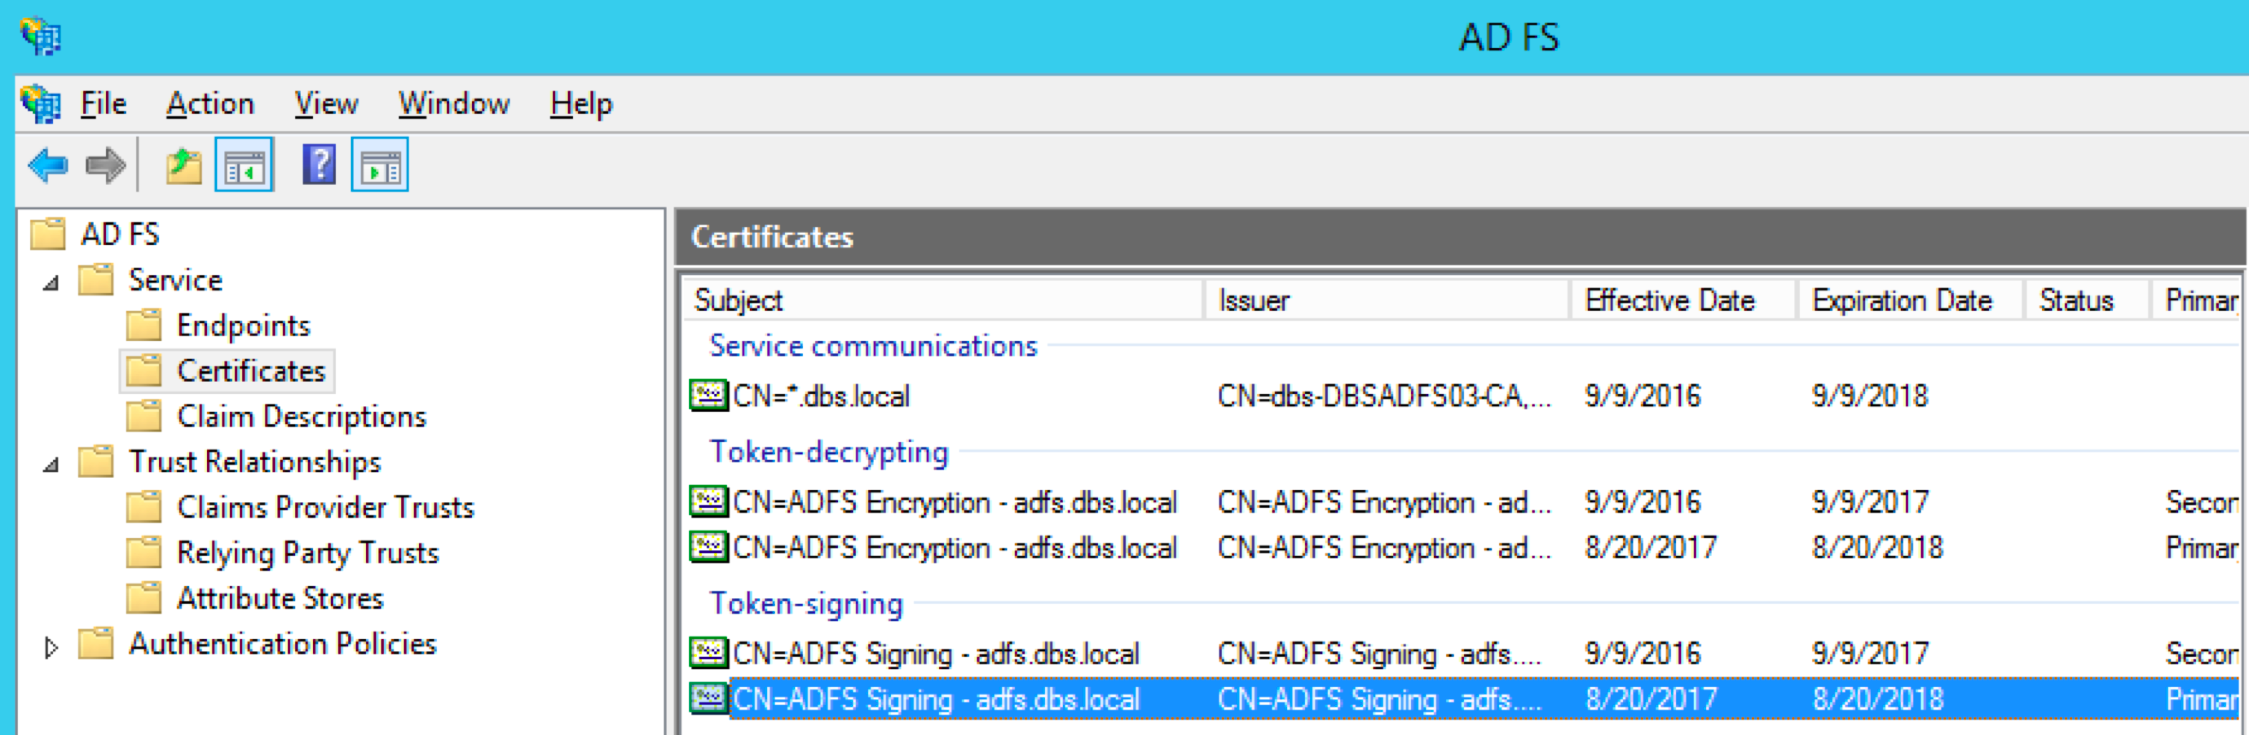
- Select ‘View Certificate’.
- Go to ‘Details’.
- Click ‘Copy to file’.
- Then open the file in a text editor and copy the string to onelogin.saml2.idp.x509cert.
...
...
| Anchor | ||||
|---|---|---|---|---|
|
...
More details about registering service provider in AD FS can be found via https://technet.microsoft.com/en-us/library/adfs2-help-how-to-add-a-relying-party-trust(v=ws.10).aspx
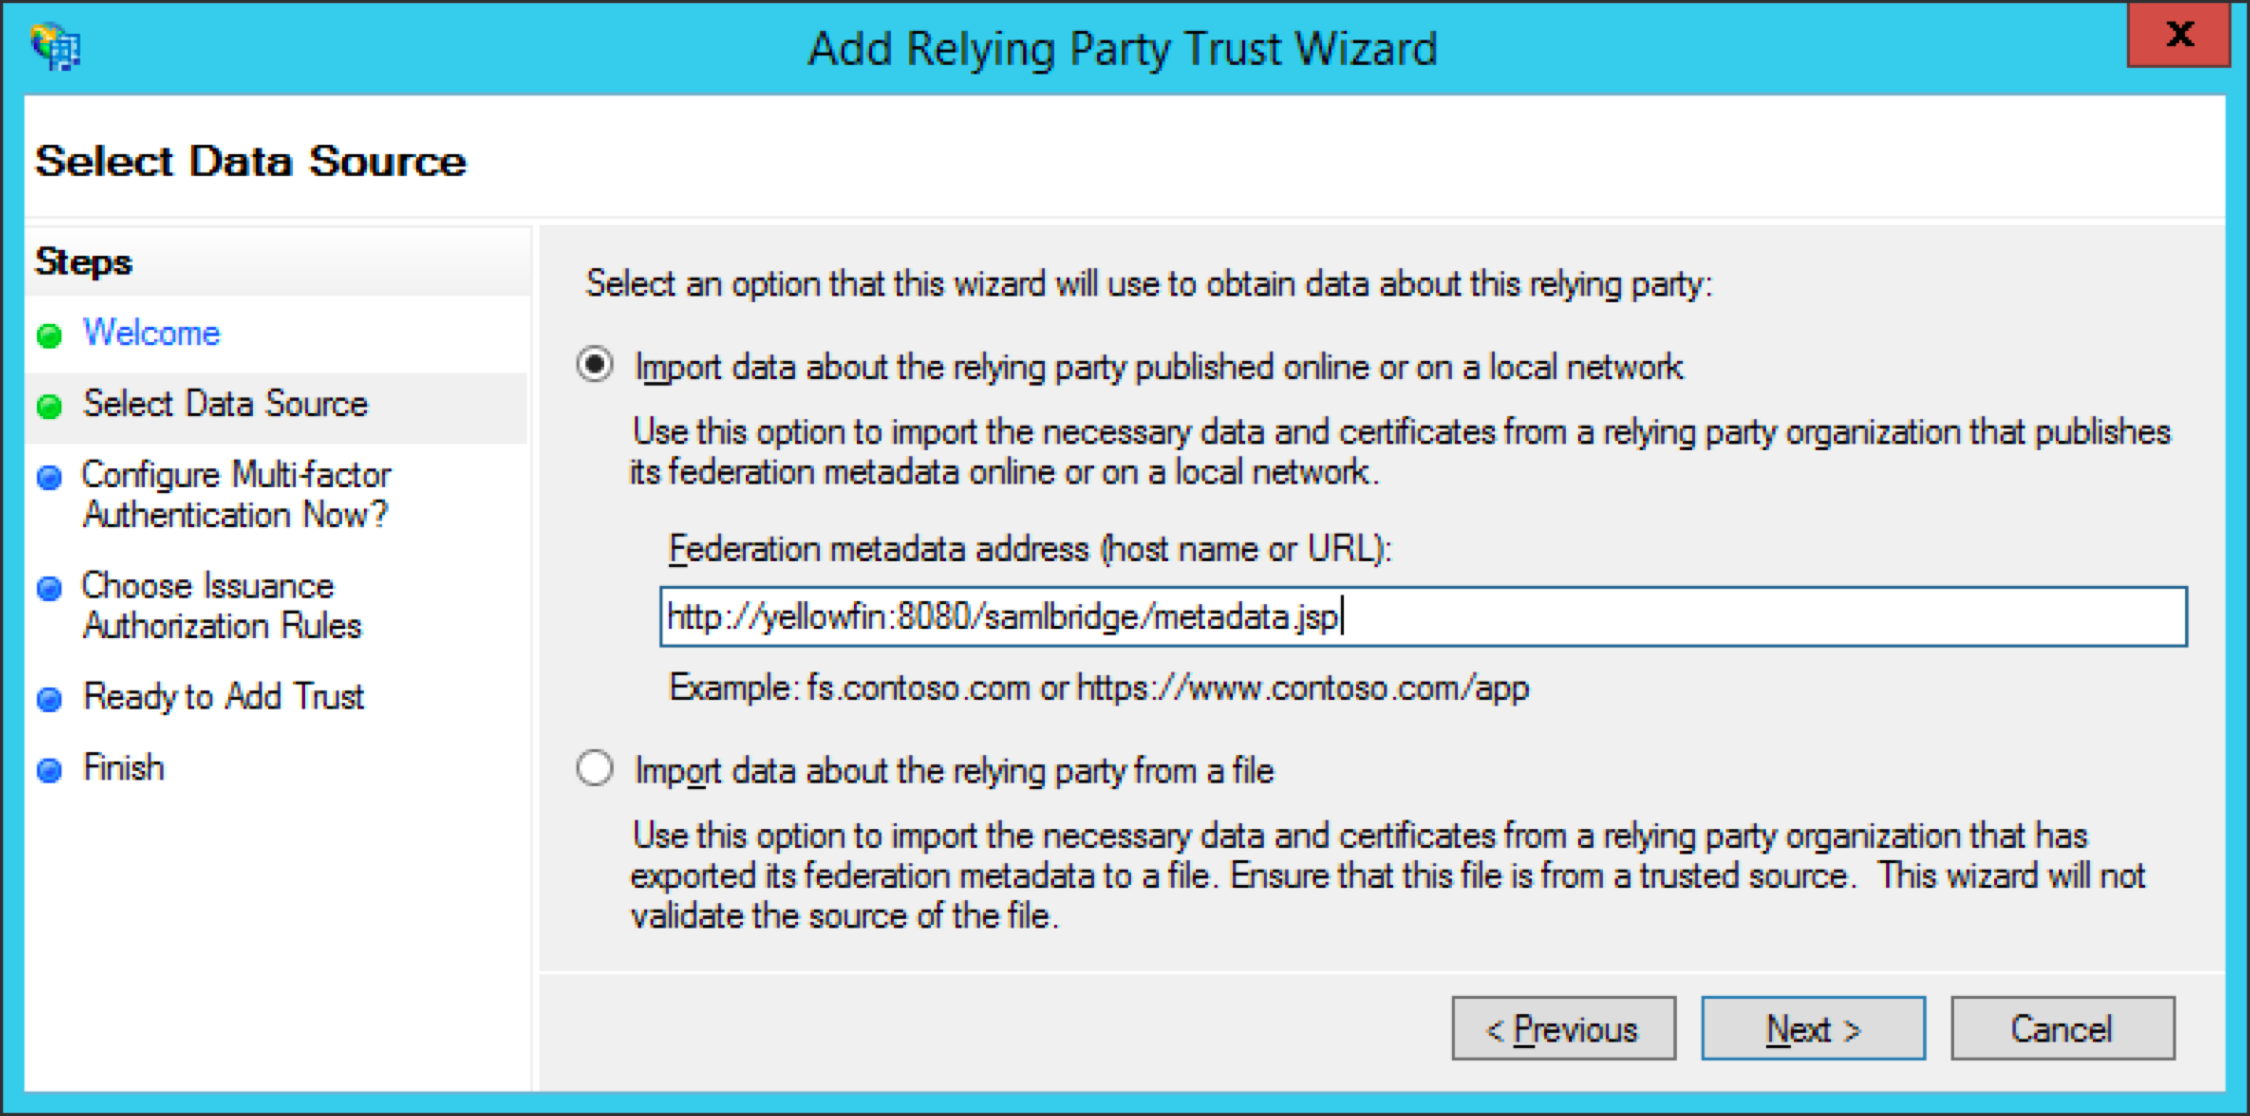
Add Relying Party Trust
- Go to ‘Trust Relationship’ in AD FS manager, click on ‘Relying Party Trust’ and choose ‘Add Relying Party Trust Wizard’.
- Select the ‘Import data about the relying party published online or on a local network’ radio button. Type into ‘Federation metadata address (host name or URL) the URL to Yellowfin SAML Bridge metadata.jsp file. For instance, http://yellowfin:8080/samldridge/metadata.jsp. This will become your service provider entity id (onelogin.saml2.sp.entityid) to fill in onelogin.saml.properties file.
On the ‘Select Data Source’ page, provide a displayed name for the service provide:

This is going to be an application name visible for a user as well as part of the SSO URL in the onelogin.saml.properties file:
onelogin.saml2.idp.single_sign_on_service.url = https://adfs.local/adfs/ls/IdpInitiatedSignon.aspx?loginToRp=YellowfinOn the next page, select ‘I do not want to configure multi-factor authentication settings for this relying party trust at this time’. Configuring multi-factor authentication is beyond this scope. Click ‘Next’.
Select the ‘Permit all users to access this relying party’ radio button. Click ‘Next’ to the end.
Once you have registered the Yellowfin SAML Bridge in AD FS, you’ll be offered to set claim rules. See below for more information on those.
Claim Rules
Note: SAML requires Name ID as part of the AD FS response, ensure that you pass it correctly in a proper format.
...
That means you need to pass an email address as a name ID from the AD FS. Your claim rules should look like below.
Request AD attributes
- Click ‘Add Rule’ and choose ‘Sent LDAP Attributes as Claims’.
- Provide it with the name and add all the attributes you want to pass to the SAML Bridge.
- To do automatic user provision via SAML Bridge, you need to pass at least email address, user name, user surname.
- You need to pass a proper user ID corresponding to the Yellowfin authentication method (either name ID or email addresses).
- Make sure that whatever you pass as email addresses attribute indeed keeps email addresses. It can be User-Principal-Name or E-Mail-Addresses.
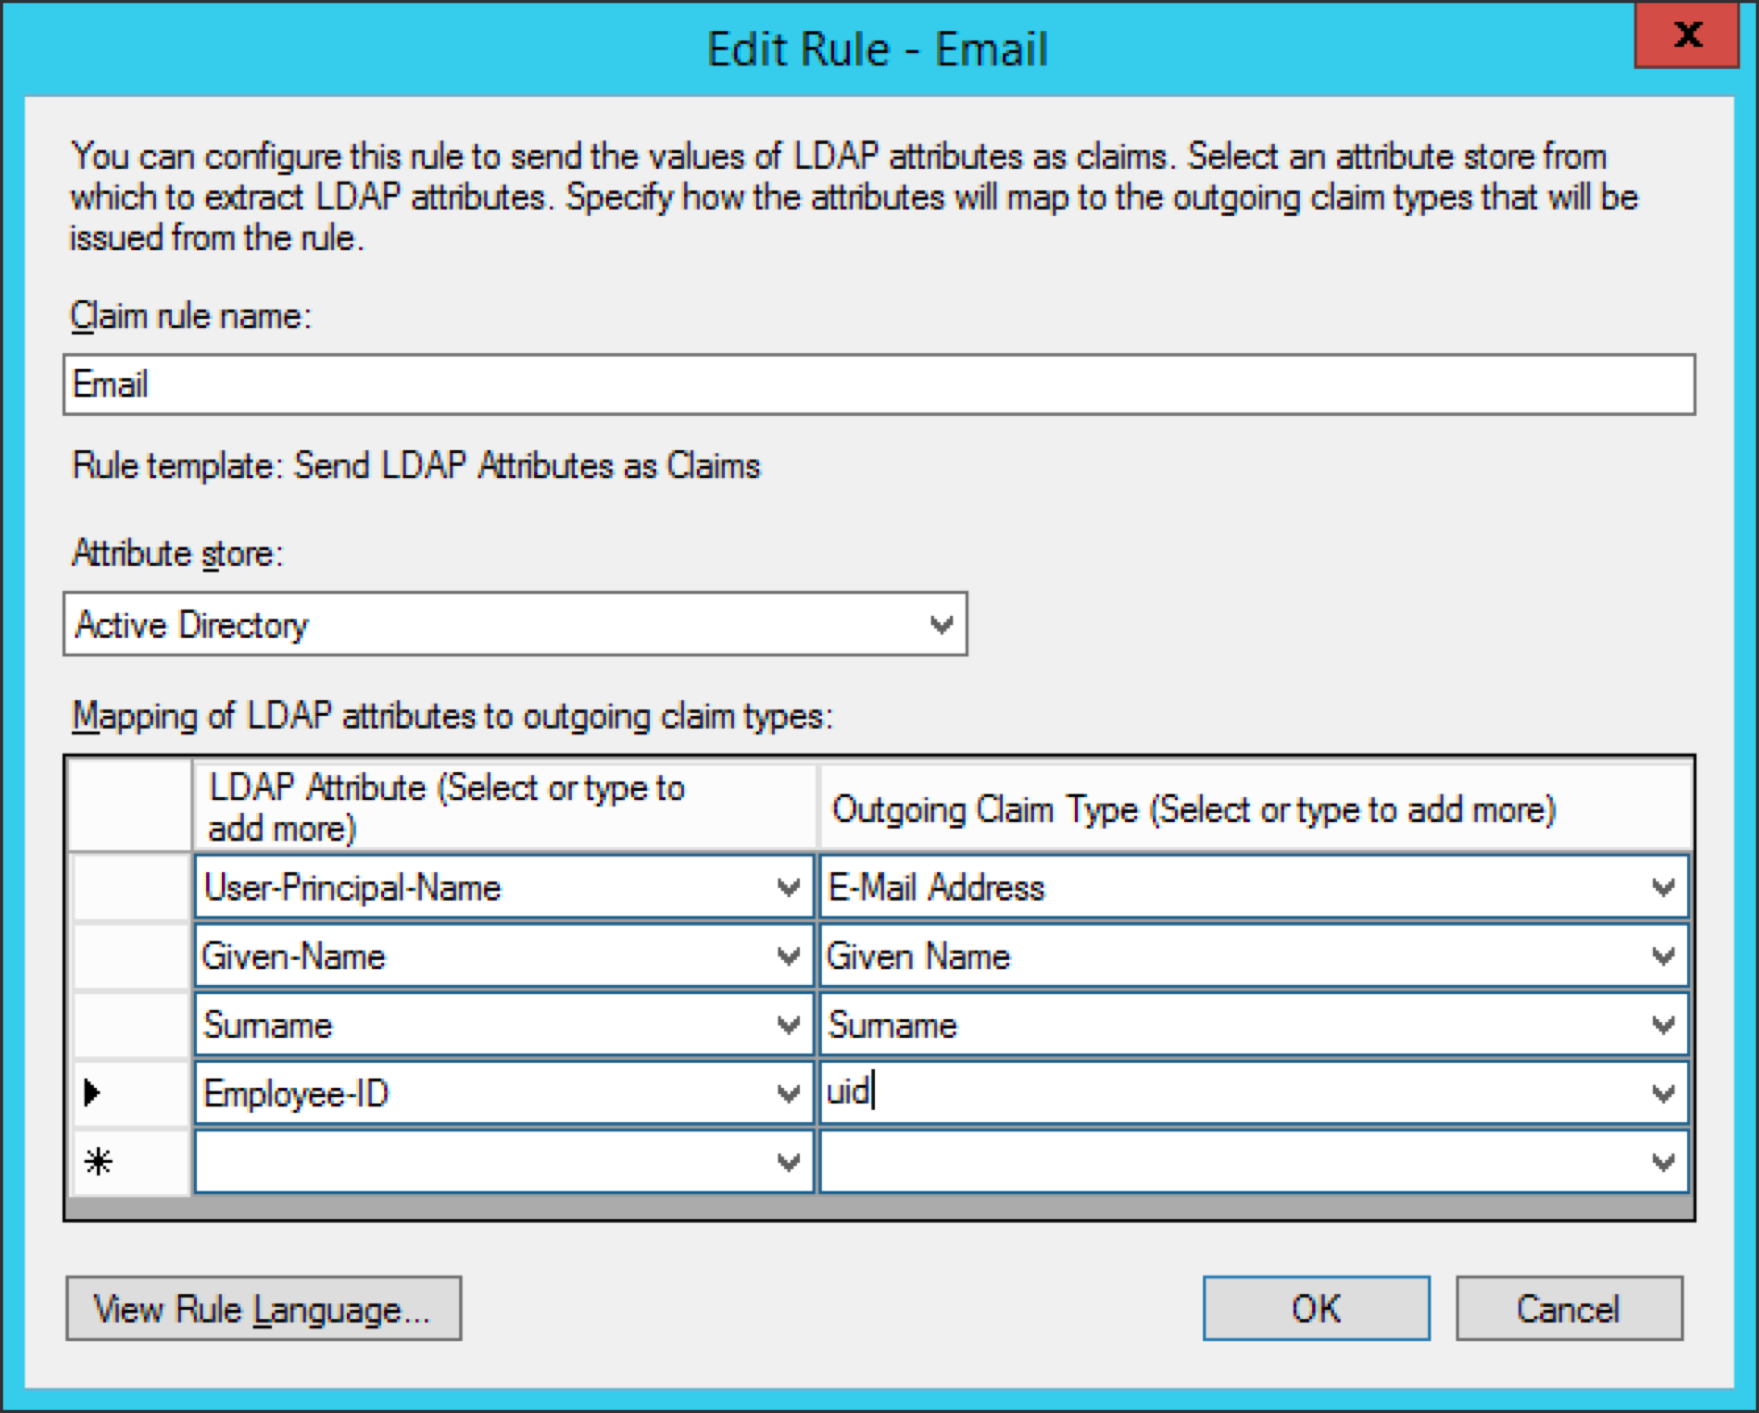
- Note: You may want to add more AD attributes to be able to do user provision via SAML Bridge like default user role, group memberships etc. Additional modification to SAML Bridge web.xml and acs.jsp files will be required.
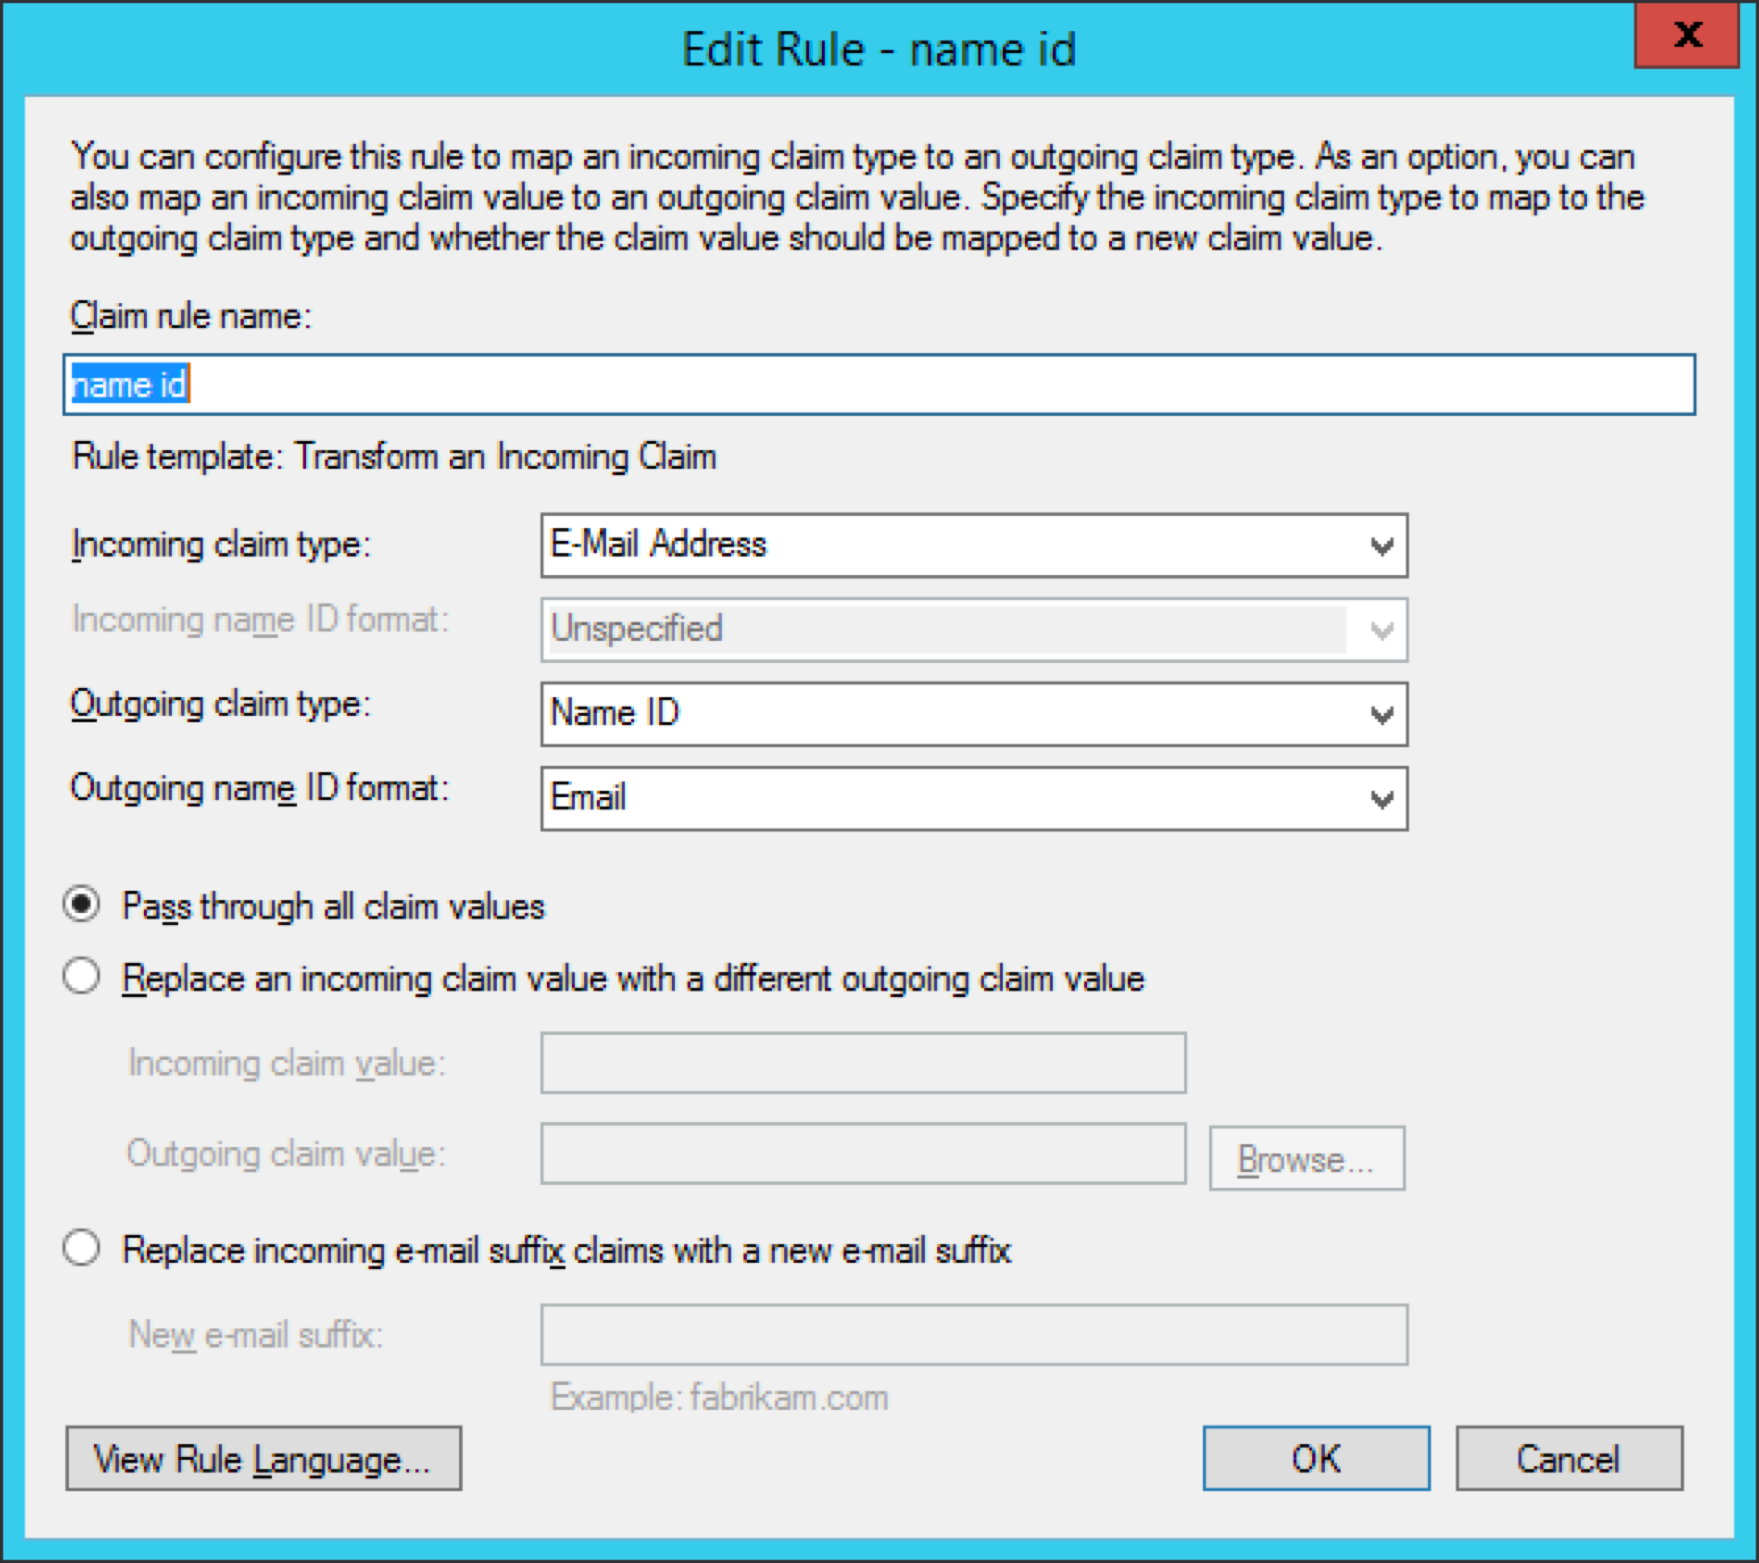
Transform email address into name ID
- Click ‘Add Rule’. This time, select ‘Transform an Income Claim’ this time.
- Select ‘E-Mail Address’ as the ‘Incoming claim type’.
- Then select ‘Name ID’ as the ‘Outgoing claim type’ and ‘Email’ as ‘Outgoing name ID format’ (this should correspond to onelogin.saml2.sp.nameidformat of onelogin.saml.properties file).
...
...
| Anchor | ||||
|---|---|---|---|---|
|
...
| Code Block | ||
|---|---|---|
| ||
onelogin.saml2.idp.entityid = https://<ADFS domain name>/adfs/ls/IdpInitiatedSignon.aspx?loginToRp=<RP> onelogin.saml2.idp.single_sign_on_service.url = https://<ADFS domain name>/adfs/ls/IdpInitiatedSignon.aspx?loginToRp=<RP> |
...
Where, <RP> is the displayed name which you defined during registering Yellowfin SAML Bridge service provider in AD FS.
More information about IdpInitiatedSignOn.aspx can be found here: https://msdn.microsoft.com/en-au/library/ee895361.aspx
| Section | |||||||
|---|---|---|---|---|---|---|---|
|
...