Page History
...
| Tip |
|---|
If the writable data source functionality is enabled, you are permitted to write data to a Google BigQuery database |
Instructions
Follow the instructions create a connection with Big Query. You can use any of your Google service accounts to authenticate the connection.
...
Prerequisites
Before you use Google BigQuery as a data source, Yellowfin needs a driver to connect to it. Yellowfin does not ship with the driver
...
due to licensing/paywall
...
considerations, but you can upload your preferred driver (such as those offered by Google) via the Yellowfin Plugin Manager.
...
Once you have uploaded a driver for BigQuery, follow the steps below connect your data source.
Instructions
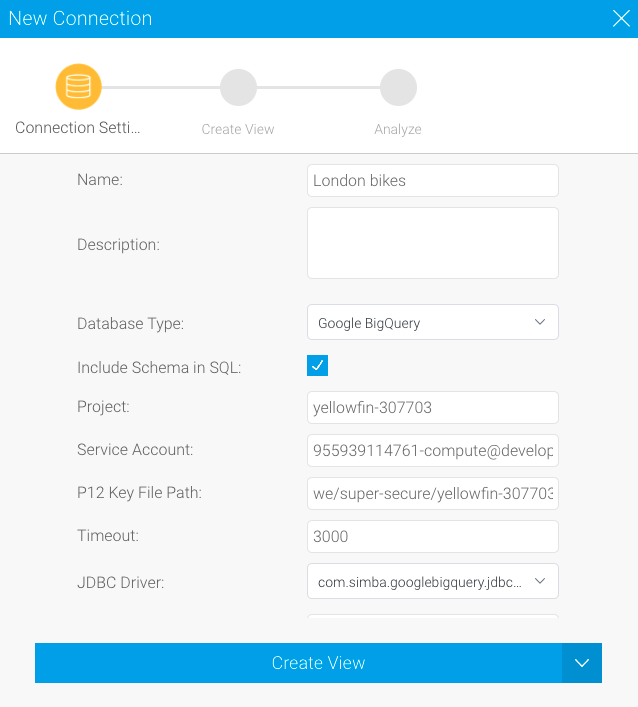
You can use any of your Google service accounts to authenticate this connection. The table below provides further details of the fields you'll be asked to provide values for.
| Field | Description |
|---|---|
| Include Schema in SQL | Selecting this checkbox adds the schema name when address |
...
| database tables in SQL queries. |
| Project |
...
| This is the project ID of your Google BigQuery project. Avoid using your project name as this won't work |
...
| . |
| Service Account |
...
| The |
...
| email address of your Google service account. |
| P12 Key File Path |
...
| The full path to a private key file for a service account. This is used to authenticate the service account email address. This field supports both |
...
| types of key formats |
...
| — .p12 and .json. |
...
| You can |
...
| create and download this from your Google service account. |
| JDBC Driver |
...
This shows the details of the JDBC driver |
...
that you installed to talk to |
...
Google BigQuery |
...
databases. It should be prefilled by default, so you shouldn't need to change this field. |
- Click on the yellow Create button
 and select Data Source from the list
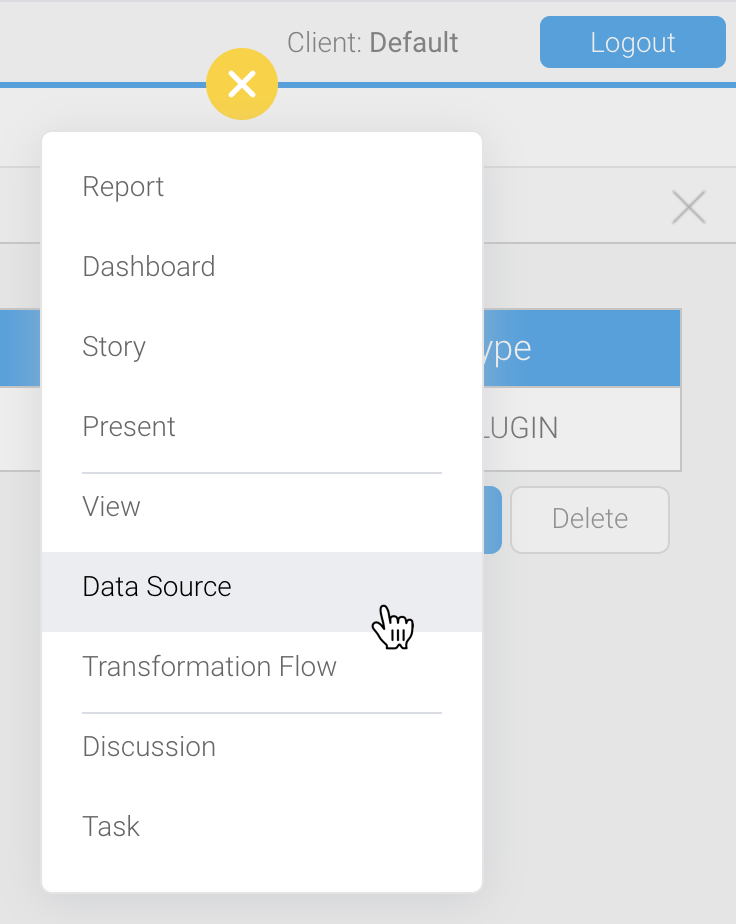
- Click on the Database data source in the top left corner
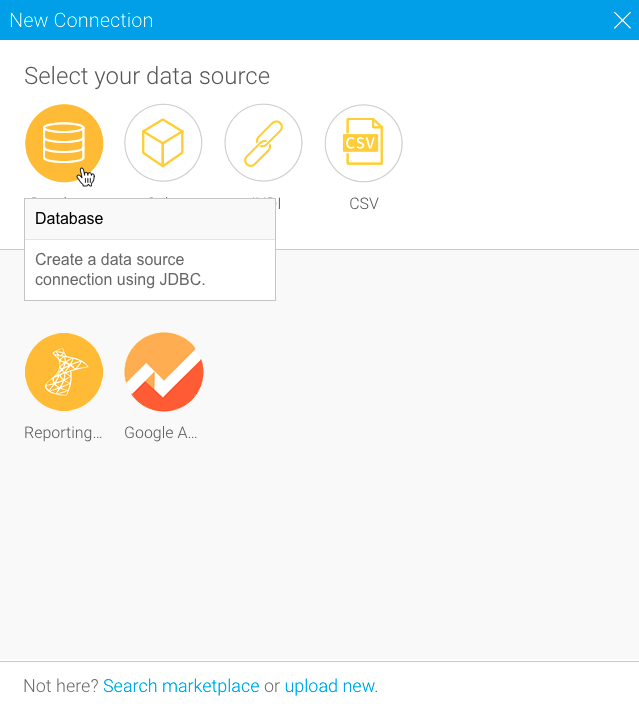
- Type in a name and (optional) description for this data source, then select the driver from the dropdown list
Yellowfin will pre-fill some of the fields below, but others will require manual input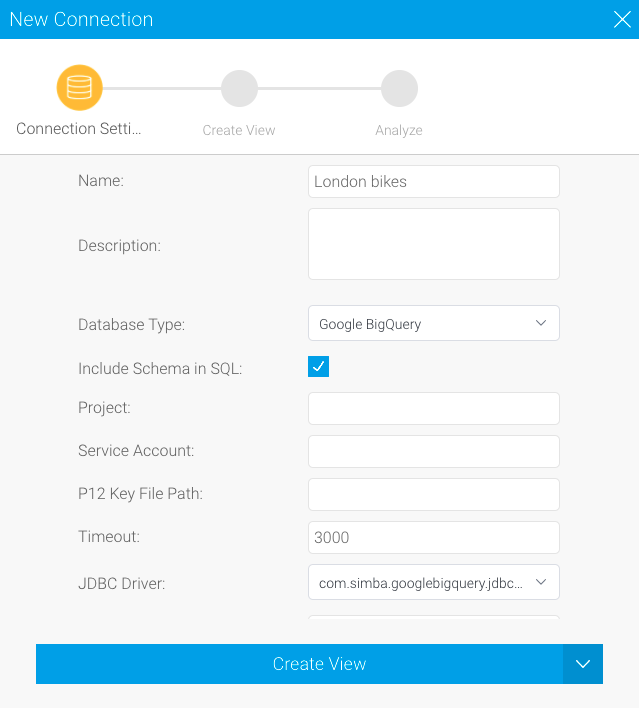
- Enter values into the remaining fields, using the table above these steps for guidance if required
Click on the arrow to the right of the Create View button and choose the option (see Creating a Basic Data Source Connection for more information on each of these options)
- Choose your preferred option to complete the steps.
| Tip |
|---|
...
We recommend testing the connection, and then saving it by using the Save & Close button. |