Page History
...
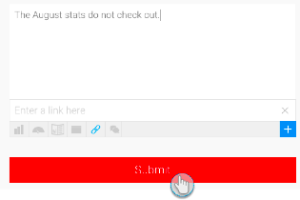
- Click Publish at the top-right corner of the story builder.
- In the new popup, you can enter or edit the story title. (If your story already has a title, the first field will display it; if you change the title, it will be updated in the story as well. If no title is provided, your story will be named 'Untitled Story'.)
- Provide a description for the story to assist users with understanding its purpose and content.
- Select a folder and sub folder to save the story into. You will only be able to select folders you have access to.

- Choose a story access setting:
- Public: permits all users with folder access to be able to view this story.
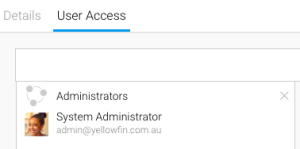
- Private: the author/collaborator may assign users access to the story. In this case, a new User Access tab will appear, allowing you to add specific users.
- Click the Publish button to save and activate the story.
- Upon publishing, a share popup will appear. You can use this to share the published story with other users and groups. Click Submit after selecting users. The selected users will receive an email notification of the story.
Note: You can always share the story at a later time.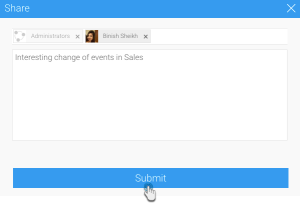
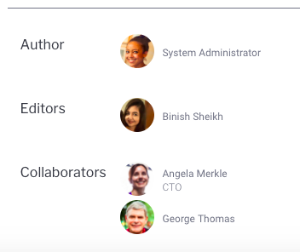
- Once a Story is published, you can view its author, editors, and collaborators at the bottom of the page.

...
| Anchor | ||||
|---|---|---|---|---|
|
...
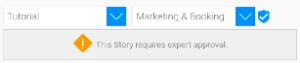
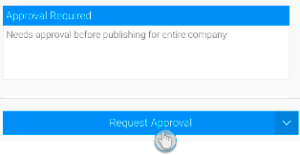
- The author/collaborator publishes the story, selecting a secure folder to save it into. A message will appear on doing so (this only appears if the user saving this Story is not the approver of the folder). Note: Secure folders can be identified with the security icon next to them.
- Enter a message to be sent to the approver with this request, and click the Request Approval button.
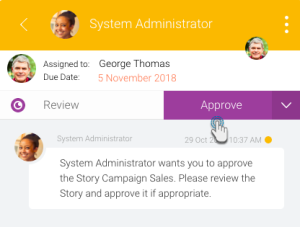
- The approver will get a message on their timeline, notifying them of this update.
- On accessing this story, they will see it in its preview mode. Click on the Approval Required button.
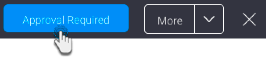
- This brings up the approval message in the Activity Panel. (Simultaneously, this panel message will also come up if the approver clicks on the Timeline message for the Story.)
- If the approver is happy to approve the Story, they will need to click on the Approve button.
- Once approved, users with rights to the Story will be able to view it. Approved Stories also include the name of the approver, increasing the reader's trust in the information shared.

- Alternatively, an approver can reject a story, in which case it will not be published. (Warning: you cannot undo this action, until the story is updated and requested for approval again.)
- In the activity panel, click on the dropdown button and choose Reject.
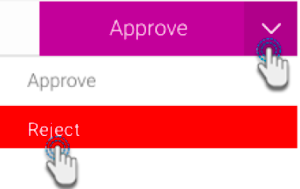
- You must enter a reason for rejecting the Story. Then click Submit.
- The Story will then be placed in draft mode. You can repeat the approval process again after updating the Story.
- In the activity panel, click on the dropdown button and choose Reject.
...
| Anchor | ||||
|---|---|---|---|---|
|
...
- While the story is opened, click More and then Preview.
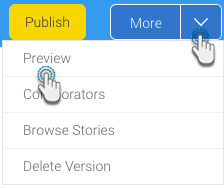
- You will then be able to view the Story in preview mode.
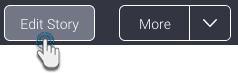
- To go back to draft mode, click Edit Story at the top-right corner.
...
...
| Anchor | ||||
|---|---|---|---|---|
|
...
- Locate the Story that you want to delete in the Browse page.
- Click on its menu icon, and select Delete. (This option will only appear if you have rights to delete the story as state above.)
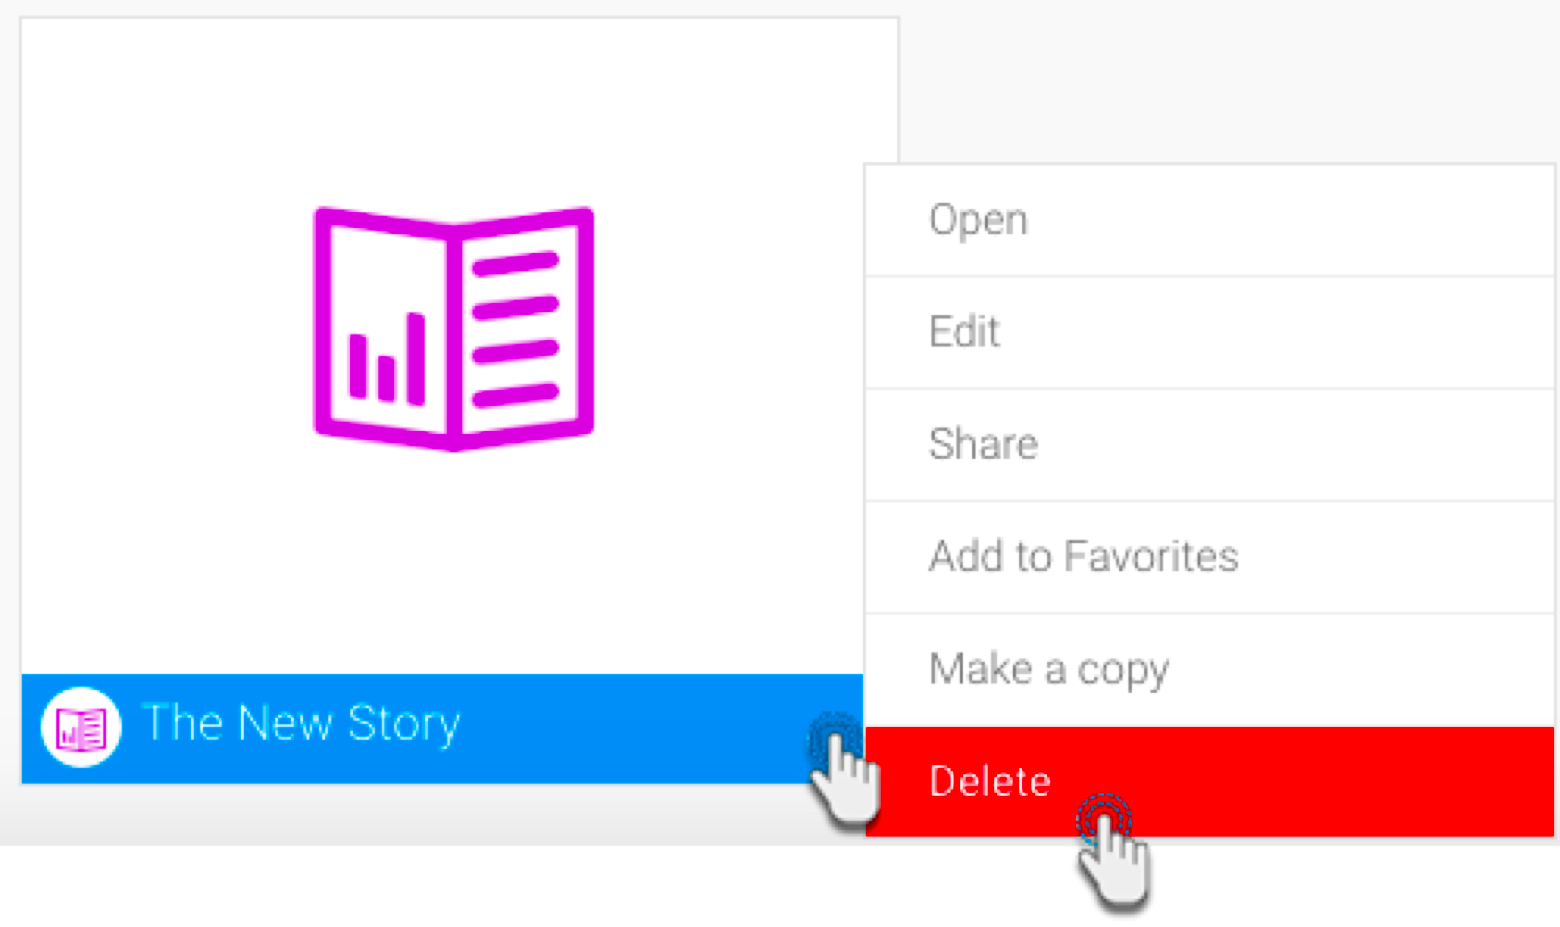
- A confirmation popup will appear. Click Delete if you are certain you want to delete the Story.
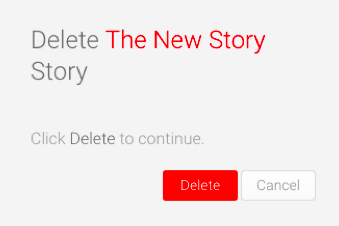
- The Story will be deleted permanently.
Export a Story to PDF
To export a Story to PDF, follow these steps:
- Open you Story.
- On the right side menu, Click on More.

3. Select Export > PDF
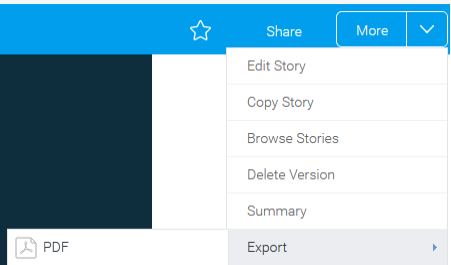
4. Select the settings for the PDF and click Export.

...