Like what you see? Have a play with our trial version.

Versions Compared

Key

  • This line was added.
  • This line was removed.
  • Formatting was changed.

...

  1. Click on the Filters icon on your presentation builder to bring up the Filter Widget list.


  2. Then drag a Filter Widget onto the presentation at the exact location you would like to display the filter.
  3. A filter panel will appear on the location it was dropped. (Side note: click here for an overview of this filter panel). 
  4. Add report filters to this panel by clicking on the + Filters button.


  5. Choose Filter to add individual filters (you can add multiple as well), or Filter Group to add a filter group. (In our example, we will choose Filter.)
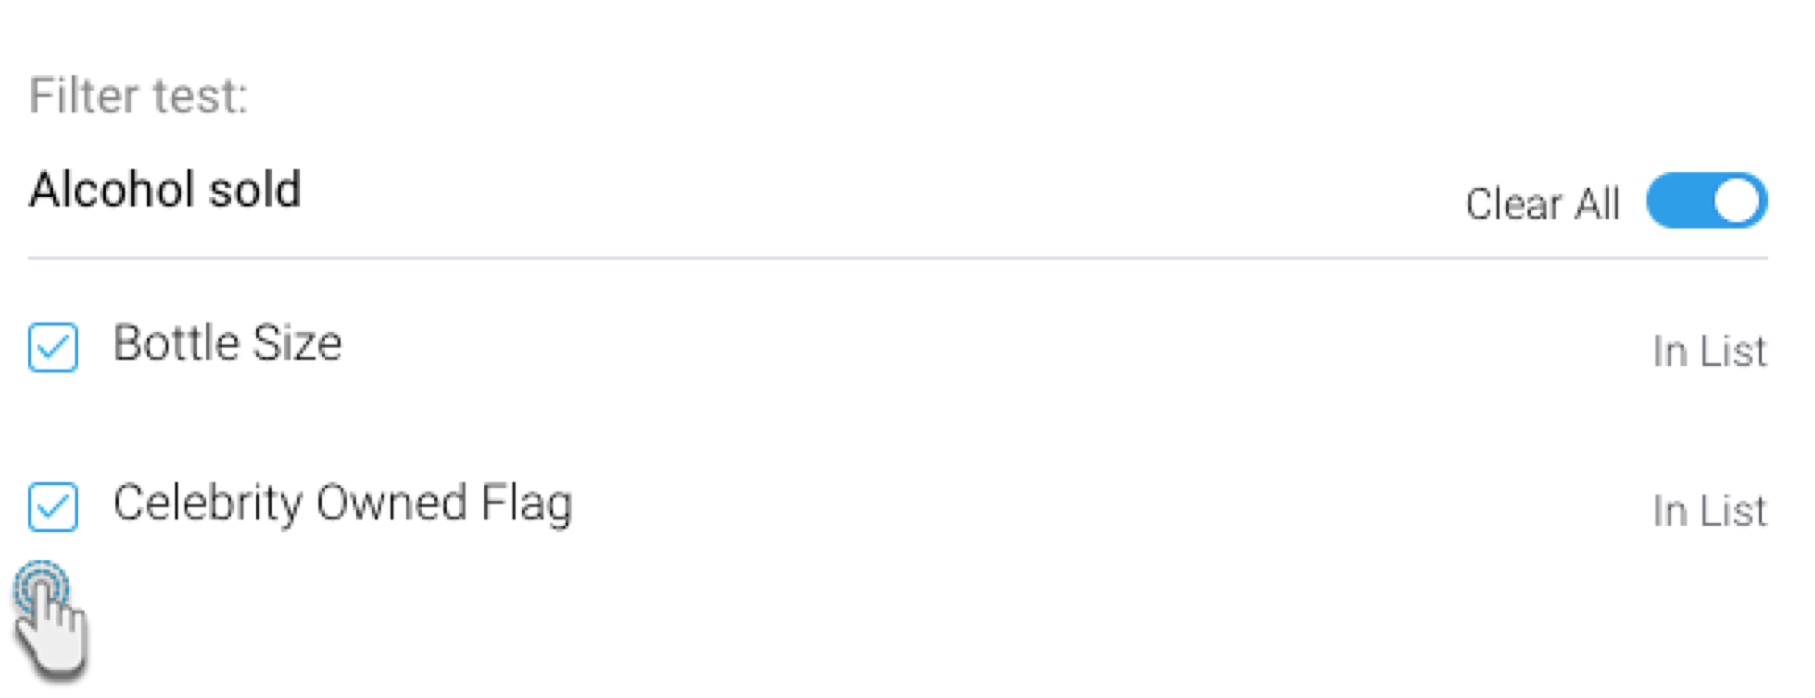
  6. A pop up displaying available report filters will appear. This allows you to choose which filters to add from any of the reports.
    Note: If none of the reports contain any filters, then the following notification will appear on this popup. Click on the Add a report link to open the Reports tab on the left side.


  7. Click on one or more filter checkboxes to select those that you want to add. Alternatively, enable the Select All toggle to select all the filters on this pop up. You can undo this selection by choosing the Clear All.


  8. Click on the Add Filters button on the bottom of this pop up to add the filters. 


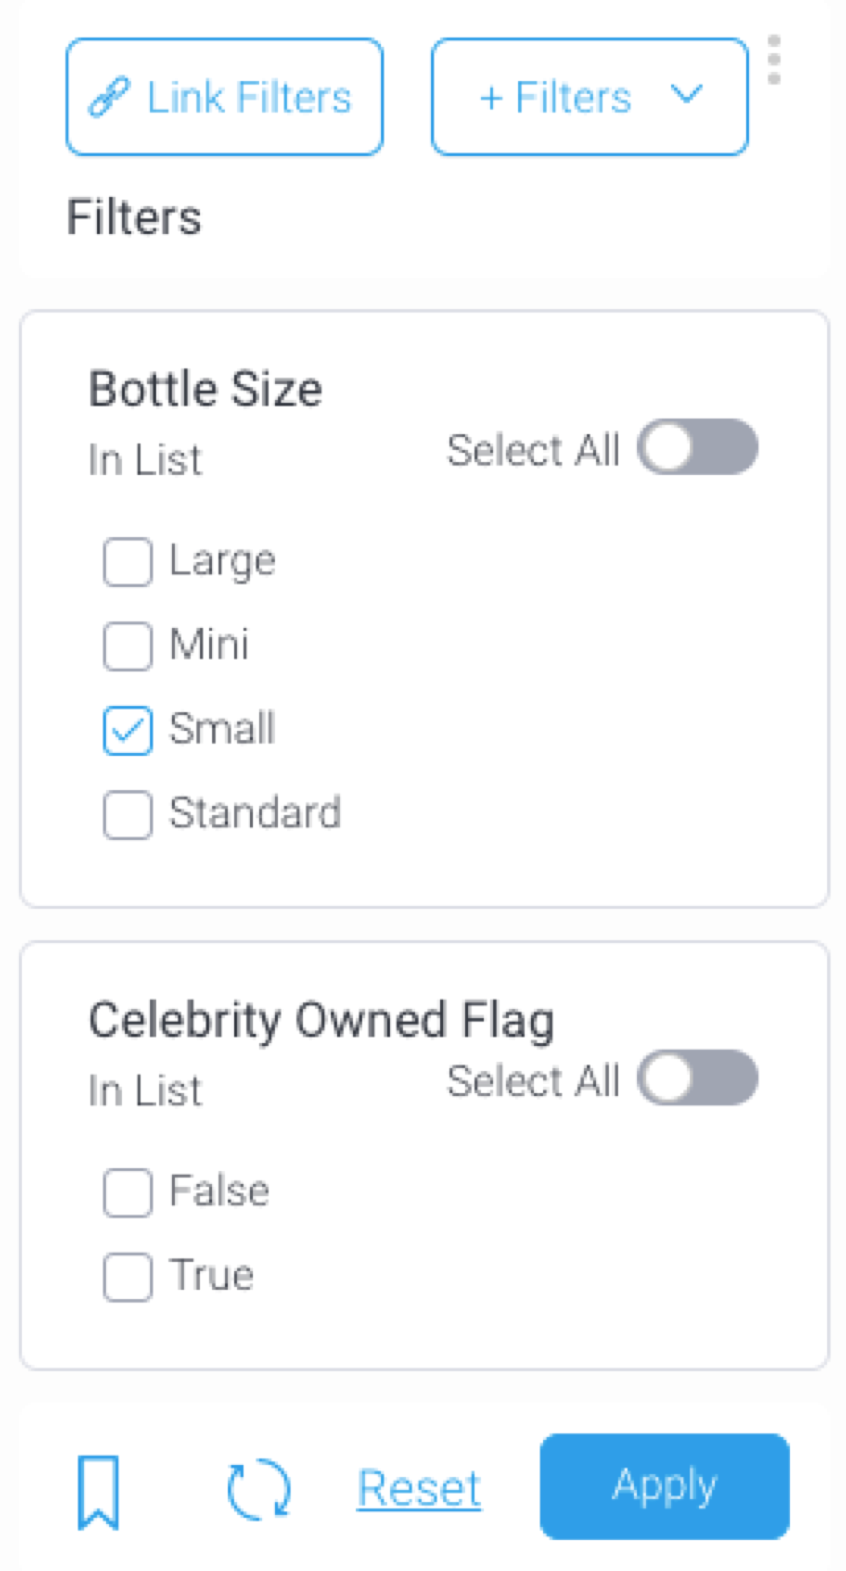
  9. The filters will then appear in the filter panel on the presentation, as shown in the example below.


Add filter default values

You can set default values for your presentation filters. refer to this section

Anchor
filterentrydisplay
filterentrydisplay

Change filter entry display

Filter entries or values will appear on presentations with the display style applied on them in the report. However, the entry display type of certain filters can be changed in the Present builder, without having to change it in the report first. Entry styles can be changed to checkboxes, lists, pop-ups, drop downs or radio buttons, depending on the filter type.

This is possible if the report filter meets all of the following criteria:

  • The filter is formatted to display its values in the form of a list. Ensure that the Value Entry Method of the filter is selected as ‘Value List Selection’ in the report.
  • The filter is not a date filter with predefined or cached values.


How to change:

  1. Add the filters using the Filter Widget.
  2. Click on the ellipses Image Added button on an individual filter to bring up its menu, and select the Entry Style option.
  3. Choose the new entry style from the list of options.

    Image Added

  4. The filter entries will be instantly updated.


...

Anchor
filterproperties
filterproperties

...

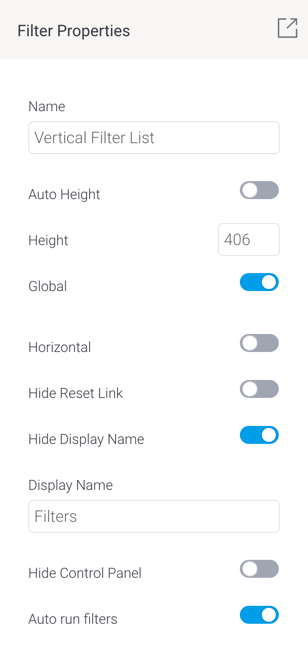
The filter properties panel lets you configure the following settings.

Section


Column


Image RemovedImage Added


Column


Property name

Description

Name

Name of the filter. This can be edited as well. This name appears in Code Mode, making it easy to edit the filter code.

Horizontal

Enable this to display your filter in a horizontal alignment. By default filters are vertically aligned. 

Hide reset link

Allows you to hide the filter reset option.

Hide display nameAllows you to hide the filter display name.
Display nameDisplay name of the filter, that appears on the filter panel. This can be edited. 

Hide control panel

Allows you to hide control buttons on a filter panel for the end user. These include bookmark, reset, and apply buttons. Present end users will not be able to use these filter features.

Auto run filtersEnable this toggle to automatically run reports when filter values are selected or changed, without using the ‘Apply’ button.
Note: Administrators can also set a time delay, where the reports are run after a specified time once values are selected. This is done through the Content Settings > Report Settings > Builder Setting > Filter Run Delay setting.
Apply button location

Allows you to specify the location of the filter control panel, including the 'Apply' button. You can choose to display the button and controls at the top or bottom of the filter panel, or in both locations.

Actions
Click Event

Select an event that will trigger when the selected widget is clicked. Event options include:

  • None: Use this if you do not wish the widget to trigger an event.
  • Next sub tab: Navigates the user to the next tab within the same presentation.
  • Previous sub tab: Navigates the user to the previous tab within the same presentation.
  • Reset filters: Allows users to clear filter selections, or in case default values are set, then reset filters to their default values.
  • Reset presentation: Refreshes the presentation by clearing any user interactivity performed on it, as well as removing all applied filters.
  • Go to report: Navigates users to a specified report. This report can be specified by providing its report UUID. 
  • Go to sub tab: Navigates to any sub tab in the same presentation, where the sub tab is specified by its order number. For example to jump to the forth sub tab, enter 4 in the sub tab # field. Note that the sub tab order starts from number 1.
  • Go to URL: Navigates to an external link or page using the specified URL. You can also choose to open the new link in a new tab or window or in the current window. (See the below URL and Target settings for more information.)
Report IDIf navigating to a report using the ‘Go to report’ click event, provide the UUID of the report.
Sub Tab #If navigating to a sub tab using the ‘Go to sub tab’ click event, enter the order number of the sub tab.
URLIf navigating to an external page using the ‘Go to URL’ click event, provide the full URL of the page.
Target

If navigating to an external page using the ‘Go to URL’ click event, specify the page target. Options include:

  • New Tab/Window: Opens the URL page in a new tab or window, depending on your browser’s settings. Note: The default for most browsers is a window, however users can use computer shorts (Ctrl in Windows, and Cmd in Mac) to open in a new tab instead.
  • Current Window: Open the page in the current window.
  • Parent Frame: If Yellowfin is embedded as an iFrame, the new page will open (that is, its contents will appear) in the parent frame. Note that the parent frame is the one within which the Yellowfin frame is embedded.
  • Current Frame:  If Yellowfin is embedded as an iFrame, the contents of the URL page will open in the current frame. Note that the current frame is the one which embeds Yellowfin.


Related topics

...