Yellowfin allows user to create scheduled reports. In some instances as the administrator you will want to delete redundant schedule items. From the admin panel you will be able to view and delete all scheduled tasks without the need to open each task individually.
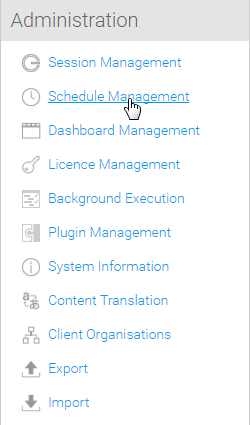
To access the schedule list go to Administration > Admin Console > Schedule Management.
There are a range of scheduled tasks that can be setup and run in Yellowfin. These include:
Schedule icon | Name | Description |
| (never run) | This task has not been executed yet. |
| Schedule running | This task is currently running. |
| Last run successful | The tasks was last executed successfully. |
| Last run failed | This task ran unsuccessfully. |
| Schedule paused | This task was paused while it was running, and therefore is not incomplete. |
| Schedule paused, last run successful | This task last run successfully, but has been paused, and will therefore not run according to its schedule. |
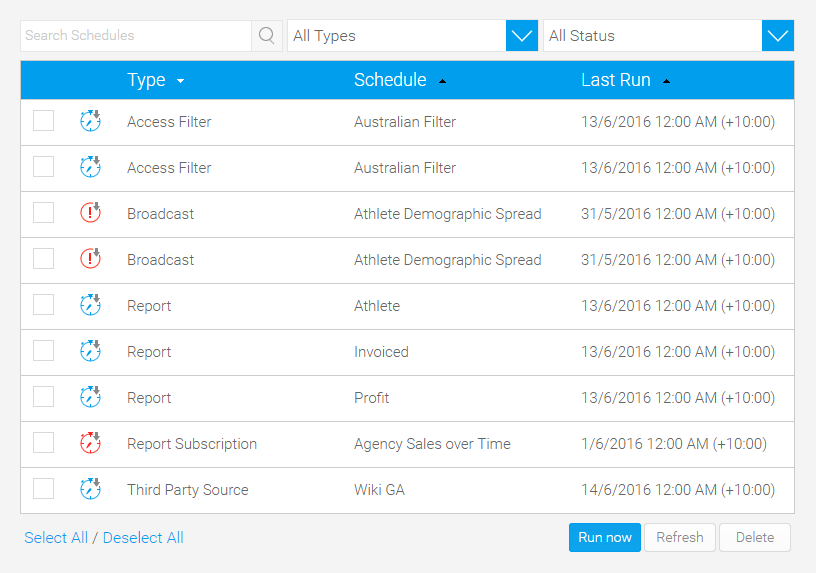
The schedule list allows you to search, view, edit, pause, run, and delete scheduled tasks.
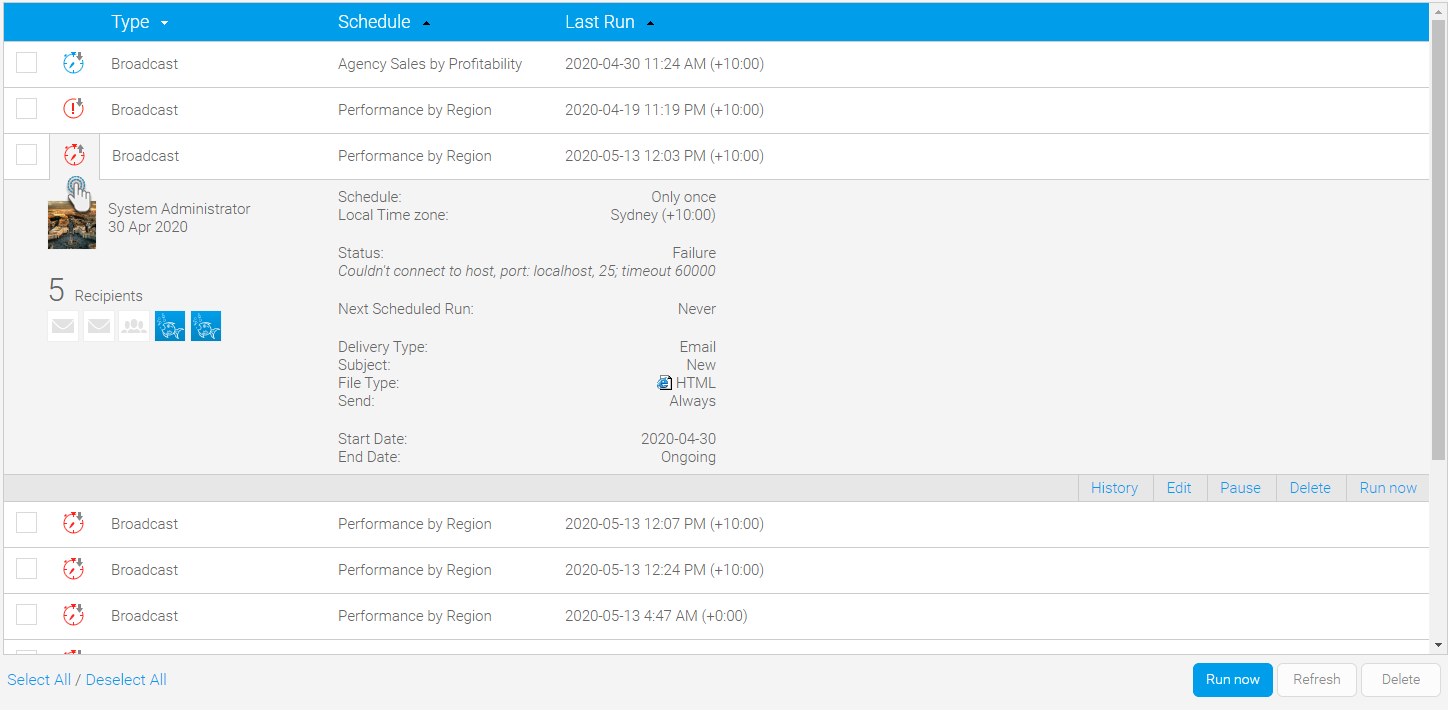
By clicking on the name of a task, you can view its schedule details.
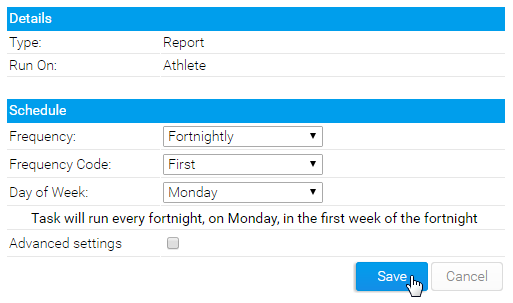
To edit a schedule simply click on the Edit button on the task and make the changes you require.

When finished, click the Save button to commit your changes.
The History button shows previous executions of a scheduled task for the last 30 days. The system tracks scheduled executions which were successful or not. In case of content delivering tasks, such as broadcast reports, a list of recipients is maintained for each execution that tracks which users the content was successfully delivered to and which it was failed to send to. It is also possible to view the error in case of a failed delivery.
Notes:
Click on the History button to bring up a list of previous runs.

When the popup appears, executions carried out in the last 30 days will appear. Tip: you can change this limit to view executions older than 30 days by using an advanced “hidden” configuration. Click here to learn more.
Click on any task execution to expand it and view its details.
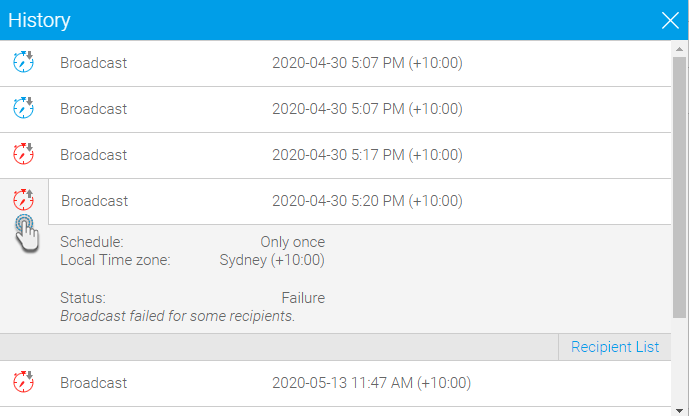
To view the delivery status of each recipient, click on the Recipient List button. Another popup will appear, with names of all recipients along with an icon representing the success of delivery.
| Schedule task failed to deliver content to recipient. Hover on this icon to see the error message. |
| Schedule task successfully delivered content to recipient. |
Hover over a failed delivery icon to view the failure error.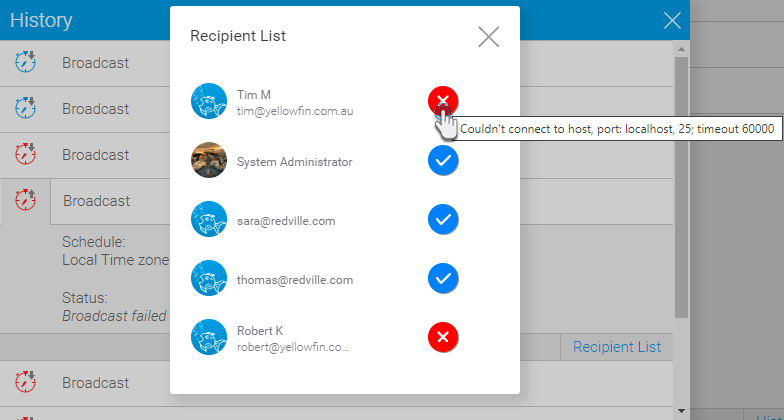
To pause a task simply open it by clicking on the name of a task and click on the Pause button.

To run a task simply open it by clicking on the name of a task and click on the Refresh button.

From the list of scheduled items select the ones you want to delete and click the Delete button.

To refresh schedules, click on the Refresh button at the bottom of the list.
All scheduled tasks (such as broadcast reports, scheduled transformation flows, filters, etc.) get added to a queue that is managed by Yellowfin’s Task Scheduler. However, there is a limit to the number of items that can be added to this queue at a time to stop the system from getting overloaded with too many waiting tasks that use up memory and CPU resources. This limit can be changed from within the web.xml file.
Before updating the limit, let’s learn more about how to Task Scheduler behaves:
The Task Scheduler wakes up every minute, and looks for tasks that need to be run.
If it’s the right time to run a task, it gets submitted to the queue. If there are free threads, the tasks get removed from the queue and start running.
When all task threads are busy, tasks stay queued until there’s a free thread to run. By default, 5 threads can run at the same time. (This thread limit can be changed through the web.xml file.)
If the queue is full then tasks are rejected and cannot run. In this case, a warning in sent to the log. By default the queue size is 20, but this can also be changed in web.xml.
This is an indication that too many tasks are trying to run at once or tasks are too slow to complete.
The user can increase memory and CPU on the server to allow more tasks to run by changing the configuration. (That is, adding a larger queue, and increasing the thread size.)
The user can change their scheduled tasks to not attempt to run so many tasks at the same time, for example, stagger them throughout the day rather than all at once on midnight.
The next time the task scheduler wakes up an attempt will be made to queue the task again, as tasks might be have finished freeing up resources.
Follow these steps to change the Task Scheduler’s thread and queue limits:
Access the Yellowfin/appserver/webapps/ROOT/WEB-INF directory.
Open the web.xml file.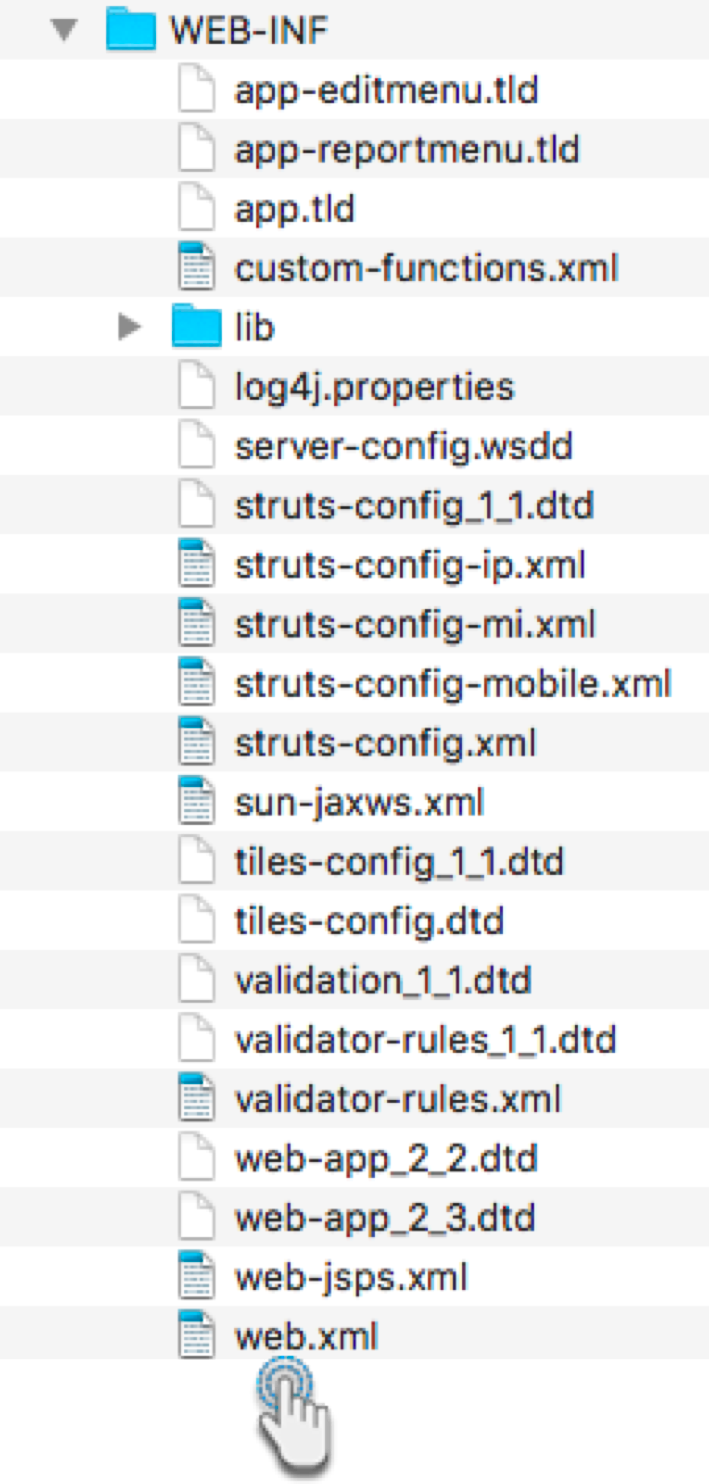
Scroll to the section on Task Scheduler. This is what it looks like in the file.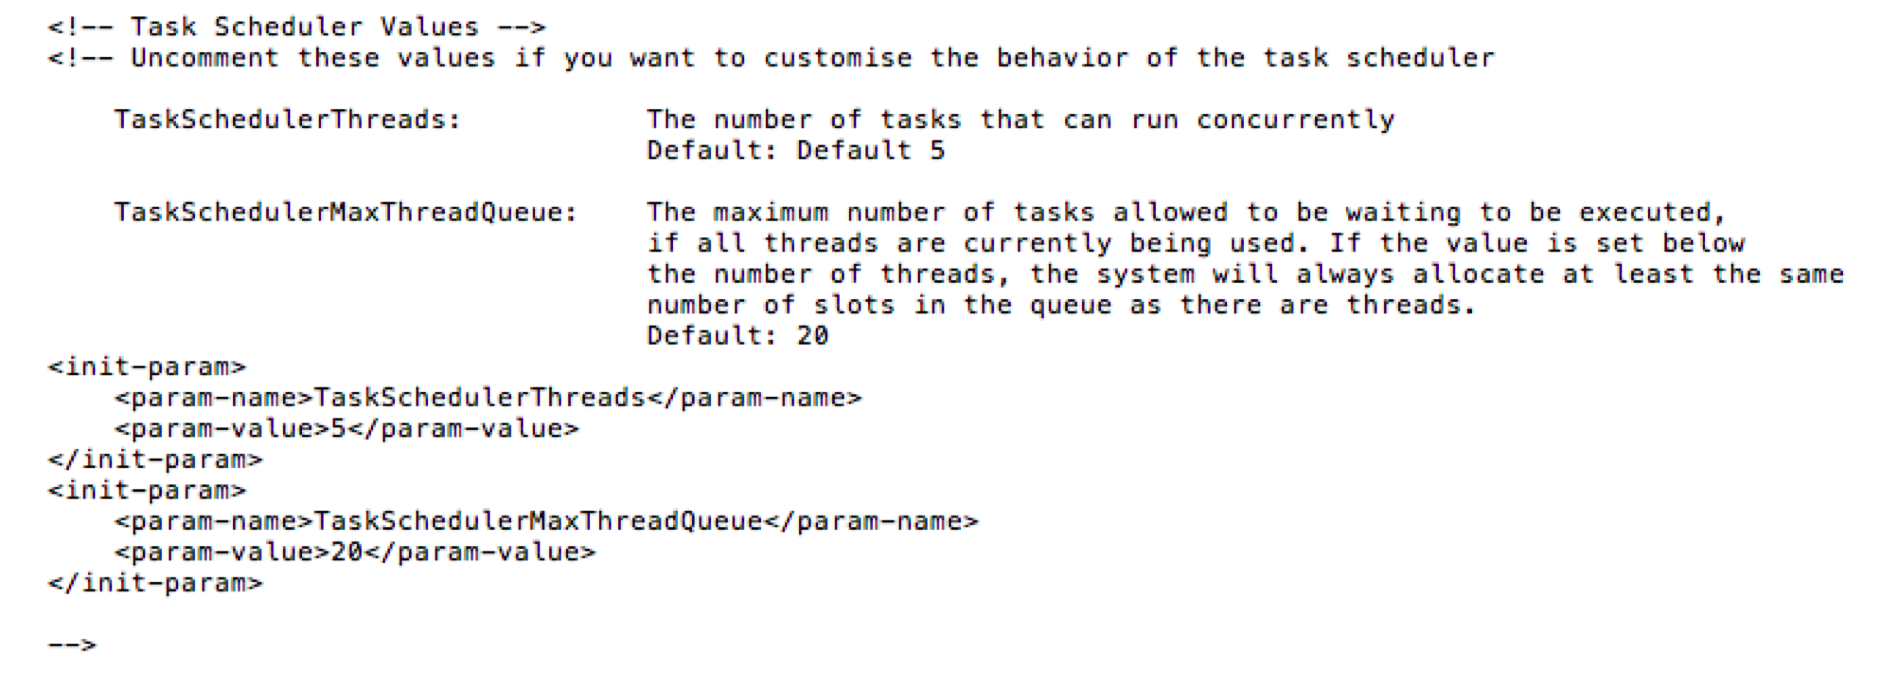
Uncomment the init-param tags from this section.
You can then edit the default number of tasks that can be executed concurrently, by changing the value of the TaskSchedulerThreads parameter, and the maximum number of tasks that can be added to the queue at a time, by updating the value of the TaskSchedulerMaxThreadQueue parameter.
Save the file. Your queue and thread limits will be updated accordingly.