Reference codes allow for more meaningful values in reports with numeric- and text-based data by mapping a code to each field value. For example, a text field that contains 'Y' or 'N' could be mapped to display 'Yes' or 'No'.
The Reference Codes page lets administrators edit existing reference codes created through the Model.
Reference code mapping can be used for all sorts of things. Some examples, are to:
use customized sorting in your tables and charts (for example, if you wish to provide more weight to some results, as shown in the example below);
Let's take the example of customized sorting. Data is typically returned from a query with an alpha-numeric sort order. If your result set were to include 'Admin Staff', 'Managers' and 'Executive Management', your report may look like this:
| Admin Staff | 500 |
| Executive Management | 10 |
| Management | 50 |
If you have a preferred sort order in mind, such as the order shown below, you can map each value to a sort order number to match your requirements. In the example below, that could be a number 1 for 'Executive Management', a number 2 for 'Management' and a number 3 for Admin Staff'.
| Executive Management | 10 |
| Management | 50 |
| Admin Staff | 500 |
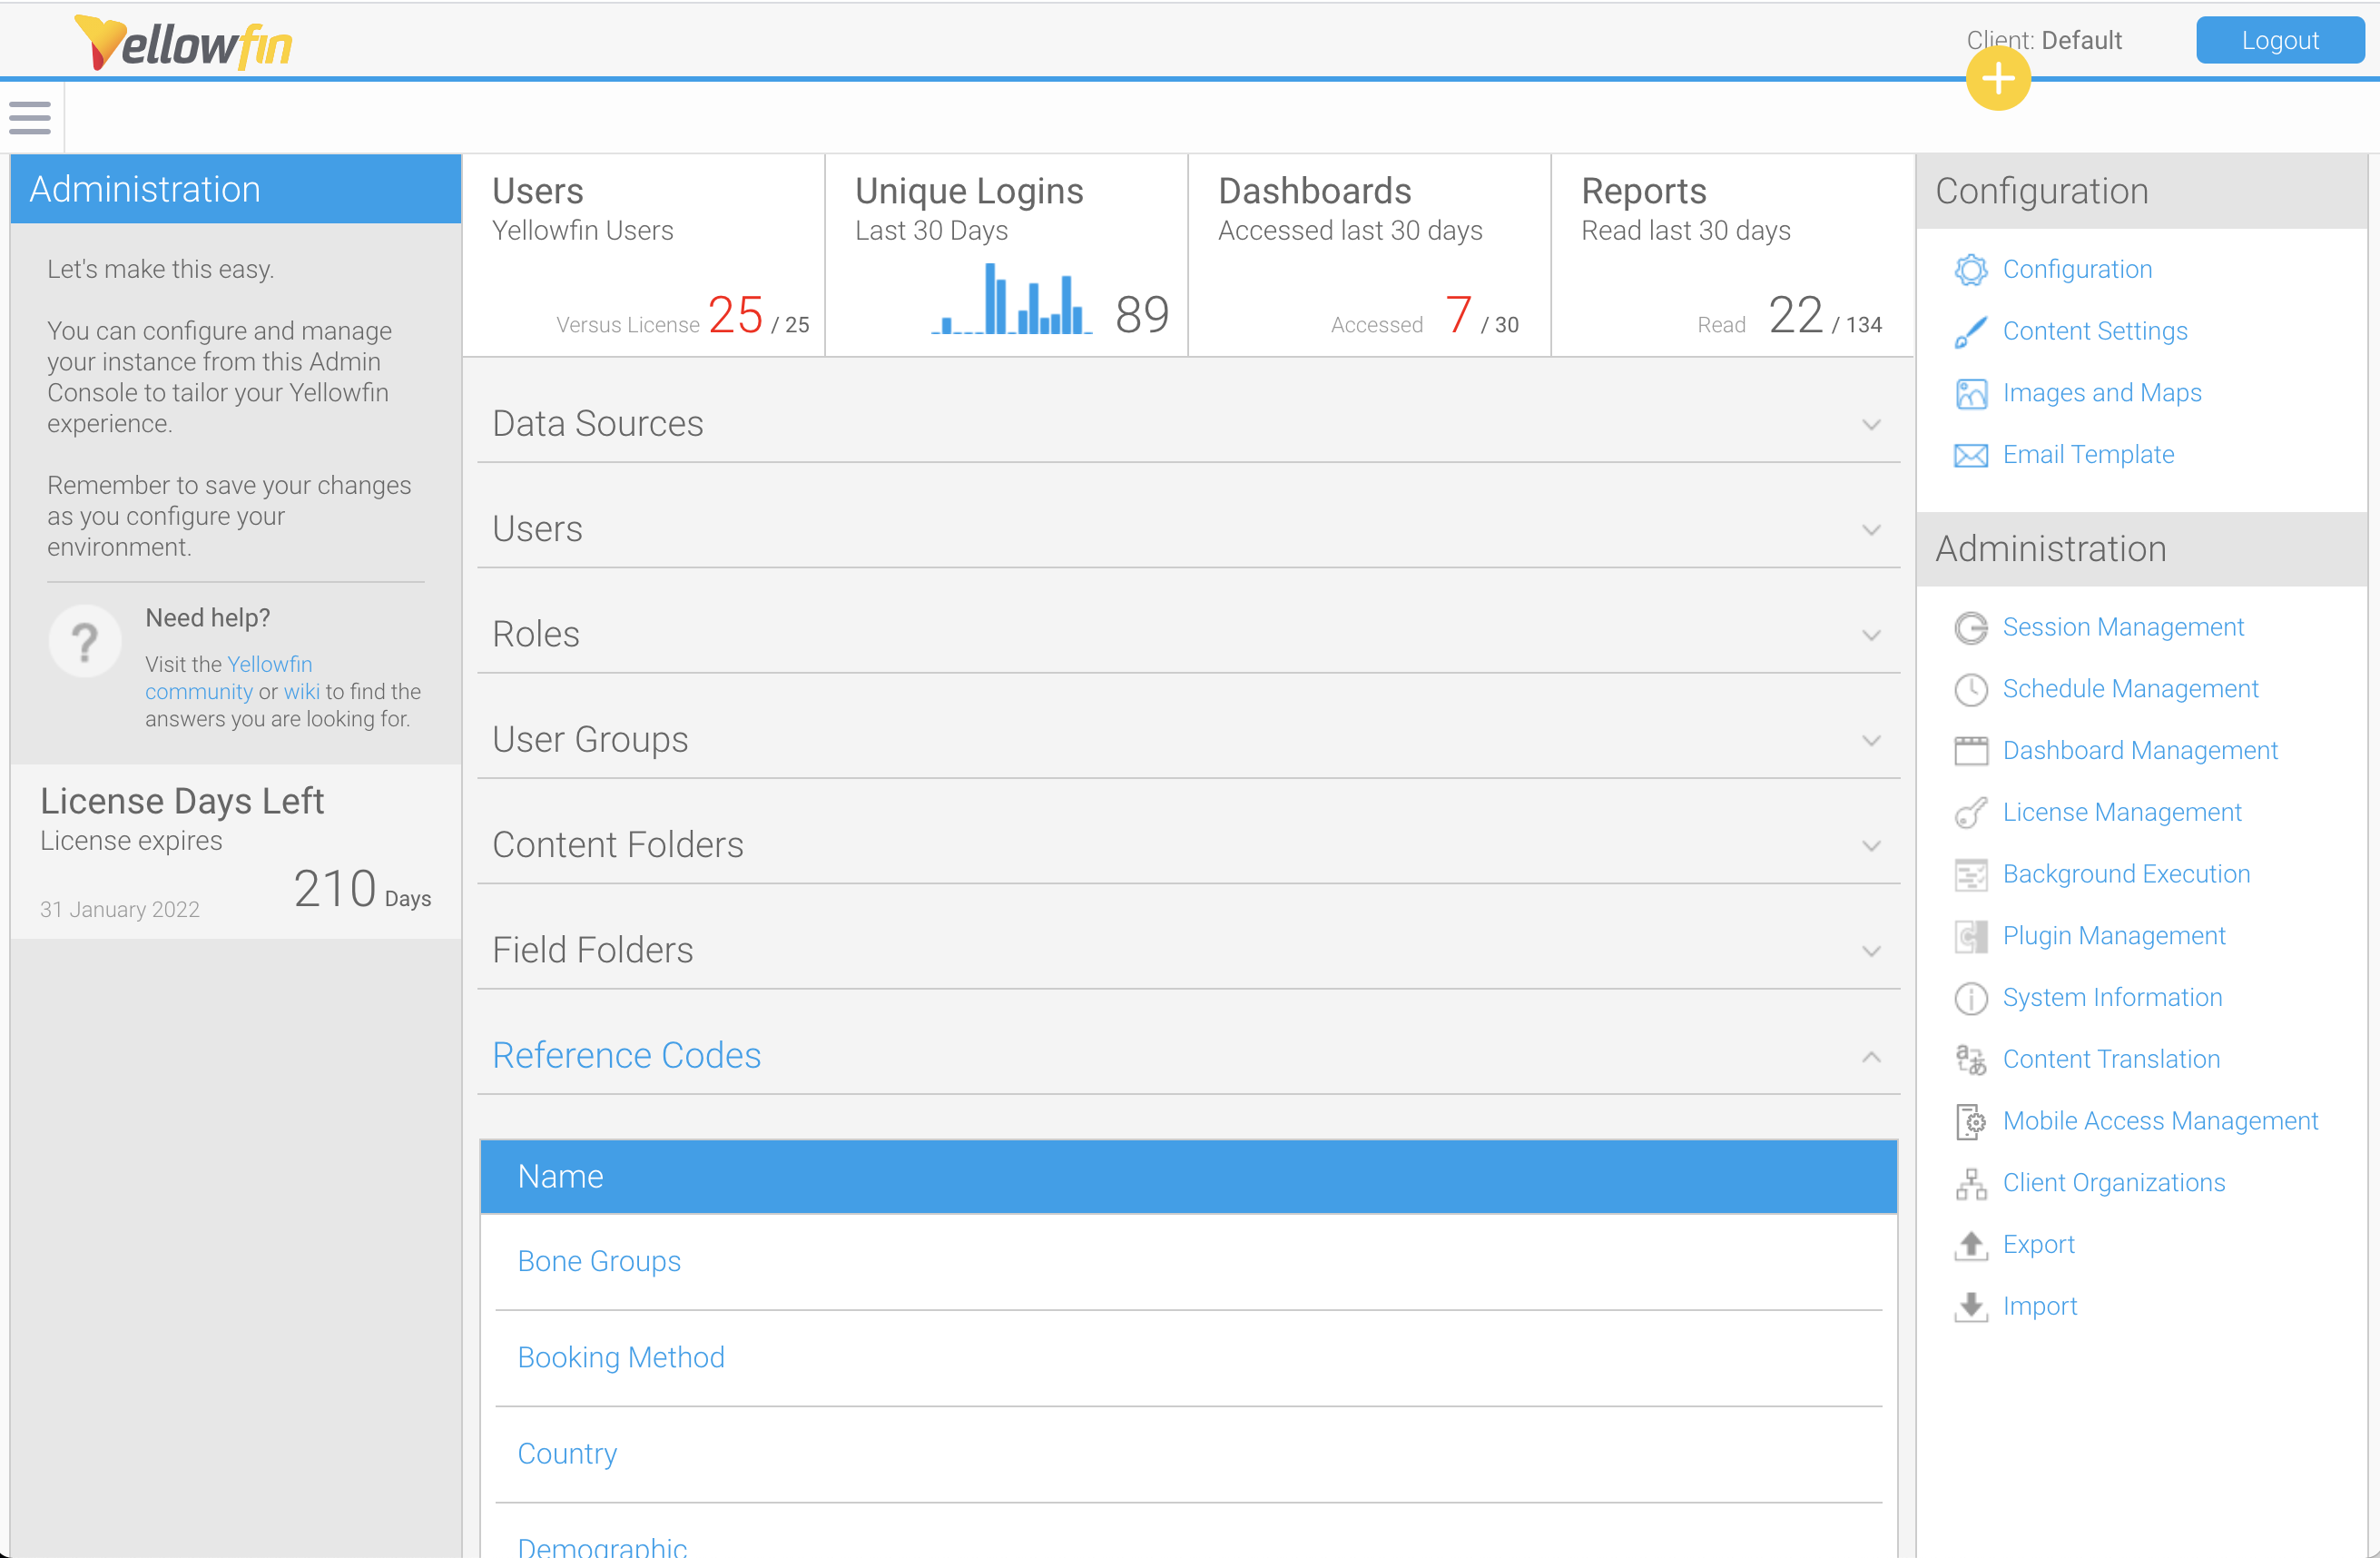
Reference codes are stored within the Admin Console of Yellowfin. To access the page, follow the steps below.
The Create Reference Code dialog box contains four tabs — Details, Values, Translation (if enabled for your deployment) and Refresh — which each provide their own functionality. Each tab is described below.
The Details tab shows which options are switched on and off for this reference code list. Changing the options here will affect what's available on the other tabs.
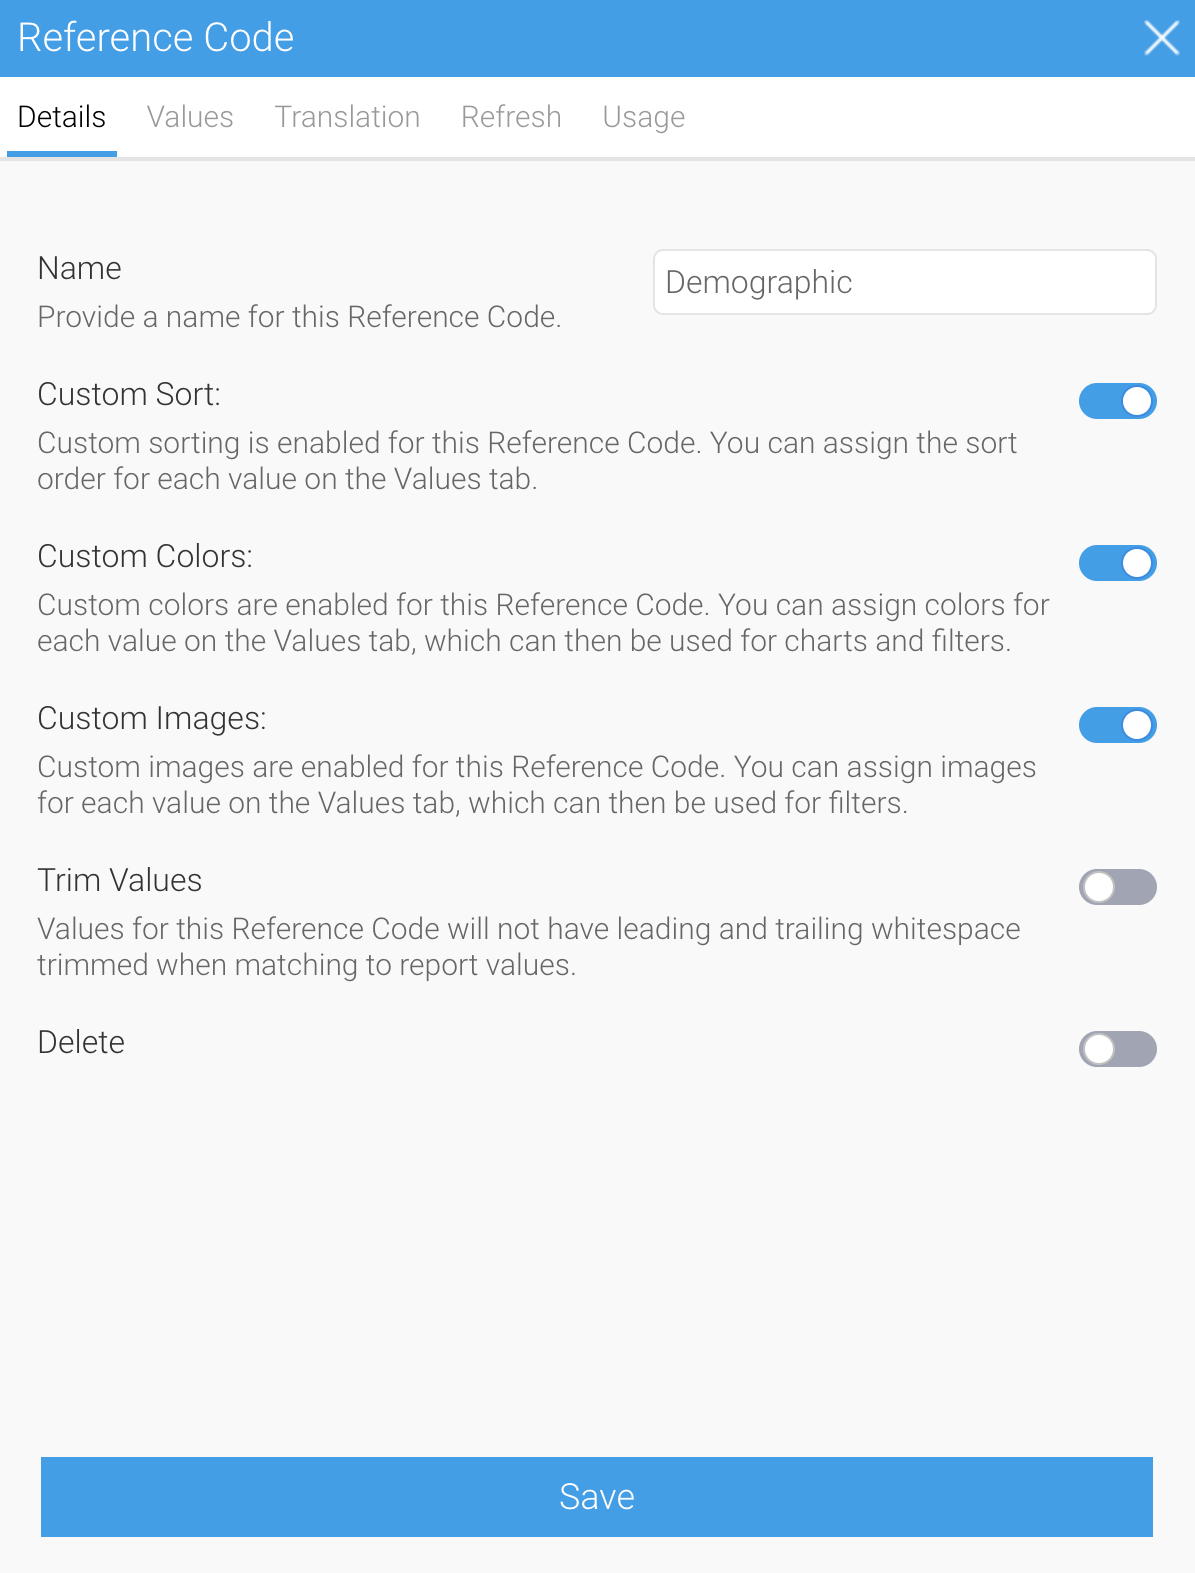
| Field Name | Description |
|---|---|
| Name | This field stores your preferred name for this reference code list. |
| Custom Sort | When enabled, this toggle lets you change the default field value sort order to your own custom order. For example, you could sort months chronologically by setting January to '1', February to '2' and so on. This toggle is disabled by default. |
| Custom Colors | When enabled, this toggle lets you assign a color to each field list value. These can be used in charts and filter to ensure that values are easily identified and consistent across reports. This toggle is disabled by default. |
| Custom Images | When enabled, this toggle lets you assign an image to each field list value. These can be used within In List filters to help users select value. The image will appear next to the value in the list. This toggle is disabled by default. |
| Trim Values | When enabled, this toggle removes leading and trailing whitespace from field values. This toggle is enabled by default. |
The Values tab is where you define any of the options that you enabled on the Details tab. If, for example, you didn't enable the Custom Sort option on the Defaults tab, the Sort column won't be available on the Values tab.
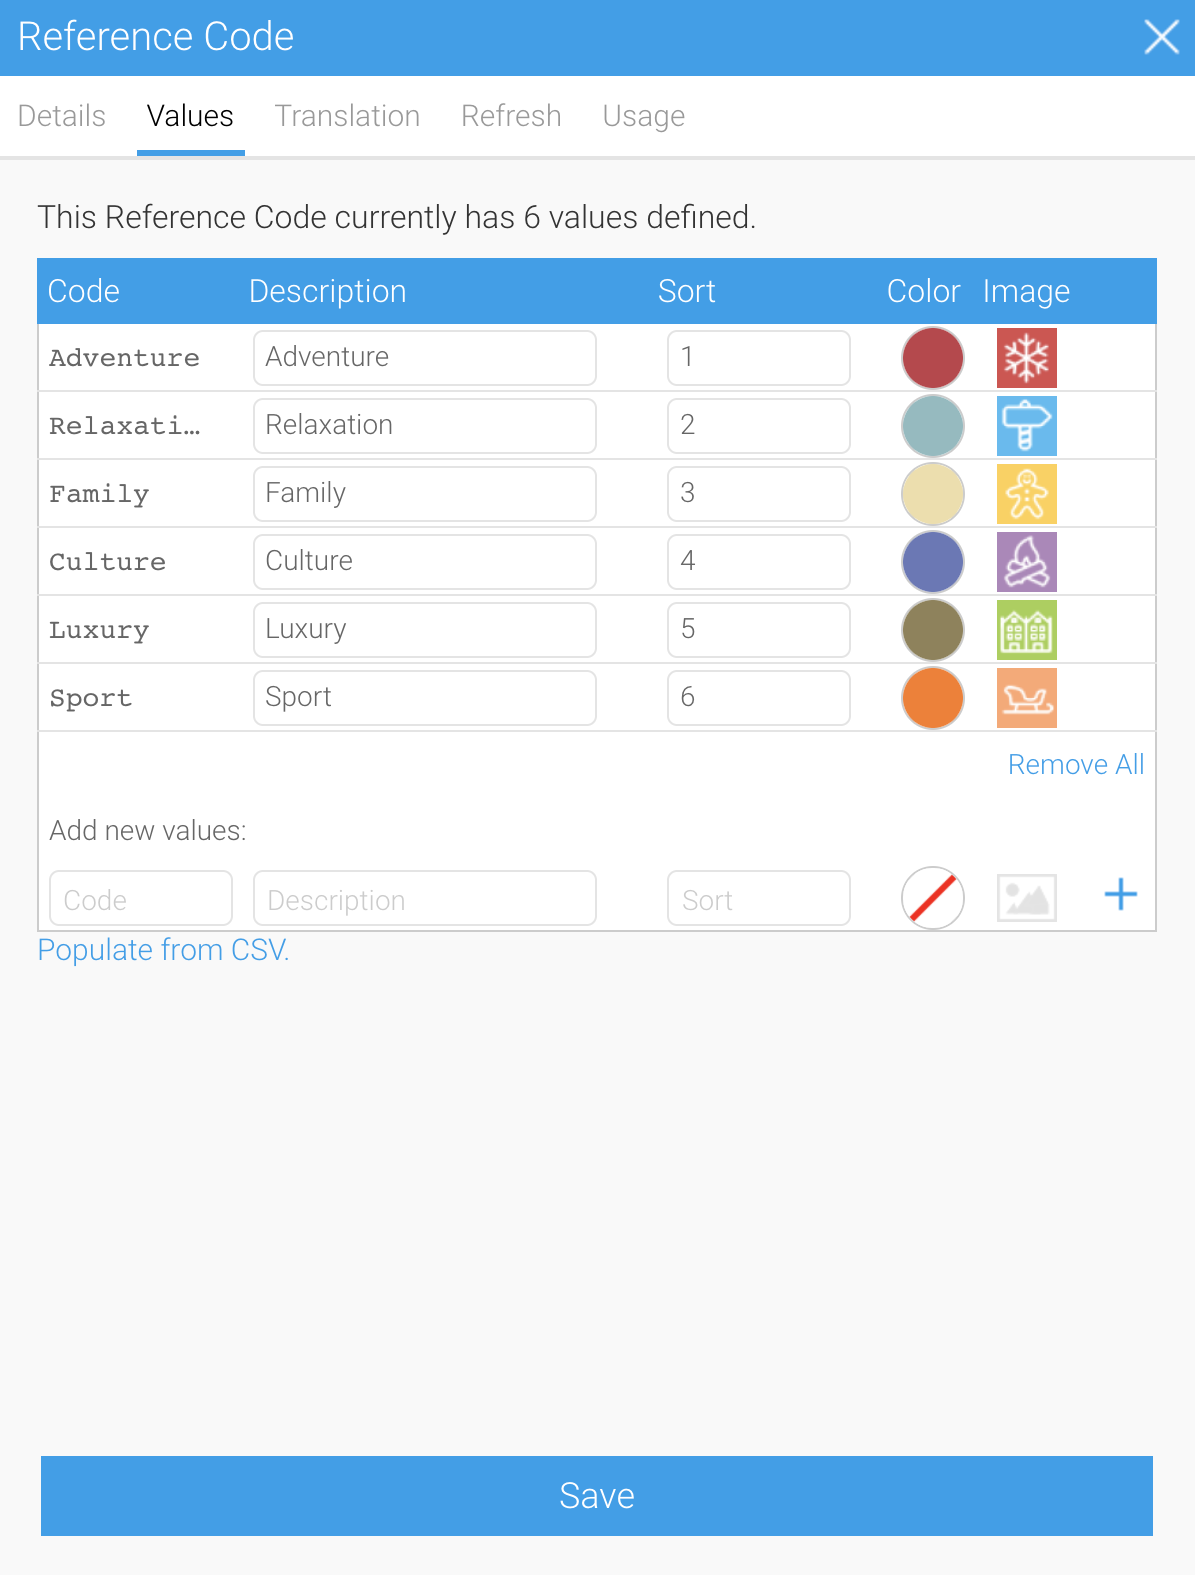
| Field name | Description |
|---|---|
| Code | This is the value used in your database that will be replaced with your new text. |
| Description | This is the text that will be displayed in the report, filter and charts to replace the code. |
| Sort | Add a number to this field to create your own sort order. If you expect to add more values to your sort order later on, consider a numbering system that provides more flexibility. For example, instead of number your top three options 1, 2 and 3, you could use 10, 20, 30 so that any future values that you would like to add between existing values will be fast to implement. |
| Color | Click on this field to add a custom color for the value. |
| Image | Click on the image to display the Image Manager, where you can choose an existing image to associate with this value (or upload a new one if you have access to do so). |
| Plus sign | When you've entered all the details for this value, click on the plus sign to add it to your list. Make sure you click on this plus sign after entering your final list item. |
| Populate from CSV | If you already have a list containing some of these details, you can click on this link to upload a CSV file to quickly populate this tab. The CSV file can contain up to three fields — Code, Description and Sort. You will need to add any custom colors and images after uploading the CSV file containing the text fields. |
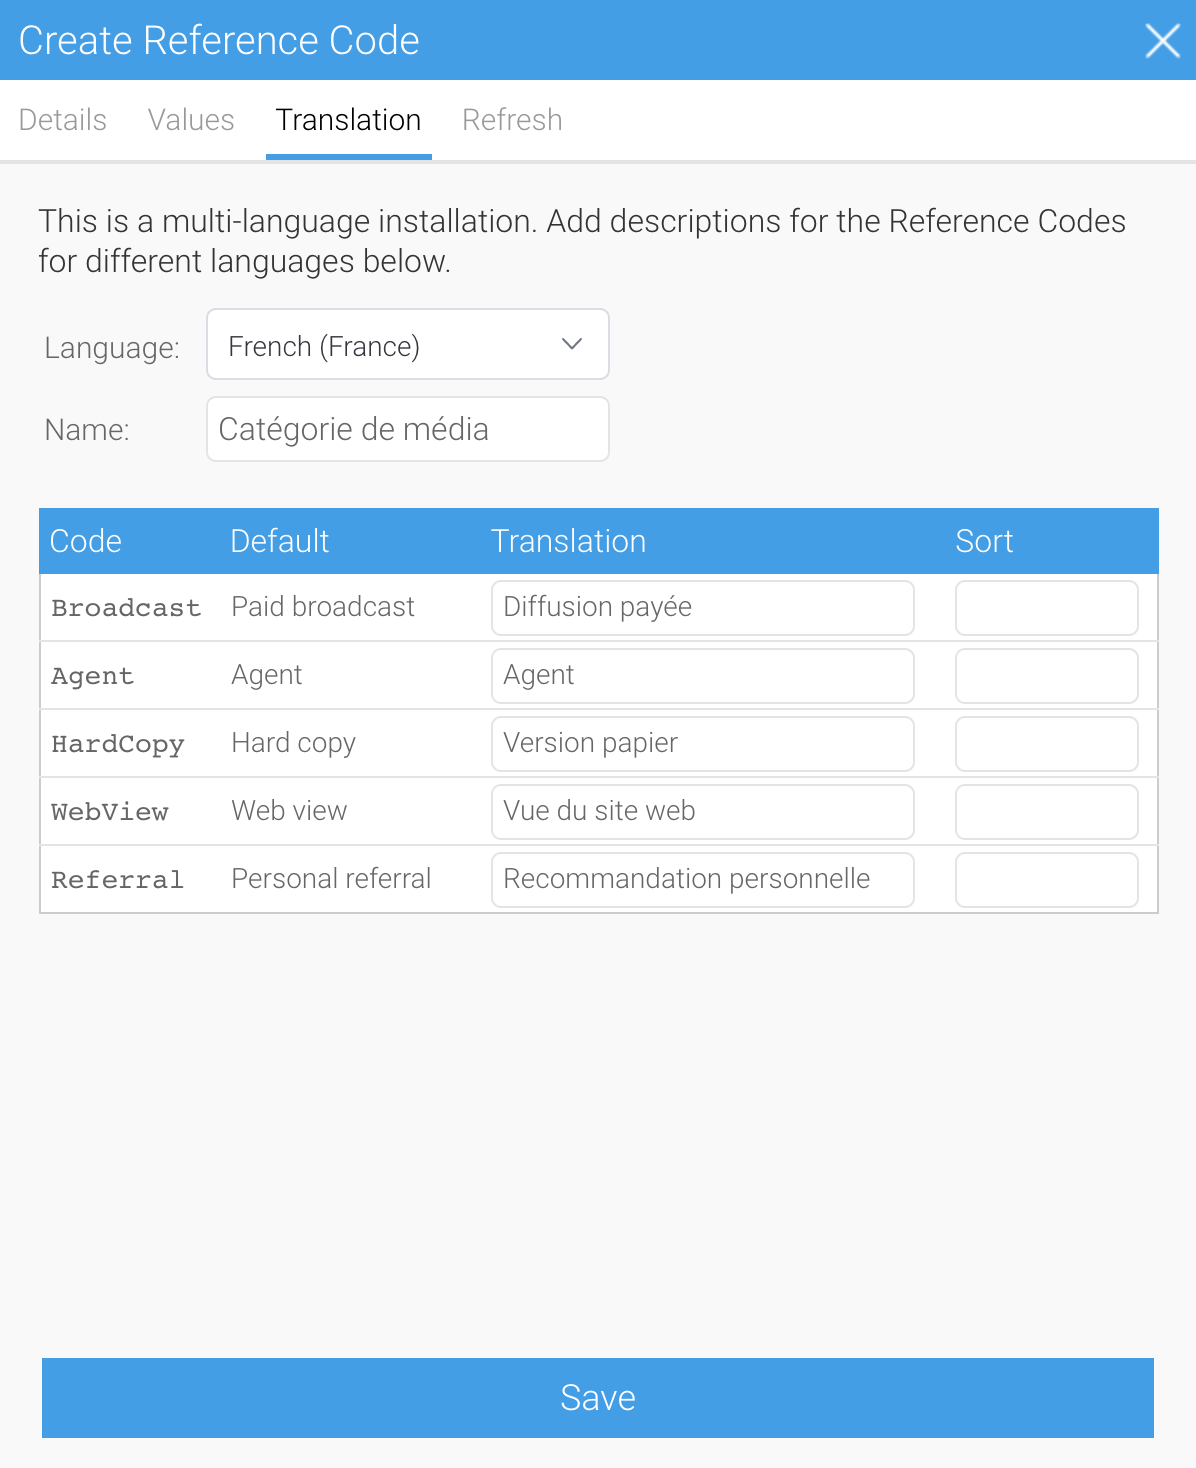
This tab will only be displayed if you're using a multi-language deployment of Yellowfin. Here, you can choose a language and provide a translation for each value, along with the name of the field.
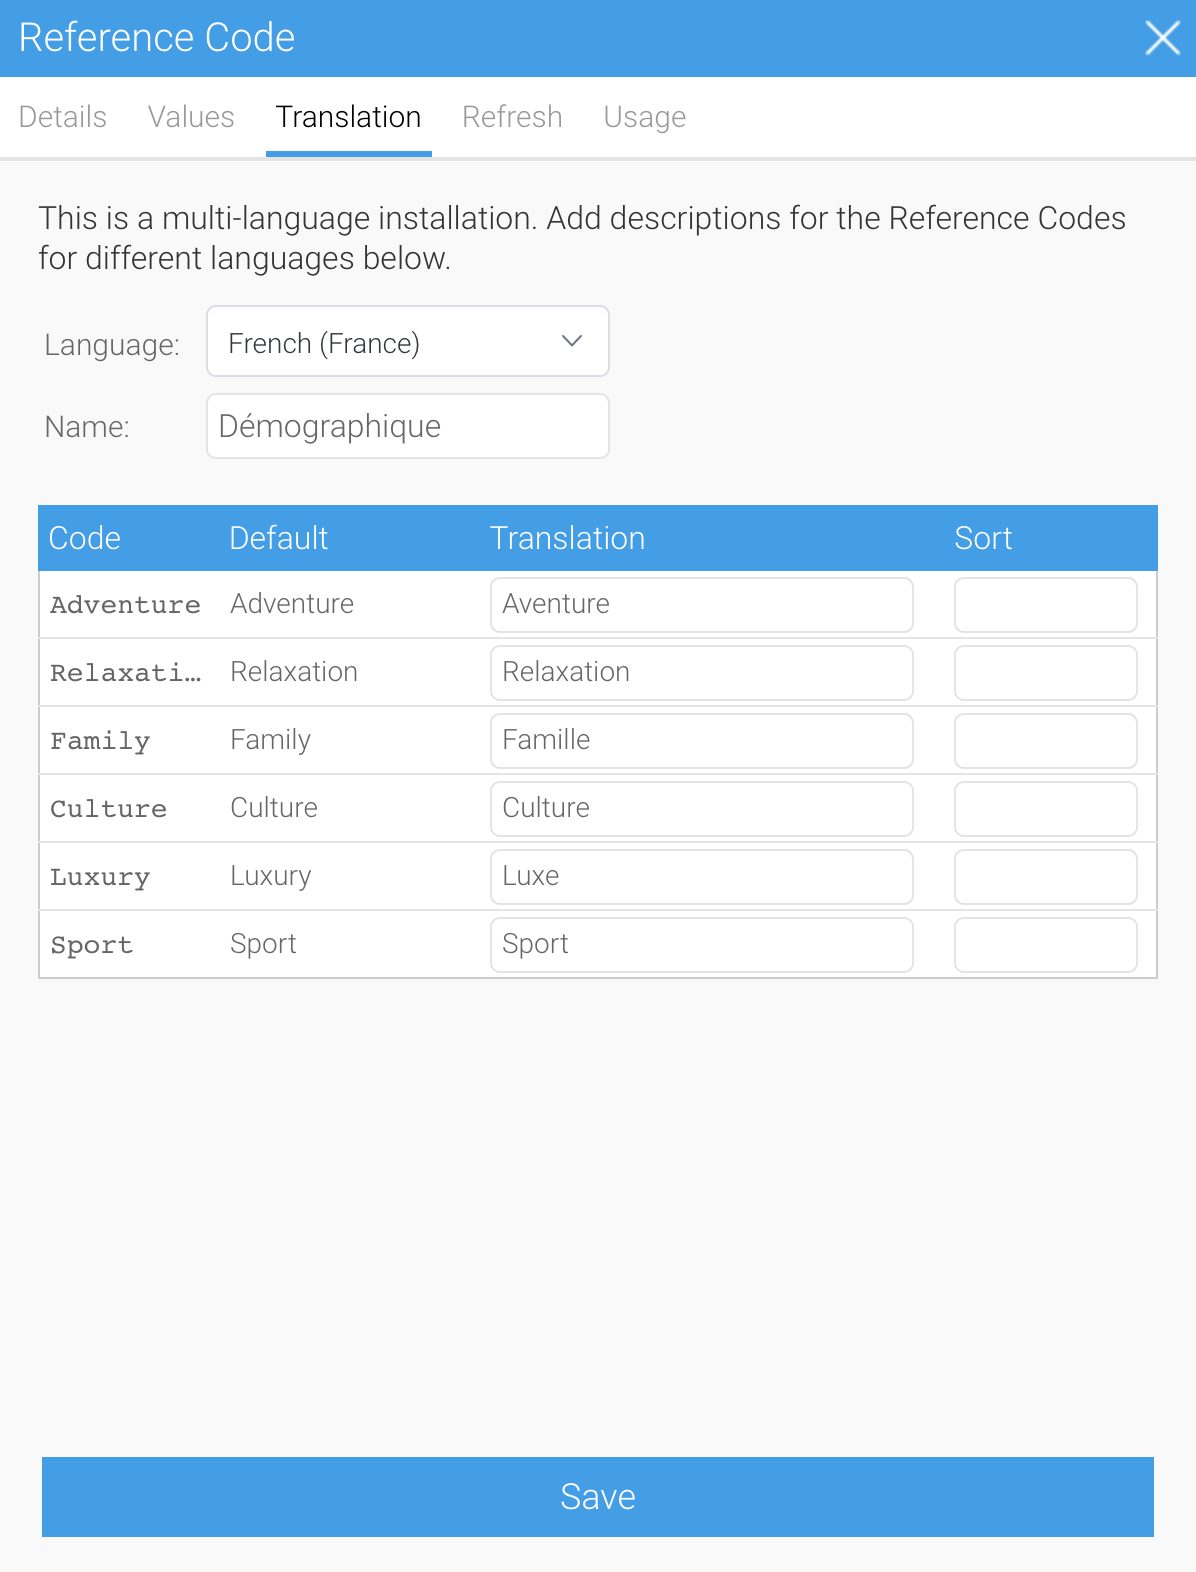
| Field name | Description |
|---|---|
| Language | Use this dropdown to select an alternative language from the list of available languages for your deployment. |
| Name | This field provides a place to enter the translation for the Name field from the Details tab. In our example, our field name is 'Demographic', which has been translated here to 'Demograpique'. |
| Code | This field is the same as the Code field from the Values tab, so you can see each value you're translating. |
| Default | This field is the same as the Description field from the Values tab, so you can see how the code field has been mapped to the default language of your deployment. |
| Translation | This field provides a place to enter the translation for each value. |
| Sort | We recommend you leave the Sort field blank because it will default to whatever sort order you set on the Values tab, ensuring your content shows the same order regardless of what language your viewers are using. |
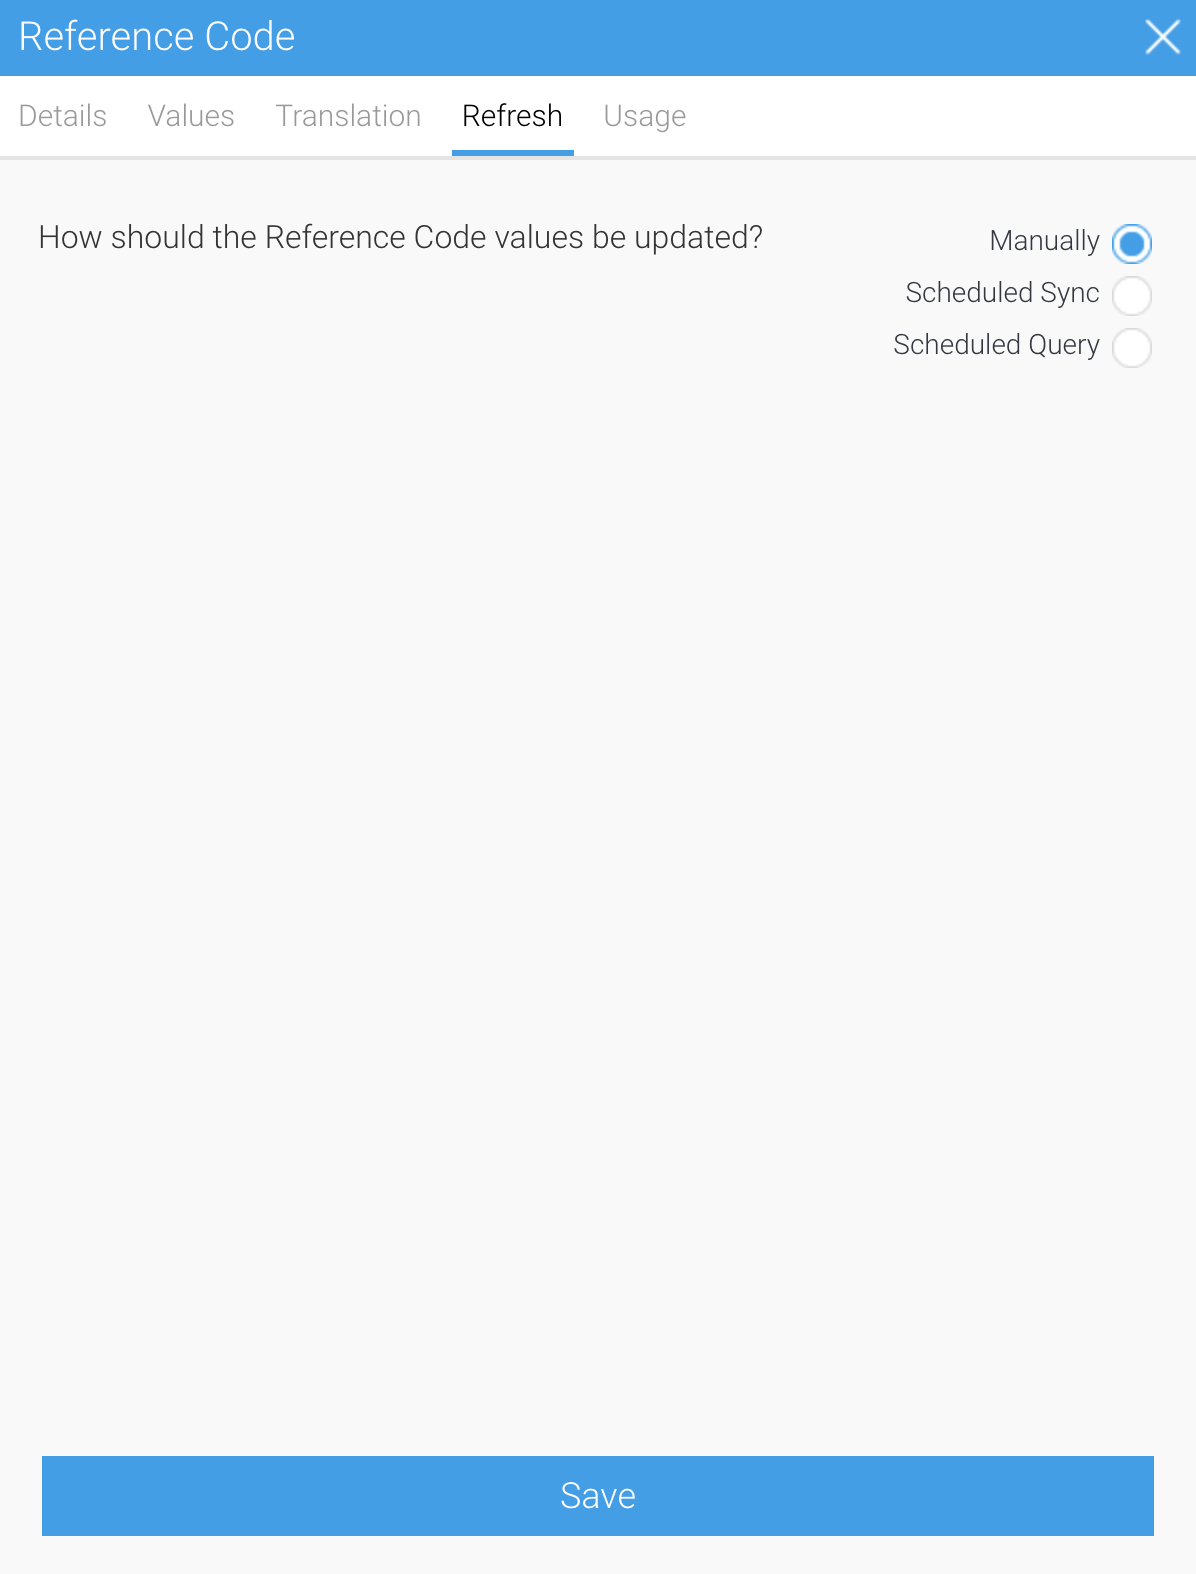
The Refresh tab provides three options for how to update code values that are mapped to your content.
| Option | Description |
|---|---|
| Manually | Use this option if you wish to continue to manually enter each value (or to manually import via the Populate from CSV link on the Values tab) . |
| Scheduled Sync | Use this option if you would like to periodically synchronize values from a specific data source. You can schedule how often Yellowfin should perform this task. Note that this option is limited to updating only one field in your deployment. |
| Scheduled Query | Use this option if you would like to periodically update values using an SQL query. This is the easiest way to populate fields, but it requires SQL knowledge. |
Follow these steps to set up a schedule to sync values from a data source.
|
Here’s what to do if you’ve chosen to add values to the reference code field using an SQL query.
|
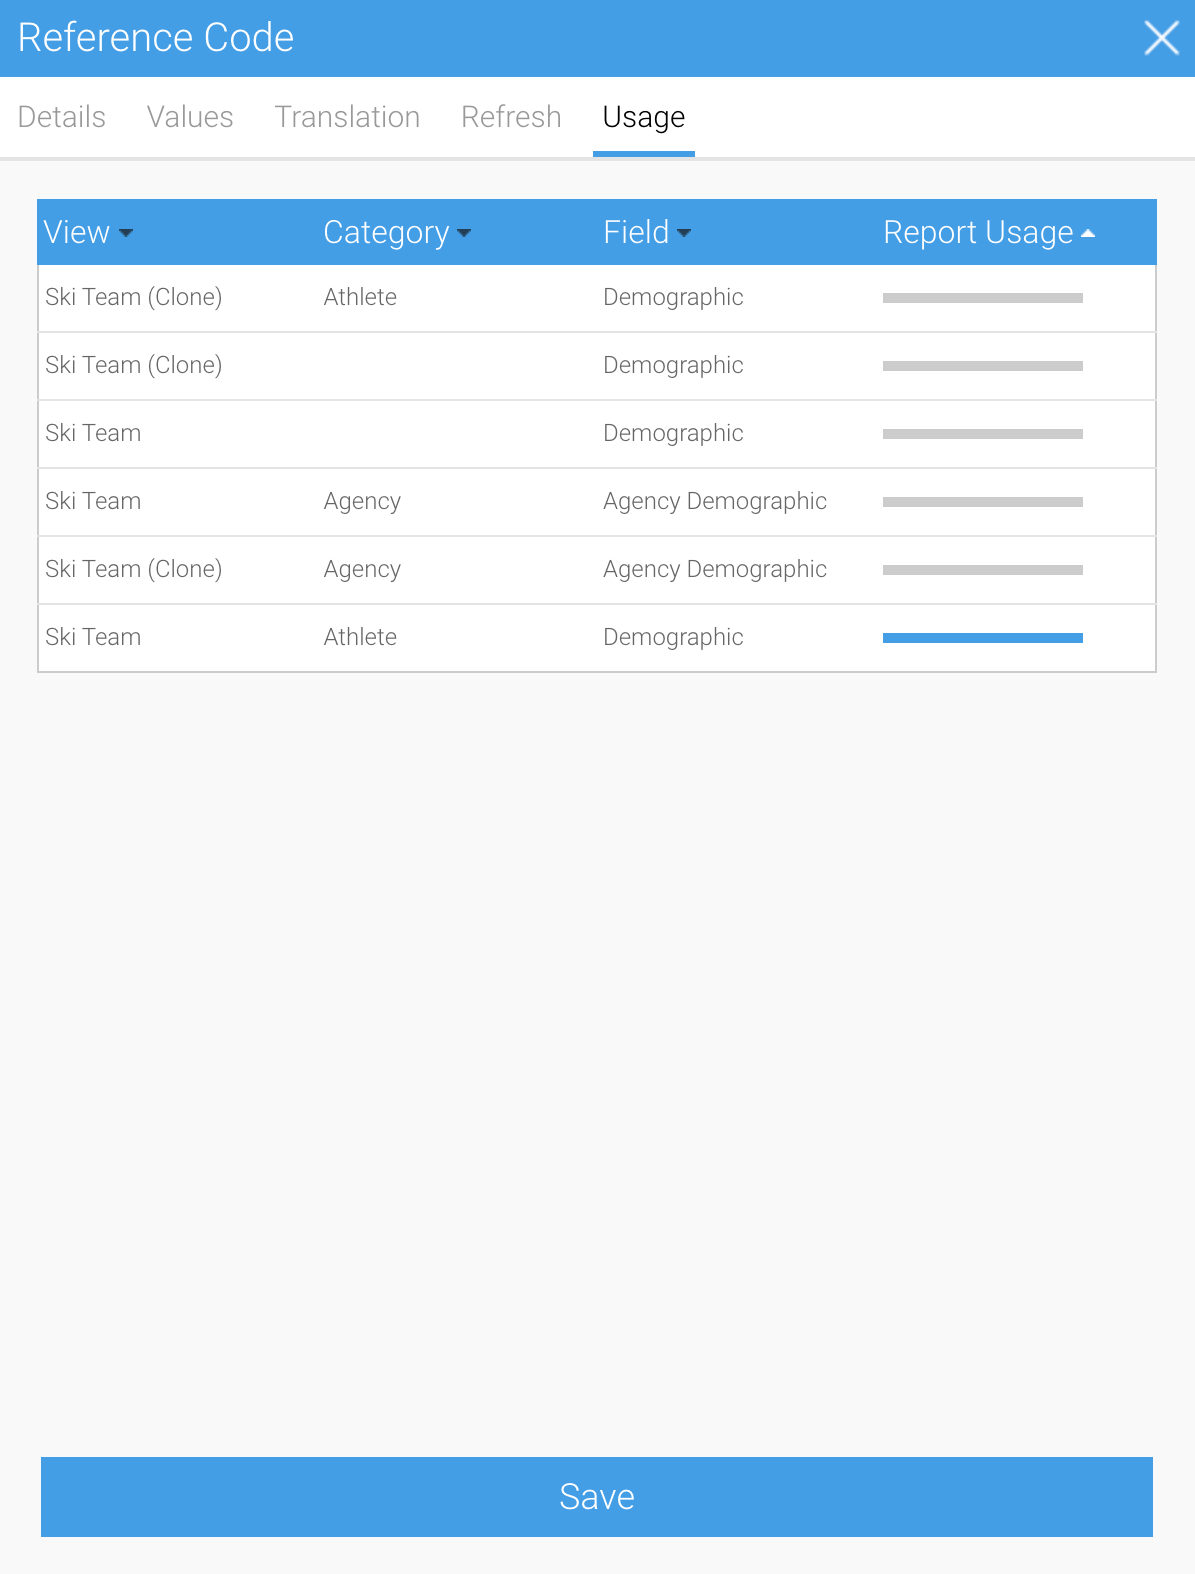
This tab shows the current View usage of the code. This is ideal if you want to delete a code, but would first like to check where it is being used.
If you'd like to create your own reference list, use the information above and follow the steps below.
Click the Add button under the list of any existing reference codes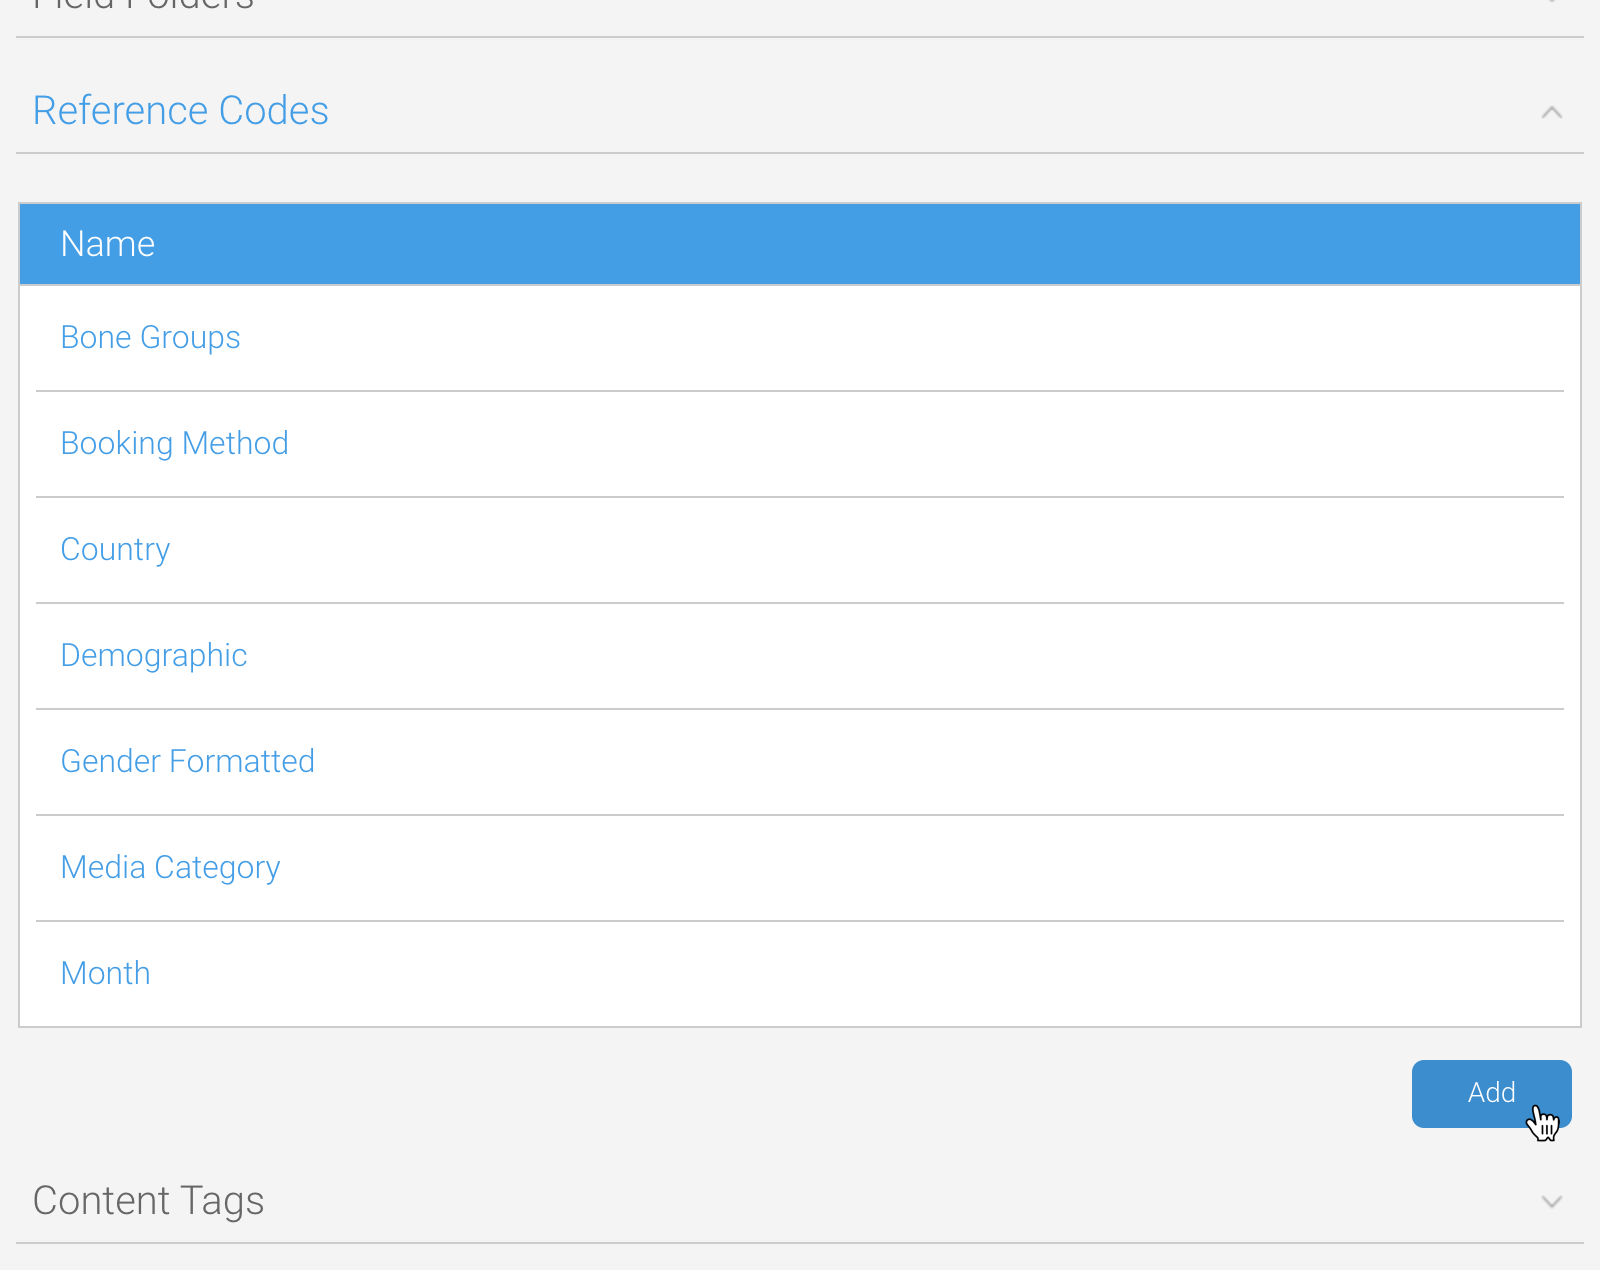
Provide a name and toggle the settings you wish to use on the Details table (see the table under Details tab of this wiki page for more information)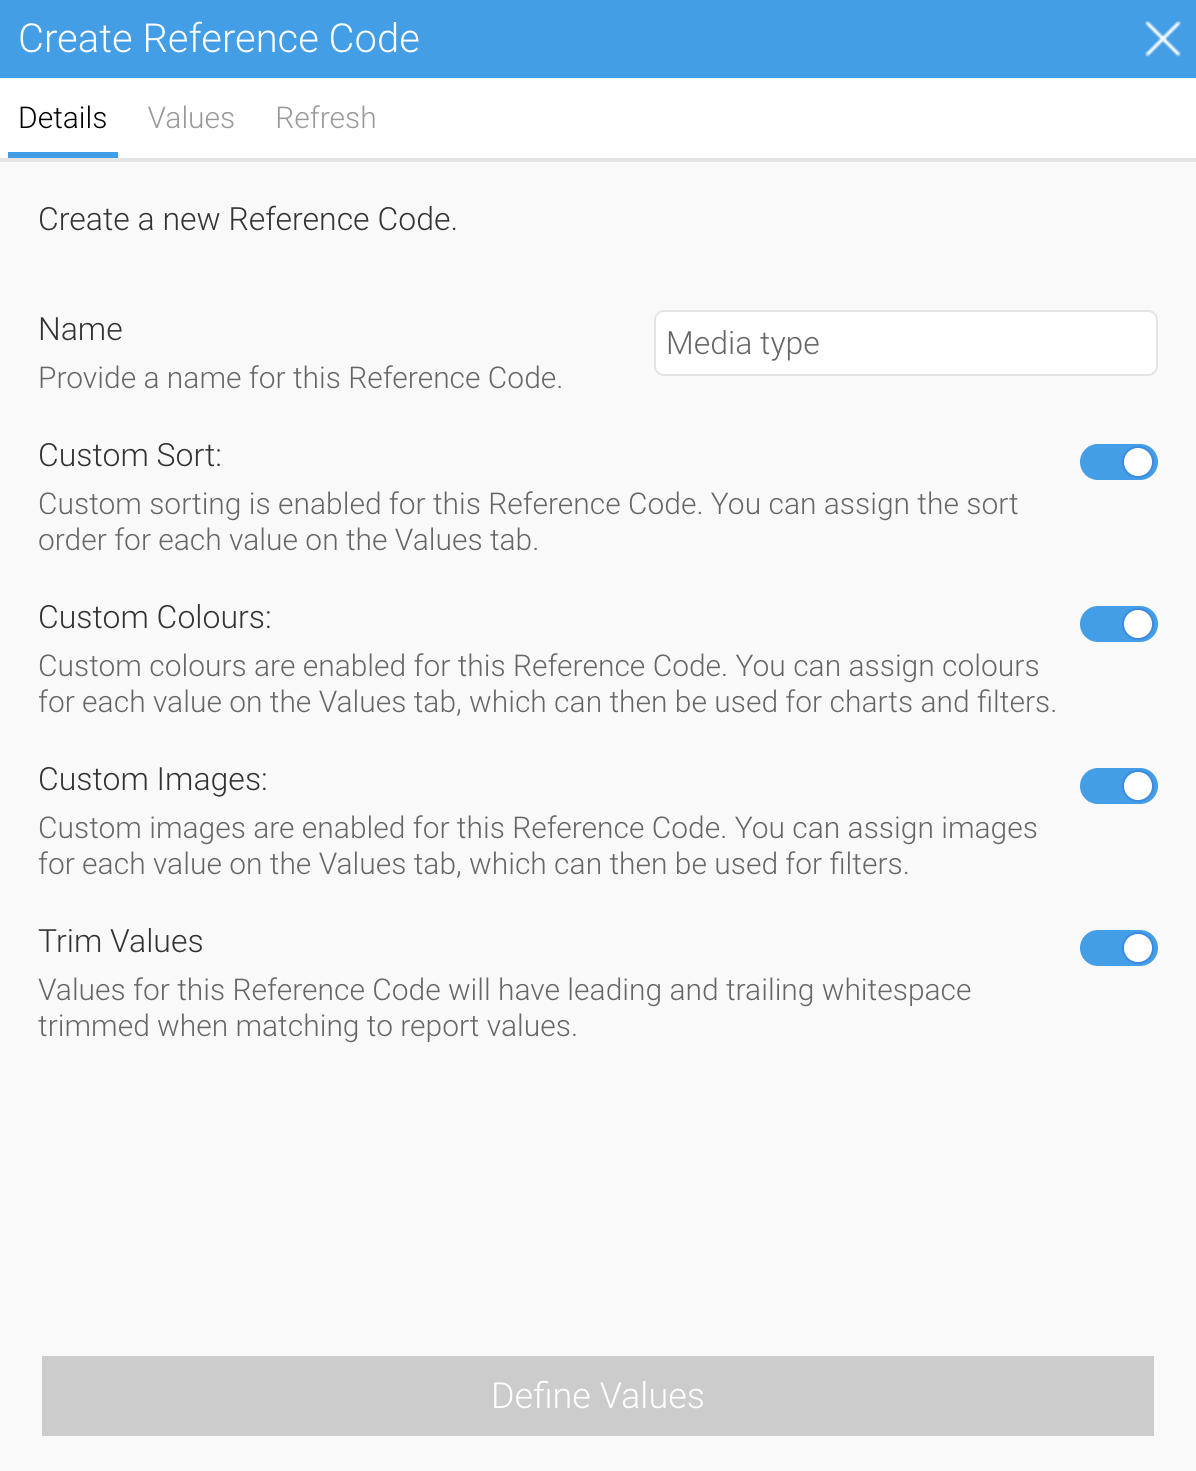
Click on the Values tab to enter the mapped content (see the table under Value tab of this wiki page for more information)
As you add each row, the existing rows will be resorted according to the sort order, or if no sort order exists, they will be sorted alphabetically by the Description field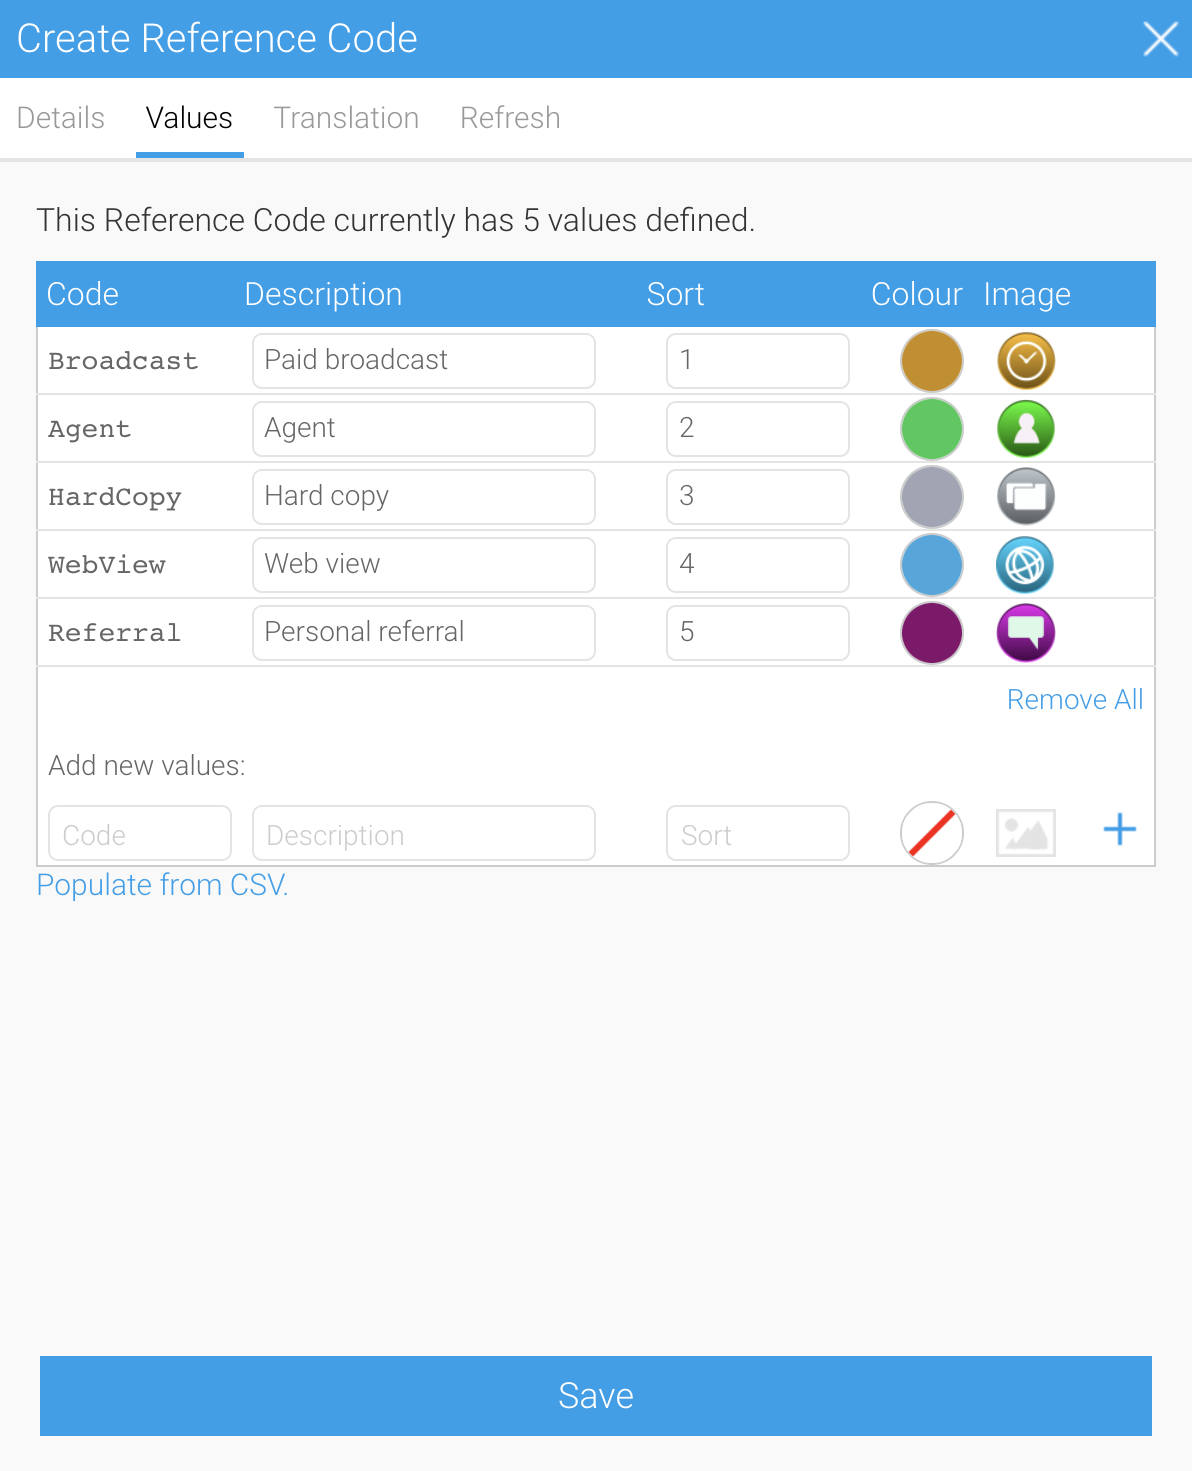
Click on the Refresh tab to ensure Manually is selected as the update method (alternatively, if you wish to schedule updates from external sources, see the table under the Refresh tab of this wiki page for more information)
Click on the Save button to save your new reference codes