Overview
Access Filters are used to restrict data based on the user running a report. A manager may only be allowed to see employee details from his or her own department, for example. Access Filters match users within Yellowfin to an arbitrary Reference Id. The Reference Id for the user can then be used as a filter when they run reports.The steps for setting up Access Filters are:
- Create an Access Filter on the data source
- Assign the Access Filter to a field on a view
- Define a default Access Filter on the view
- Assign an Access Filter to a report
Create an Access Filter
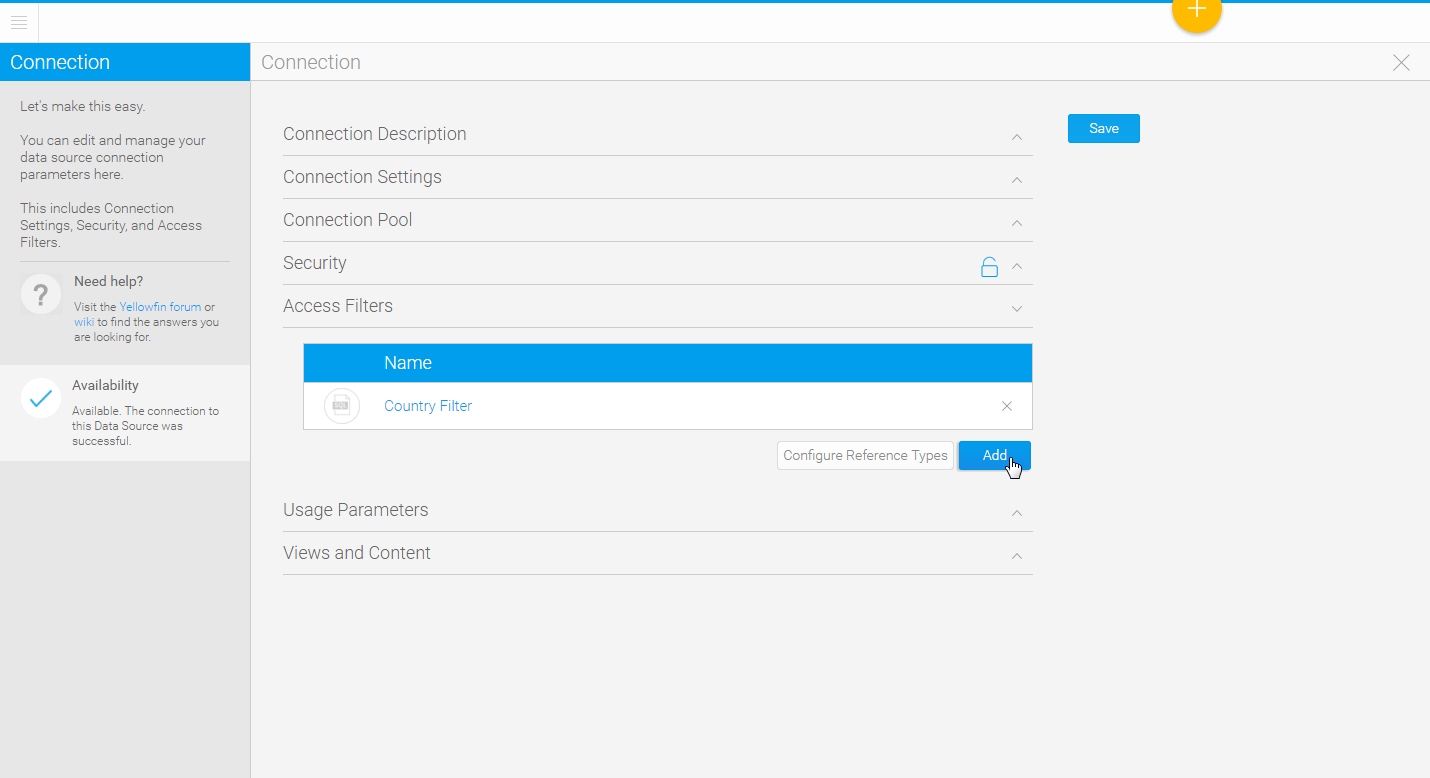
1. Open the Access Filters section on the connection details page.
2. Click the Add button in order to create a new Access Filter.
If this is the first time you have created an access filter, you may be shown this message, which provides you with some information on how access filters work.
Click on the Got it! Don't show me this again link in order to continue and not be shown this message the next time you set up an access filter.
Click Continue to create an access filter and ensure you see this message next time.

3. You will now need to specify which method to use when sourcing access filter records. The following options are available:
- Manual - this allows you to manually provide the access filter pairings, relying on you to maintain the records manually over time. Generally this option is reserved for initial trials of access filters before moving to one of the alternative methods below.
- Report - this allows you to use the results of a report as the records of your access filter. You will need to have a report enabled for use in this way.
- SQL Query - this allows you to run an SQL query which returns the records for your access filter.
- CSV - this allows you to upload a CSV file to use as the records of your access filter.
- Manual - this allows you to manually provide the access filter pairings, relying on you to maintain the records manually over time. Generally this option is reserved for initial trials of access filters before moving to one of the alternative methods below.

Filter Parameters
Each Access Filter contains a list of one or more records matching a Yellowfin user to a Reference Id. These can be loaded into the system in three ways: manual entry, from a CSV file, or by running a scheduled query on the source database.
In each case you will need to enter records consisting of four fields (in this order):
| Identifier Type | Identifier | Filter Type | Reference ID |
|---|---|---|---|
The Identifier Type and Identifier are used to identify a Yellowfin user. The Identifier Type can be either
The user id related to the user id used within Yellowfin. | The Identifier field will then be the corresponding user id. | The Identifier field will then be the corresponding user id. | The Reference Id field is the corresponding data for the matching user. |
Settings
Input Values
Records
Usage

Settings
Input Values
Records
Usage


Settings
Complete the settings step in order to define how the access filter records will be sourced and updated.
| Setting | Description |
|---|---|
| Name | Provide a name to help identify this access filter on the Connections and Task pages. |
| Data Source | Select a source that will be queried to return access filter records. |
| New User Auto Refresh | Define whether the access filter records need to be automatically refreshed every time a new user is created. |
| SQL Query | Define the query used to return access filter values, in the format outlined in the Filter Parameters section. |

Once the SQL has been defined, it will need to be validated. Click the Validate button and you will either be shown errors returned from the database, or this valid message.

| Setting | Description |
|---|---|
| Refresh Type | You will have two refresh options:
|
| Refresh Schedule | Define whether access filter records will automatically be updated based on a schedule. |
Once complete, use the Submit button to save your access filter and load values.

Records
You will now be able to view all the records loaded into your Access Filter.

Usage
You will be able to see a usage count to help identify how and when your Access Filter is used.

CSV Access Filters
The file must consist of records of the four fields listed above. The file may contain a header row, which must have the titles “Identifier Type”, “Identifier”, “Reference Type” and “Reference Id”.Settings
Input Values
Records
Usage

Defining a Filter Type
Each source filter that you create needs to be categorised. You can share categories across various source systems but filters must have unique filter types within a source record.The filter type is used to link the data in your source system with Yellowfin meta-data. It also provides a mechanism to categorise the type of filters that you can make available for your views.
- From the Source entry page you will see the Available filter types on the right hand side of the page. Click Edit to add new filter types.
- From the popup click the add link to add a new filter type. This will open a section at the bottom of the popup. Enter a code and description of the filter type you are creating.
- Once you have created a new type click the add link and then the OK link to save all your changes. This will take you back to the main access filter page and you should see a filter type specified in the available list.
Note: If you wish to delete a filter type then from the edit popup select a type and click the delete link. You will be prompted to click OK to save your changes. If you delete a type which is in use this may impact your reporting filter process.
Assign to a View
Once you have set up one or more Access Filters on a data source, you can assign them to any views created against that source.- Create your view as normal, and then on the Fields page, select a field that corresponds to one of the Reference Types you have created.
- On the Access tab, select the correct type from the Access Filter selection. You will not be able to select Reference Types that don’t have any filter records saved against them.
- Once you have selected the Access Filter, save the field. You can select more than one field to be different Access Filter types if you wish.
- Once you have finished assigning access filter types to the fields on the view, go to the View Security page. You can select a default filter to be applied to reports created against this view here, or choose not to have one. If you select a default filter, any subsequent report created against this view will have the filter applied. Users creating reports that have the appropriate access level can change or remove the filter on a per-report basis.
Assign to a Report
When creating a report using the Drag and Drop Builder, an Access Filter can be applied if the selected View has had Access Filters defined.On the Report Data page, open the Report Data section in the Report Options box on the right hand side. The Access Filter selection box contains any filters that have been attached to the selected view.
If you select a filter, it will be applied to the results for each user when they run the report.
Note: that only users with the appropriate security access level will be able to change the Access Filter on a report.