Overview
Once the required translation options have been configured, you are able to begin translating User Entered text. There are two options to accomplish this:- Translate all content at once. This will allow you to provide translations across Views, Reports, and Dashboards in one CSV file.
- Translate individual components as required. This allows you to translate a View, Dashboard Tab, or Report, independently of other content. This is useful when you need to make changes to limited text and do not wish to go through the larger CSV file.
Translating Content System Wide
To set up translated content, you will need to have completed the Translation Configuration options outlined in the previous section. You will then need to follow these steps:- Ensure all content you wish to translate is Active; the Translation process will not include Draft content.
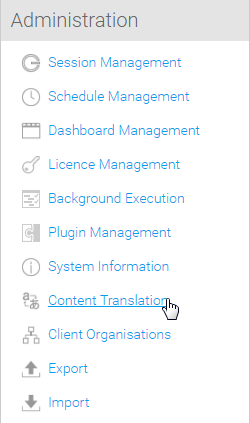
- Navigate to Administration > General > Content Translation
- Click on the Begin button

- Select the languages you wish to translate from the list configured previously.
Note: you do not have to translate all available languages every time you complete this process, just whichever are required at the time.
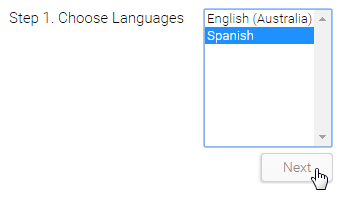
Click on the Next button. This will generate the content grid discussed in the next step. - Select the content you wish to translate. You will be provided with the following options:
- Export All (All): includes translatable content across all active Views, Reports, and Dashboards.
- Content that has Changed (Changed): includes translatable content across all active Views, Reports, and Dashboards that have been flagged by the user as Changed since their last translation
- Content with no Selected Language (None): includes translatable content across all active Views, Reports, and Dashboards that do not have translations for the selected language.
You will also be shown a content grid which displays a count of unique content that matches the All, Changed, or None criteria.
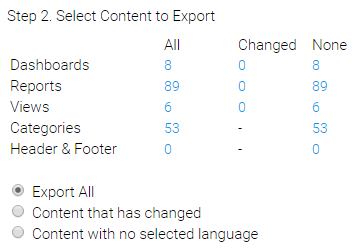
There is a count for each type of content;
Dashboards (Dashboard custom text),
Reports (Report and Chart custom text),
Views (View and Field custom text),
Categories (Report, View, and View Field Categories), and
Header & Footer (Default Header & Footer content defined in Configuration)
From here, you can click on any of the figures to see a breakdown of the content that makes up the selected count.
Note: if multiple languages are selected, and items marked as Changed also have no translation values for at least one of the selected languages, then these items will be displayed in None, rather than Changed.
- Click on the Export button to generate your Translation CSV. Follow standard browser settings to save and open the file.

- You will now have a Translation CSV that contains 4 standard columns (UUID, Text Type, Key, and Original Text), and then a column for each of the languages you selected to translate.
In order to provide translations you will need to ensure the standard columns remain unchanged, and all translations are entered into the appropriate language column.
Note: making changes to the structure of the CSV will mean that the import will fail. - Once the translation is complete you will need to import your CSV back into Yellowfin. If you have moved away from the Content Translation page, navigate to it through Administration > General > Content Translation.
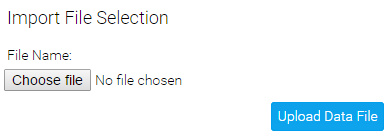
- Click on the Import button

- Locate your translated CSV and click the Upload Data File button.
- Yellowfin will now display one of the following validation messages when
- Your translation CSV upload is successful

- There is an error in your CSV file, or an unsupported file type was used

- One of the language column headers was changed and is not supported, in the example below en_au was changed to klingon which is not a valid language code

- Either the order of the standard (first four) columns has been altered or there is no language column
- The CSV file was empty, or no file was selected

- Your translation CSV upload is successful