You can download the Xero connector from Yellowfin's Marketplace to connect to your Xero account. This section shows you how to download this connector and install it to your instance of Yellowfin.
The user performing these steps must possess administrative rights that allow them to create a new data source connection.
Download the Xero Connector
You can download the Xero connector from Yellowfin’s marketplace:
- Log in to Yellowfin’s Marketplace
- Click on the option for Connectors

- Choose Xero from the selection of connectors available on Yellowfin
- When this connector option expands, click on the Download button. (If you see the Login to Download button instead, you will first need to log in to the Marketplace to continue)

- The Xero connector file will be saved to your computer
Import the Xero Connector
Here's how to upload the Xero connector to Yellowfin:
Ensure that you have an active Xero account. You will need to obtain a few configuration details from this account.
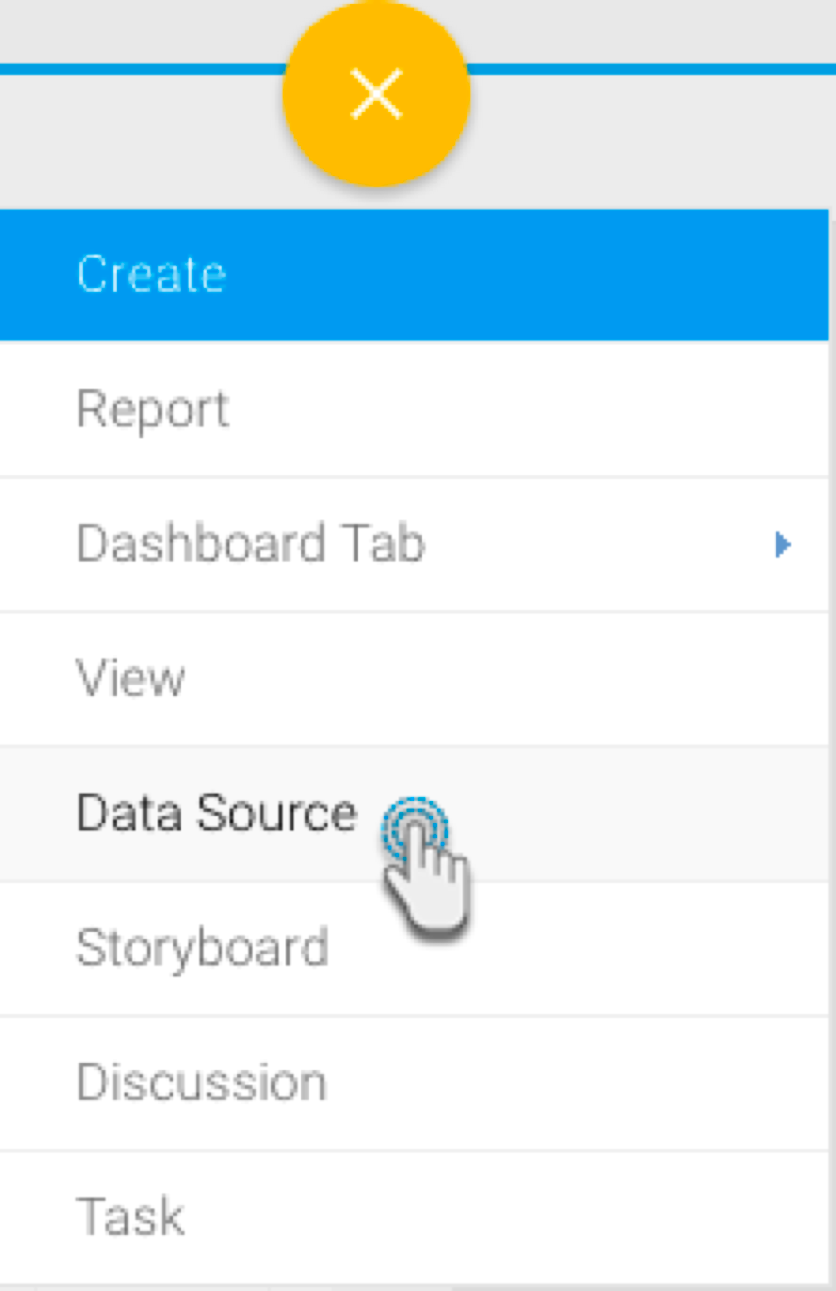
- Click on the Create icon after logging in to Yellowfin
- Select the Data Source option
At the bottom of the new connection screen, click on the upload new link
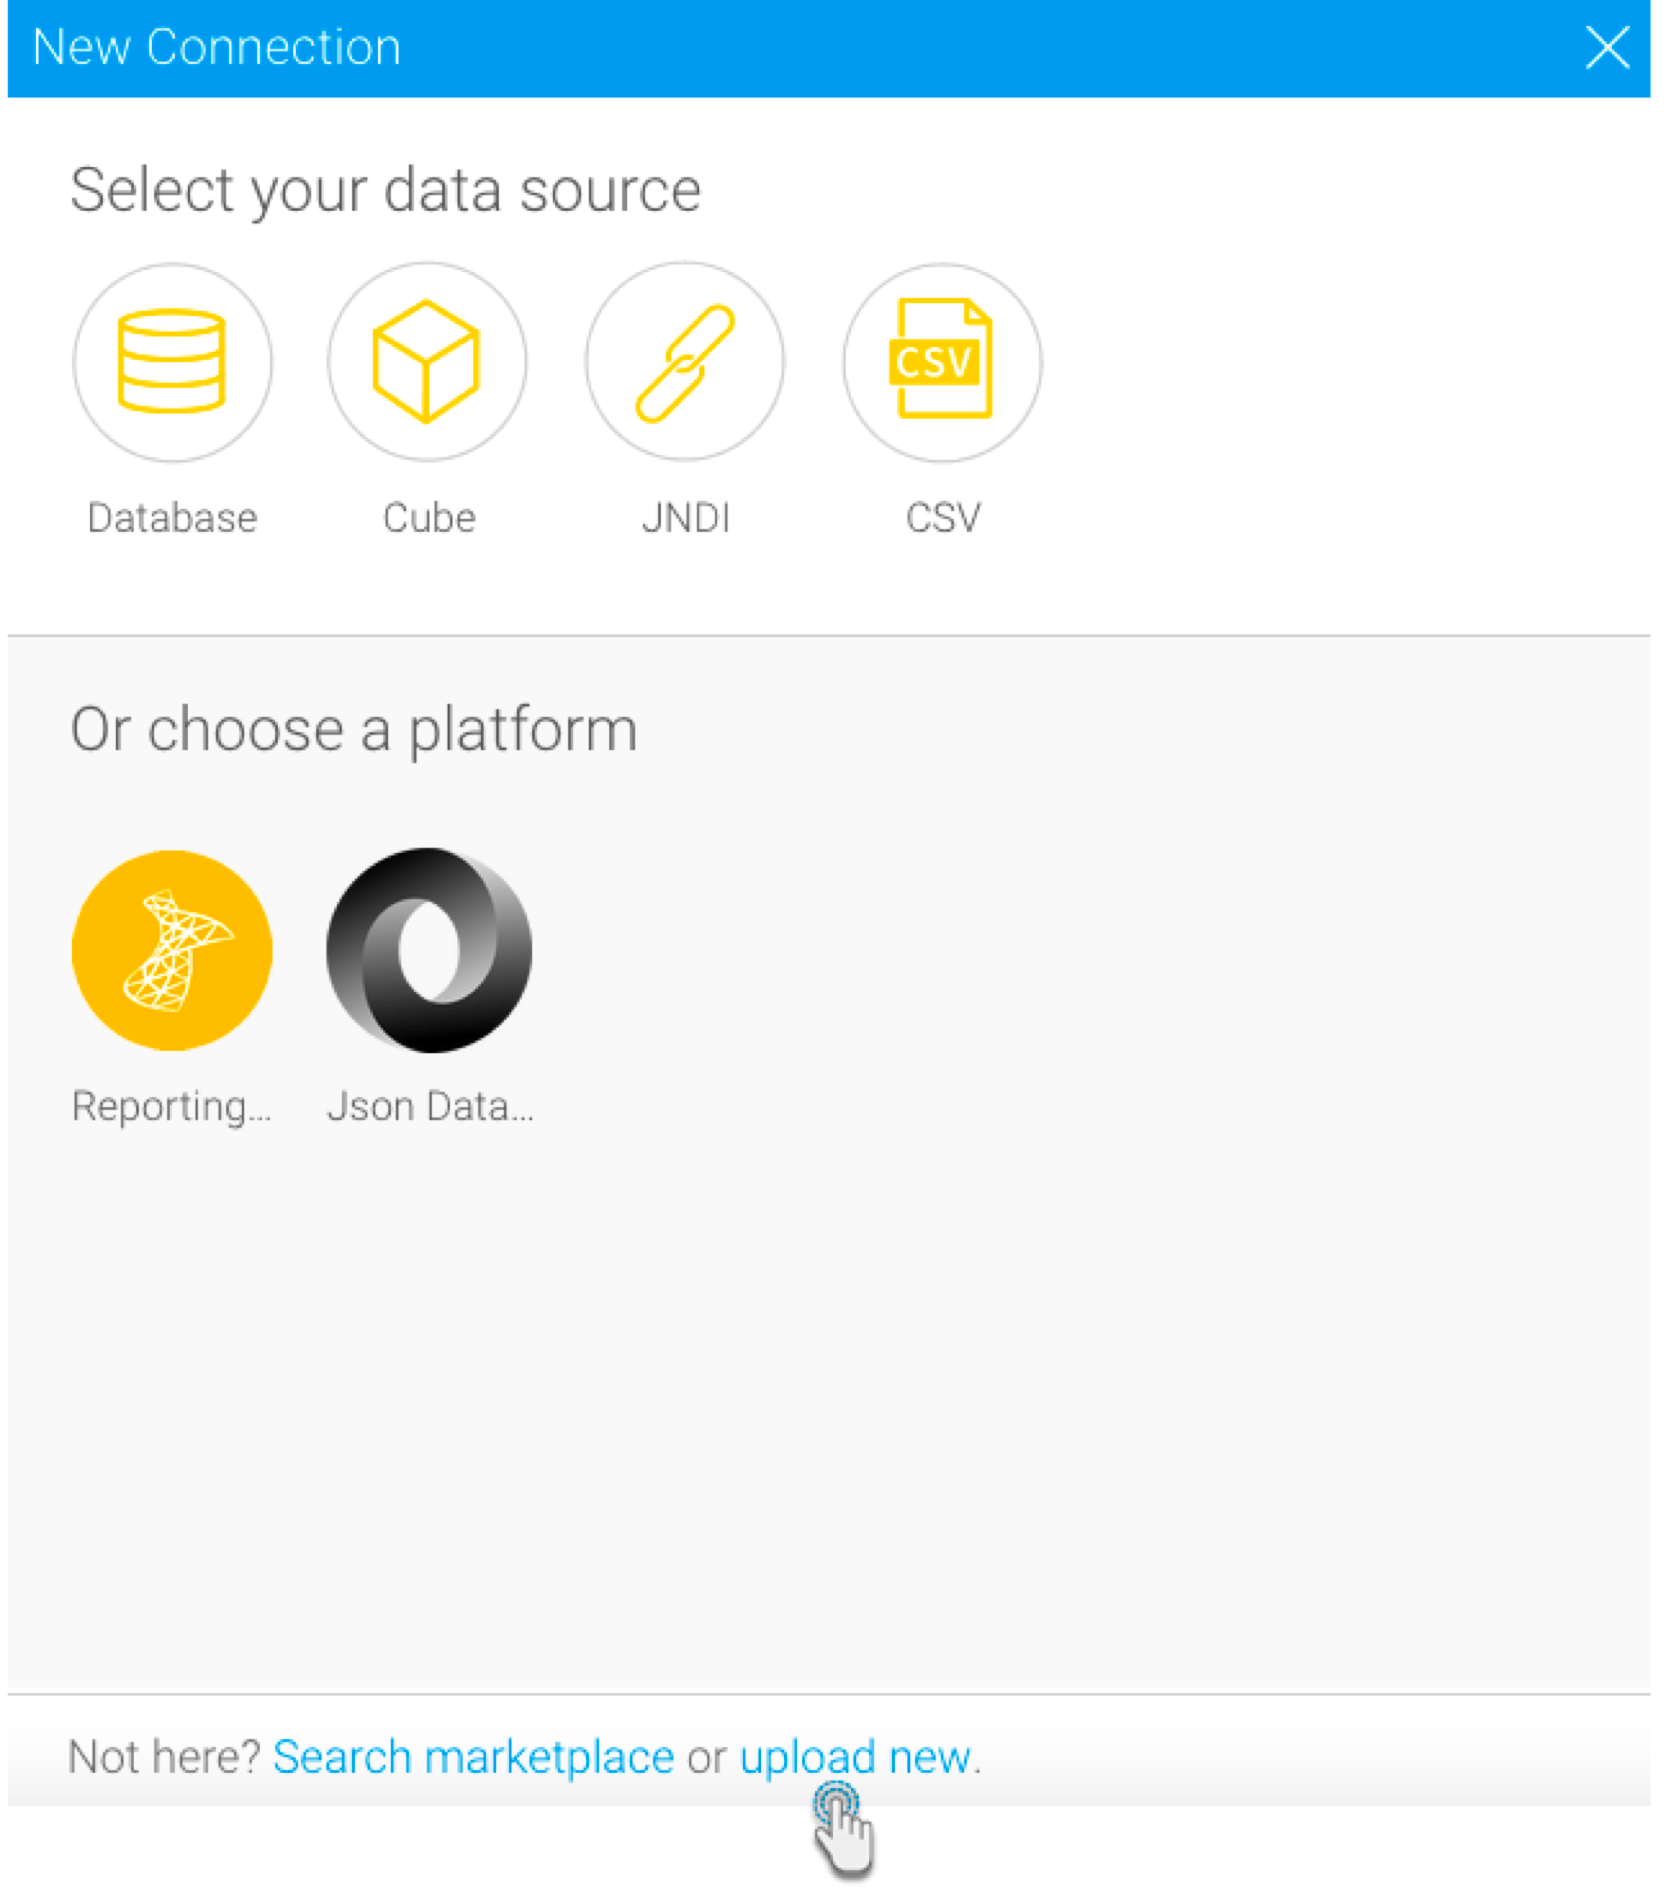
Note: You can also upload a new connector by following this Yellowfin path: Administration > Admin Console > Data Sources > Add
- In the new connection popup, either drag and drop the Xero connector file you downloaded from the marketplace, or click on the Browse Files link to browse and select the file
- Once the file has been successfully uploaded, click on the Connect Platform button

- Now you can create a Xero connection, as explained in the following section.
Create a Xero Connection
Next, you can continue by providing details of your Xero account.
- Either continue on from the previous step, or navigate through to Create New menu > Data Source to use the Xero connector
- Then click on the new Xero connector

- The following connection setting screen will appear

- Provide a suitable name for your connection
- You can also write a quick description, if required
- Copy the key that is to be uploaded to Xero from this screen

- Next click on the Go To Xero button to get redirected to your Xero account. If you're already logged into this account, you will access the Add an Application screen
- Use the Setup an Application panel on the bottom left to establish a new application
- Choose the private organization option
- Then enter a name for this new application
- Select your company from the list
- For the public key certificate, choose the default Paste In option and then paste the key you had copied from Yellowfin's connection setting page
- Select the terms and condition checkbox and click on Save

- On the next page, you will notice some new details, along with two keys on the right within the OAuth Credentials panel
- Click on the Show buttons for both these keys to reveal their full forms

- Copy the consumer key from here and paste it into the appropriate field on the Yellowfin form
- Do the same for the consumer secret
- Now you may perform the following additional tasks on this connection, although you are not required to: (Click on the menu button besides the Launch Pre-Built Content button to make a list of actions appear)
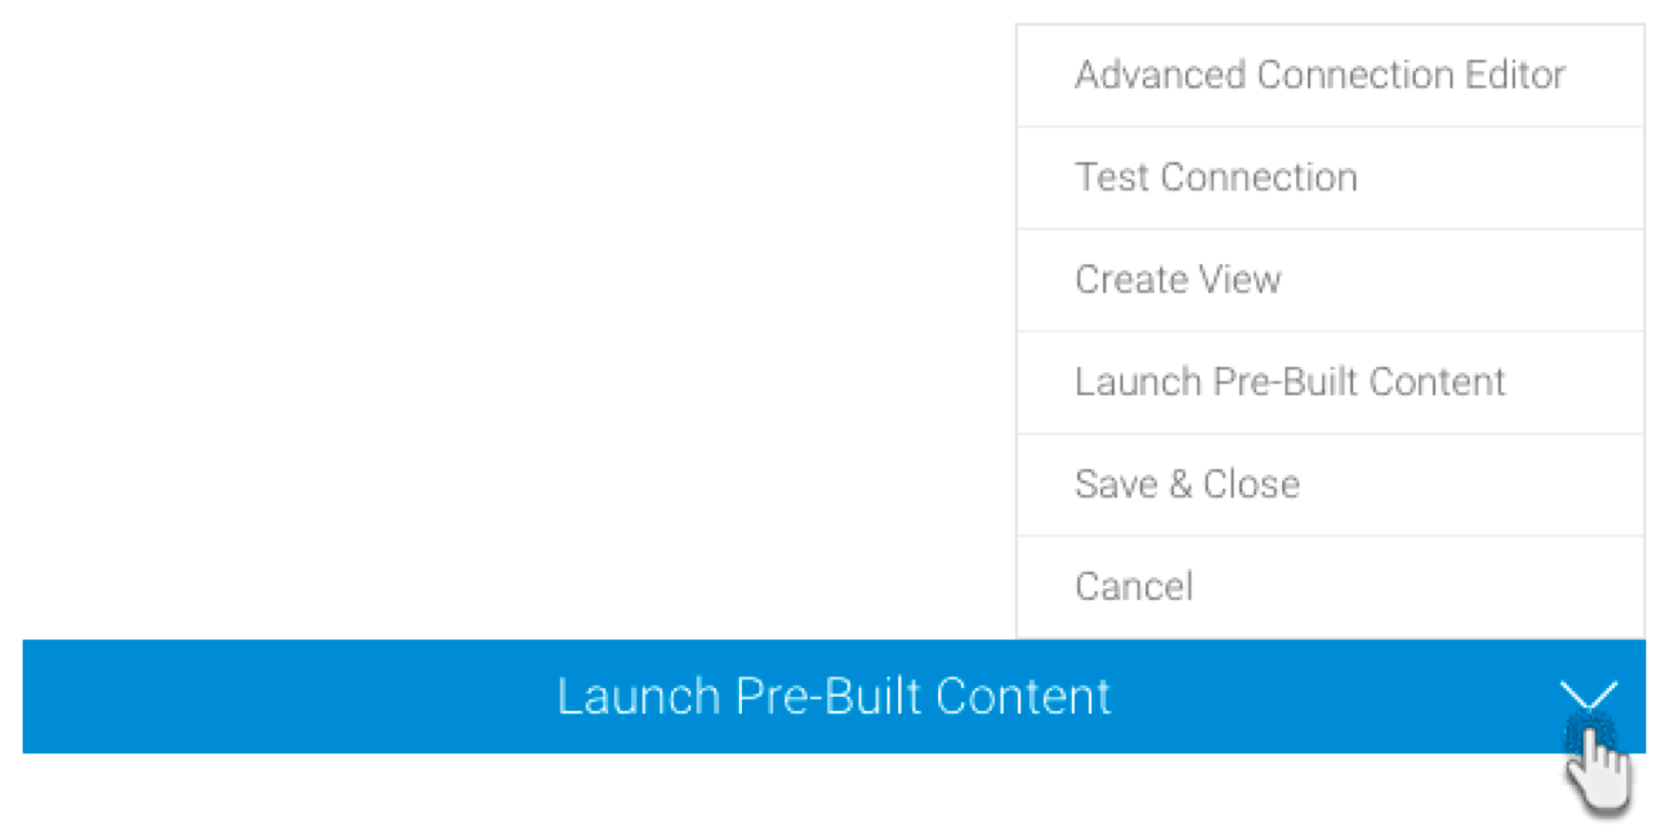
- Advanced Connection Editor: This will take you to the Data Source page in the Admin Console and allow you to edit all the advanced options available for your data source.
- Test Connection: This option lets you test out your Xero connection settings to ensure that you can connect to your data source. If successful, a message with your Xero's account details will appear.

- Create View: This re-directs you to the view creation screen.
- Launch Pre-Built Content: This allows you to install any pre-built content that may come with the connector.
- Save & Close: Use this action to save your connection details and return to the previous screen, closing the connection popup.
- Cancel: This closes the connection window without saving any details.
- We will proceed by clicking on the Launch Pre-Built Content button
- You will get redirected to Yellowfin's browse screen with the new Xero dashboard present there (Note: You might need to search for this dashboard, if its thumbnail cannot be seen right away)

If you access this dashboard, you will be able to view your Xero account data directly in Yellowfin (as shown in the example below)

Delete the Xero Connector
You can delete the Xero connector from your Yellowfin instance by following these simple steps below.
- Navigate to left side menu > Administration > Admin Console
- From the options listed on the right side, click on Plugin Management under Administration
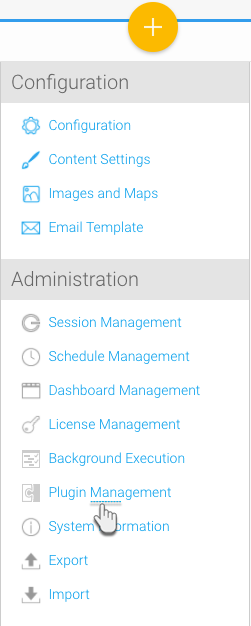
- At the Plugin Management page, select the checkbox for the Xero connector
- Then click on the delete button on the bottom right

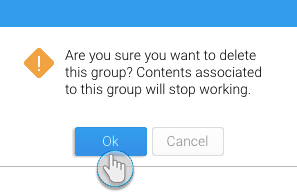
- Choose OK when the confirmation dialogue box appears
- Your Xero connector would be removed from the system