This guide shows you how to connect Yellowfin to an LucidDB database.
Yellowfin does not ship with the driver required for this connection due to licensing/paywall reasons. You will need to manually upload the driver through the Plugin Manager.
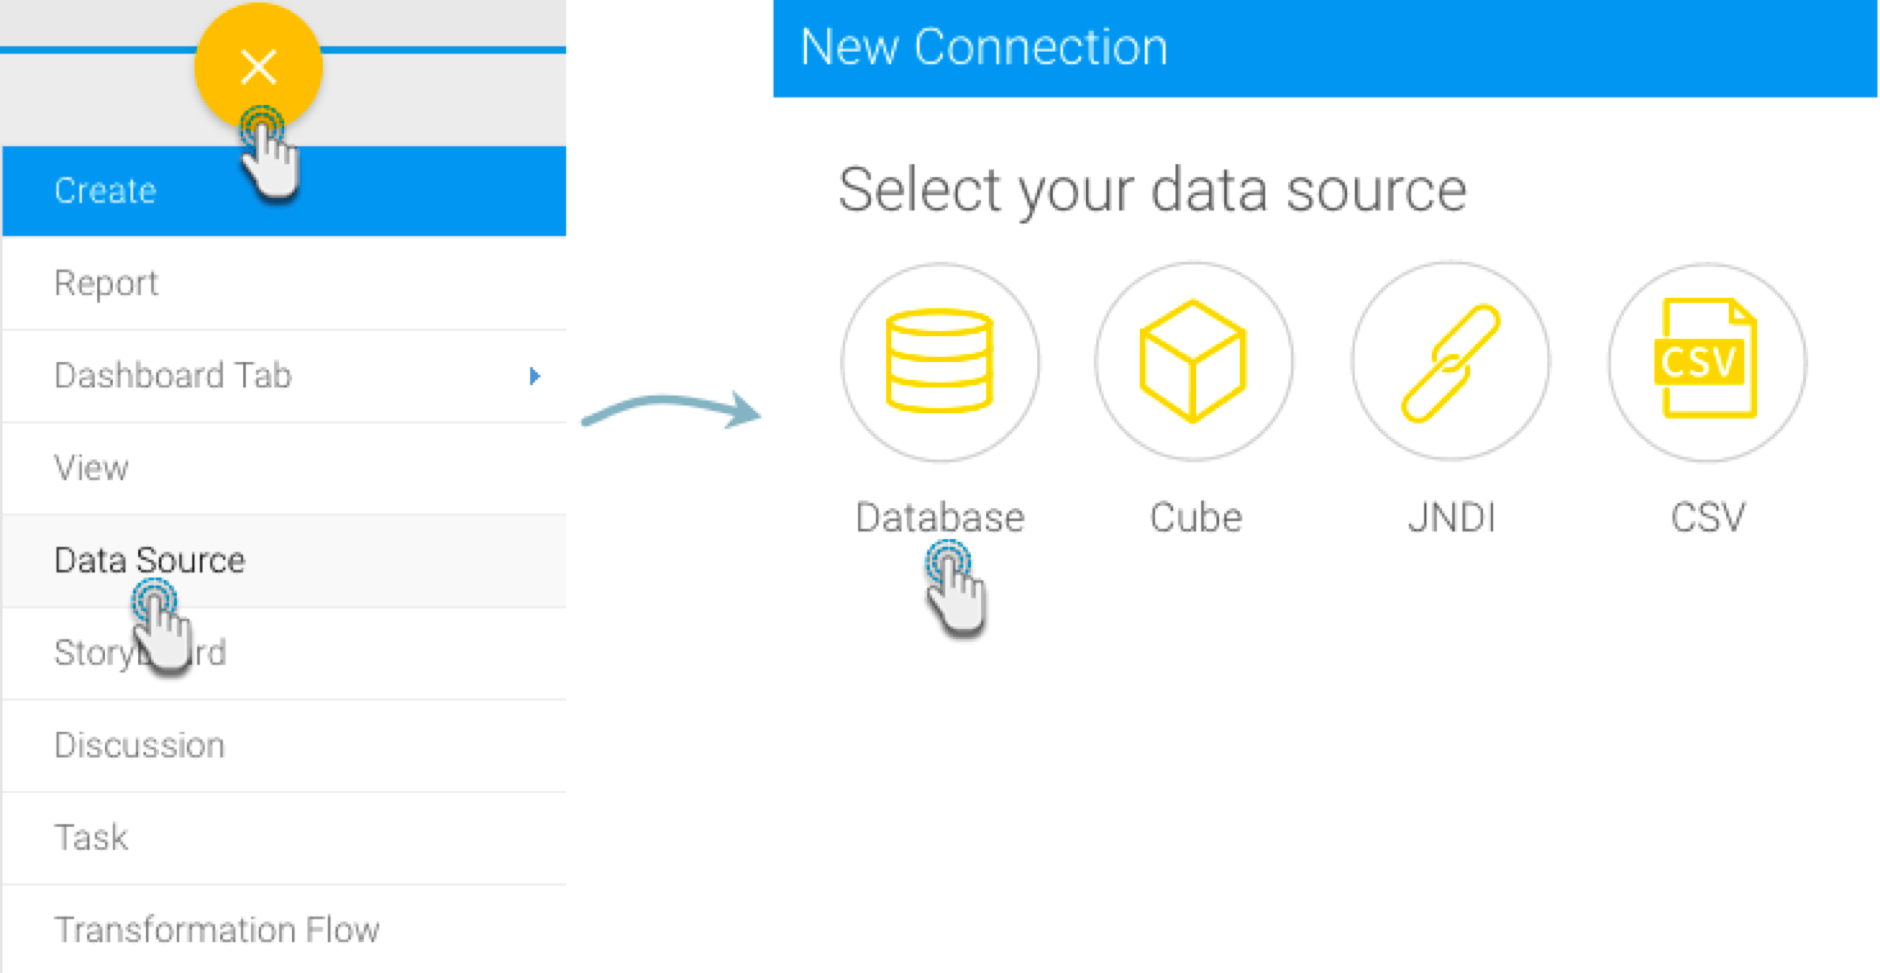
- Click on the Create button and choose the data source option.
- Then select the database option.
- When the New Connection popup appears, provide a name and description for your database.
- Choose Lucid DB from the list of available database options. New configuration fields will appear on doing so.
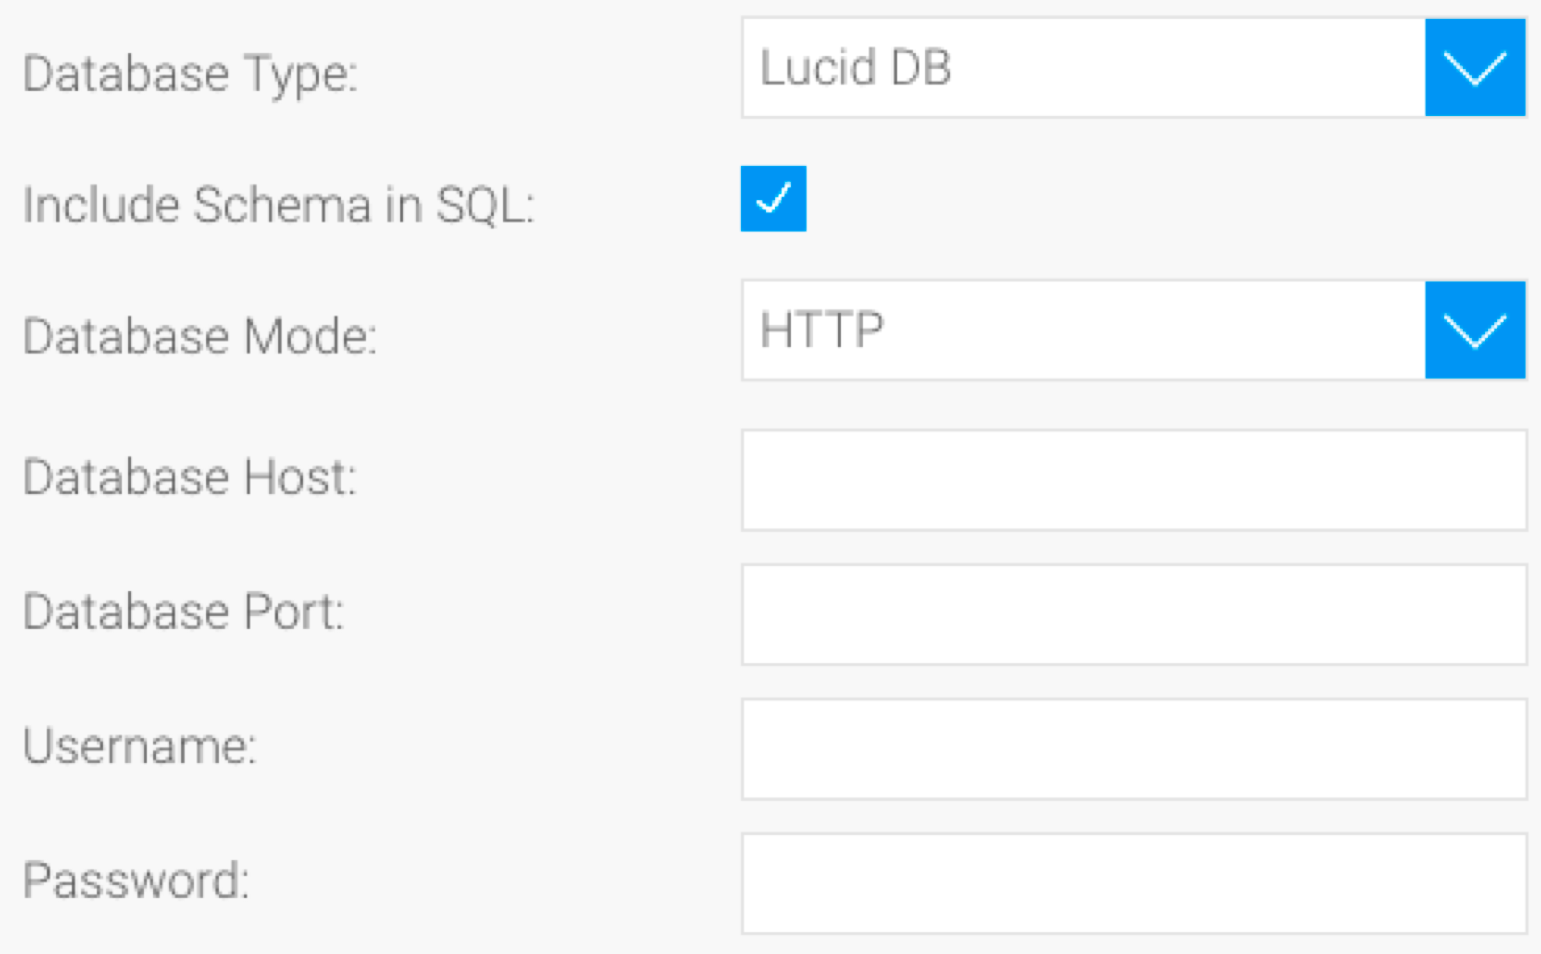
- Include Schema in SQL: Select this checkbox to add the schema name when addressing database tables in SQL queries.
- Database Mode: Select one of the two modes for the LucidDB database. A different driver will be chosen based on the mode selected here. One driver uses HTTP to communicate with the database, while the other uses Remote Method Invocation (RMI).

- Database Host: Enter the name or IP address of the server hosting the database.
- Database Port: Specify the correct TCP/IP port number for this connection.
- Username: Enter the username of your database account.
- Password: Provide the password of the above account.
- Once you have completed your connection information, you will have several options:
- Advanced Connection Editor: This will take you to the Data Source page in the Admin Console and allow you to edit all the advanced options available for your database.
- Test Connection: This will validate the connection parameters you provided to ensure it can connect to your database. If the connection was successful, a message will appear.
- Create View: This will save your connection and get you started on creating a view based on it.
- Save & Close: This will allow you to save your connection and close the New Connection popup, returning you to the page you were on previously.
- Cancel: This closes the New Connection popup without saving your connection, returning you to the page you were on previously.
- We recommend testing the connection, and then saving it by using the Save & Close button.