Follow the instructions below to connect Yellowfin to a Snowflake database.
Yellowfin does not ship with the driver required for this connection due to licensing/paywall reasons. You will need to manually upload the driver through the Plugin Manager.
- Click on the Create button and choose the data source option.
- Then select the database option.

- When the New Connection popup appears, provide a name and description for your database.
- Choose Snowflake from the list of available database options. New connection parameters will appear on doing so.
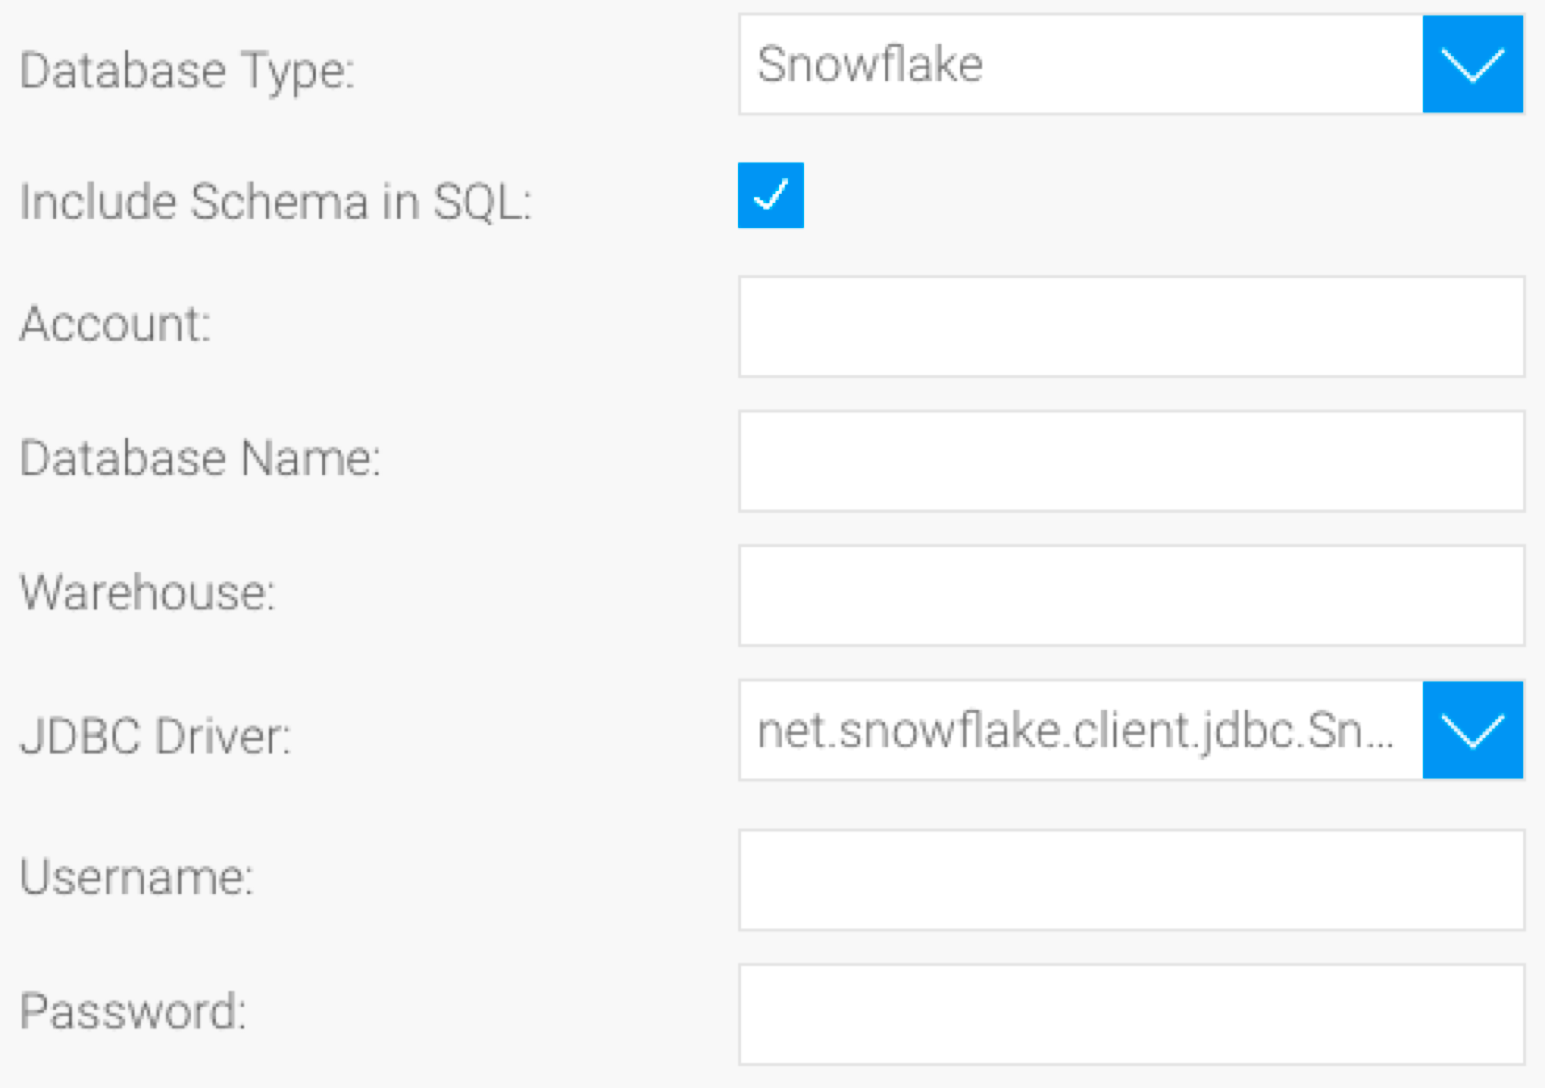
- Include Schema in SQL: Select this checkbox to add the schema name when addressing database tables in SQL queries.
- Account: Specify the name of your Snowflake account. The value you provide here depends on the region your Snowflake database is in. If it is in the US West Region, then specify the account name. For all other regions, specify the account name with region ID, separated by a dot (that is, in the format: <account_name>.<region_Id>).
- Database Name: Specify the name of the default database to use, once a connection is made (should be an existing database), or ‘nodb’.
- Warehouse: Provide the name of the virtual warehouse to use once connected (should be an existing warehouse), or ‘nowarehouse’.
- JDBC Driver: The JDBC driver to talk to your Snowflake database.

- Username: Enter the username of your database account.
Password: Provide the password of the above account.
If you require further clarification on the above parameters, refer to Snowflake’s website: https://docs.snowflake.net/manuals/user-guide/jdbc-configure.html
- Once you have completed your connection information, you will have several options:
- Advanced Connection Editor: This will take you to the Data Source page in the Admin Console and allow you to edit all the advanced options available for your database.
- Test Connection: This will validate the connection parameters you provided to ensure it can connect to your database. If the connection was successful, a message will appear.
- Create View: This will save your connection and get you started on creating a view based on it.
- Save & Close: This will allow you to save your connection and close the New Connection popup, returning you to the page you were on previously.
- Cancel: This closes the New Connection popup without saving your connection, returning you to the page you were on previously.
We recommend testing the connection, and then saving it by using the Save & Close button.