Follow the instructions below to connect Yellowfin to an Infobright database.
Yellowfin does not ship with the driver required for this connection due to licensing/paywall reasons. You will need to manually upload the driver through the Plugin Manager or Creating a Basic Data Source Connection.
1. Click on the Create button and then on Data Source. 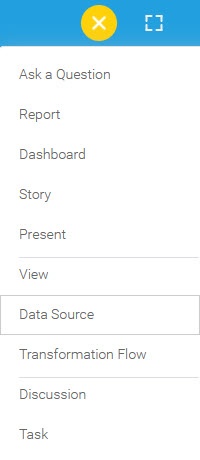
2. Select Infobright from the databases list.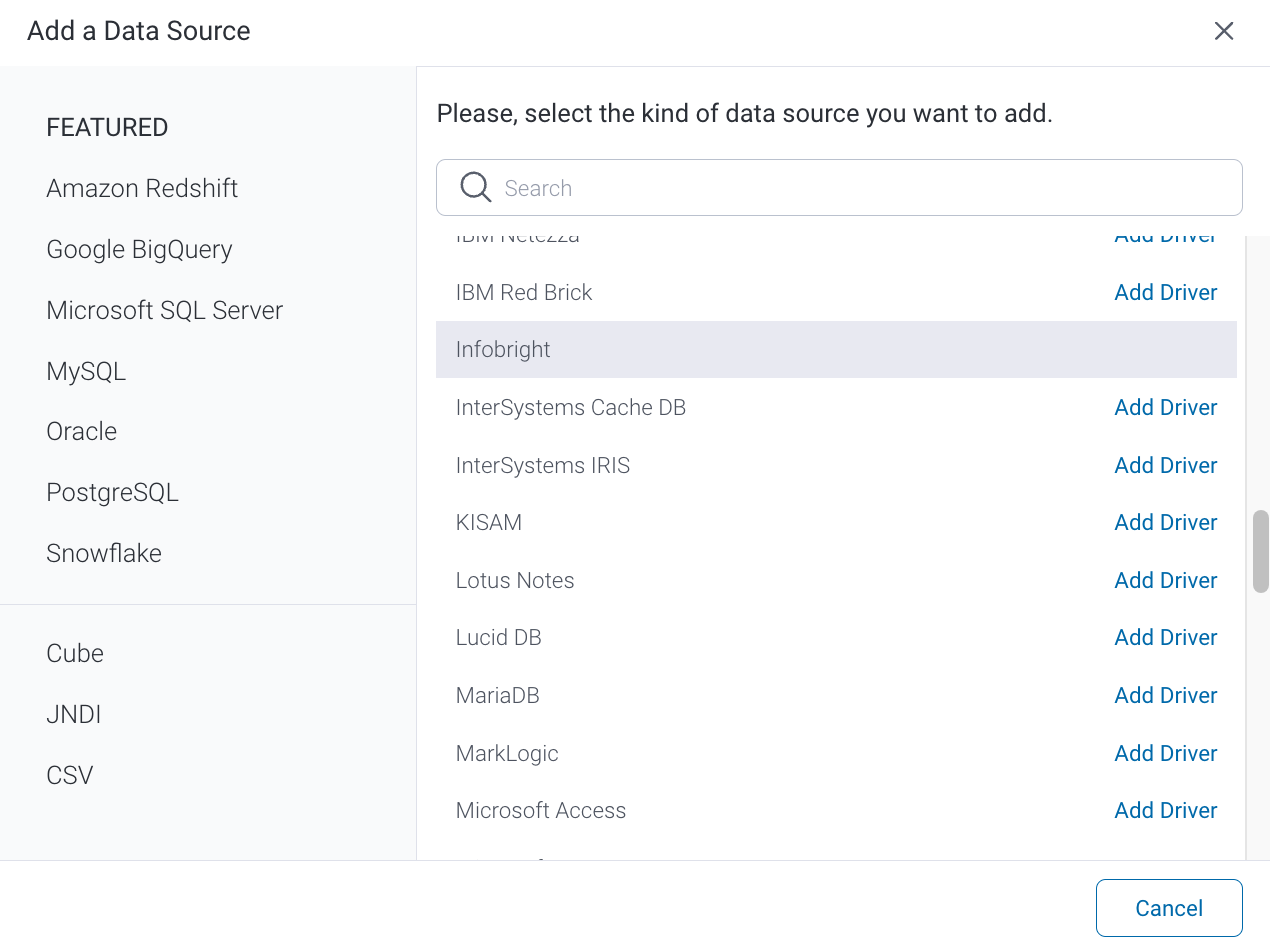
3. When the New Connection popup appears, provide a name and description for your database.
4. Connection String: when selecting Connection String you have the same functionality as in Generic JDBC Data Source.
5. Infobright configuration fields.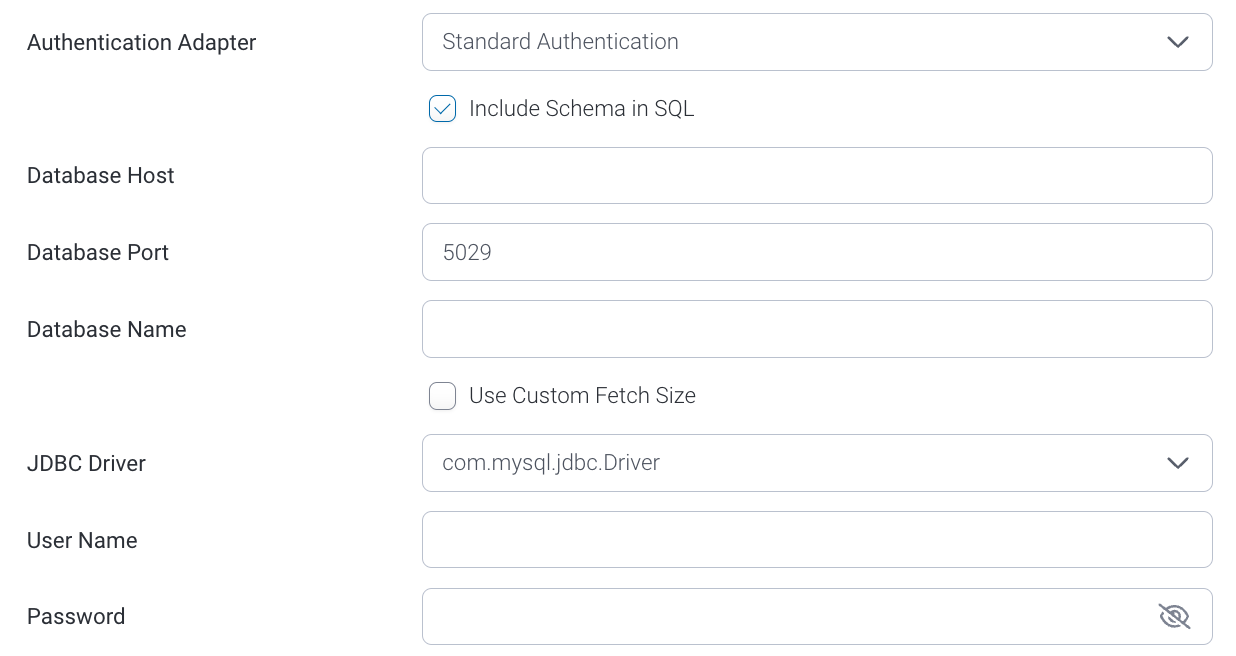
6. Authentication Adapter: Specify an authentication method for the database adapter. More details Advanced Connection Editor.
7. Select the Include Schema in SQL checkbox to add the schema name when addressing database tables in SQL queries. 
8. Next, enter the name of the server hosting the database.
9. The TCP/IP port number required for this database will already be displayed.
10. Specify the name of the database containing the data that you require.
11. Select the Use Custom Fetch Size checkbox if you want a specific number of data rows to be retrieved from the database after a query is executed, instead of fetching its entire result. Specify the number of rows.
12. Yellowfin will automatically select the correct JDBC driver to talk to your Infobright database.
13. Enter the username and password of your database account.
14. Toggle Advanced Settings to see more settings.
15. Once you have completed your connection information, you will have several options:
- Back: This will navigate to the database selection.
- Cancel: This will close the New Connection popup.
- Test Connection: This will test the connection parameters you provided to ensure it can connect to your database. If the connection is successful, an indicator will appear and you will be able to save the connection.

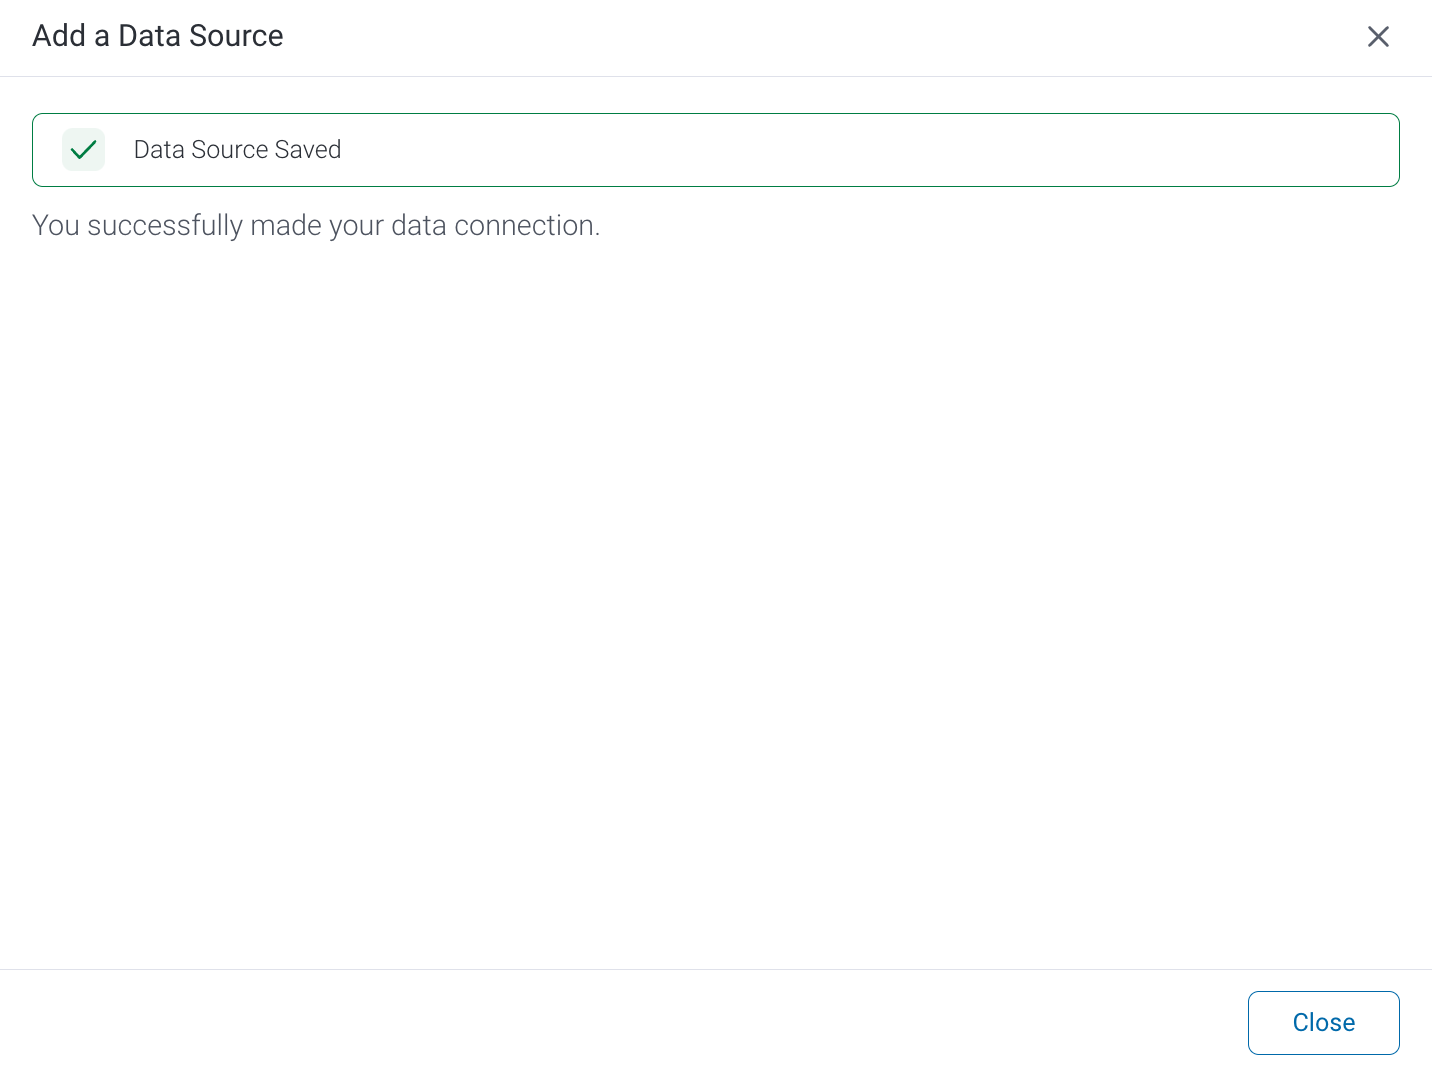
- Save: This will allow you to save your connection and navigate to the Success page: