Overview
| Option name | Option description |
|---|---|
| Client Organization Functionality | This enables the Client Organizations features of Yellowfin. If it is not enabled, Yellowfin ignores this functionality altogether. |
| Global Annotations | This option is only displayed when Client Organization Functionality is enabled. Annotations on reports are normally only shared with other members of a single organization, even if a report is visible to members of other organizations. Enabling Global Annotations here means shared reports also have annotations attached to them shared. Learn more about annotations. |
Activating Client Org functionality
To start using client organizations, enable the feature via the Administration area of Yellowfin, then check that role permissions are enabled for any users who might need to manage client orgs.
Enable client organizations
Anyone with Yellowfin administrator rights can enable client orgs. Follow the steps below.
- On the left-side navigation pane, click on Administration, then Configuration.
- Click on the Authentication
 tool along the top of the screen, then click on the Client Organizations section to display the following options:
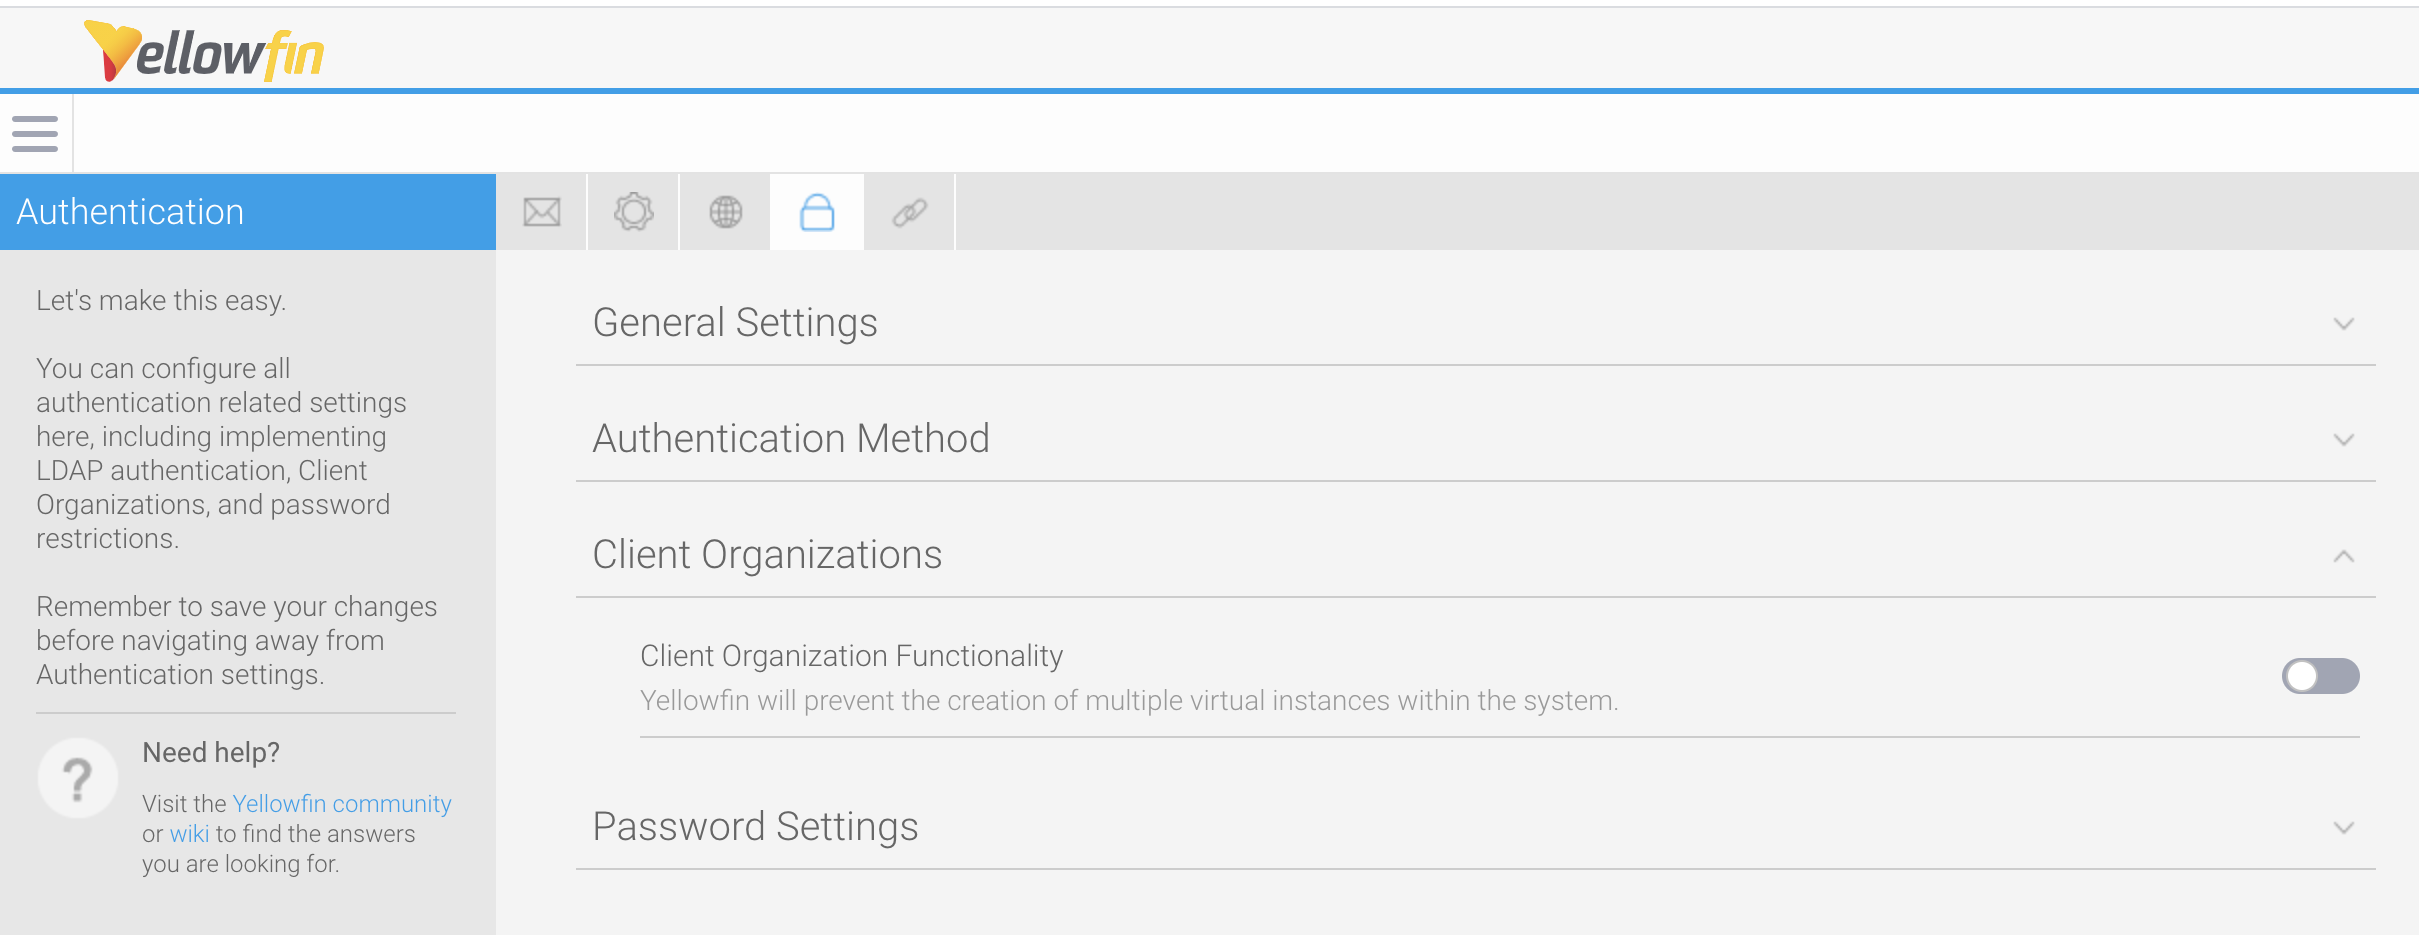
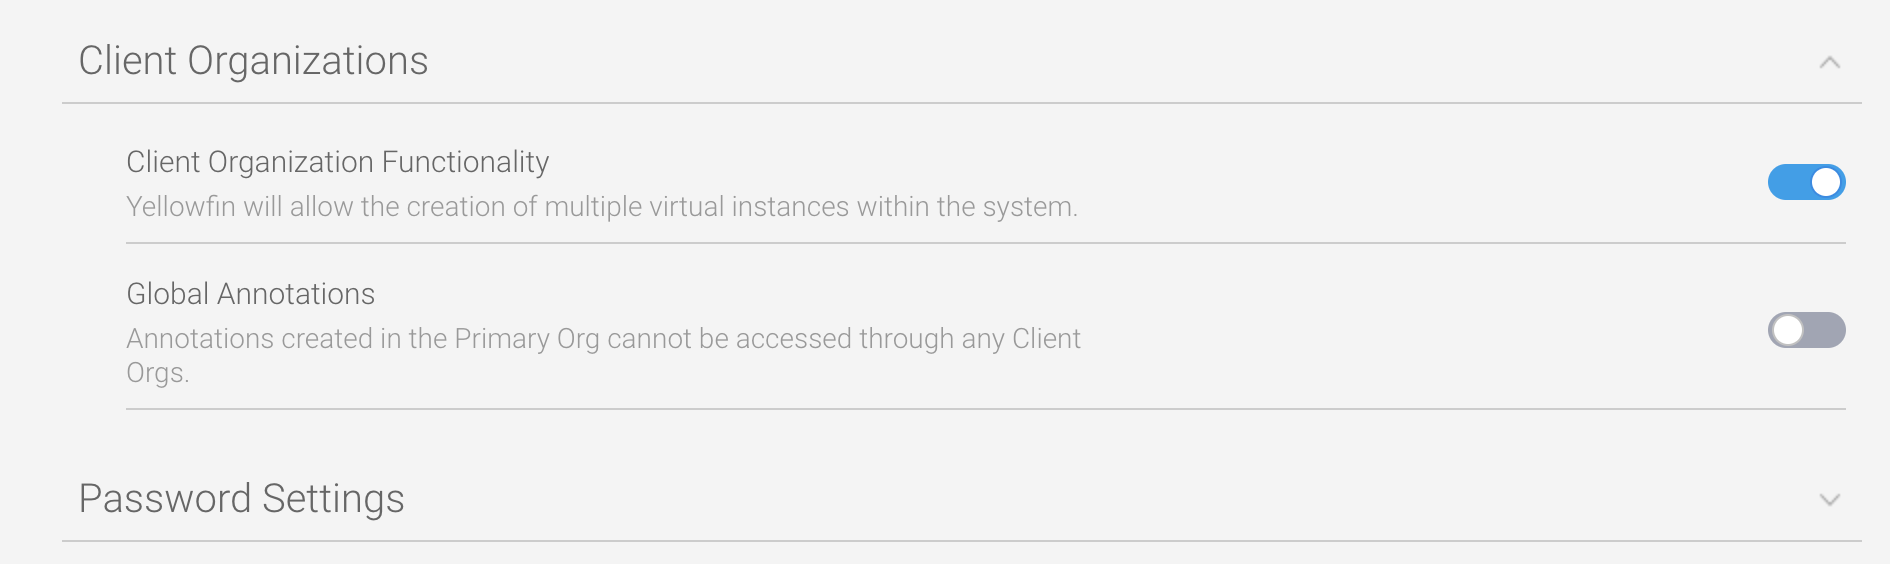
- Click on the toggle for Client Organization Functionality. Also choose whether you'd like to enable global annotations via the Global Annotations toggle (see table above for more info).
Check role permissions are enabled
A system administrator would typically manage client orgs, so end-users usually don't need this functionality. However, you can assign options to different roles, including access to create ("C") new client organizations, view ("R") existing client orgs, update ("U") the details of existing client orgs and delete ("D") any client orgs.
To check or enable the required role permission to manage client orgs, follow these steps.
- On the left-side navigation pane, click on Administration, then Admin Console.
- Click on the Roles section and select the role you wish to grant access to, which will open the Role Management page.
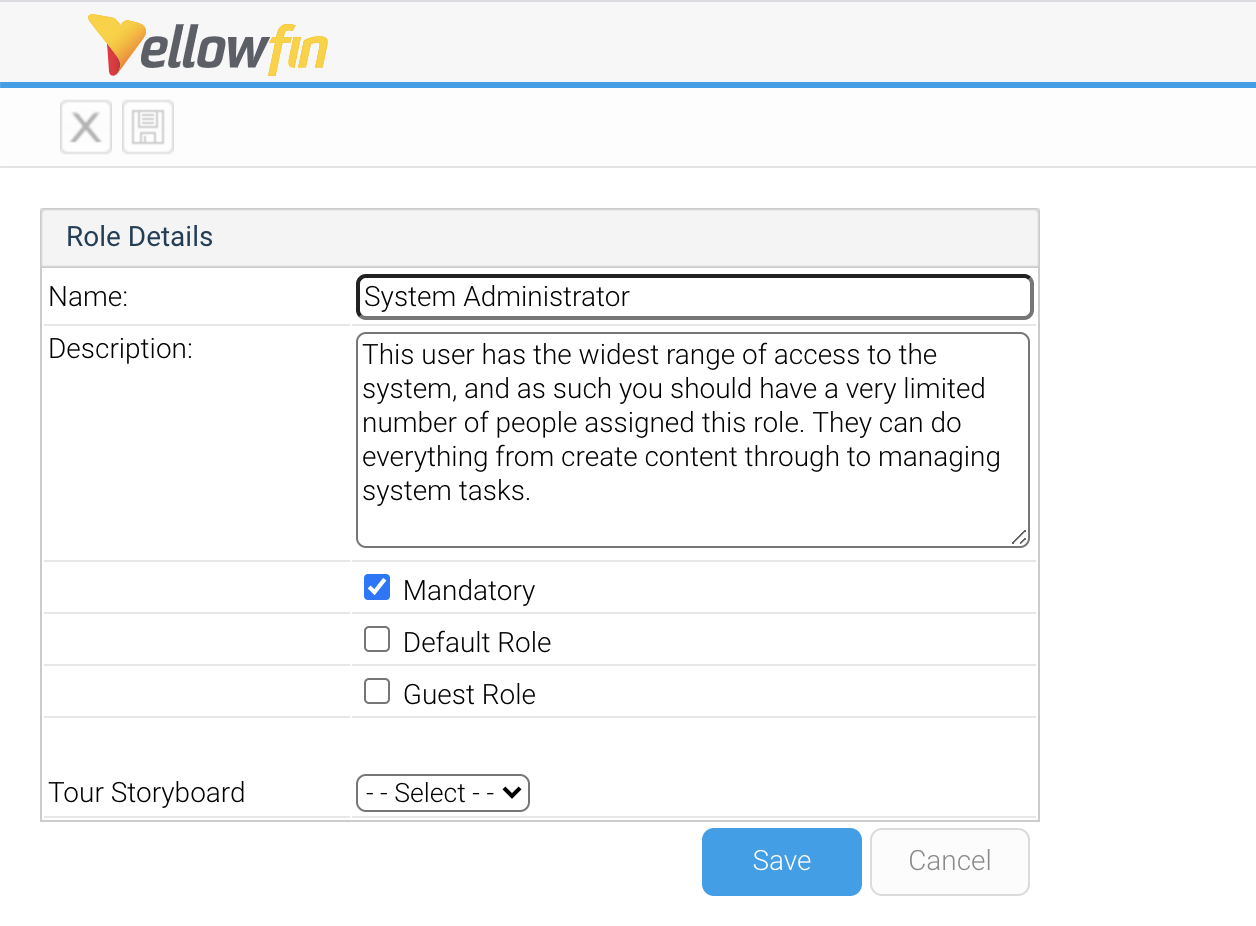
- Scroll down to the Administration section and click on it to expand the role permissions.
- Check the box for Client Organization Management, then check any required permissions (C, R U and/or D, described above).

- Scroll up or down to the Save button and click on it to save your changes.
If the changes apply to the role you're currently logged into Yellowfin with, you will need to log out and back in again for the changes to take effect.
Creating client organizations
Once you've enabled client orgs, you can create individual client orgs with their own time zone, style, name and more. Before you begin, there are several fields to define.Client Reference ID
A client org is identified by a Client Reference ID. This is an arbitrary text identifier of characters, numbers or both, assigned when the client org is created. This ID must uniquely identify the org across the entire system and may not be left blank. The Default Org is an exception to this, as the ID is initially blank, but can be defined at any time.
Generally, the Client Reference ID should be an internal, unique code that you use to identify a client. Yellowfin can use this code to filter reports based on which client a user has logged into. A display name for the client is also set, which may be different to the ID.
Users
A user must first be created in the system before they can be added to a client org. They can be created either at the primary org or client org level. When a new user is created, they are automatically assigned access to the organization they were created in. If users were created before client orgs were enabled, they will need to be manually added to any client orgs they require access to. Once created in Yellowfin, users can be assigned access to any org (primary or client) in the system.
Groups
By default, user groups can only contain users who have login access to the client org containing the group. For example, if an administrator creates a group for Client 1, only users of Client 1 can be added to the Group, Client 2 Users will not.
However, groups can also be set to be visible across all organizations in an instance. In this case, if an administrator creates a group for Client 1 and sets it to be visible at client organizations, users of both Client 1 and Client 2 can be added to the group. For further details...
When you are ready to create a new client org, follow the steps below.
- On the left-side navigation pane, click on Administration, then Client Organizations to display the Client Organizations page.
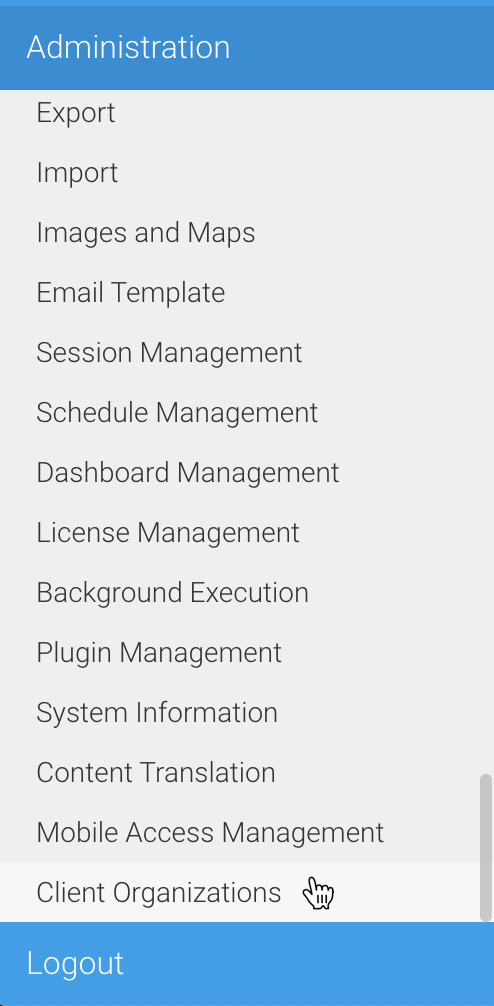
The Client Organizations page will appear: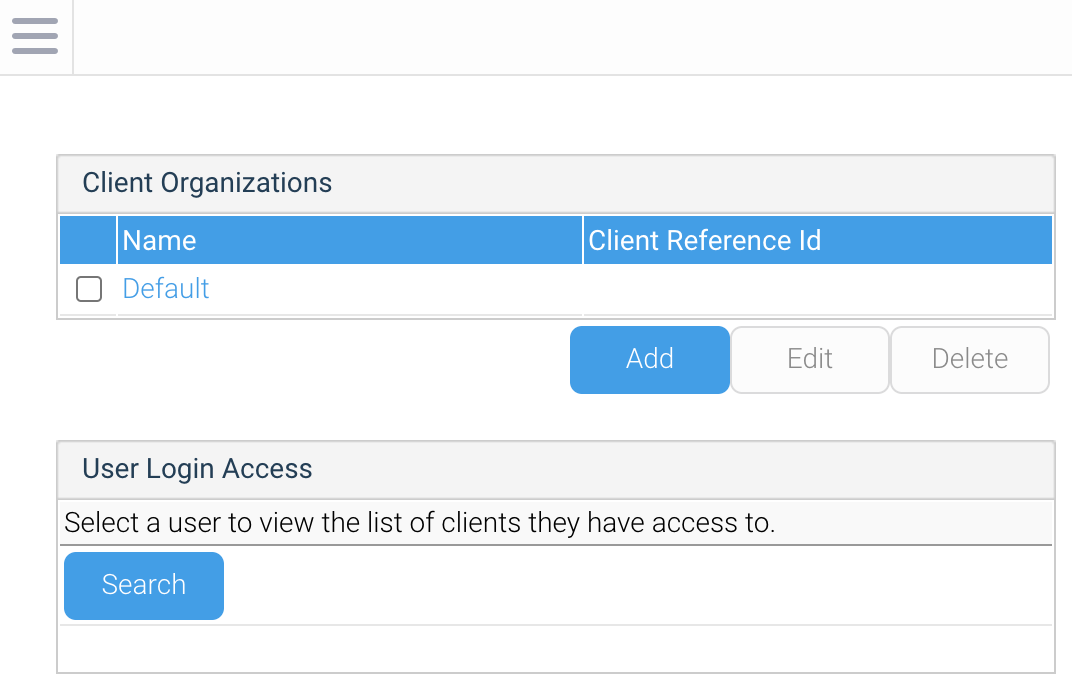
- Click on the Add button, which will open another new window:
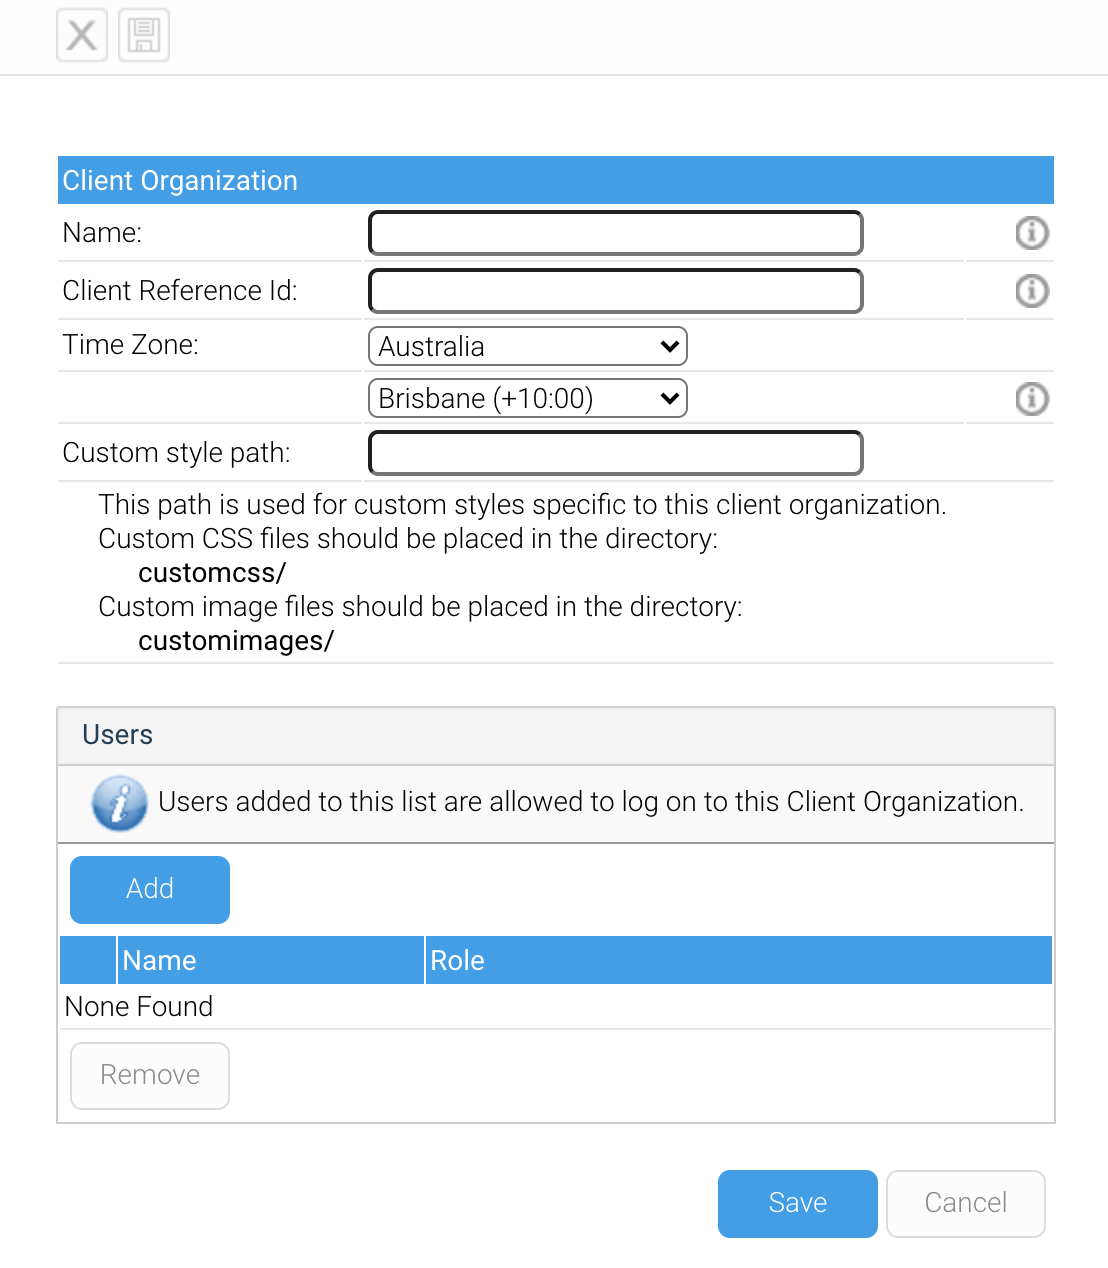
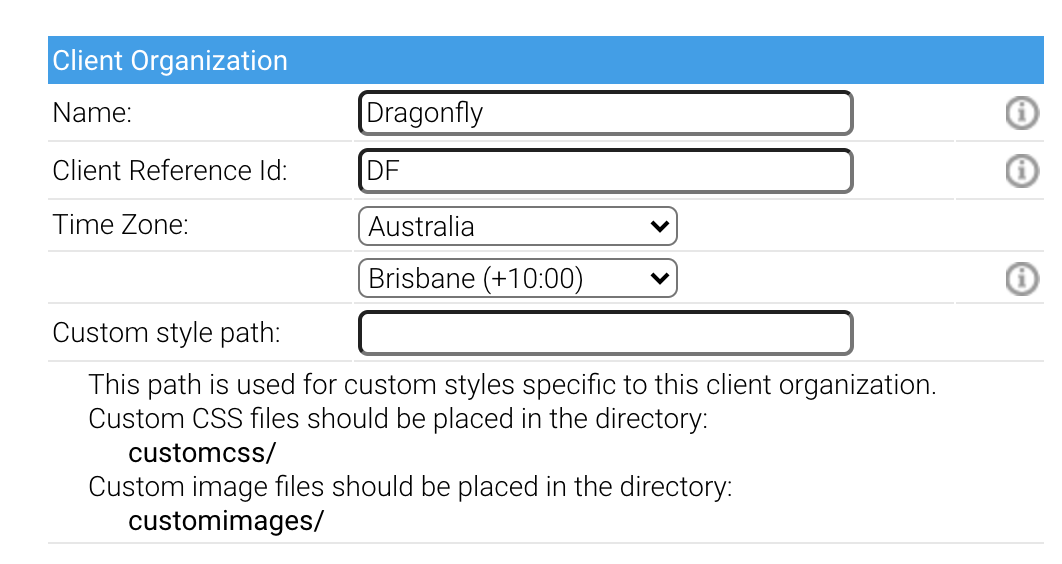
- In the Name field, type the display name for the client organization.
- In the Client Reference ID field, type used to uniquely identify the client org. This can be characters, numbers or a mix of both. Use whatever works best for your environment.
- In the Time Zone field, set the correct time zone according to GMT. This is used as the default time zone when new data sources and users are created within this client org.
- In the Custom Style Path field, you can provide a path to a custom style sheet for this client org. This field is not mandatory.
- Click on the Add button to add any exiting users who should have access to this client org.
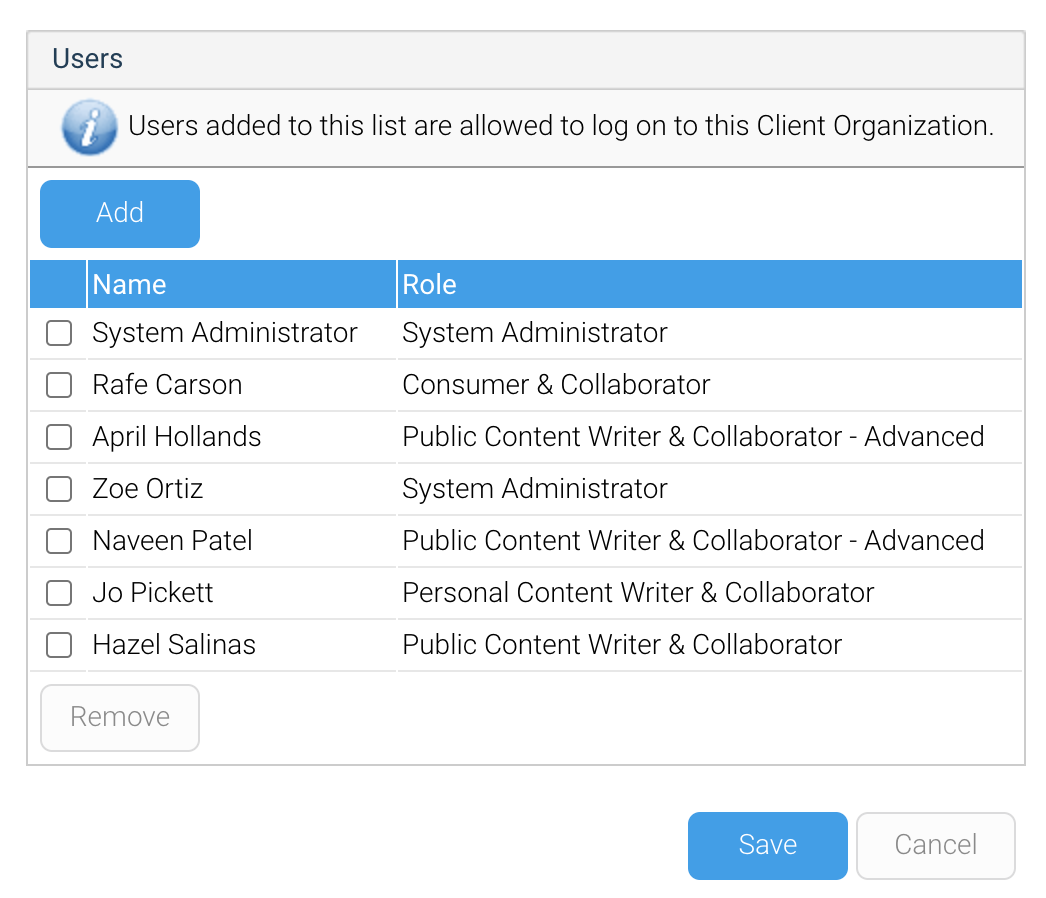
- Click on the Save button to save the new client org details.
Access to client orgs
A user may only ever log into one organization at a time, even if they can access more than one organization. As part of the login process, Yellowfin checks which orgs the user can access. If they have access to a single org, they will automatically be logged into that org. If, however, they have access to multiple orgs, they will be prompted to select an which organization they would like to access: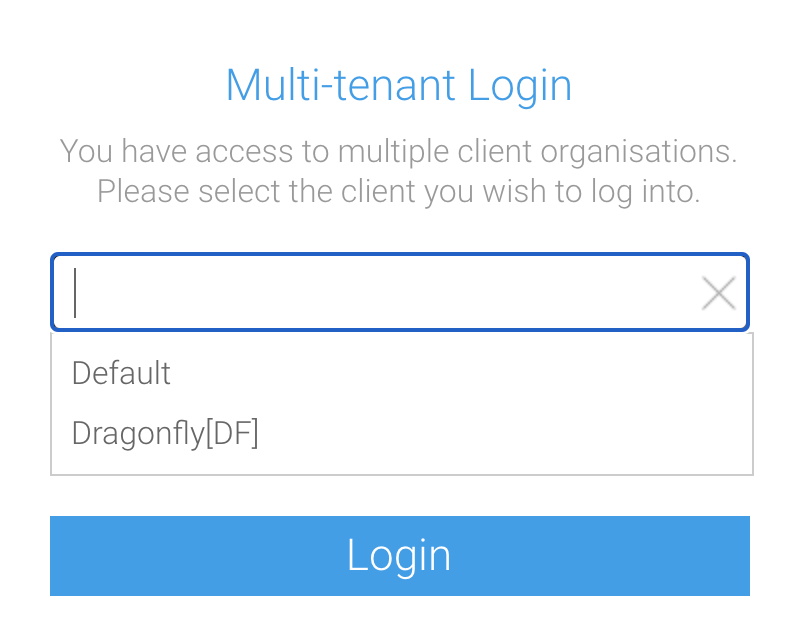
Note
If you wish to specify which org the user logs into, this selection screen can be bypassed using a custom login page, or with web services.
Content visibility between orgs
Content created at the primary organization is shared to all clients, so a user logging into a particular client will be able to see any content created at that client, as well as any content created at the primary organization.
See Content Management for more information.
Securing Primary Org Content
It is possible to assign access permissions to content located in the primary org by securing the Content Categories it's stored in, based on Client Org User Groups.
See Primary Org Content Security for more information.
Group visibility between orgs
From Yellowfin 9.4, groups can be set to be visible to more than just one organization, if desired. If you choose to enable this option, client org privacy is enforced. For example, users from one organization will not be able to see users in the same group from any another organization.
See User Groups for more detailed information.
Configuration Options
Note
Some configuration options are only applicable to the primary organization, and will not be shown when logged in to a client.
Any changes to primary organization configuration may be optionally applied to any client organizations. Below are the steps to control this functionality, presuming you're an admin of the primary org with the typical default access to manage client orgs.
- Make a change to any of the primary org config options. In this example, we added a language.
- Click on the Save button to save your changes.
Before the configuration update is save, you'll be prompted to select whether you wish to apply the update to client orgs: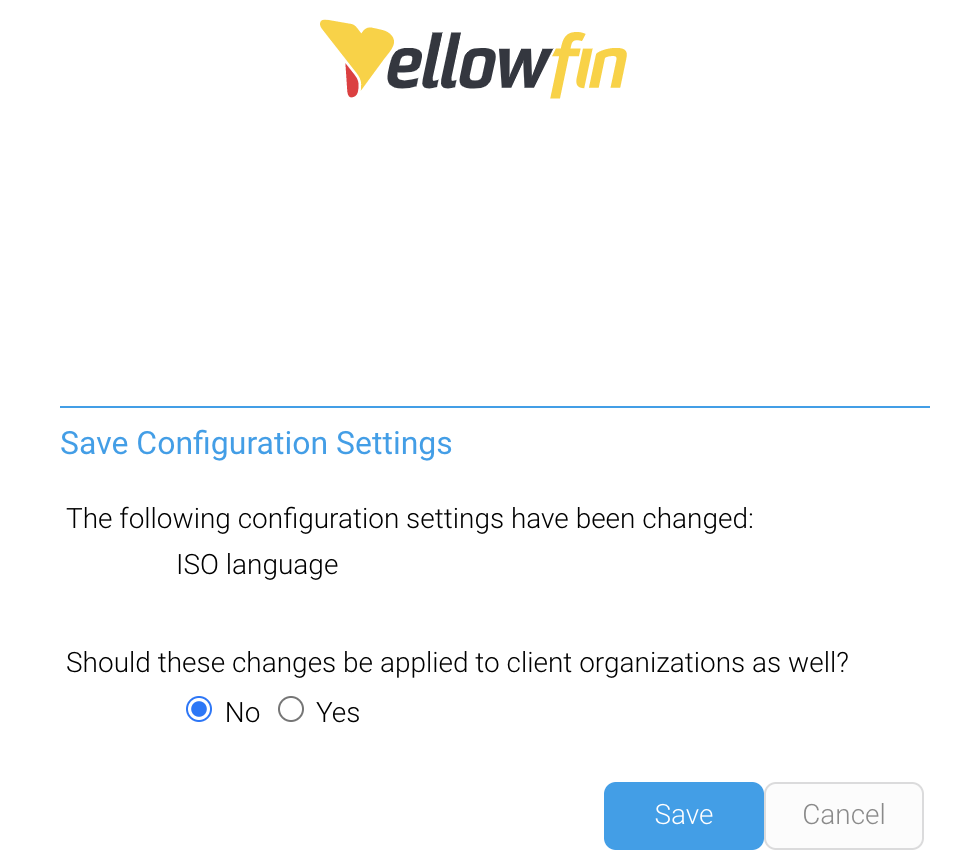
- Click on the Yes radio button.
A further prompt will appear, asking you to choose which client orgs to apply the changes to: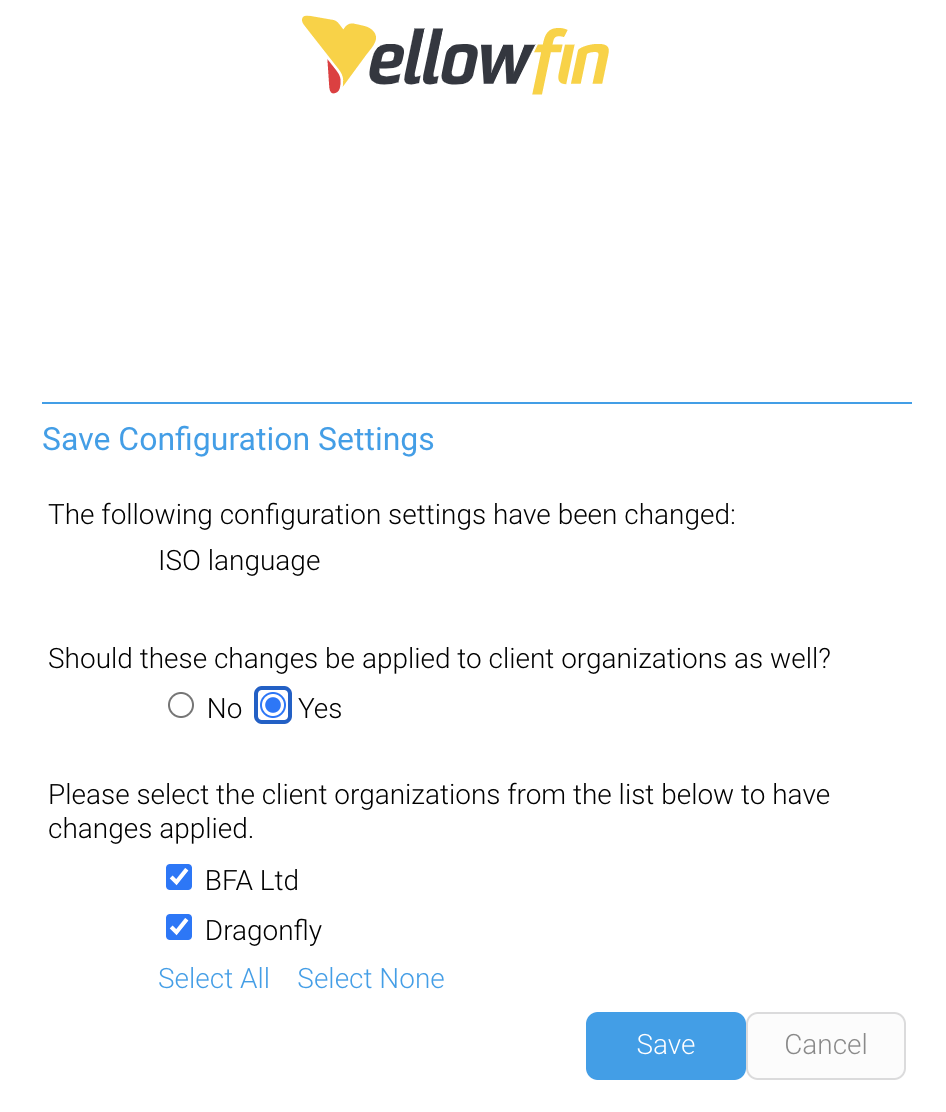
- Click on any client orgs you wish to include in the configuration change, then click on the Save button.
Displaying current client organization
For users who access more than one client org and routinely move between different client organizations, it may be useful to display which client a user is currently logged in to. To enable this display, follow the instructions below.
- On the left-side navigation pane, click on Administration, then Configuration.
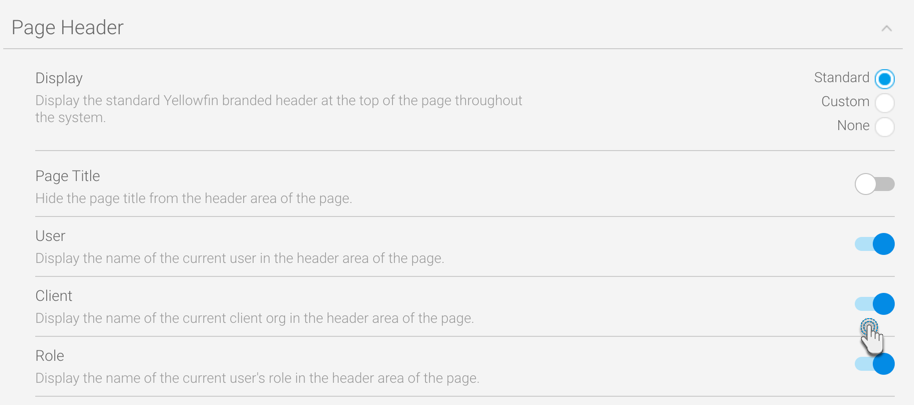
- Click on the Integration button, then click on the Page Header section to expand it.
- Click on the toggle for Client to enabled it, then save the changes. There are also options to display the name and role of the current user:
Using the example above, the following items would be displayed in the standard Yellowfin header:
![]()