Page History
| Table of Contents | ||
|---|---|---|
|
Overview
Once your story is ready, you can publish and share it. This involves activating the Story to make it available to other users besides the collaborators.
...
When publishing, you can choose to make the story publicly accessible to all Yellowfin users, or a specific bunch set of users by setting the access rights to the story accordingly.
Once you are ready to publish your story, follow these steps.
- Click Publish at the top-right corner of the story builder.
- In the new popup, you can enter or edit the story title. (If your story already has a title, the first field will display it; if you change the title, it will be updated in the story as well. If no title is provided, your story will be named 'Untitled Story'.)
- Provide a description for the story to assist users with understanding its purpose and content.

- Select a folder and sub folder to save the story into. You will only be able to select folders you have access to.

- Choose a story access setting:
- Public: permits permits all users with folder access to be able to view this story.
- Private: the the author/collaborator may assign users access to the story. In this case, a new User Access tab will appear, allowing you to add specific users.

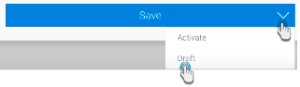
- Click the Save button to save and activate the story. Note: you can save your story as a draft and activate it at a later time, by expanding the drop down button next to Save and choosing Draft.
- Once a Story is published, you can view its author, editors, and collaborators at the bottom of the page.
...
Story Approval
For utmost security and data governance, you can set up your process so that your Stories will require approval before they're published and made available to the users. This is achieved by saving the Story into a private content folder. Only once a Story is approved, will it get published for readers. Also note that when a Story is pending approval, it can still be viewed and edited by its author and collaborators.
Each content folder only has one approver. If a user group gets assigned to approve Stories, the group member with the least number of tasks gets appointed as the content approver.
| Note |
|---|
Any user with the Approval Admin role function will also be able to approve a story besides the appointed approver. |
Approvers can only review the Story without making any changes to it. Following outlines the approval workflow:
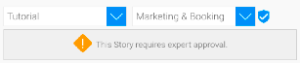
- The author/collaborator publishes the story, selecting a secure folder to save it into. A message will appear on doing so (this only appears if the user saving this Story is not the approver of the folder). Note: Secure folders can be identified with the security icon next to them.
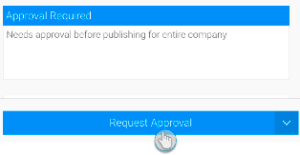
- Enter a message to be sent to the approver with this request, and click the Request Approval button.
- The approver will get a message on their timeline, notifying them of this update.
- On accessing this story, they will see it in its Preview mode. If the approver is happy to approve the Story, they will need to click on the Approval Required button.

- This brings up the approval message in the Activity Panel. (Simultaneously, this panel message will also come up if the approver clicks on the Timeline message for the Story.)
- Click Approve if the Story is ready to be published.

- Once approved, users with rights to the Story will be able to view it. Approved Stories also include the name of the approver, increasing the reader's trust in the information shared.

- Alternatively, you can reject a story, in which case it will not be published. (Warning: you cannot undo this action, until the Story is updated and requested for approval again.)
- In the activity panel, click on the dropdown button and choose Reject.

- You must enter a reason for rejecting the Story. Click Submit.

- The Story will then be placed in draft mode. You can repeat the approval process again after updating the Story.
- In the activity panel, click on the dropdown button and choose Reject.
...
- Once your story has been published, click on the new Share button in the top right corner.

- In the new popup, specify the user to share this story with, and if required, provide an additional message.
- Then click on Submit.

- The user will be notified of this with a message on their Timeline.
...