Page History
...
Here's a step-by-step tutorial to help you set up your development environment.
- Get Download and set up Eclipse for EE developers. Note: This is Yellowfin's recommendation, however these steps can be applied in case of other IDEs as wellbut you can use your preferred IDE.
- Install the Tomcat plugin if it isn't already bundled with the installation.
- Install the version of Yellowfin to be be used for development. It's ideal to get the latest version, so that more functionality is supported, allowing you to create advanced plugins Note: We suggest getting the latest version for increased productivity.
- Start up Yellowfin to extract the WAR file.
...
Here's what to do when you want to create a new project for your Java plugin.
- Once On starting Eclipse is started, create a new Java project.
- Enter the project name and ensure you select a JRE compatible with the version of Yellowfin.
- Click Next and change the default output folder to <project-name>/ROOT/WEB-INF/classes.
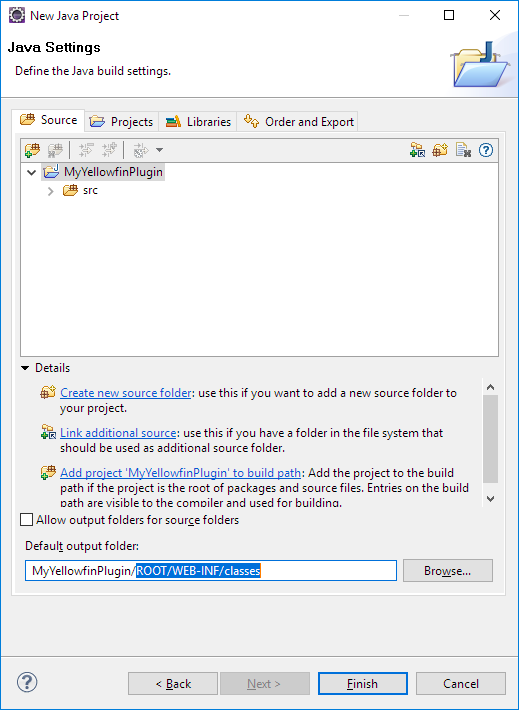
- Click Finish.
- Import files from the installed Yellowfin instance.
- Right click on the project and select Import.
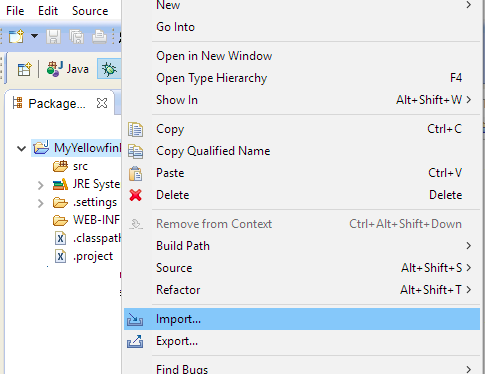
- Select File System and click Next.
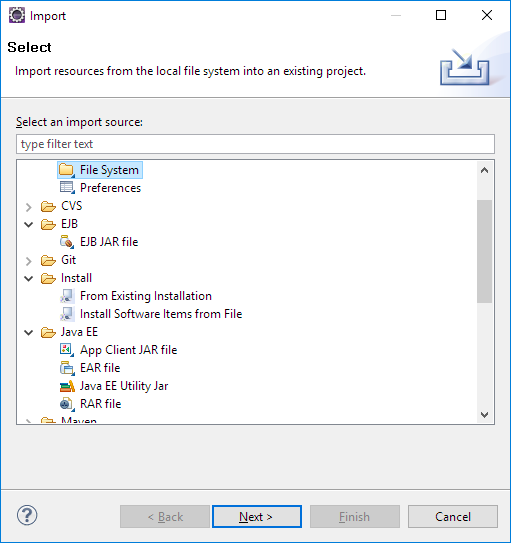
- Navigate to appserver/webapps/ROOT in the Yellowfin install directory. Select ROOT and click OK.
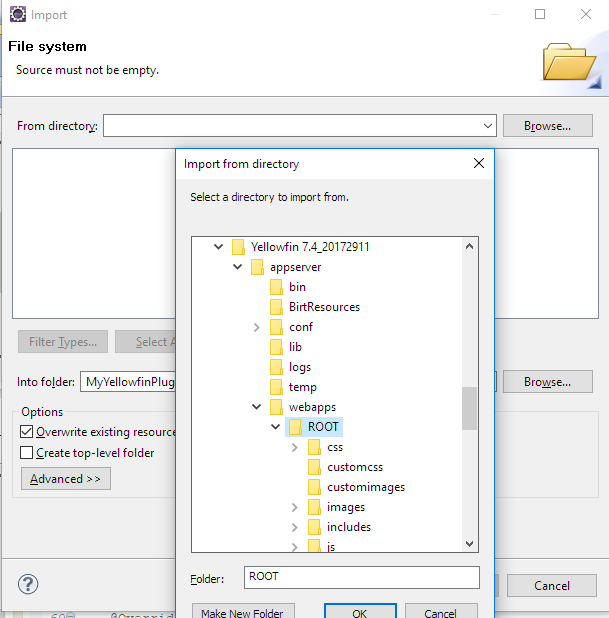
- Select everything under ROOT and in the Advanced section, select the Create links in workspace checkbox.
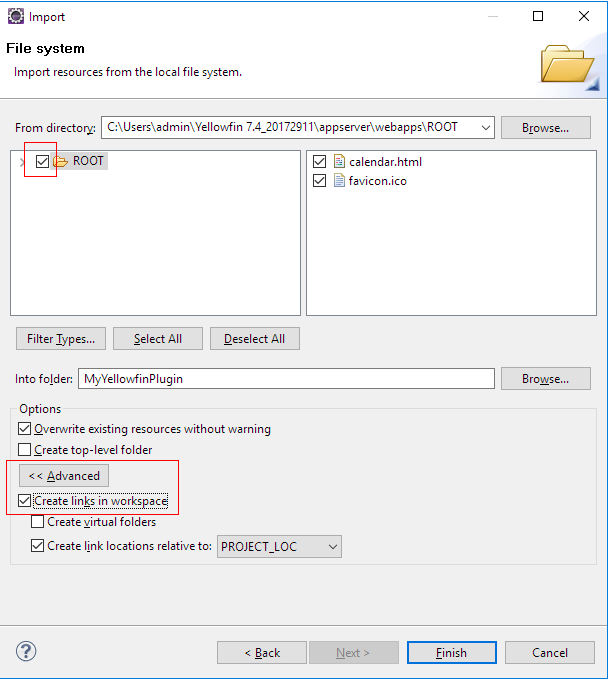
- Click Finish. Files from the installed Yellowfin get will be linked to the plugin this project.
- Right click on the project and select Import.
Configure the Project
Next, configure the project you've just created. Here's how:
- Right click on the project and select Build Path > Configure Build Path and select the Libraries tab.
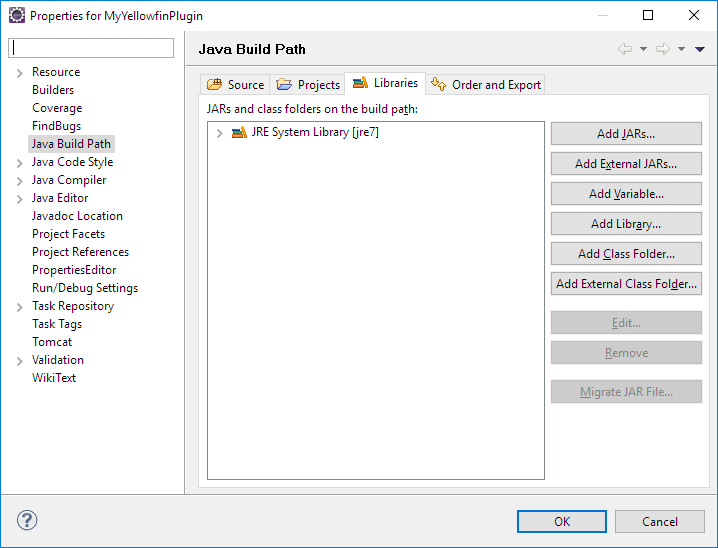
- Click Add JARs and type "i4" into the search bar. From the results, select i4-core.jar and i4-mi.jar from your plugin project. Click OK to save this and OK again in the build path config window.

- Create the following folder structure under src: META-INF/services.
Depending on which plugin is being developed, create a file with the full qualified name of the plugin interface, in the services directory.
Yellowin Plugin
Interface
Description
Transformation Step com.hof.mi.etl.step.ETLStep A Step which may be used in Data Transformation Analytic Function com.hof.mi.interfaces.AnalyticalFunction Analytic Functions used in Reports Data Type Converter com.hof.mi.interfaces.Converter Converts used at the View Level and Data Transformations Custom Formatter com.hof.mi.interfaces.CustomFormatter Formatting used in Reports Data Profiler com.hof.mi.interfaces.DataSuggestionPlugin Profile data for a field and and determine whether the implemented suggestion is applicable
Icon Set com.hof.mi.interfaces.IconSet Defines an icon set for use with Report Alerts Third Party Connector com.hof.mi.thirdparty.interfaces.AbstractDataSource Connectors to an external API Canvas Widget com.hof.mi.widgetcanvas.interfaces.CanvasObjectTemplate Custom Widgets for the Dashboard, Storyboard and Report Output Source Platform com.hof.sources.SourcePlatform Define Source Types such as JDBC, JNDI, OLAP etc - For exampleinstance if creating a Transformation Step, name the your file 'com.hof.mi.etl.step.ETLStep' if creating a Transformation Step.

- For exampleinstance if creating a Transformation Step, name the your file 'com.hof.mi.etl.step.ETLStep' if creating a Transformation Step.
- Create the plugin class by implementing one of the interfaces given above. The fully qualified classname should be added to the services file corresponding to the interface.
So if the plugin being developed is a Data Transformation Step, add its fully qualfied class name to META-INF/services/com.hof.etl.step.ETLStep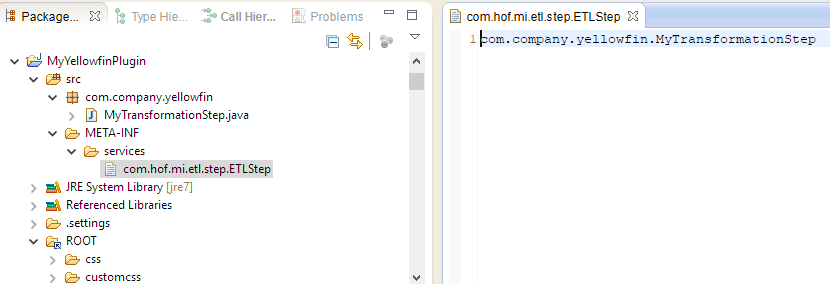
If necessary, another transformation step may be added below this line.
Configure Tomcat
The next phase is to set up your Tomcat configurations.
- Select Window > Preferences and go to the section for Tomcat
- Set Tomcat Home to <Yellowfin Install directory>/appserver and Contexts directory to <Yellowfin Install directory>/appserver/conf/Catalina/localhost
- Expand the Tomcat section and click on Advanced. Add the plugin project to Tomcat's classpath.
- Adjust JVM Settings if necessary. You could use this to increase the memory available for Tomcat.
- Select Source Path and add the plugin project.
- Click OK to save.
- Start up tomcat from eclipse using the buttons in the toolbar
- The plugin will be now be available in Yellowfin
...