Like what you see? Have a play with our trial version.

Error rendering macro 'rw-search'

null

Versions Compared

Key

  • This line was added.
  • This line was removed.
  • Formatting was changed.

...

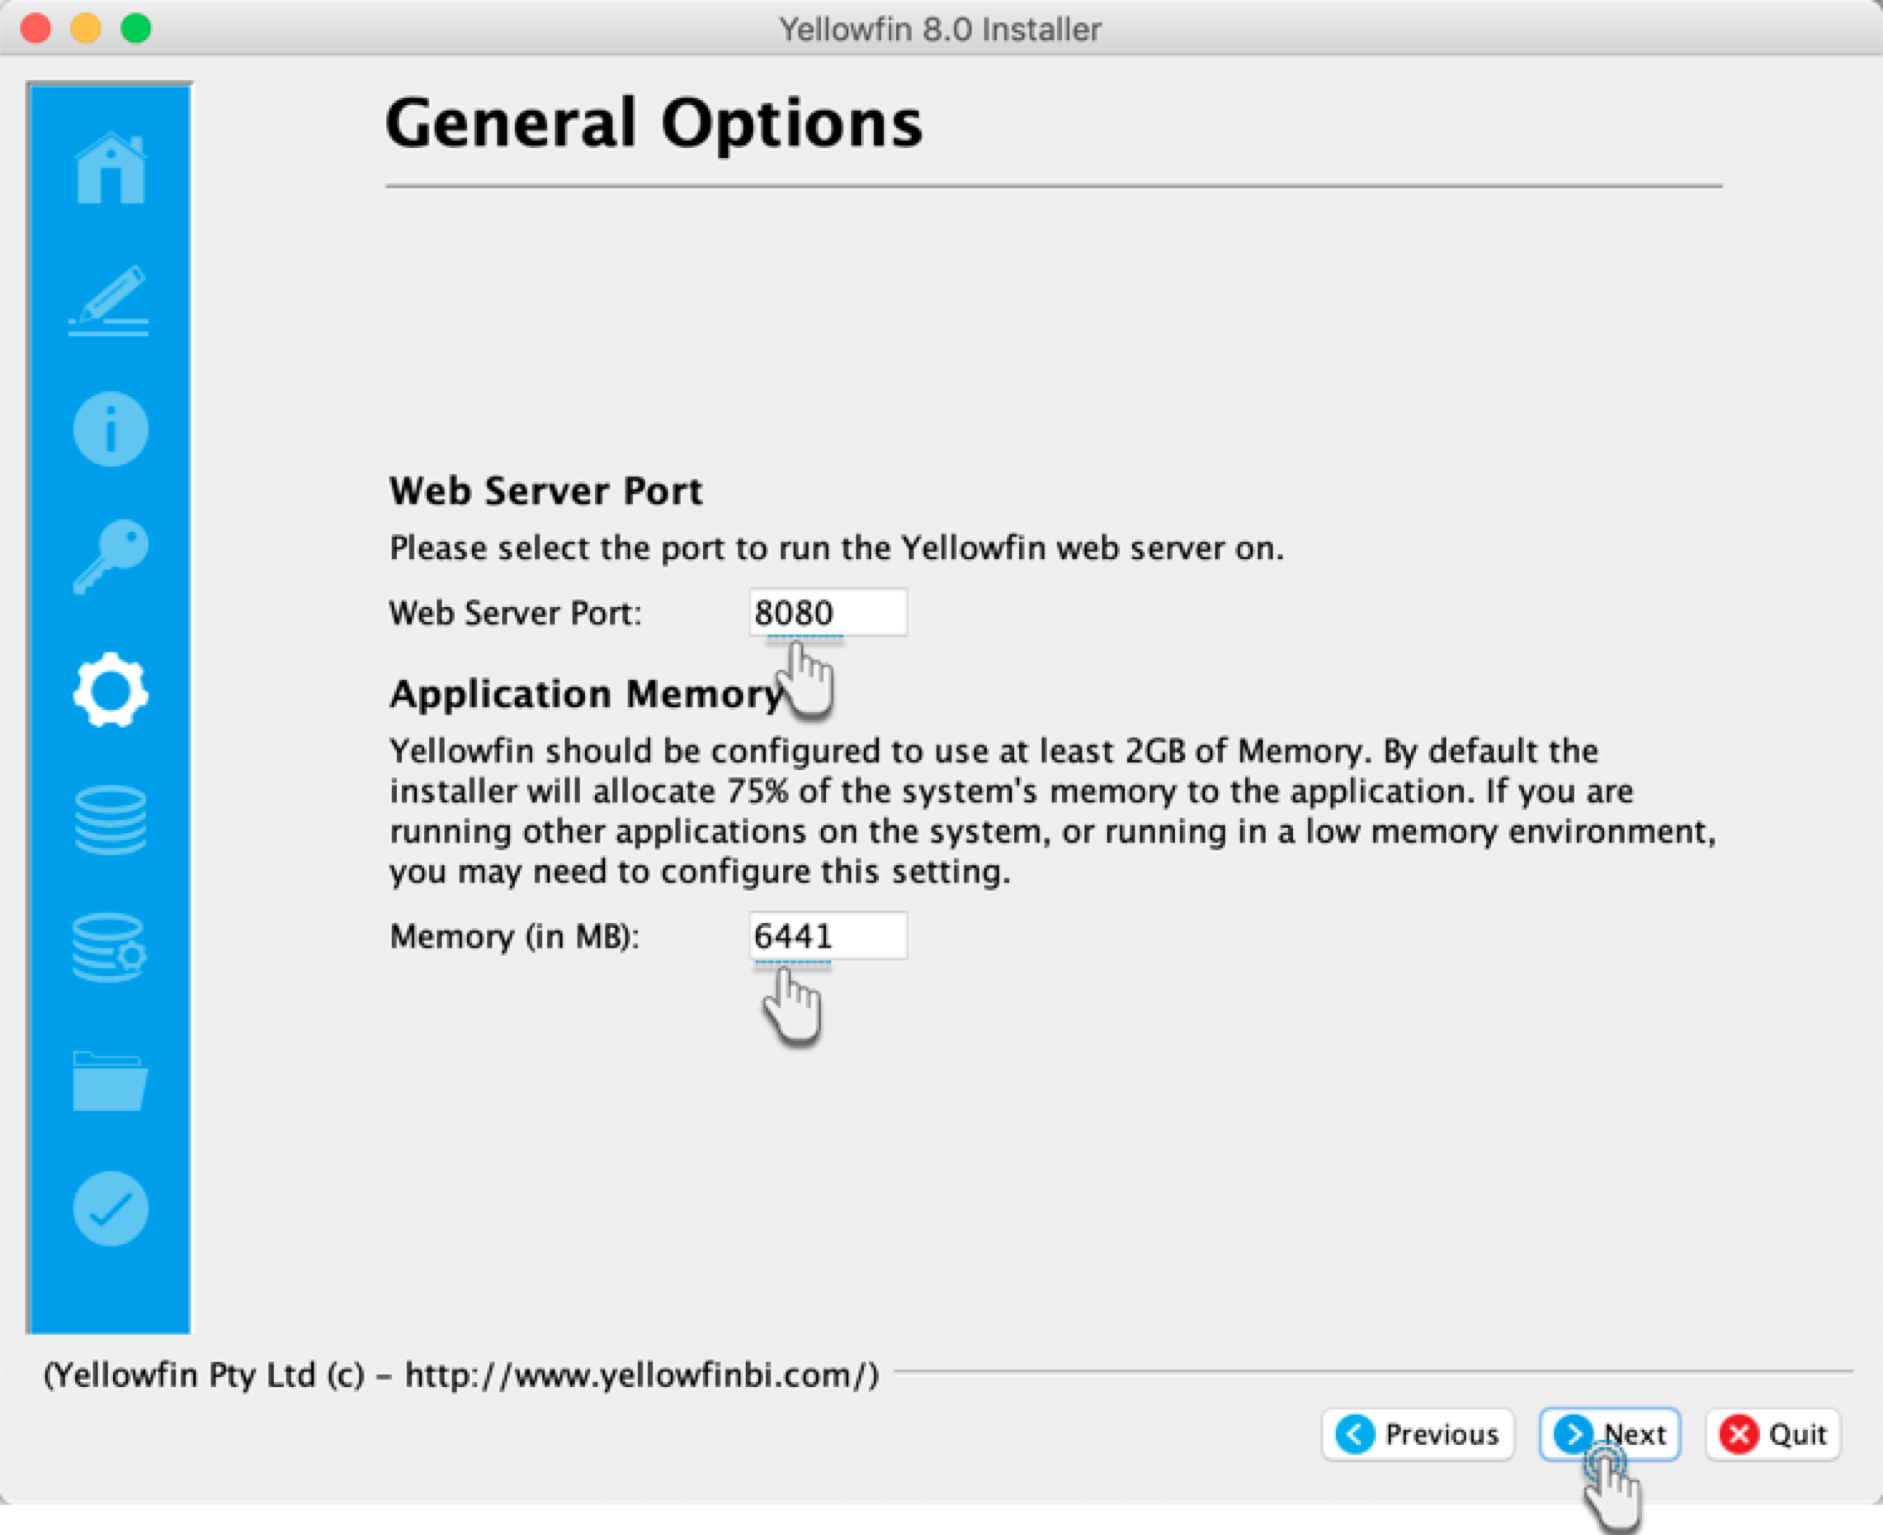
Step 7: General Options

Section


Column
width40%50

This screen enables you to select main configuration options for Yellowfin.

ConfigurationDescription
Web Server PortThis configuration option allows you to set the port number to which the Yellowfin application will listen for web browser requests. By default, all web browsers send requests using port 80.
Select a port number which is not currently in use by another application on the machine. Port numbers like 8080, 8081 and so on are good candidate port numbers. If there are no other web servers on the machine that Yellowfin is being installed on, accept the default port number of 8080. If there are already web servers installed on the machine that Yellowfin is being installed on, then there may be port clashes and Yellowfin will fail to function correctly.
Windows ServiceThis configuration enables you to install Yellowfin as a Windows Service on the server. This means that it will automatically start up whenever the Windows Server is booted and save having to be manually started. Note: this option will only appear during installation on a Windows platform.
Application MemoryThis configuration lets you specify a memory size (in MB) that should be used by Yellowfin. Yellowfin should be configured to use at least 2GB of memory. By default, the installer will allocate 75% of the system's memory to the Yellowfin, but this size can be changed here.


After configuring these value, click the Next button to continue.


Column
width60%50


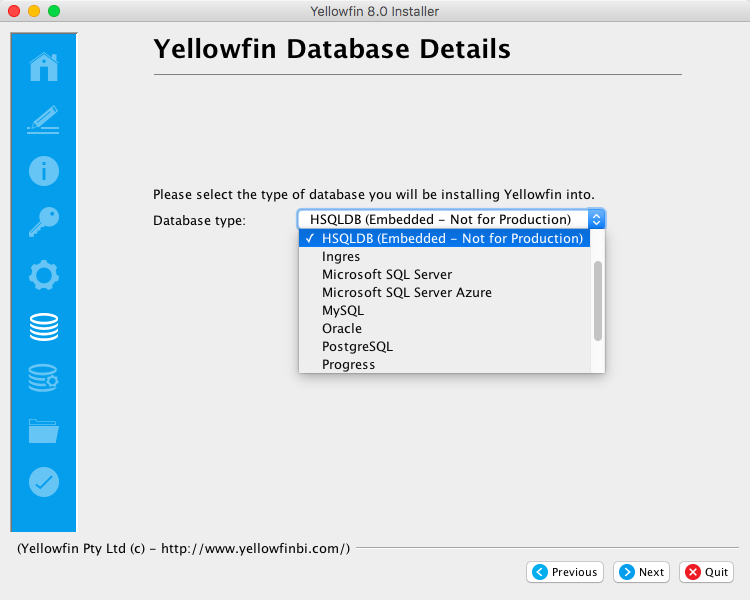
Step 8: Database Selection

Section


Column
width40%50

Choose the database type that you wish to install the Yellowfin Repository database into. This selection is based on the database information covered in the prerequisites.

Based on your selection the next few steps will vary. Click the Next button to continue.


Column
width60%50


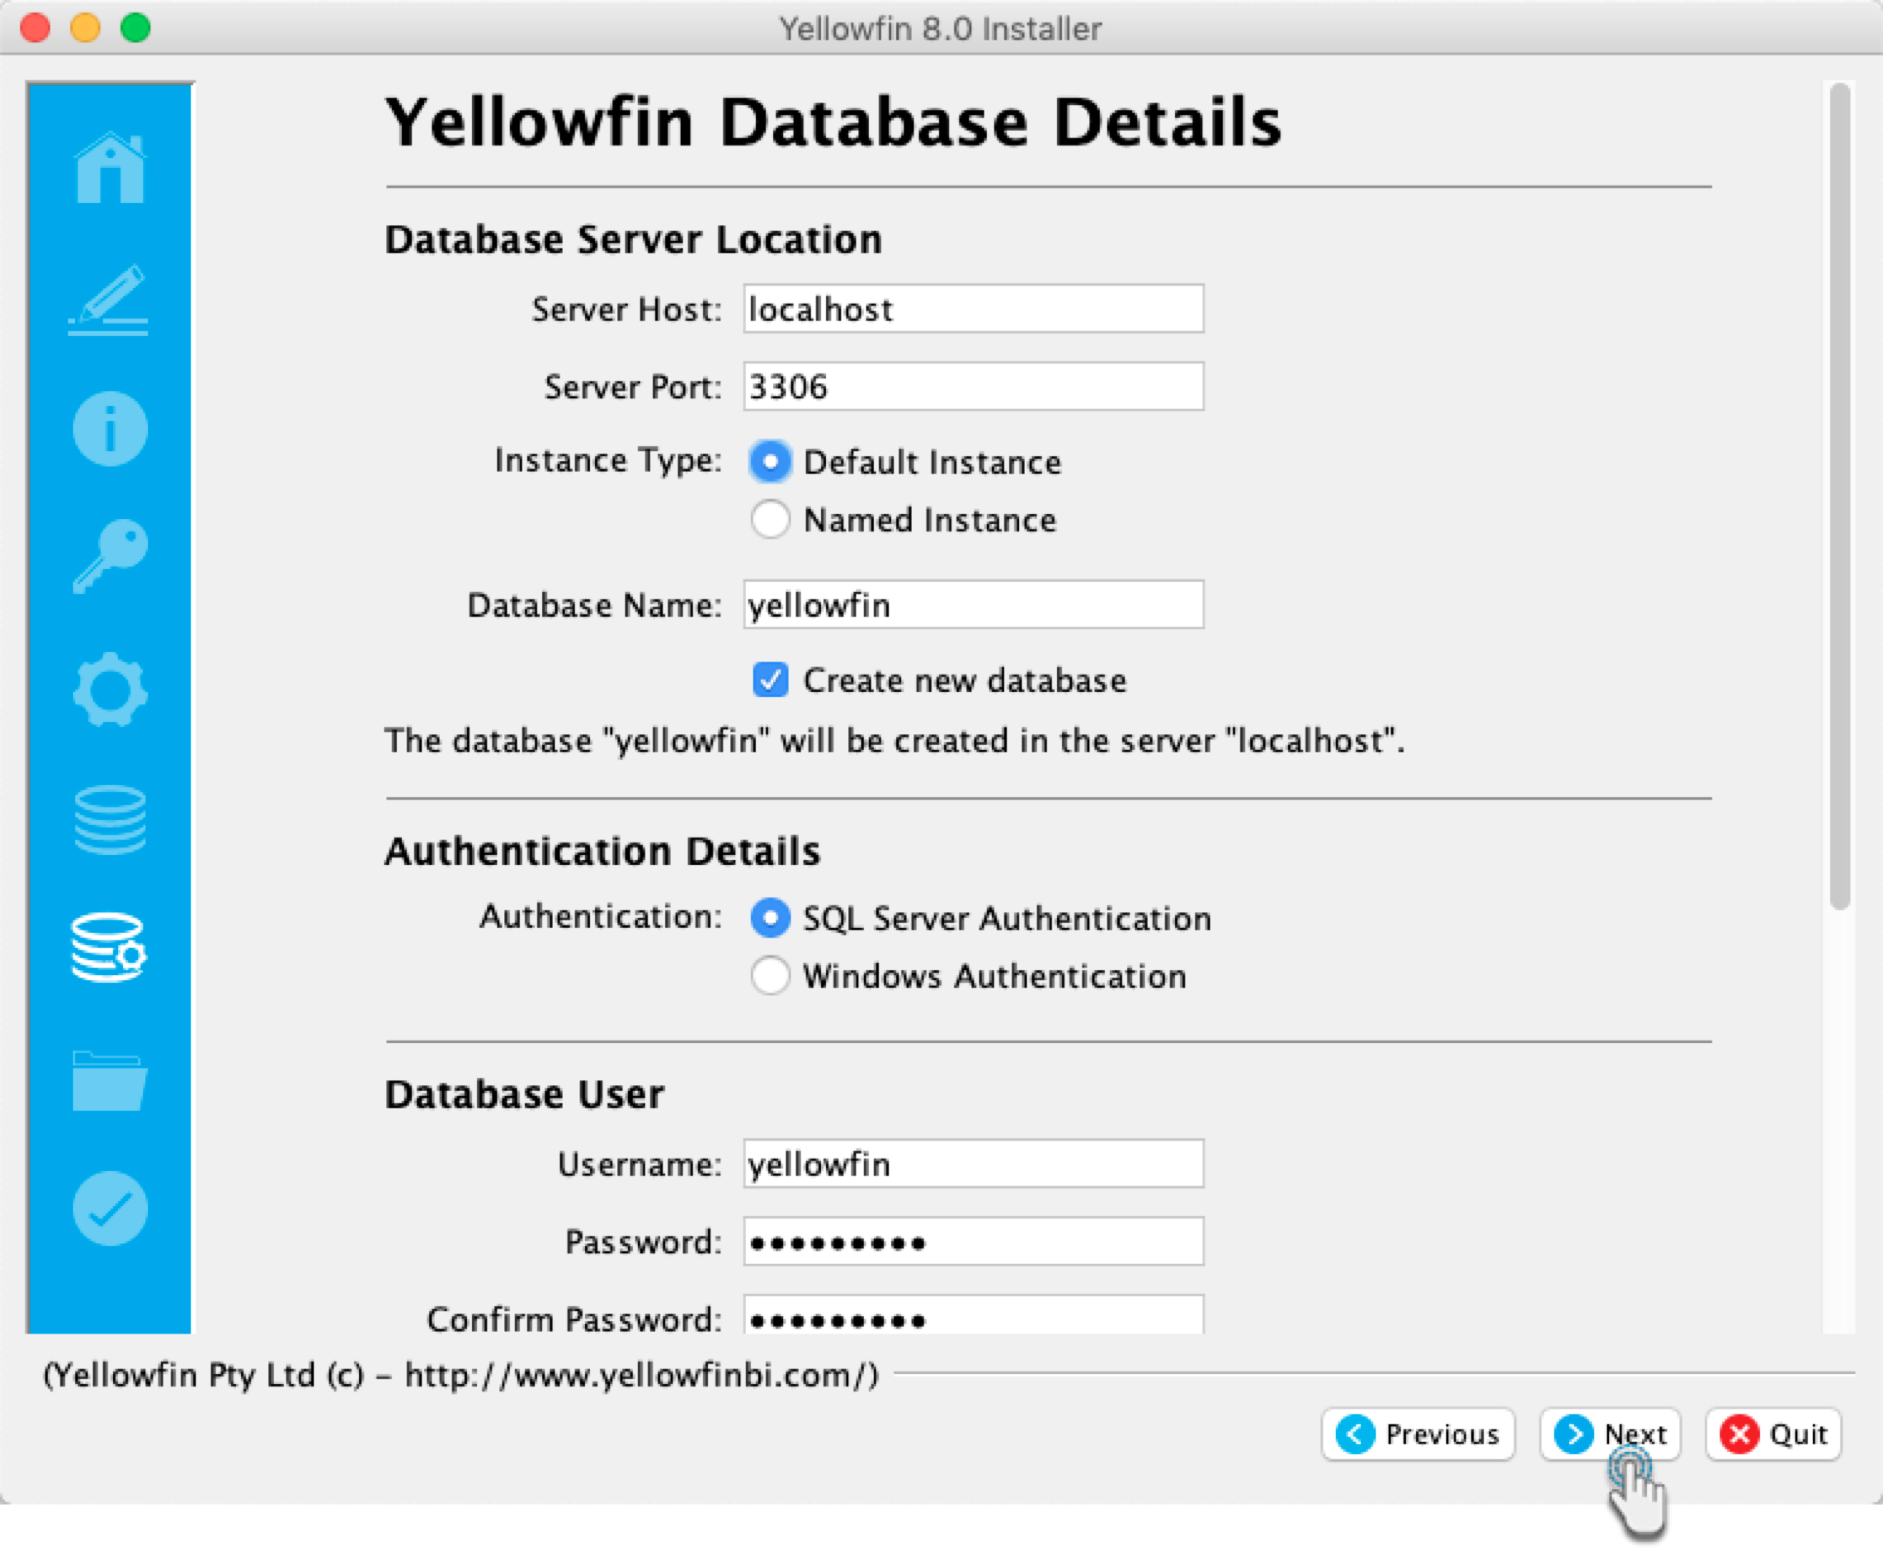
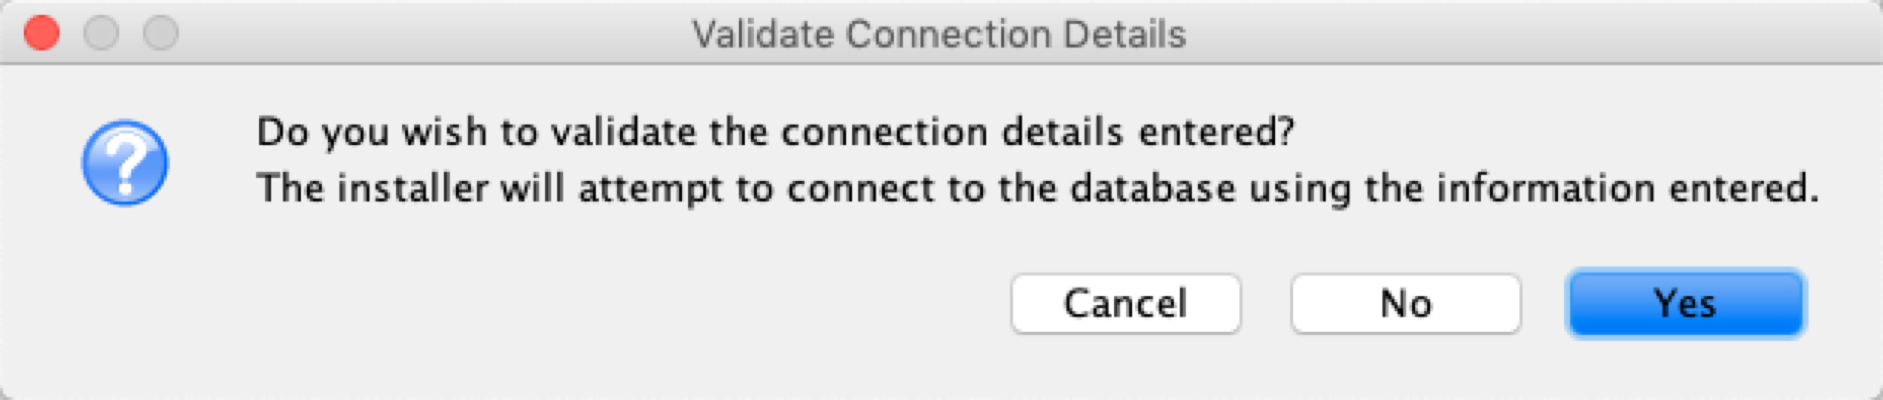
Step 9: Database Details

Section


Column
width50

In this step, provide the configuration details for the database server this is hosting the Yellowfin database. This is the database that stores all the Yellowfin content definitions, configuration information, and event details. This database can be created before the installation or the Yellowfin installer can create it for you.

Note

If you chose a database type of HSQLDB (Embedded - Not for Production) you will not see this screen because this database type has no configuration options.


As an example, if you selected Microsoft SQL Server, these are the options you would have to populate in order to set up the Yellowfin Configuration Database. If you choose another compatible database server the screen may look slightly different.


Database Server Location

Server Host

Enter the network address of the database server hosting the Yellowfin database. If the Yellowfin database is on the same computer as the Yellowfin application enter localhost

Server Port

Enter the network port number of the database hosting the Yellowfin database.

Database Name

Enter the name of the Yellowfin database.

Create New Database

If the above database does not exist on the database server, tick this option to allow the Yellowfin installer to create a new database to host the Yellowfin database using the database name entered above. When you tick this option the Administrator User section will appear on the screen.

Authentication Details

Authentication

This configuration is specific to Microsoft SQL server. Choose how the database users should be authenticated. Options include:

  • SQL server authentication
  • Windows authentication

Logon Domain

If Windows authentication is selected, then specify a logon domain.

Database User

Username

Enter the name of the database server user account that has access to the Yellowfin database. This database user must have full read and write permissions to the Yellowfin database.

Password

Enter the password of the database server user account that has access to the Yellowfin database.

Confirm Password

Re-enter the password of the database server user account that has access to the Yellowfin database. (This is only required if creating a new user.)

Create New User

If the above database user does not exist on the database server, tick this option to allow the Yellowfin installer to create a new database user account to access the Yellowfin database. When you tick this option the Administrator User section will appear on the screen.

Administrator User 

This section appears if you select the Create New Database and/or Create New User options.

Username

Enter the name of the database server user account that has administrator-level access to the database server hosting the Yellowfin database.

Password

Enter the password of the database server user account that has administrator-level access to the database server hosting the Yellowfin database.


Column
width50


...

Section


Column
width50

After providing the details, click on the Next button. You will have the option to get your database connection details validated. Click Yes if you wish to do so to confirm a successful connection, otherwise choose No. Proceed to the next step


Column
width50


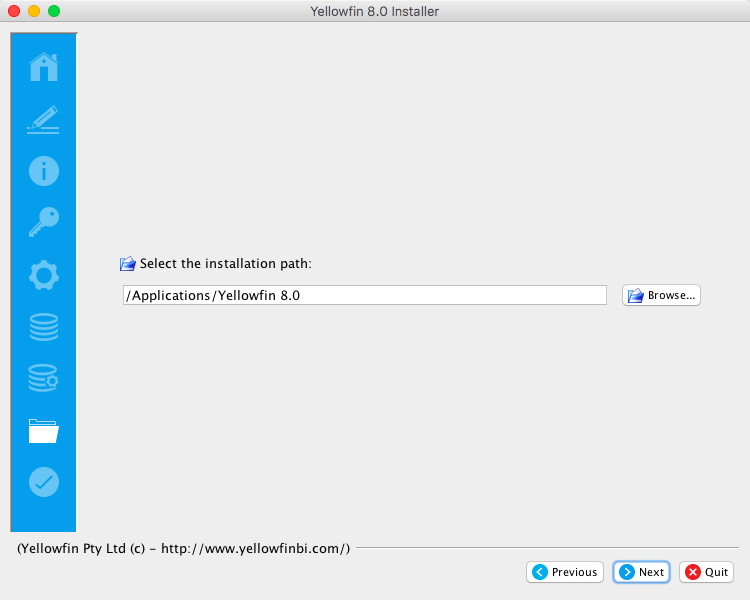
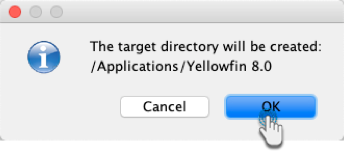
Step 10: Installation Path

Section


Column
width40%50

Define You will have to define the installation directory for Yellowfin. This will default to different directories based on the operating system you are installing to. For example, C:\Users\Administrator\Yellowfin 8.0.

You can change the default installation directory by directly typing in a new path, or using the Browse button to navigate the file system.

When you have chosen your installation destination, click the Next button to continue.Note: .

Notes:

  • If the installation path does not exist just enter the required installation path and the installer will create the directory.
  • If you select an installation directory in the path C:\Program Files then the Yellowfin application must always be run as an administrator.
  • Windows users installing into a 64bit version will need to ensure they choose a path outside of the Program Files directory.
  • Choosing an installation path without space or punctuation characters will make future advanced configuration easier.


Column
width60%

Image Removed
Image Removed

50

Image Added


Section


Column
width50

If the installation path is new, click OK to confirm that the new directory will be created.


Column
width50

Image Added


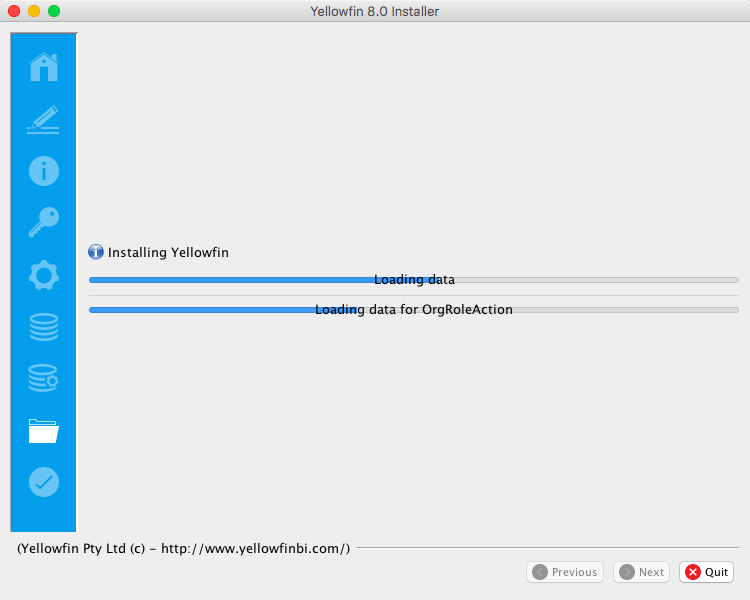
Step 11: Installation Progress

Section


Column
width40%50

This screen will enable you to observe the progress of the software installation. Depending on the server capacity of the computer hardware and software capacitythe content pack you selected, this could take a few minutes.

You will be able to click Next to move to the next window once the installation is completeWhen the installation is complete the Yellowfin installer will automatically move to the Installation Complete screen.


Column
width60%50

Image Modified


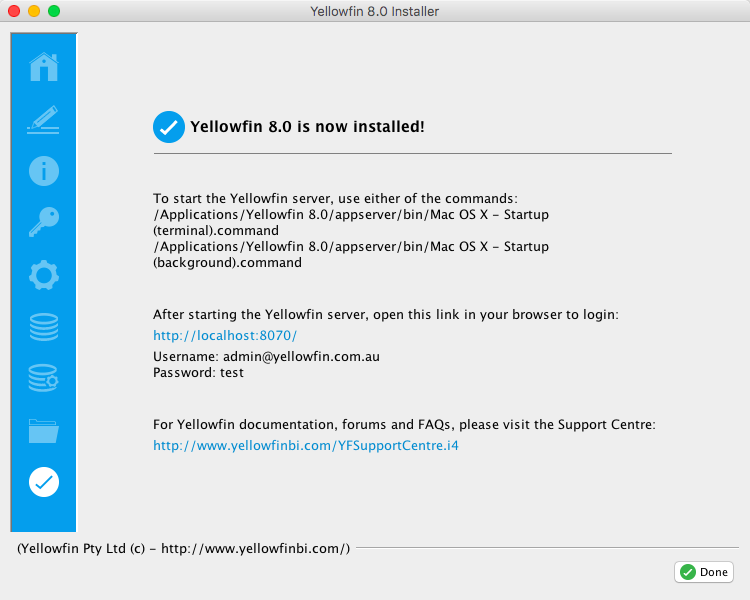
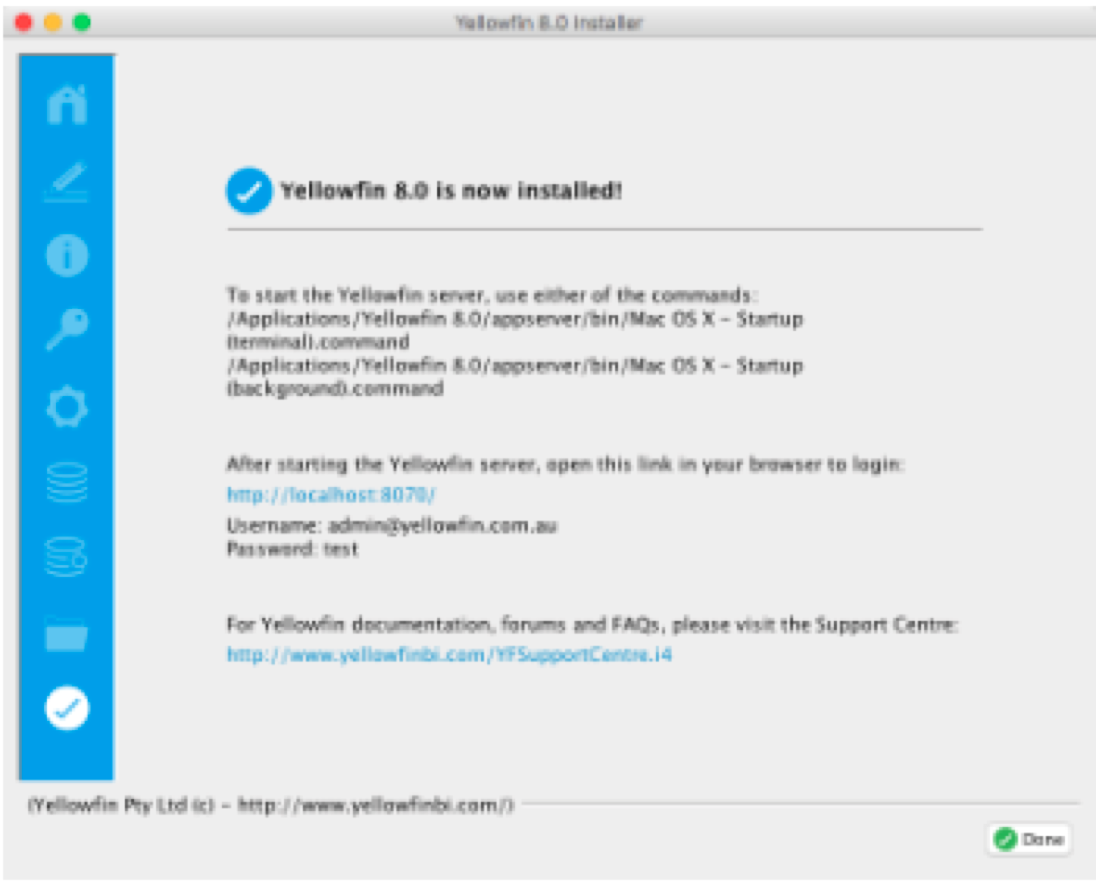
Step 12: Installation Completion

Section


Column
width40%50

This screen will be displayed at the end of a successful installation of the Yellowfin Application Server.

Note: An uninstall function has been created for you under the directory nominated in the database selection step. Select the installation path.

If you do not see this window, contact your Yellowfin representative or contact Yellowfin Support.

Take note of the information provided on this screen. This includes details of how to start the Yellowfin application, and the information you need to log in to Yellowfin from a web browser.

Click the Done button to complete the installation procedure.


Note

An uninstall function has been created for you under the directory nominated in the database selection step.


Column
width60%50

Image RemovedImage Added


Directory Structure

...

  1. Database Server Name: This will probably be the "localhost".
  2. Database Server Port: This should be 1433.
  3. Database Name: This is the name of the database you want Yellowfin to install to. This should be "yellowfin". This is used for Yellowfin configuration and operational data. It is not the database you wish to report off.
  4. Create Database: Click this to create the new Yellowfin database. We suggest removing the Yellowfin database if your installation failed previously.
  5. DBA User: This could be "sa".
  6. DBA Password: This could be "sa".
  7. Reports UserId: Set this to "yellowfin_user".
  8. Reports UserId password: Set this to "yellowfin_user" or whatever you prefer.
  9. Create user id: Check this checkbox.

Additional Resources

If you are experiencing other installation issues the Yellowfin forum is a good place to look for answers. Go to http://www.yellowfinbi.com/YFForum.i4 to explore previous posts or seek help from other users and Support Members. Some useful troubleshooting posts include:

  1. http://www.yellowfinbi.com/YFForum-ERROR-Yellowfin-Installation-on-MS-Server-08-?thread=103838
  2. http://www.yellowfinbi.com/YFForum-install-Yelliowfin-on-SQL-Server-2005-?thread=89809
  3. http://www.yellowfinbi.com/YFForum-New-installation-of-Yellowfin-but-it-s-not-launching-?thread=105437


If the above posts do not solve the issues you're experiencing, please send an email to support@yellowfin.bi with a clear description of the issue, along with the following:

  1. Screenshots (if applicable)
  2. YellowfinInstallLog-date.log (this can be found in the Yellowfin directory)
  3. All log files found in Yellowfin\appserver\LOGS (if you have any)


...


Section


Column

...

width
Styleclass
ClasstopLink
75

Previous topic:  Installation Prerequisites


Column

Next topic: Post Installation

top