Page History
...
Right-click on a connection to bring up the menu.
Click Edit Flow.
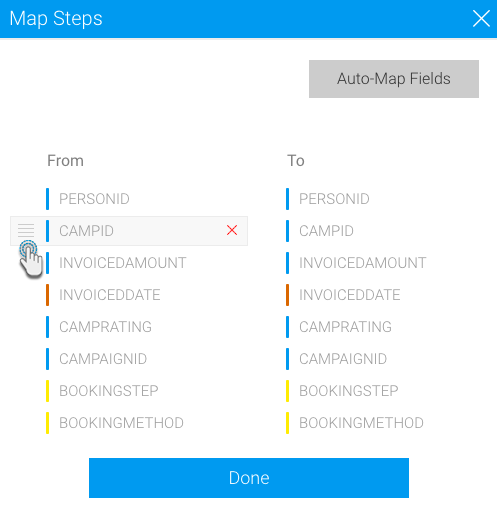
A popup will appear displaying the data mapped between the two steps. The incoming/source fields (from the previous step) will appear on the left side, and the target fields (for the next step) will appear on the right side.
You can perform the following types of actions on the mapping:
Auto-mapping: Allow Yellowfin to do the field mapping for you by clicking on the Auto-Map Fields button. The system automatically matches fields based on their names and data type. Note: This feature is ideal for situations in which a connection is deleted and then created again. The fields will not be mapped as before, and using this button will auto-map them correctly.
Change mapping: Hover your cursor over a field on the left side, and when the reorder icon appears, click and drag it to match any field on the right side.
Note: The target field will lose its previously mapped field, which will appear in the unmapped section.
Deleting fields: You can delete a field, in which case it will not be sent to the target step and any subsequent steps.
Hover over a field on the right side, and when the delete icon appears, click on it.
On doing so, the matched source field will be added to the unmapped section at the bottom.
Delete this field from the unmapped section as well. It will not appear in the target step.
Field unmapping: If a field on the left side is deleted first, then the target field will lose its mapping. Similarly, fields can get unmapped when a mapping is changed or reordered. Unmapped fields will have the following warning appear next to them.
All target fields are required to be mapped, therefore you can either delete that target field, or drag another field to match with it. The removed field will be added to the umapped section.
All unmapped fields appear at the bottom of the popup on the left side (as shown in the example below). Fields in the unmapped section will be sent to the target step, however any data conversions or field transformations previously made on them will be lost, and not be applied to these fields in the target and any subsequent steps. However, previous steps will not be affected.
Click on the Done button. A confirmation popup will appear, displaying mapping changes made to the flow.
Click Confirm to apply these changes.


...