Page History
| Anchor | ||||
|---|---|---|---|---|
|
| Table of Contents | ||
|---|---|---|
|
Overview
| Styleclass | ||
|---|---|---|
| ||
Install
| Styleclass | ||
|---|---|---|
| ||
1. Create a new Data Source by using one of these methods:
- Left Side Nav - open the left side navigation panel, click on Create, select the Data Source option
- Top Right Button - click on the create button, select the Data Source option.
- Toolbar - click on the Create link in the toolbar, select the Data Source option.
- Toolbar - click on the Create link in the toolbar, select the Data Source option.
- Admin Console - navigate to the Admin Console, open the Data Sources section, click on the Add button.
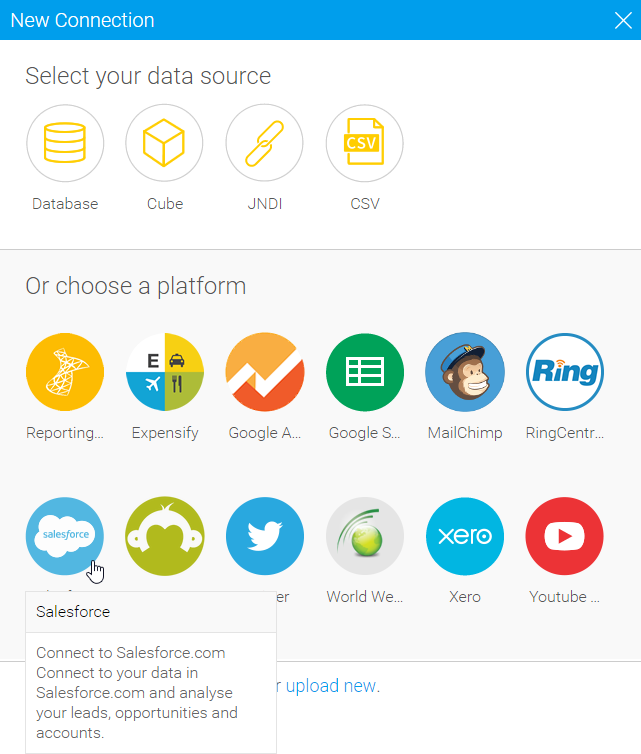
You will now see the New Connection lightbox.
| Left Side Navigation | Top Right (with Left Side Nav enabled) |
|---|---|
| Toolbar | Admin Console |
2. Select the Salesforce connector to set up your data source.
3. Fill in the details required by the connector. In this example, you will need to complete the Name and Description.
This should describe the specific connection, rather than the connector.
4. Complete the Connection Instructions. Each connector will have different requirements that will need to be completed in order to successfully access your data.

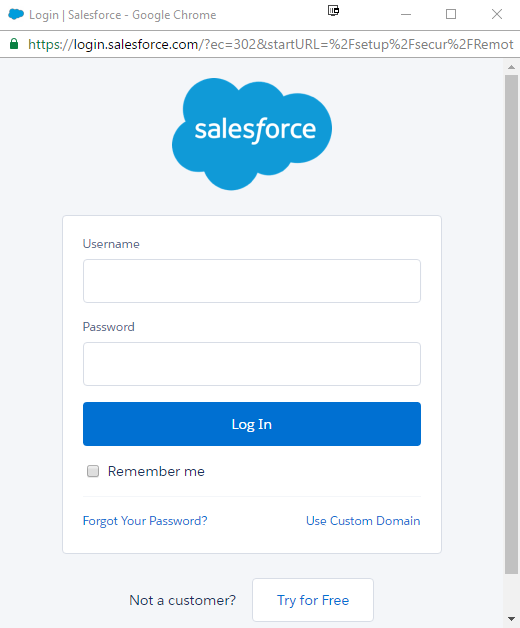
5. From here you will have to authorise the connector. Start by clicking on the Authorise Salesforce button.

6. Enter your login credentials for Salesforce, and click Log In.
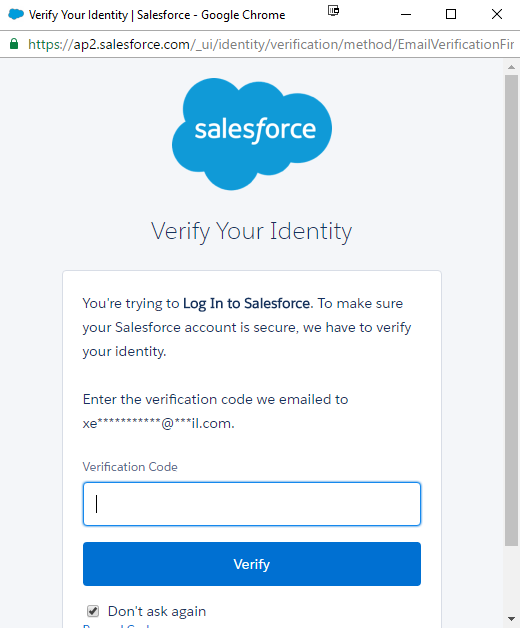
7. You may now have to confirm your account details. Follow the steps provided.
8. Once confirmed, you will be provided with a Code that needs to be copied.

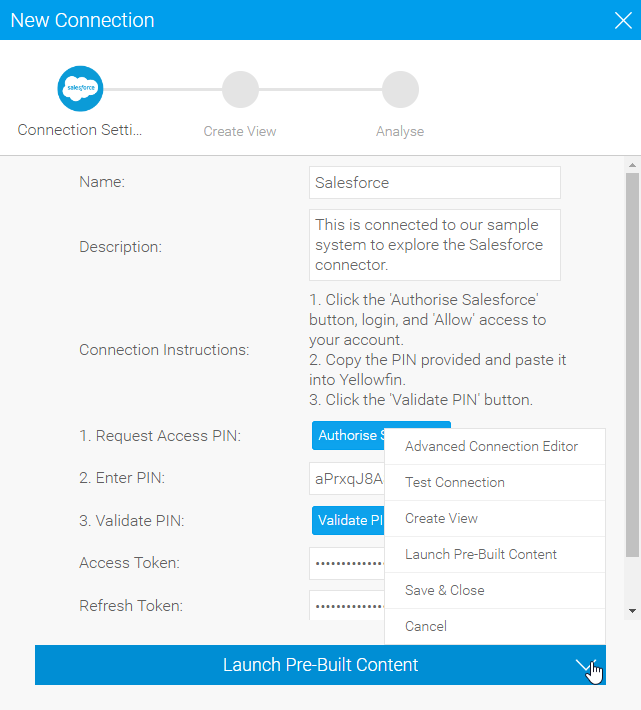
9. Return to the New Connection window and paste your Code into the box displayed here.
10. Click Validate PIN to continue.

11. From here you have a range of options available to you:
- Advanced Connection Editor - this will take you to the Data Source page in the Admin Console and allow you to edit all the advanced options available for your data source.
- Test Connection - this will allow Yellowfin to test the connection parameters you provided to ensure it can connect to your data source.
- Launch Pre-Built Content - this will allow you to install any pre-built content that may come with the connector.
- Save & Close - this will allow you to save your connection and close the New Connection lightbox, returning you to the page you were on previously.
- Cancel - this closes the New Connection lightbox without saving your connection, returning you to the page you were on previously.
- Advanced Connection Editor - this will take you to the Data Source page in the Admin Console and allow you to edit all the advanced options available for your data source.
Your connection is now complete.
| horizontalrule |
|---|