Page History
| Table of Contents | ||
|---|---|---|
|
Overview
Yellowfin’s Yellowfin offers a PMML transformation step that allows users to import data science models stored in a PMML file format into Yellowfin and then apply them on data to generate results, such as predictions. The step works within Yellowfin’s data transformation module by creating a transformation flow.
...
| Tip |
|---|
It would be ideal to get a better understanding of the data transformation module before continuing with this guide. |
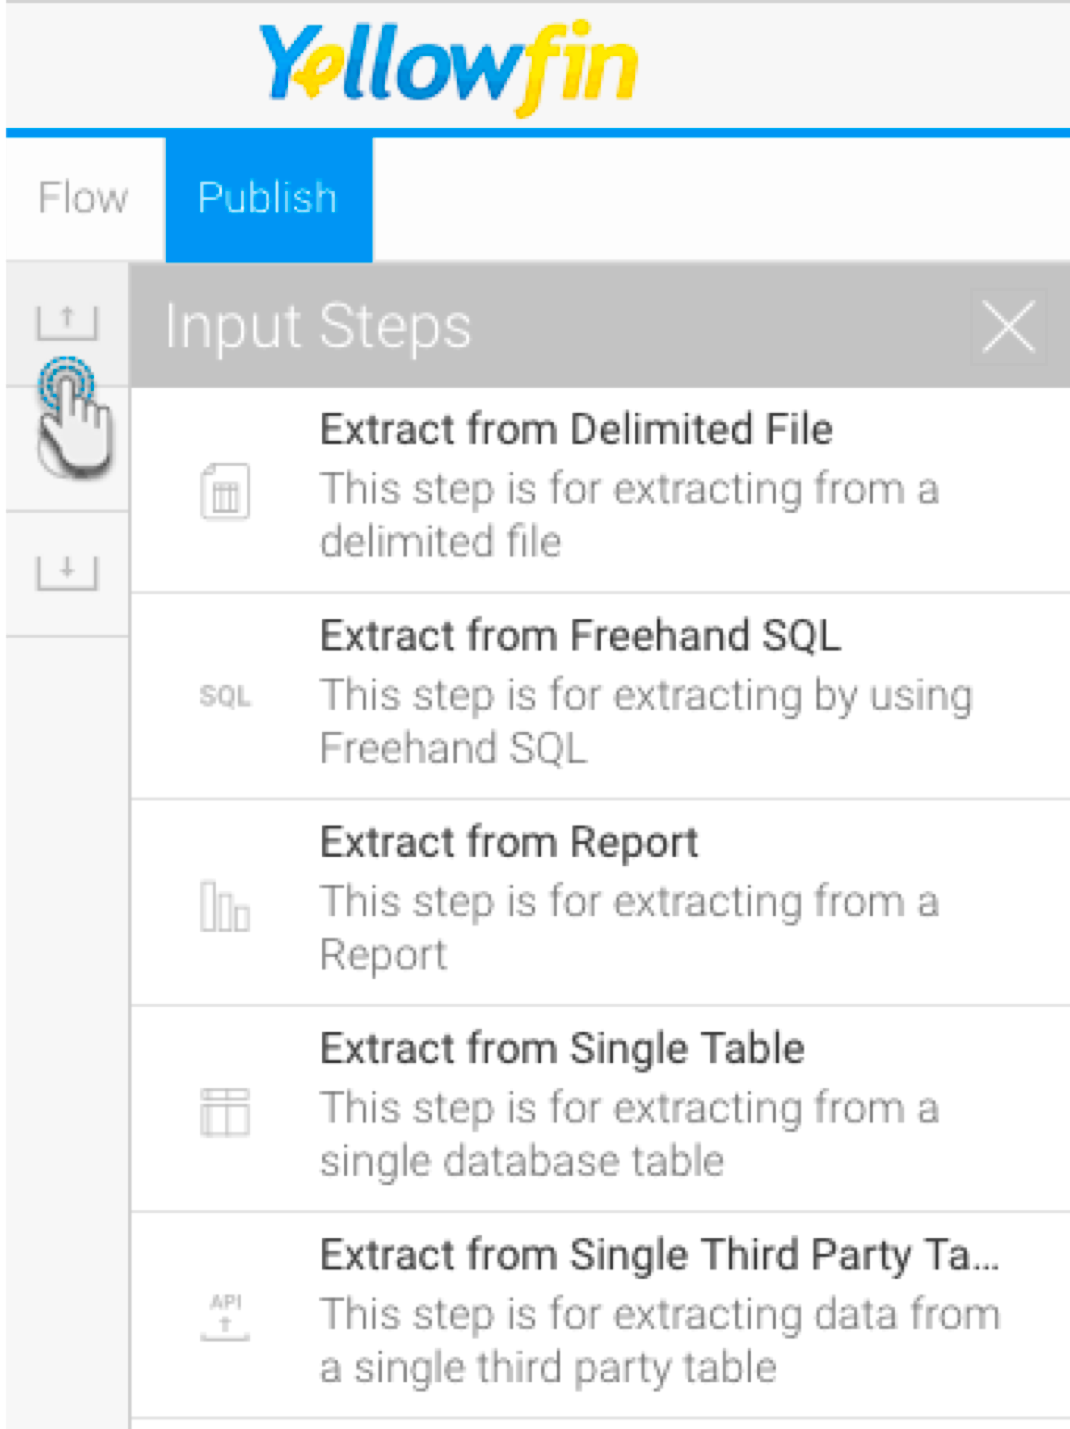
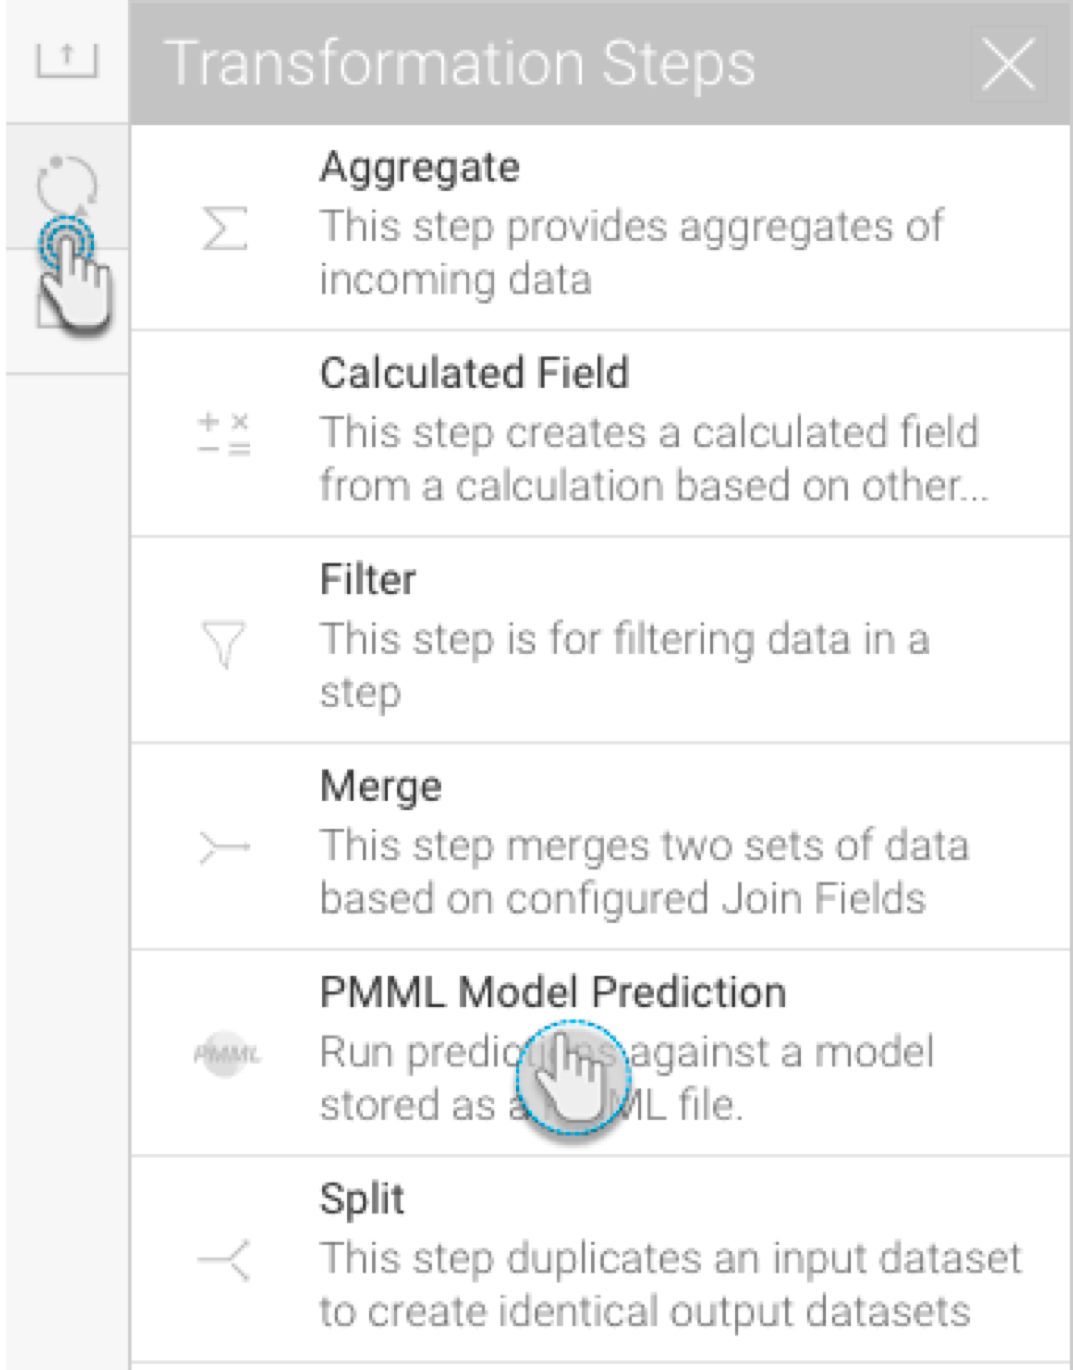
Required Transformation Steps
The data transformation module creates transformation flows by using different “steps”. For this procedure, it will require at least 2 types of steps:
...
The Data Transformation module lets users create different types of transformation flows and include the PMML step when required. For instance, you can apply the PMML model on data that has undergone other transformations, and even continue to use further transformations on the result it generates.
Supported Model Types
Yellowfin’s PMML transformation step supports the following types of data science models:
- Association rules
- Cluster model
- General regression
- Naive Bayes
- kK-Nearest neighbors
- Neural network
- Regression
- Rule set
- Scorecard
- Support Vector Machine
- Tree model
- Ensemble model
Supported PMML File Versions
The PMML transformation step fully supports PMML files of versions 3.0 and above. However, some earlier file versions might also work. In addition to that, even though PMML standard allows for multiple models within one PMML file, the PMML step will consider only one model in a PMML file. If there is more than one model described in a file then Yellowfin will use the first one.
Configuring the PMML Step
When the PMML transformation step is added to the flow, it will need to be configured. This involves uploading the PMML model, and once it has been properly parsed, configuring the input and output fields specified in the model. Note: It is assumed that the model being used, has specified input and output fields.
Input Configuration
The model’s input refers to the fields of data that are required to conduct calculations. For example, in case of a regression model, the input is a list of independent variables required for the model. To properly execute the PMML step, we will need to map the data fields to fields required by the model.
Output Configuration
In turn, the model’s output is a set of result fields that the model is designed to generate. In some cases the output can consist of only one field, such as in the case of a regression model where the output is usually one predicted field. But on the other hand, a clustering model can have either a specified number of clusters as an output, or fields with distances to centroids of each cluster. When configuring the output, the user can choose which of the available fields they wish to see in the result, but at least one output field should be selected. The datatype of the output field will be whatever has been specified in the model, however if a type isn’t specifically defined, then the result will be considered as Text.
Taking an example, a model can be designed to predict the fare paid by passengers of the Titanic based on their travel class and age. In this case, age and class will be the configured inputs and the resulting field selected would be fare.
How to use a PMML Transformation Step
This guide shows you how to integrate your data science model using the PMML transformation step into Yellowfin.
- Build a model in PMML and save it in .xml format. (This file will be referred to as the PMML file in this guide.)
- Navigate to Yellowfin’s Data Transformation module. (Create button > Transformation Flow)
- Create a transformation flow beginning with an input step to extract data. (Click here if you want to learn how to create a basic flow, or here to learn about the different ways data can be extracted).
- The extracted data will appear in the data preview panel. You can add more steps to further transform the data.
- Once you are ready to use the PMML model, follow the procedure below.
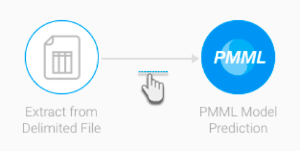
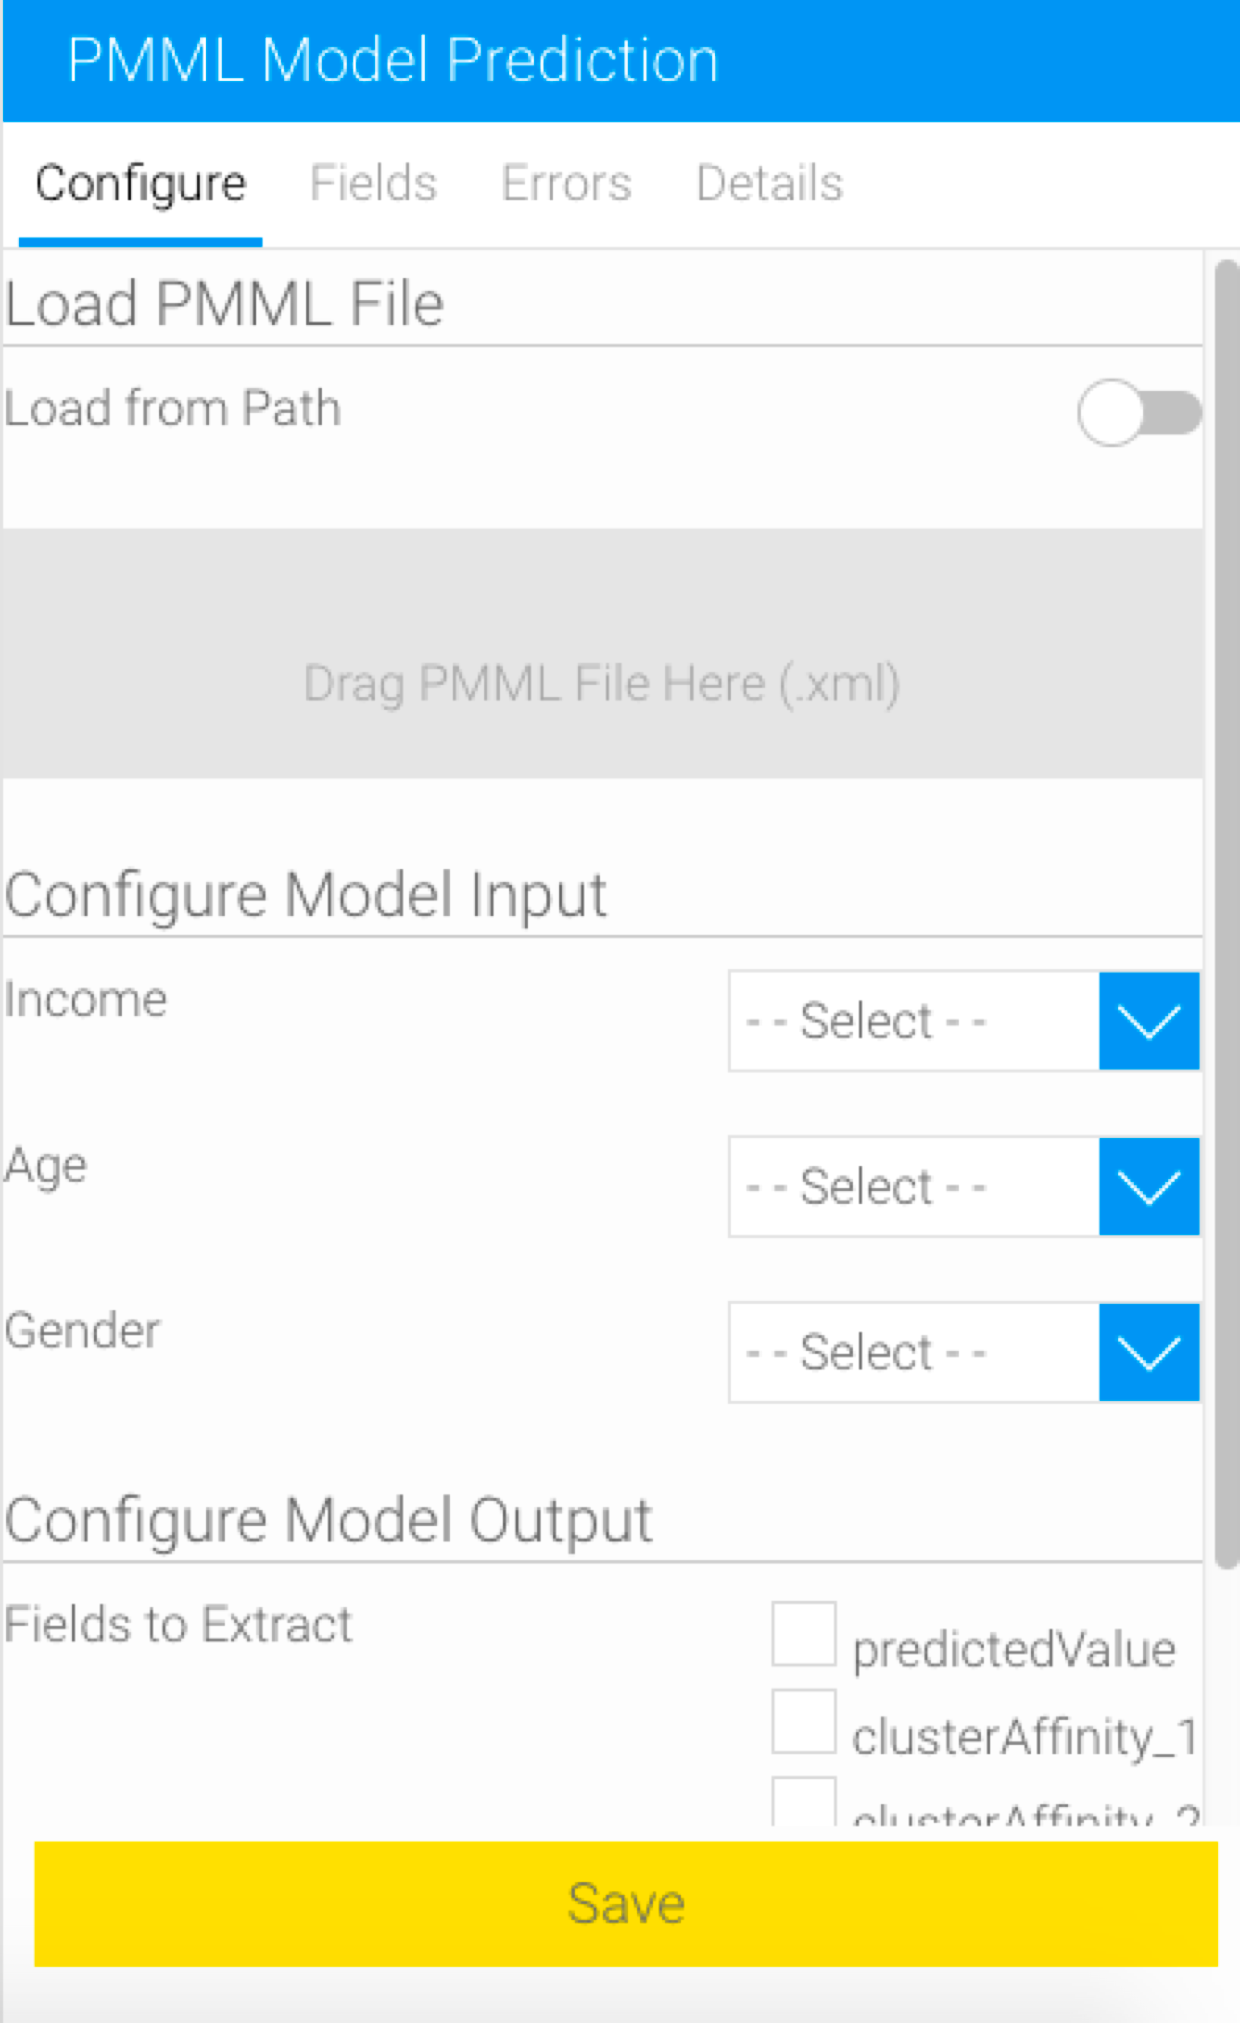
- Drag the PMML model prediction step from the transformation step list onto the canvas. (Note: If you don’t see this step, ensure that you have installed the PMML plug-in.)
- Using a connection point, create a connection from the last step to the PMML transformation step.
- Next, you need to configure the PMML step. (Make sure it is selected to bring up its configuration screen.)
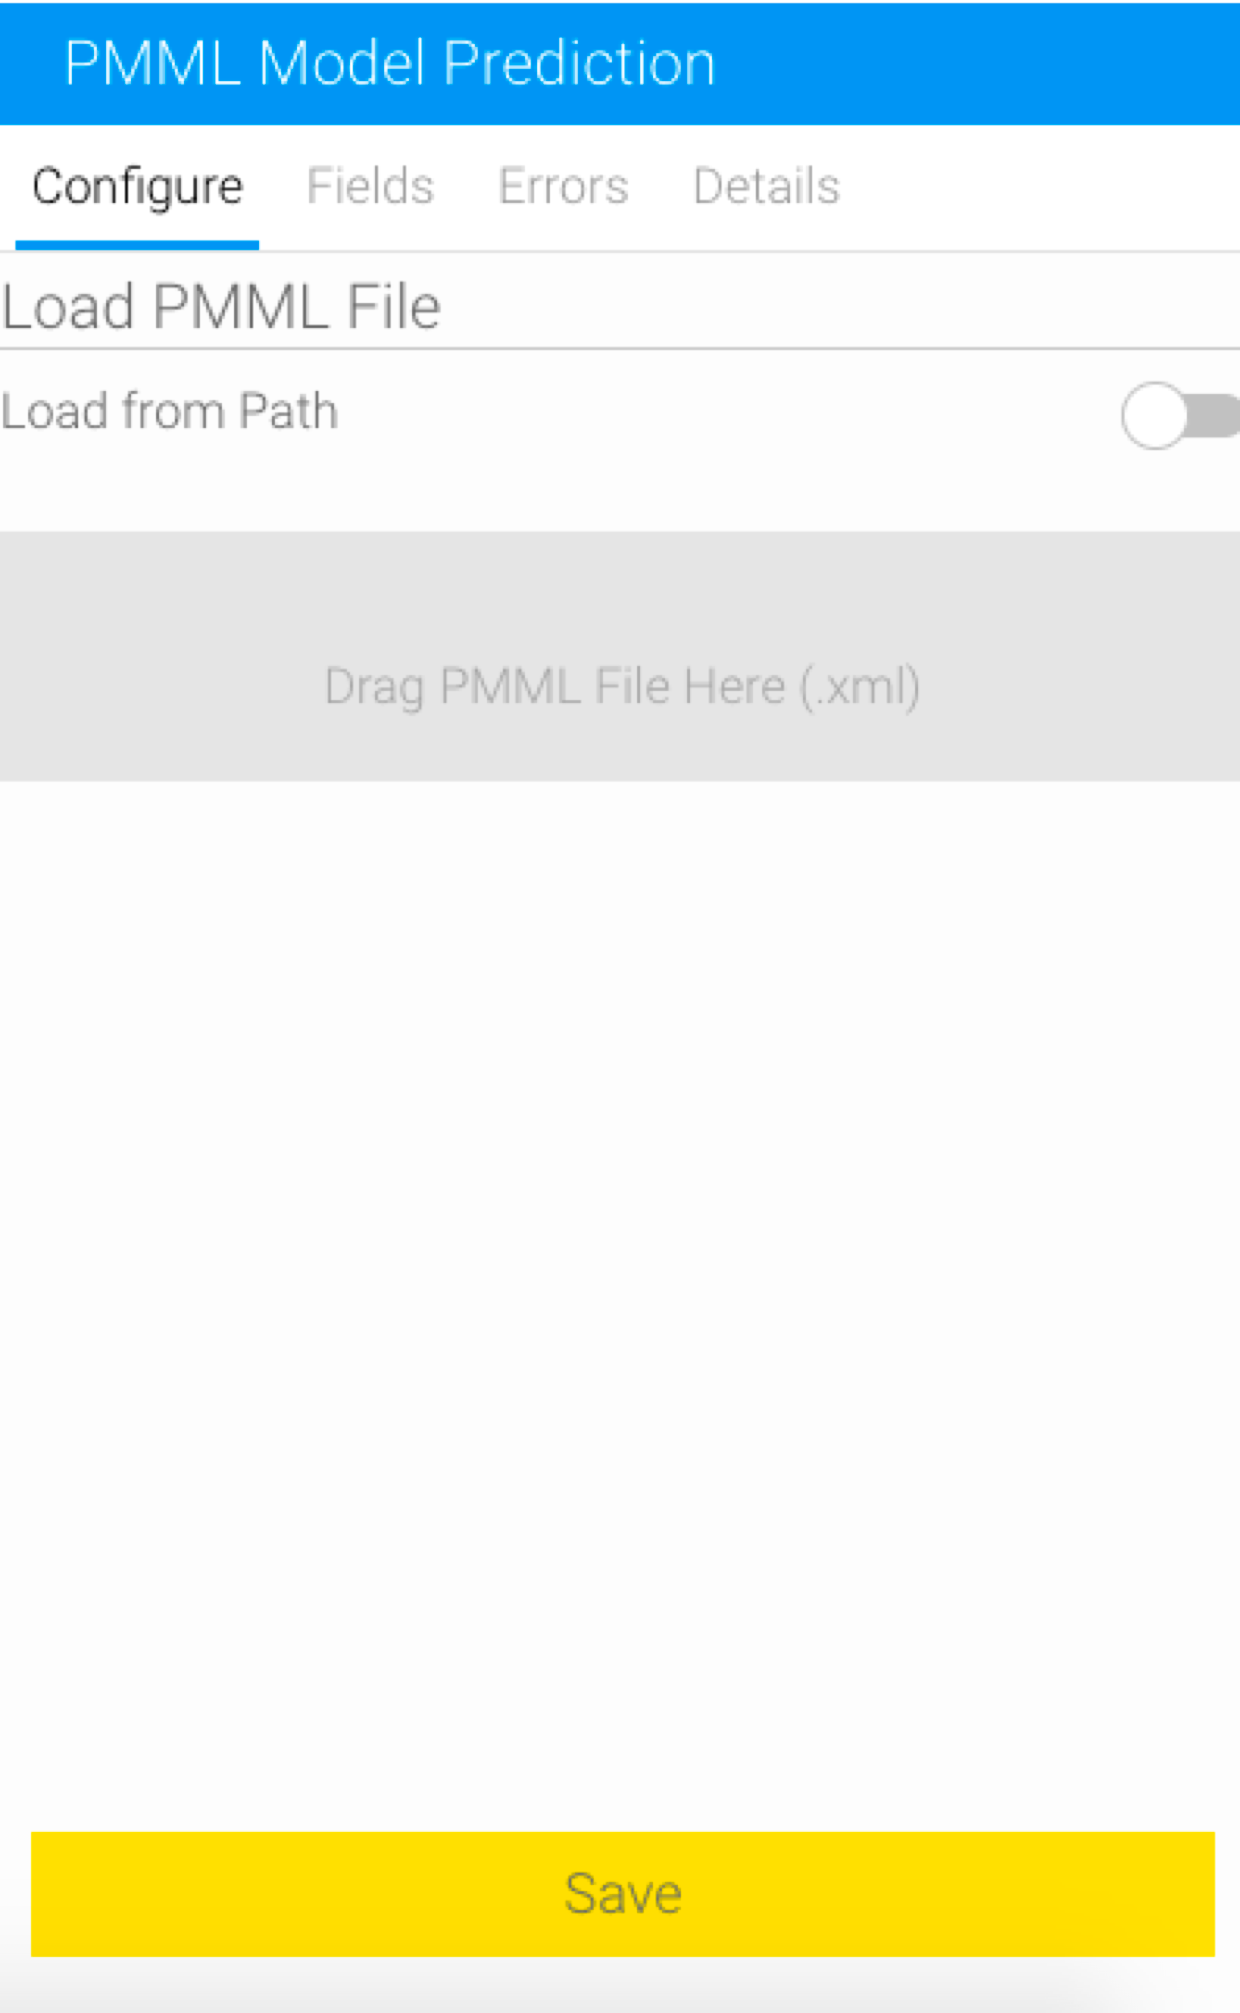
- Upload your PMML file. There are two ways of doing this.
- Drag the file into the specified panel, or browse and select it. (This is the preferred method if the file is located on your local machine.)
- Or enable the Load from Path toggle and load the file by providing its path or URL. Then click on the Load File button.
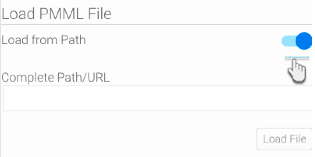
- Provide the full URL to access the PMML file, for example: http://dmg.org/pmml/pmml_examples/knime_pmml_examples/ElNinoLinearReg.xml
(Note: To be able to load a PMML file using a URL, you would need an internet connection, otherwise the file will not load.)
Example of a full file path on a Windows machine is given below:
C:\Users\admin\Desktop\audit_cluster.xml
Example of a file path on a Linux machine is given below:
/root/audit_cluster.xml
Note: If the file cannot be parsed, or if the path provided is invalid, then the following error message will appear.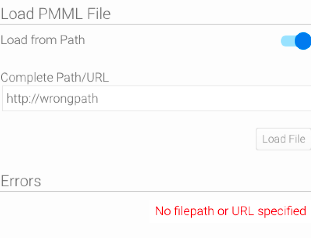
Note 2: When using the drag and drop method to upload a file, the file name might disappear when you first upload it, but will reappear once an action on the step is performed.
- Once the file is successfully uploaded, detailed configuration options will appear to map the input fields and specify the output. The input and output fields that appear will be dependent on the model.
- First, match the input columns required by your model with the appropriate columns in the extracted file. For example, our model requires input in the form of income, age and gender.
Note: It is essential to make the correct mapping here in order to produce the correct result. The data fields may not have the same names as they do in the model. You should ensure that the selected fields match the datatype that the model is expecting. (If an incorrect mapping is made, the Errors tab will generate errors for each of the data values.)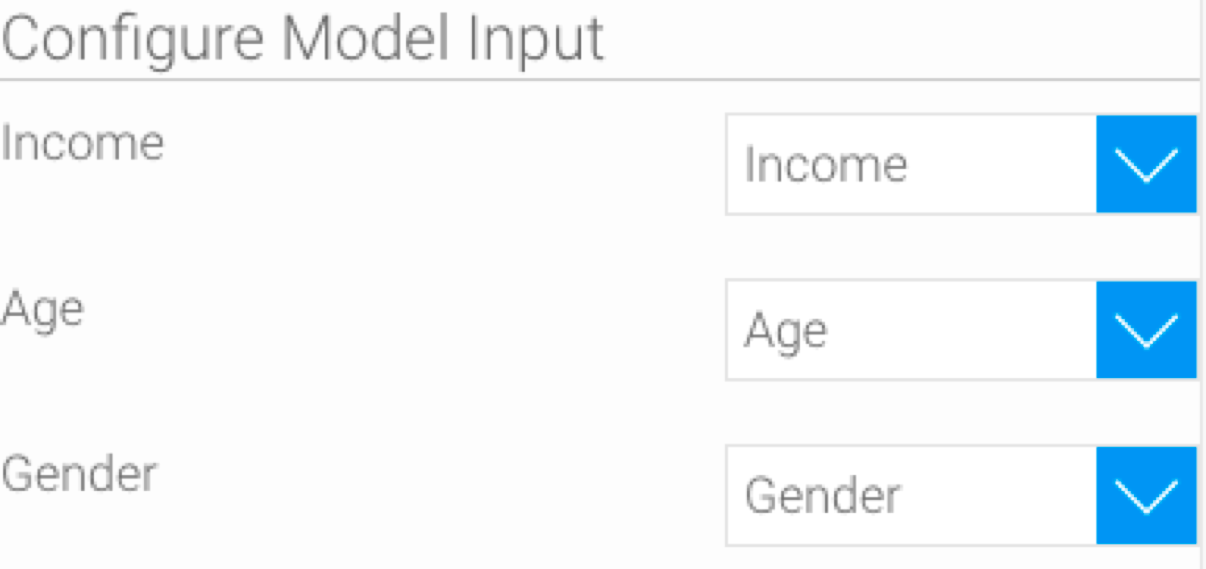
Note 2: All the input fields are mandatory for mapping, the step will not run unless all these are properly matched. - Next, select which model output result you would like to generate. The configure panel will display all the possible outputs that your model is designed to produce. You can choose one or more outputs (however at least one output field must be selected).
Note: The “Default Target” output field contains the default output of the model. If the PMML file does not explicitly specify an output field, then only the “Default Target” option will be available.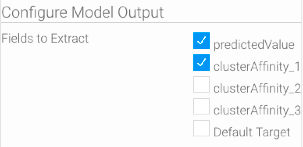
- Once the input and output fields have been properly configured, click Save. (Note: If you click anywhere outside of the configure panel after configuring the model and before clicking Save, you will lose the configuration details.)
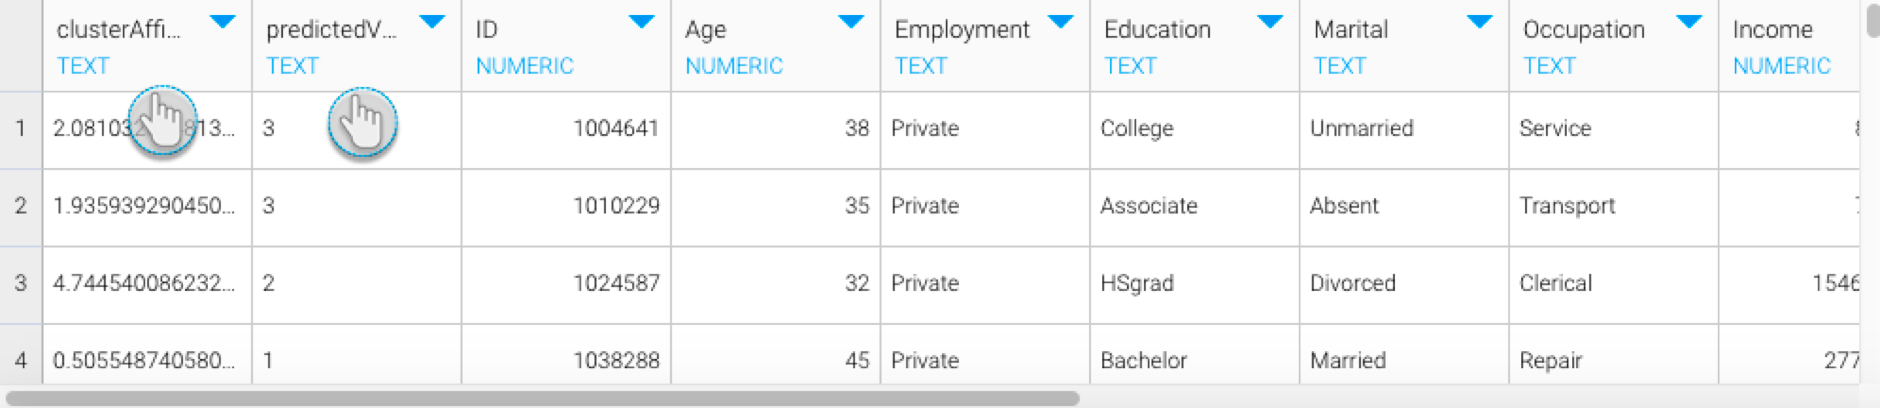
On doing so, columns(s) with the model’s result will appear in the data preview panel. (Note: Since we selected two output fields, therefore our example shows two new result columns.)
Note The datatype of these output columns will depend on what has been specified in the model. However, if not specified, then the system will use Text as the default type.
- You can perform further transformations or save your result in a database.
Editing a PMML Transformation Step
You can edit the PMML step by either replacing the PMML file with one with a different model, or by changing the input or output configurations. However, this will affect your transformation flow.
...