Page History
| Anchor | ||||
|---|---|---|---|---|
|
| Table of Contents | ||
|---|---|---|
|
Overview
| Styleclass | ||
|---|---|---|
| ||
Metric
This calculation returns numeric values and allows for standard Metric formatting options such as decimal places, prefix, suffix, and default aggregation.
Dimension
This calculation allows for all the standard Dimension formatting and functionality such as inclusion in Drill Down Hierarchies.
Creating a Calculation
- Drag in the appropriate Formula Builder field type (Metric or Dimension), assigning it to a Field Category.
- Navigate to the Formula tab
- The formula builder will allow you to generate a valid formula that will be returned by this column. Highlighted buttons will help guide you to create a valid formula.
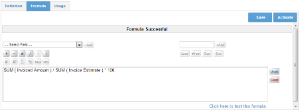
- Test your formula by clicking the test formula link.
- Save & Activate
Case Statements
| Styleclass | ||
|---|---|---|
| ||
Case Statement Structure
If you are not familiar with Case Statements, the basic structure is as follows:
| Code Block | ||
|---|---|---|
| ||
CASE WHEN this is true THEN return this WHEN this is true THEN return this WHEN this is true THEN return this ... ELSE return this END |
Each of the items in CAPS are a component in the case statement:
Component | Description |
|---|---|
CASE | The calculation will always begin with the CASE component. Make sure you have added this before trying to build the formula, other components will not be available until you do. |
WHEN | You can have as many WHEN components as you like in a Case statement, but they will always need to be before the ELSE component. WHEN is used to define a condition, for example: |
THEN | This is linked to the WHEN component and instructs Yellowfin on what to return when the condition is met. For example: |
ELSE | This is an optional component that is used to tell Yellowfin what to do when none of the WHEN conditions are met. It basically works like an extra THEN component. |
END | The calculation will always end with an END component in order to tell Yellowfin that it's complete. Your calculation will not be valid if you don't have an END so be sure to add it. |
Creating a Case Statement
- To insert a Case statement, click the CASE button in the Formula Builder.
- Click on the WHEN button will open a popup and create your first WHEN condition and THEN instruction.
Note: it operates similar to the formula builder, only allowing formula objects to be inserted where they are valid.

- Click OK to complete your condition/instruction
- Continue adding WHEN conditions until you have covered all the possibilities required
- Add an ELSE condition if needed, this is optional, but recommended.
- Add your END component
- Save & Activate your calculation
Grouped Values
| Styleclass | ||
|---|---|---|
| ||
| Section | ||||||||||||||||||||||||||||||||||||
|---|---|---|---|---|---|---|---|---|---|---|---|---|---|---|---|---|---|---|---|---|---|---|---|---|---|---|---|---|---|---|---|---|---|---|---|---|
|
Creating a Grouped Values Field
In order to set up a Grouped Field complete the following (this example will create three groupings with text labels):
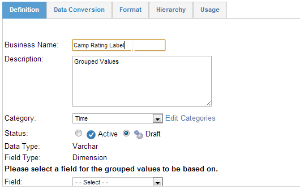
- Drag in Grouped Values field into a Category in the Available Fields panel
- Select a Field to base the grouping on
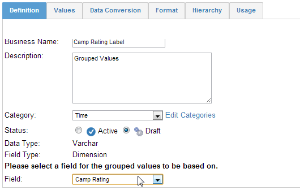
- Supply a Business Name
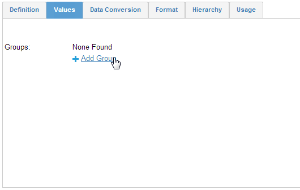
- Navigate to the Values tab
- Click on Add Group
- Poor Between 0 AND 3
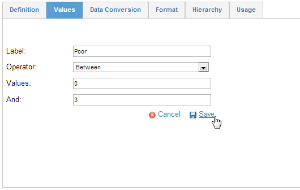
- Click Save
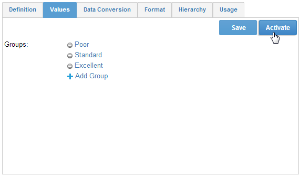
- Poor Between 0 AND 3
- Click on Add Group
- Standard Between 4 AND 7
- Click Save
- Click on Add Group
- Save & Activate your field
| horizontalrule |
|---|
| Styleclass | ||
|---|---|---|
| ||