Page History
| Anchor | ||||
|---|---|---|---|---|
|
The data transformation module consists of a drag and drop transformation flow builder which allows users to create transformation flows. This section helps you understand this builder and its various components.

Accessing the Transformation Flow Builder
To access this builder, follow the steps below.
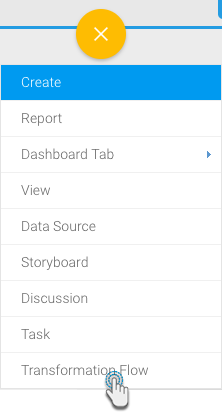
- Click on the Create button.
- Then choose the Transformation Flow option.
- You will be navigated to the transformation flow builder.
Understanding the Flow Builder's Components
Before you start using the builder to create transformation flow, get an understanding of its different components and features.

# | Function/Panel | Description | |
|---|---|---|---|
1. | Navigation menu | The buttons here enable you to save, publish and delete a transformation flow.
| |
2. | The different There are three types of transformation steps that can be selected from the buttons. There are three main types:included in a transformation flow. Hover over their individual buttons or click on them to view a list of the selected step. These are connected to one another by connectors connections. | ||
3. | Middle header menu |
| |
4. | Configuration panel | This panel provides details of the overall transformation flow, or a selected step. Transformation flow: If no step is selected, details of the entire transformation flow are seen here. This includes the flow's run logs, and activity stream. Step configuration: If a step is selected, this panel is used to configure its settings. Used to configure a selected step or the overall flow. The tabs in this panel will vary according to the selected step or main flow. | |
5. | This shows the extracted and/or transformed data. Every time a change is made, it can be instantly be viewed here. | ||
6. | Transformation builder canvas | This canvas is used to create the transformation flow. Drag items steps here to include them in the flow, and create connections between them. | |
7. | Canvas positioner | The map view can be used to move the canvas around - this is useful when there are large numbers of steps on the canvas. You can also use this to re-centre the canvas. |
Steps
| Expand | ||||||||||||||||||||||||||||||||
|---|---|---|---|---|---|---|---|---|---|---|---|---|---|---|---|---|---|---|---|---|---|---|---|---|---|---|---|---|---|---|---|---|
| ||||||||||||||||||||||||||||||||
Include an input step to define where to extract your data from. The following types can be used: Input Step Types
Input step functionsOnce an input step is added to the canvas, right click on it to see the functions that can be performed on it. These are explained below:
|

| 8. | Exit button | Use the exit button to close the transformation flow builder and return to your dashboard |
...
| title | Transformation Steps |
|---|
Use a transformation step to transform or convert the connected data.
Transformation Step Types
...
| Column |
|---|
|
...
Icon
...
Transformation type
...
Description
...
...
Aggregate Step
...
This step summarises data including the ability to count, sum and average metric fields.
...
Calculated Field
...
This step creates a calculated field based on other fields in the step.
...
Filter
...
This step is for filtering data in a step.
...
Merge
...
This step merges two sets of data based on the configured Join Fields.
...
Split
...
| . |
| Styleclass |
|---|
|
Output step
Save the transformed data into a database using an output step.
Icon | Transformation type | Description |
SQL Database | This outputs data to a selected writeable data source. There are multiple options to create and manage tables and indexes, and to insert or update data. |
Connectors
Connectors are used to join steps together and create a relationship between them. Data will flow from one step to another step. Click on a step to reveal its connecting points. These points are then used to connect one step to another. The flow of a connector is represented with an arrowhead at the end of it.
Connection rules (running left to right):
- An input step can be connected to only one transformation or output step.
- A transformation step cannot be connected to an input step, but to another transformation or output step.
- All types of transformation steps, except the split step, can only be connected to one other step.
- A split step can be connected multiple times.
- Connections can only be made to an output step, but it cannot be the origin of a connection.
Breaking a connection:
Once a connection is created between two steps, it can be broken or deleted. Simply right-click on one of the steps, and click on Break Connections. This will break all the connections associated with that step.
Alternatively right-click on the connector itself and select Break connections.
---------------------------------------------------------------------------------------------------------
Configuration panel
Click here learn more about this panel.
Data preview panel
| |