Page History
...
| Table of Contents | ||
|---|---|---|
|
Overview
There are a variety of ways to deploy Yellowfin on AWS. The most common are:
- Download and install the Yellowfin installer, as you would do for an on-premises installation;
- Install Yellowfin within one or more containers that you've already set up on AWS; and,
- Try Yellowfin for free with a pre-installed version of Yellowfin for AWS (using Amazon Machine Image - AMI).
Option 1: Download and install the Yellowfin installer
If you decide to install Yellowfin independently on AWS, you can use our existing on-premises installer and follow the steps outlined here in our Install on Premises section.
Option 2: Install Yellowfin in a container on AWS
For containerized deployments, see our dedicated section — Install in a Container.
Option 3: Try the pre-installed version of Yellowfin for AWS
You can try Yellowfin for free with AWS with a special evaluation offer
| Styleclass | ||
|---|---|---|
| ||
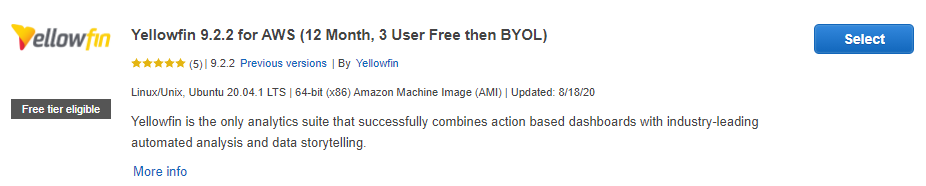
- Ready-to-go AWS deployment: Yellowfin with all of its tutorial content to demonstrate reports, dashboards, stories, presentations, alerts and storyboardsmore.
- Free 1 Year one-year licence for 3 three users: the licence is designed to allow give you time to full fully evaluate the system, allowing you to buy once you've ticked all the boxesso you know exactly what's on offer with the tools Yellowfin provides.
- Connection to Redshift: Yellowfin can connect to Redshift in order to store your data and generate reports without setting up an external database.
Setup
| Styleclass | ||
|---|---|---|
| ||
Amazon Elastic Compute Cloud (EC2) Settings
...
| width | 40% |
|---|
1. Log in to Amazon Web Services (AWS)
You will still need your own Amazon Web Services account, which is not included in this offer.
Deploy the pre-installed version of Yellowfin for AWS
Even if you're not familiar with AWS, setting up Yellowfin for AWS is straightforward. Follow the detailed steps below to launch Yellowfin.
In the following steps, we'll:
- configure the Elastic Compute Cloud (EC2) location setting to ensure the fastest speeds for your location;
- create an EC2 instance;
- choose an Amazon Machine Image (AMI);
- launch and view your EC2 instance;
- name your EC2 instance; and
- locate the IP address for your EC2 instance so you can launch Yellowfin.
Make sure you have an AWS account before getting started.
Note that these steps relate to third-party software, so the screen dumps and steps may change at any time and are provided as a guide only.
...
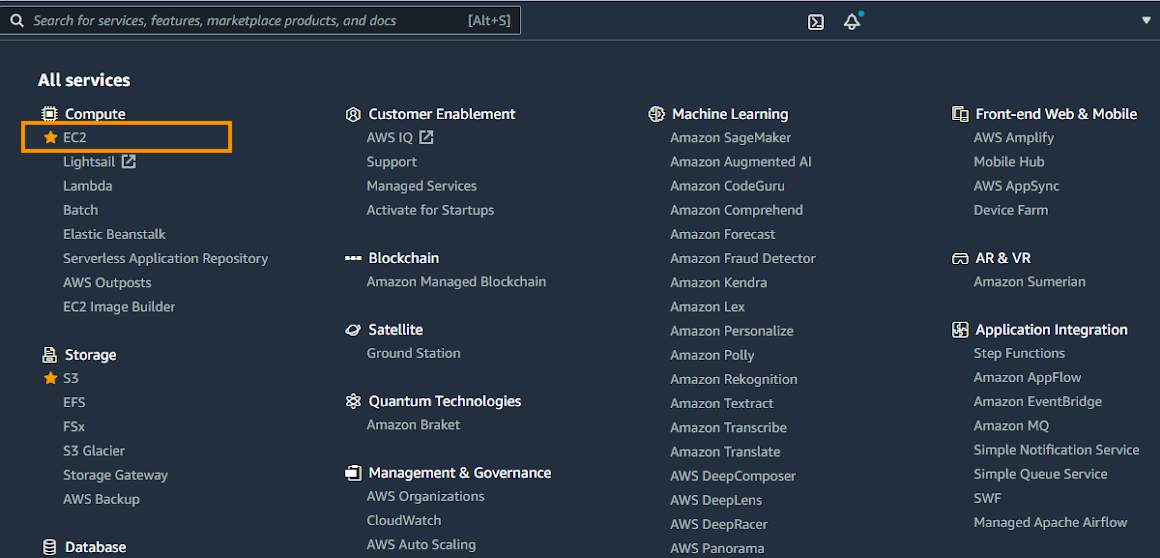
- Log in to AWS
- Open the Services menu at the top of the page, then under the Compute category, click on EC2
...
| Column | ||
|---|---|---|
| ||
|

Location
...
| width | 40% |
|---|
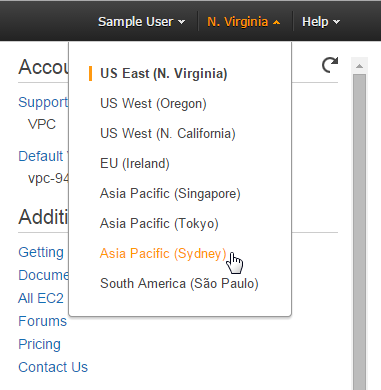
While in the EC2 Dashboard it's important to select the closest location to your users. This will generally result in the fastest response times.
...
- Click on the Location currently in use next to your name at the top right corner of the page
...
...
- Select the location closest to you
...
...
Create Instance
...
...
| width | 40% |
|---|
...
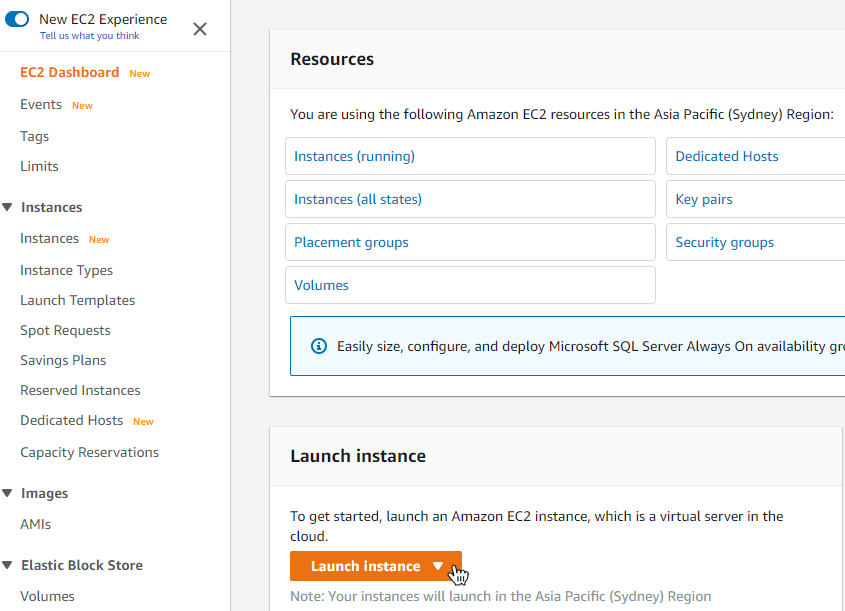
- While still on the EC2 Dashboard, click on the Launch Instance button under the Create Instance heading
...
From here you will be walked through a setup process where you define and configure the instance.
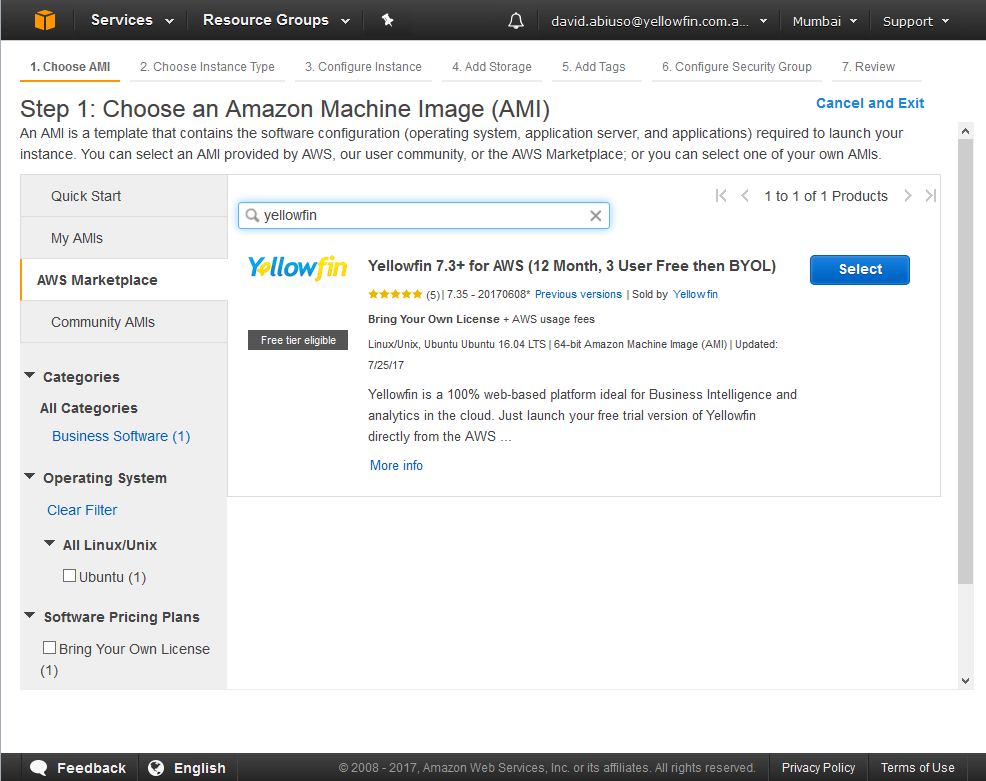
- In the navigation pane on the left, click on AWS Marketplace, then in the search bar above it, type Yellowfin
The Yellowfin AMI should be displayed: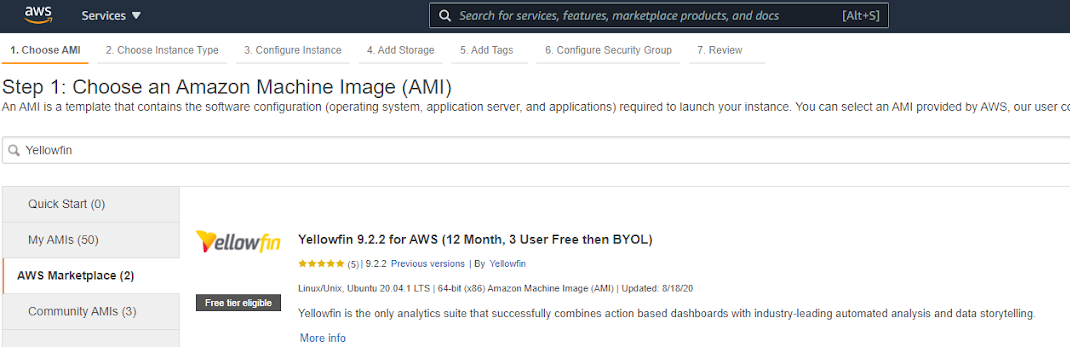
- Click anywhere on the Yellowfin AMI and then click on the Select button
AWS will prompt you to define your instance, including
| Column | ||
|---|---|---|
| ||
|

Choose an Amazon Machine Image (AMI)
| Section | ||||||||||
|---|---|---|---|---|---|---|---|---|---|---|
|
| Section | ||||||||||
|---|---|---|---|---|---|---|---|---|---|---|
|

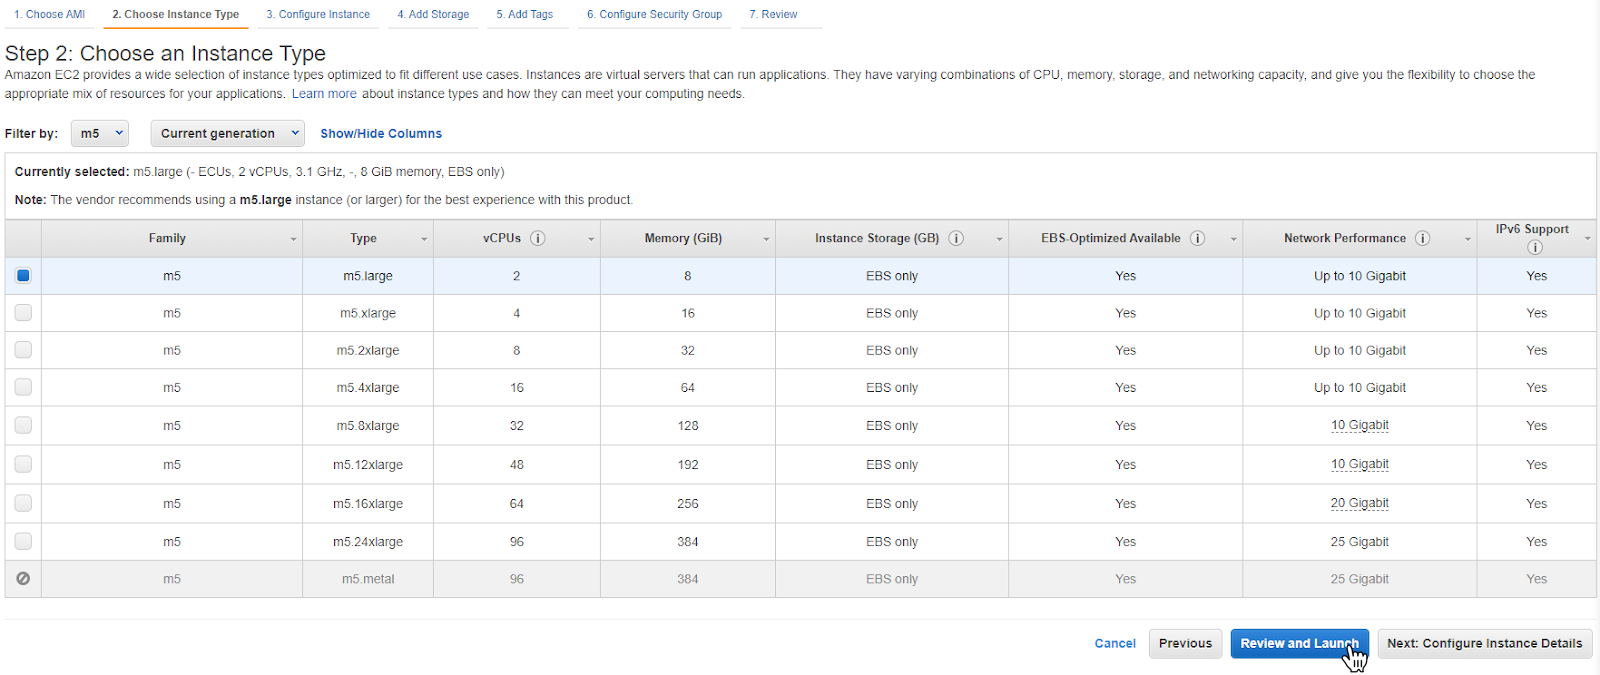
Choose Instance Type
...
| width | 40% |
|---|
...
| Column | ||
|---|---|---|
| ||
|

...
| width | 40% |
|---|
...
- the CPU, memory, storage, and networking capacity
...
For evaluation purposes, the t2.micro type is fine, and is free to use. For production purposes the t2.medium or higher options are recommended.
- allocation
During evaluation, the m5.large or t3.large types are fine. For production, we recommend m5.xlarge or higher
- Select the type you wish to use
...
...
- Click the Review and Launch button
...
| Column | ||
|---|---|---|
| ||
|

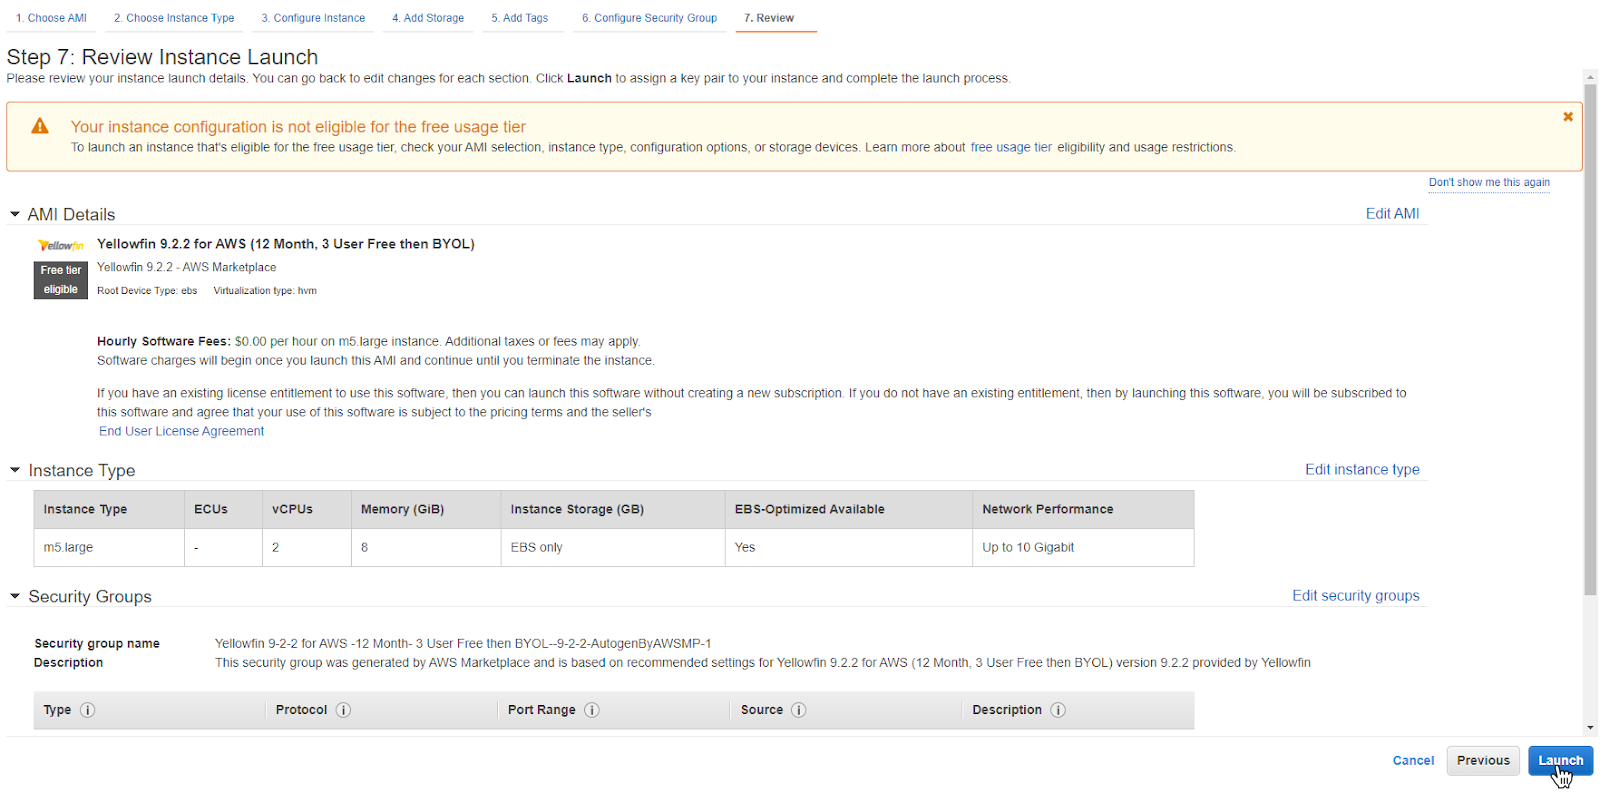
Review & Launch
...
| width | 40% |
|---|
You will now be presented with a range of options to finish configuring the instance to suit your specific needs.
- Follow the prompts to complete your instance configuration, depending on your specific needs
- Once configured, click the Launch button
...
| Column | ||
|---|---|---|
| ||
|

...
| width | 40% |
|---|
You will now be prompted to define key pairs. For the purposes of this example, we are not going to use a key pair, but you can define them as required for security purposes
...
...
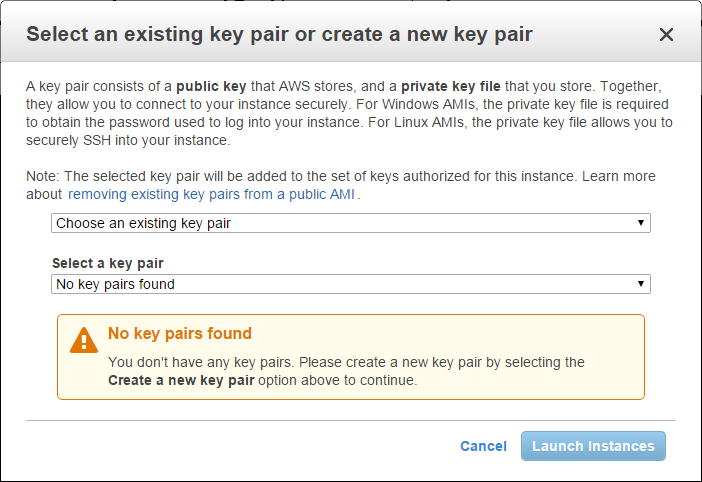
Note: if you
...
- wish to
...
- access the log files and other configuration items outside of the UI, or you wish to patch Yellowfin in the future you
...
- must use a key pair
...
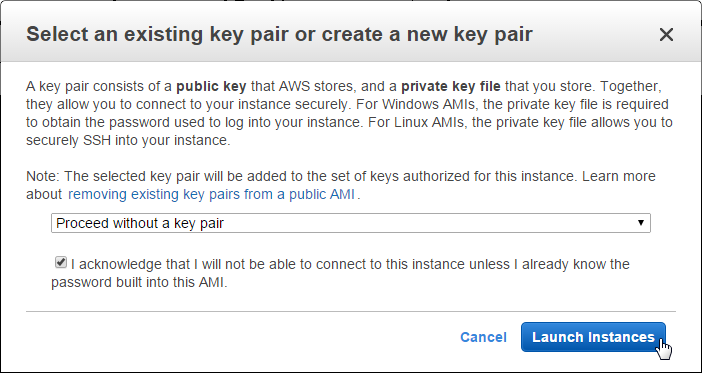
- From the dropdown list, either select a key pair
| Column | ||
|---|---|---|
| ||
|

...
| width | 40% |
|---|
...
- , or select the Proceed without a key pair option
...
...
- Click the Launch
...
| Column | ||
|---|---|---|
| ||
|

View Instances
...
| width | 40% |
|---|
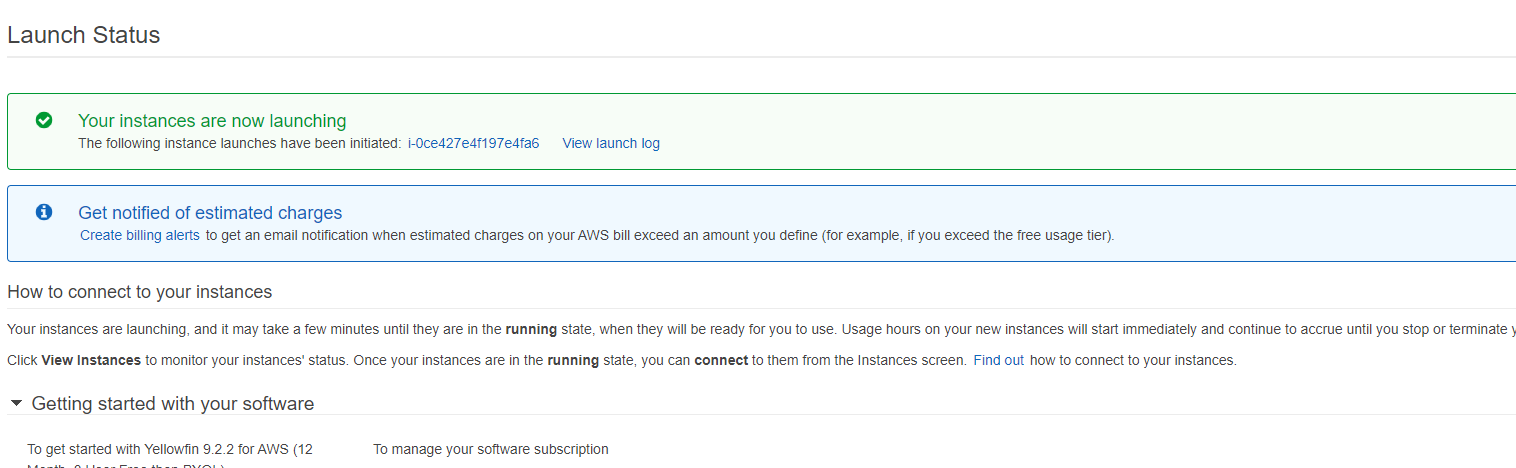
Your instance will now be launching and should be ready shortly.
...
- Instances button to initiate the process
- Click on the View Instances button
...
- to see a list of
...
- available and initialising instances
...
| Column | ||
|---|---|---|
| ||
|

Instance Name
| Section | ||||||||||
|---|---|---|---|---|---|---|---|---|---|---|
|

Public IP
...
| width | 40% |
|---|
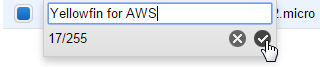
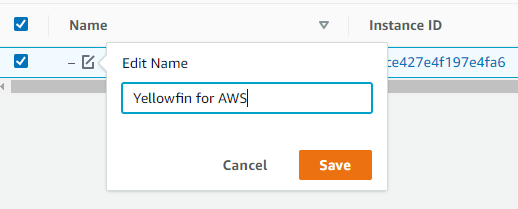
- Click in the empty Name field for your initiating instance to edit the name

- Type a name, then click on the Save button
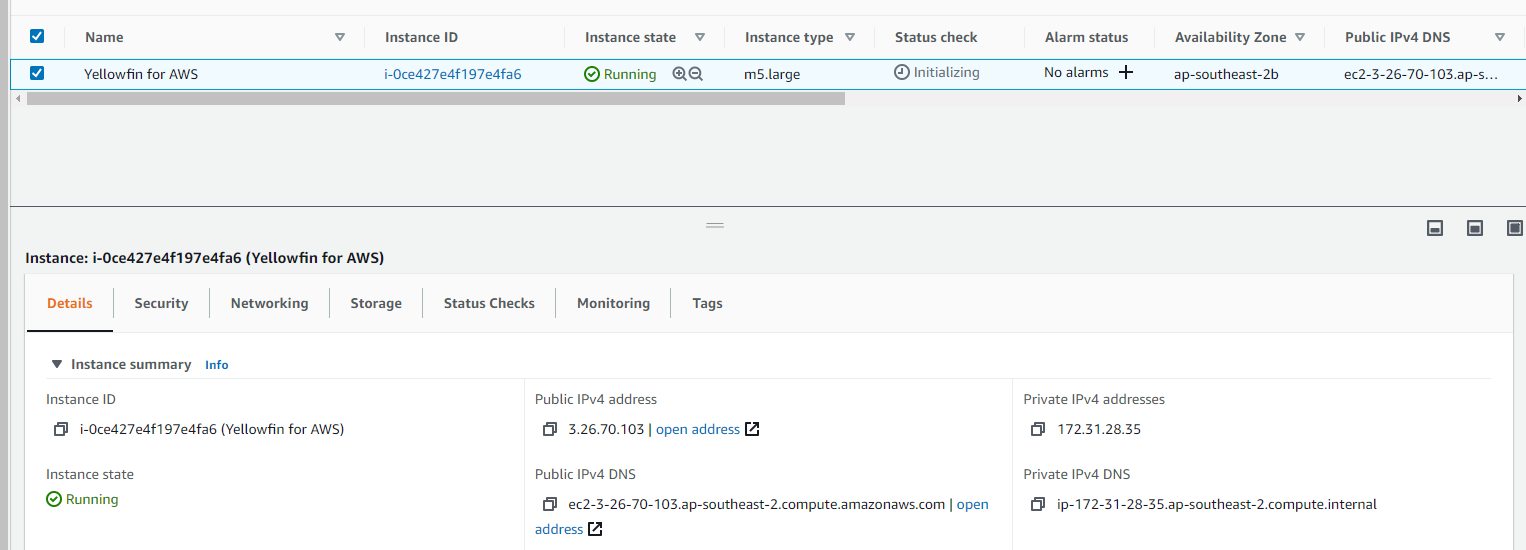
Once the instance is running, you will need
...
- its IP address
...
- to access Yellowfin
...
- via your browser
...
- Click on the
...
- Details tab while the instance is selected and
...
- take note of the IP address displayed in Public IPv4 address
Launching
| Column | ||
|---|---|---|
| ||
|
Yellowfin
| Styleclass | ||
|---|---|---|
| ||
Open Yellowfin
...
| width | 40% |
|---|
...
Now that AWS has an instance of Yellowfin with an IP address, you can open Yellowfin and register for a login.
Yellowfin is supported on a number of web browsers including:
- Chrome
- Firefox 2+
- Microsoft Edge
- Opera 8+
- Safari 2+
If you're using any other browser, we recommend you switch to one of the browsers listed above when accessing Yellowfin.
- Open a web browser and
...
- type or paste the IP address from the previous steps.
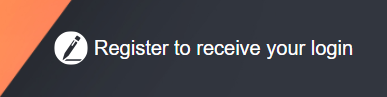
The Yellowfin login screen will be displayed: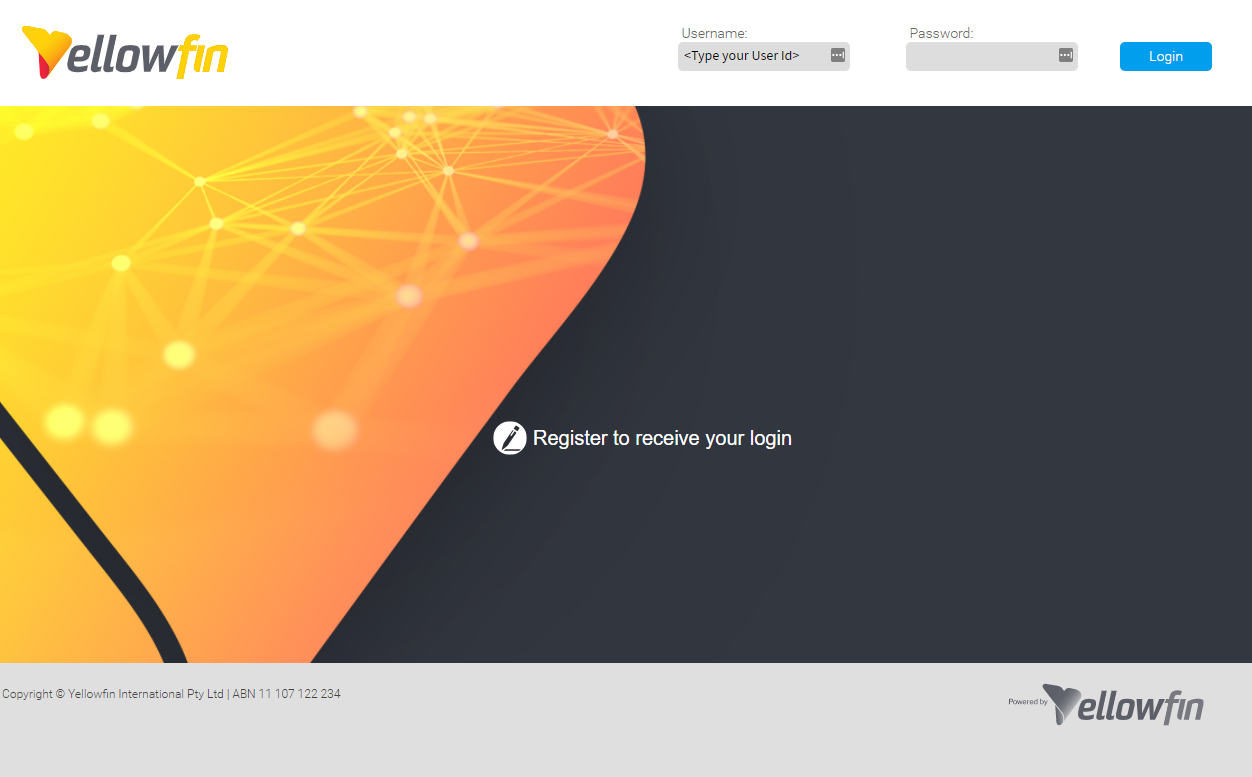
- To receive your own login details, click on the text Register to receive your login
- Complete the registration form. When you have sent the form, the Yellowfin login screen will display a different message:
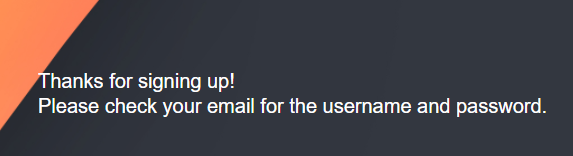
- Check your inbox for your registration confirmation email. It contains your username and password, along with some helpful getting started links
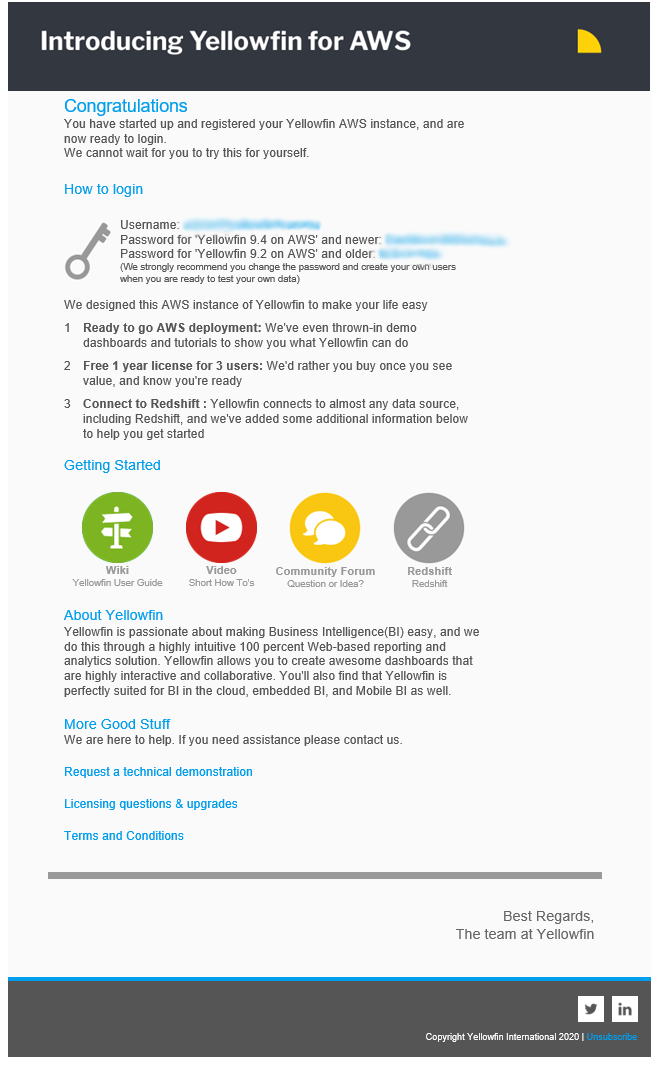
- Use the details in the email to login to Yellowfin
...
What next?
Make sure you read through our Deploy Yellowfin page for the next steps on how to get started quickly with Yellowfin. It covers the configuration basics and provides information about log file location, directory structure and more.
...
Section navigation
| Section | |||||||||||||||||||||||||||||||||||||||||||||
|---|---|---|---|---|---|---|---|---|---|---|---|---|---|---|---|---|---|---|---|---|---|---|---|---|---|---|---|---|---|---|---|---|---|---|---|---|---|---|---|---|---|---|---|---|---|
Current topic - Install in the CloudThis page is part of the Install And Deploy Yellowfin section of the wiki, which has these topics:
|
| Column | ||
|---|---|---|
| ||
|

Register Yellowfin
| Section | ||||||||||
|---|---|---|---|---|---|---|---|---|---|---|
|

| Section | ||||||||||
|---|---|---|---|---|---|---|---|---|---|---|
|

| Section | ||||||||||
|---|---|---|---|---|---|---|---|---|---|---|
|

...
| Styleclass | ||
|---|---|---|
| ||
...
...