Page History
| Anchor | ||||
|---|---|---|---|---|
|
| Table of Contents | ||
|---|---|---|
|
Overview
| Styleclass | ||
|---|---|---|
| ||
Grouping Age Example
The example below groups the results of the age column into a segment group. People with an age 13 and 18 (inclusive) are grouped as teenagers.
For example:
| Section | |||||||||||||||||||||||||||||
|---|---|---|---|---|---|---|---|---|---|---|---|---|---|---|---|---|---|---|---|---|---|---|---|---|---|---|---|---|---|
|
Grouped Metrics
| Styleclass | ||
|---|---|---|
| ||
1. Click the drop down list on a view field and select the New Grouped Data Field option. Alternatively, click on the Create button at the bottom of the View Fields list and select Grouped Data.

You will now see the Group Data lightbox.
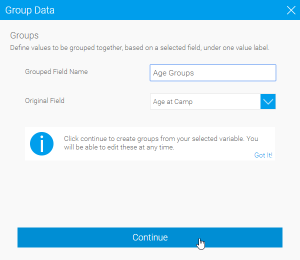
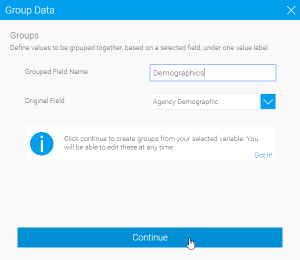
2. Provide a name for the field, and specify which view field it should be based on.
3. Click Continue to begin designing groups.
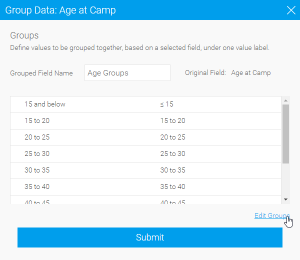
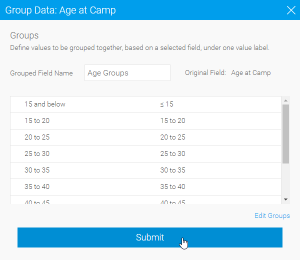
When it comes to metrics, Yellowfin will automatically provide groupings, which you can then adjust.
4. Click Edit Groups to make adjustments to the auto groups.
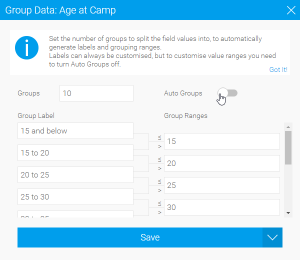
5. You can now specify the number of groups Yellowfin divides your data into.

6. If you want to further edit the groups, disable Auto Groups.
7. You can now change the labels and value ranges for the groups.
8. Click Save to complete your changes.
9. Click Submit to complete your grouped data field.
1. Click the drop down list on a view field and select the New Grouped Data Field option. Alternatively, click on the Create button at the bottom of the View Fields list and select Grouped Data.

You will now see the Group Data lightbox.
2. Provide a name for the field, and specify which view field it should be based on.
3. Click Continue to begin designing groups.
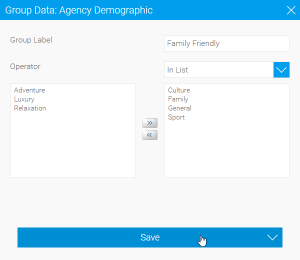
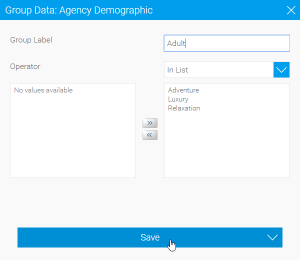
4. Provide a label for your first grouping. This will be what's displayed instead of the grouped values.
5. Pick an operator for your grouping logic:
Operator | Description |
|---|---|
In List | One or more alphanumeric or string values |
Not In List | Two or more alphanumeric or string values |
6. Select which values should be used in this group, moving them from the list on the right to the list on the left.
7. Click Save to complete this group.
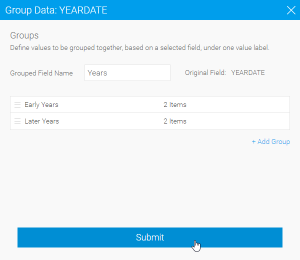
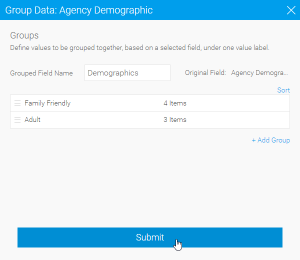
8. To add additional groups, click on the + Add Group link.
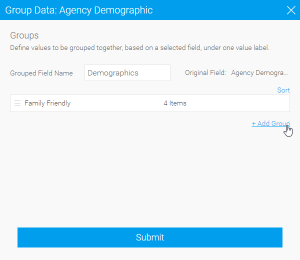
9. Define and save your additional groups.
10. You can reorder your groups by clicking and dragging the  icon.
icon.
11. Edit a group by clicking on its label.
12. Click Submit to complete your grouped data field.
1. Click the drop down list on a view field and select the New Grouped Data Field option. Alternatively, click on the Create button at the bottom of the View Fields list and select Grouped Data.

You will now see the Group Data lightbox.
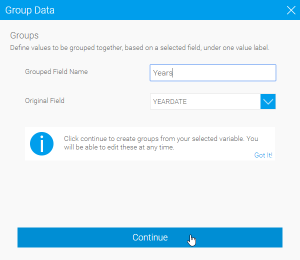
2. Provide a name for the field, and specify which view field it should be based on.
3. Click Continue to begin designing groups.
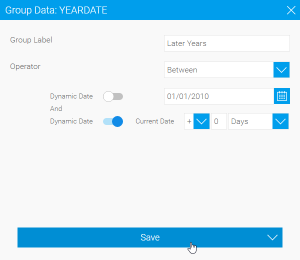
4. Provide a label for your first grouping. This will be what's displayed instead of the grouped values.
5. Pick an operator for your grouping logic:
Operator | Description |
|---|---|
| Equal To | The same as the specified date. |
| Different From | Different to the specified date. |
| Greater Than | A date later than the specified date. |
| Greater Than or Equal To | A date the same or later than the specified date. |
| Less Than | A date before the specified date. |
| Less Than or Equal To | A date the same or before the specified date. |
| Between | A date in between the two specified dates. |
| Not Between | A date outside of the two specified dates. |
| In List | A date the same as one in the list of specified dates. |
| Not In List | A date not found in the list of specified dates. |
| Is Null | A null date. |
| Is Not Null | A date. |
6. Select which values should be used in this group, moving them from the list on the right to the list on the left.
7. Click Save to complete this group.

8. Click Submit to complete your grouped data field.