Like what you see? Have a play with our trial version.

Error rendering macro 'rw-search'

null

You are viewing an old version of this page. View the current version.

Compare with Current View Page History

« Previous Version 24 Next »

Overview


Broadcasting allows you to send a report to one or more users via email, based on a defined schedule and set of rules. A personal broadcast is exactly the same, except it can only ever be sent to the person who defined the broadcast.

Note: If broadcasting or sharing reports with tabbed co-display content, you must first export the report into an XLSX file, and then schedule the broadcast. You need not use the exported file, but simply create a copy.

Administrators must configure the sender’s email address for content scheduled for broadcasts. This is done via the Email settings on the Configuration page.


1.  Ensure your report is Active (not in Draft mode)

2.  Click the Broadcast button in the main navigation menu

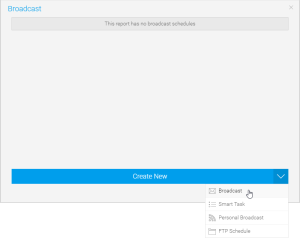
3.  Click on the Create New button and select the Broadcast option (to send to many) or the Personal Broadcast option (to send to yourself).

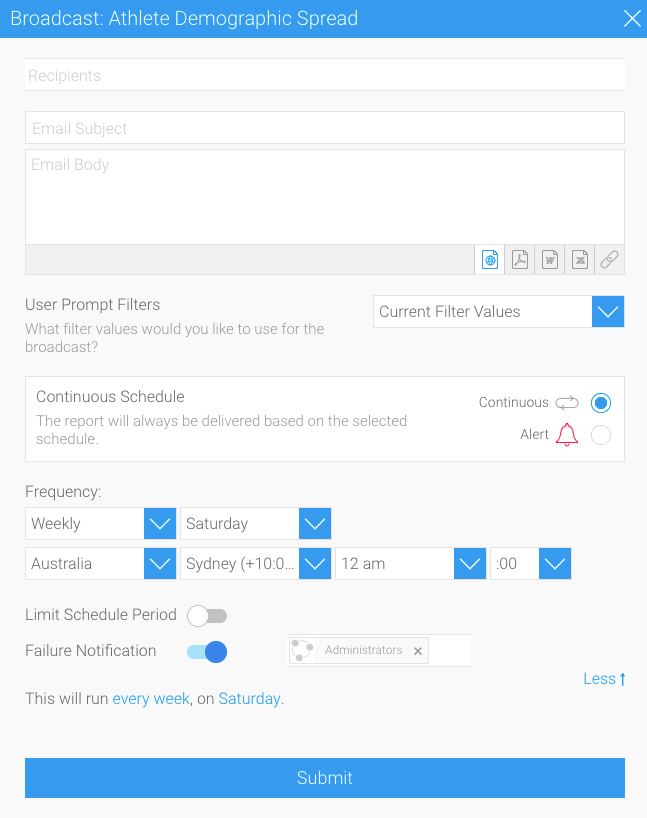
4.  The Broadcast window will open, providing you with a variety of described below.


Recipients


A Broadcast email can only be sent if recipients have been defined. One or more recipients can be selected for a broadcast. 

Note: this step is not available for personal broadcasts.


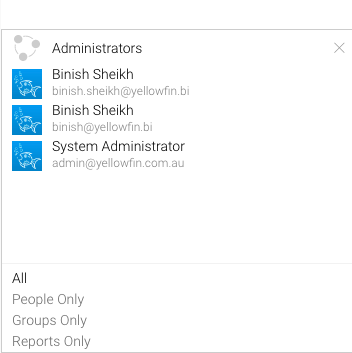
1.  Click in the Recipients box.

2.  From here you are able to search through Yellowfin Users, Groups, and Reports, or type in an external email address (external users require a multicast licence).

User

A person that is a registered user of Yellowfin.

Group

A group of users that have been setup within Yellowfin. This option allows you to send a report to multiple users at once.

Email Address

You can insert an external email address so that the report can be sent to external users. Ensure that it is a valid email address.

Note: this function depends on your licence options.

Report

You can select a report that already contains email addresses. These email addresses will be included in the broadcast. The email addresses don’t have to belong to Yellowfin users. Other columns in this report can be linked to the main report as filters, resulting in a uniquely filtered report sent to each email address.
Select the report you wish to use.

Note: the column that contains the email addresses in this report must be formatted as ‘Email’ to be displayed in the list. To do this:
a. Select the column in the Columns format menu.
b. Open the Display menu for the column.
c. Set the Format option to be Email.

3.  Once selected, your recipients will appear in the box.

Notes: 

  • Broadcast reports are run for each of the multiple recipients separately, taking into account their access filters, languages or other factors. However, to conserve memory usage and system performance, you can configure it so that each recipient’s report is delivered as soon as it’s generated (instead of waiting for all the recipients’ reports to get done before sending them together). See the configuration to do this here.

  • For multiple recipients that have access to the same data, you can set up a ‘carbon copy’ configuration. This allows a single email to be generated and sent to the first user, with the remaining recipients being sent a carbon copy. Note that all recipients will be visible to one another. See the configuration to do this here.
  • To further refine the audience from a report with emails, click on the Advanced  button. From here, you have more control over the filtering options.


Subject, Body, File Type


Define the basics of the email to be sent.

1.  Enter text for the subject of the email.

2.  Enter text for the body of the email.

3.  Select the preferred format of the report from the following:


    • HTML
    • PDF
    • CSV
    • DOCX
    • XLSX
    • Text
    • Link to Report

4. If the report is being broadcast as a file, an Append Broadcast Date checkbox will appear. Select it to include the current date in the document name.

5. When broadcasting a PDF file, a Secure PDF checkbox will appear. Use this to password-protect your PDF files. You can specify a password yourself, use the one created when exporting the file, or use a default one generated by Yellowfin. 

Learn more about this here.


Filters


If your report contains filters you will have the option to select which of these are applied to the broadcast report. 

The options include:


    • Current Filter Values
    • Default Filter Values
    • Bookmarks


Source Filters

If your report uses source filters, the broadcast report will also be filtered by the source filter, as well as whatever filters were defined above. If the report has been sent to an external email address, rather than a defined Yellowfin user, the recipient will inherit the source filter from the user who defined the broadcast.

Note: To broadcast a source filter report to recipients not defined in the source filter, make sure the user sending the report has the Multicast Access Filter Reports checkbox enabled in Report Menu section for their role.


Delivery Rule


An alert delivery rule is used for exception reporting. For example, if sales of a particular product drop substantially, a sales team could receive an alert to take action as soon as possible. Alert-based broadcasts and their delivery rules therefore allow businesses to deal with issues as soon as they happen.

  1. Change the Continuous option to Alert
  2. Click on the Add Alert Delivery Rules link
  3. You will now have the choice of building a rule based on:
    1. One or more rows must match (eg, a transaction less than $1,000)
      OR
    2. Aggregate against entire result set (eg, when total sales are less than $100,000)
  4. Select the field you wish to apply the condition on, click Add Field, and apply your condition. You can add multiple conditions here if required.
  5. Click Submit to apply your condition(s)
  6. Your rule will now be displayed on the Broadcast window


Frequency


The last step is to define the frequency for your broadcast
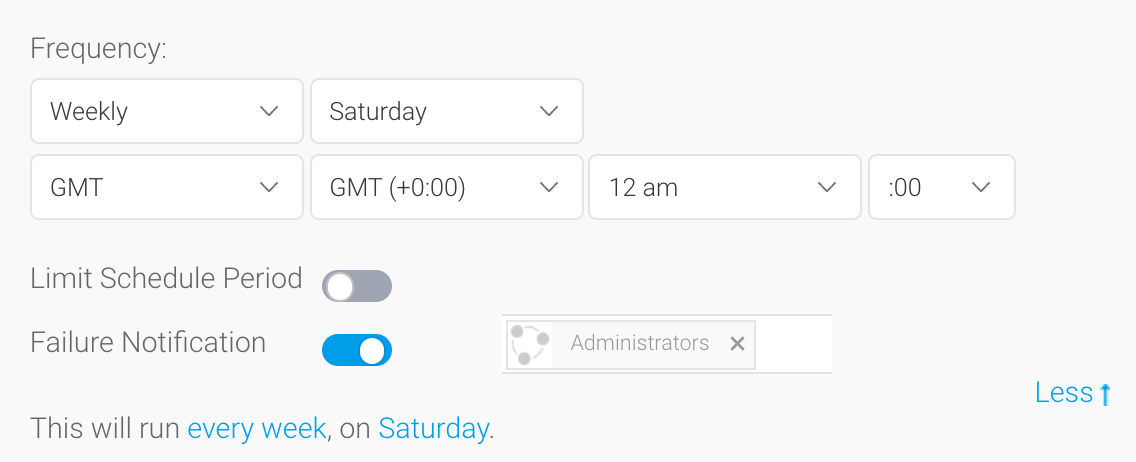
  1. In the Frequency section, select the desired schedule.
    Depending on the option selected here, you may be required to provide further details. For example, if Fortnightly is selected, you will be prompted to select either the first or second week of the fortnight to send in, as well as the day of the week. See the table below for further details.

    Select 'Once' as the frequency to send out the broadcast as soon as possible.

  2. Set any optional details:
    • Timezone: Sets the delivery timezone.
    • Limit Schedule Period: Limits the schedule to run only within a set period: enabling this option will display some from/to dates to select.
    • Failure Notification: Defines the admin group to notify if the broadcast schedule fails.

1.  Click on the Submit button to complete the broadcast setup.


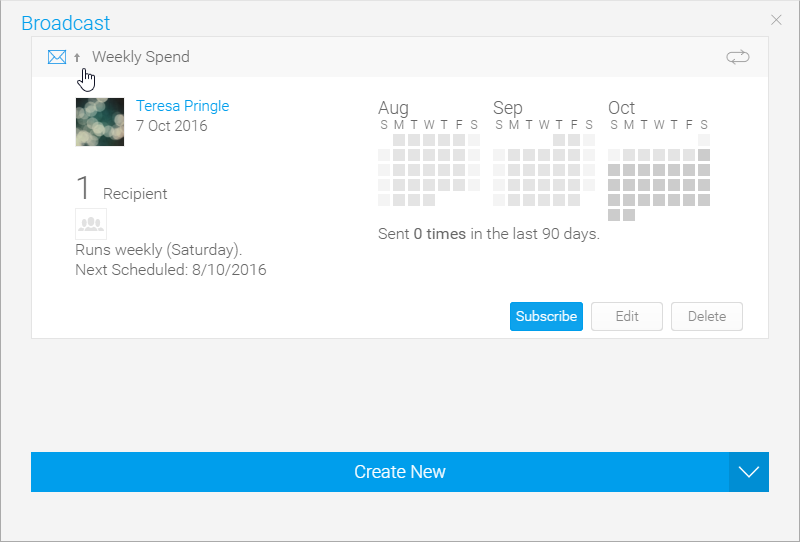
2.  You will now see your broadcast listed.


  • No labels