Embedding using Embed Links
Using an embed link is the simplest way to integrate Yellowfin content.
Obtaining an Embed Link
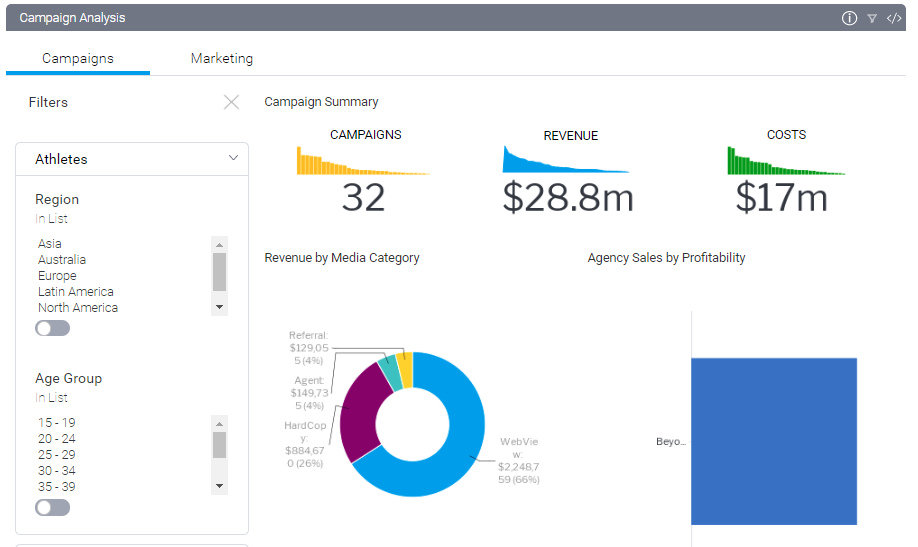
First and foremost, the content that you are wanting to embed must be already built in Yellowfin. Open the relevant Report or Dashboard and click on the Share option.
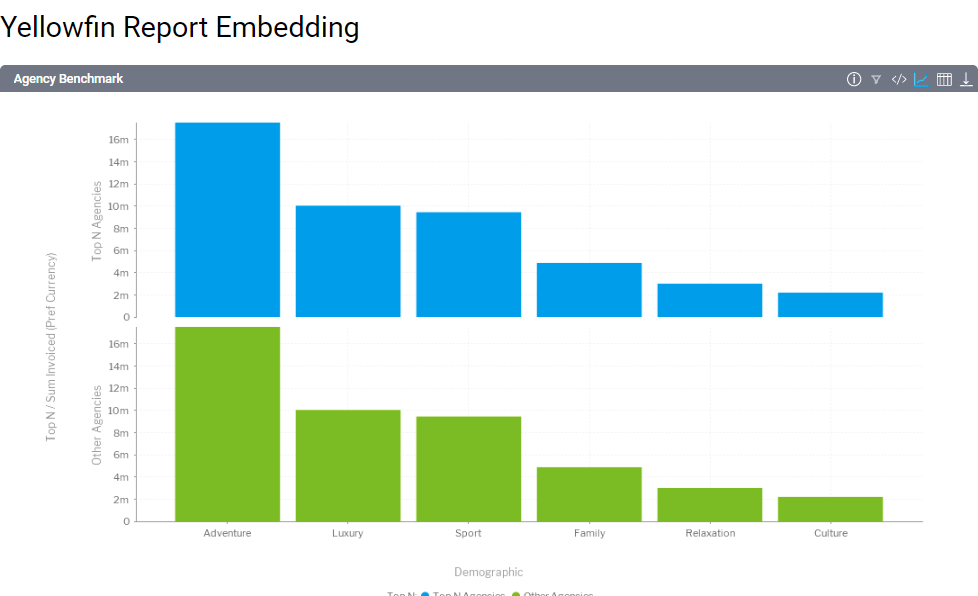
Share option on a report:
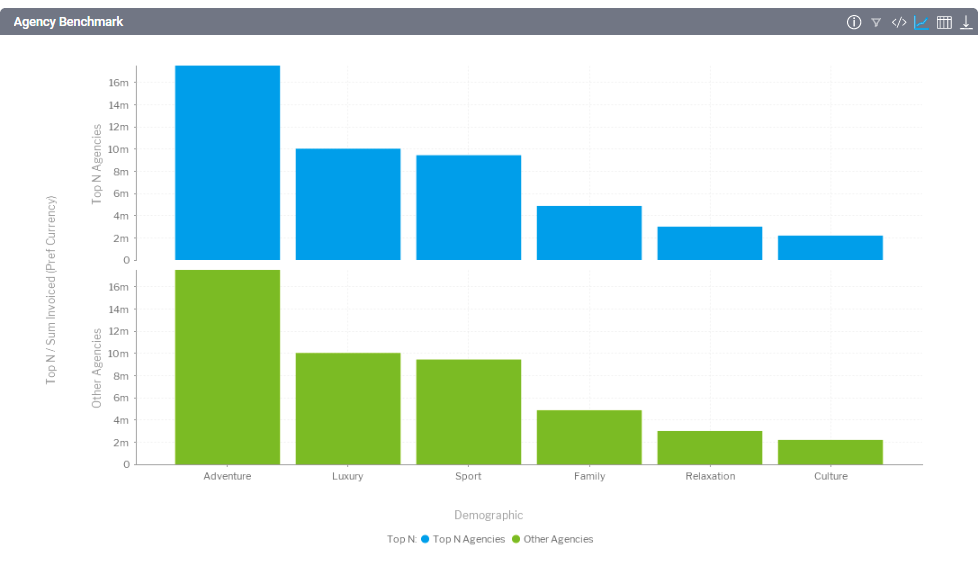
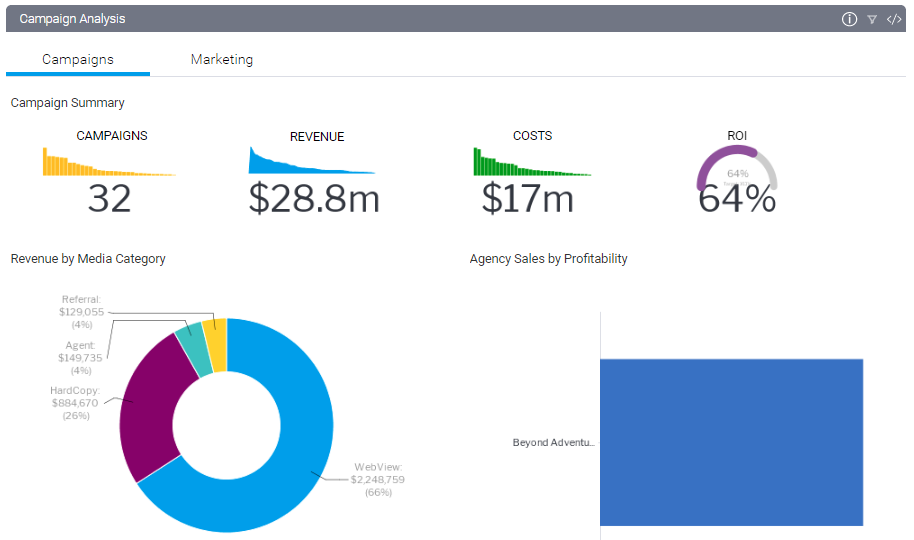
Share option on a dashboard:
![]()
Share popup with Embed link:
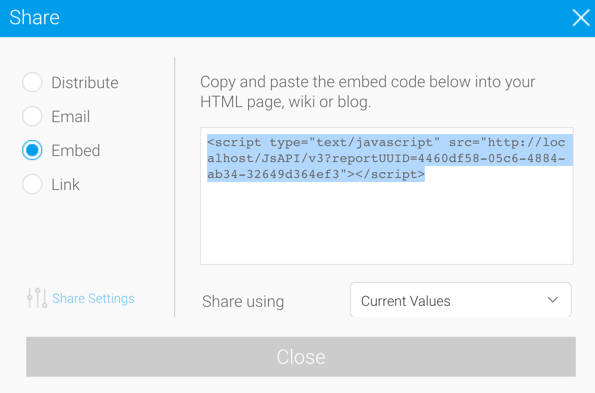
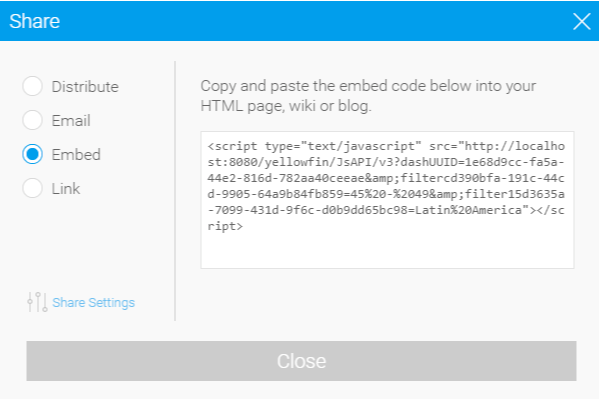
One of the types of Share available displays a script tag that looks like the following:
<script src=”http://localhost:8080/JsAPI/v3?reportUUID=2130913-asdsad8-21930123-asdads”></script>
Using the Embed Link on your page
Put this script tag into your HTML page:
<!DOCTYPE html> |
When the page is loaded, this will call all of the required code to display a report or dashboard on your page.
This content item will take up 100% of the space available to it. So if you embed it on a page with no styling it will take up 100% of the width of the browser and as much height required to render the chart of the table.
Embed Link Options
The embed link can have a number of options passed to it. These can be manually appended to the link after it has been obtained.
Reports
The following options are relevant when embedding a report.
The report’s charts and tables will size themselves to fit inside the container. A report canvas will not be scaled to render within the dimensions of the embedded report. If the defined size is smaller than the report canvas size, scrollbars will be added to the report element to allow you to see the entire canvas.
width
Used to set the width the report should render to. If no width is defined it will render to 100% of its parent element.
| &width=200 |
height
Used to set the height the report should render to, if no height is defined the report will render to 100% of its parent element.
| &height=200 |
showToolbar
Determines whether or not the toolbar above a report will be visible.
Default: true
Note: If this is set to false, showTitle, showInfo, showExport, showFilters, showShare, showDisplayToggle will also be treated as false, as they are all children of the toolbar.
When the property is not defined or set to true:
| &showToolbar=true |
The toolbar will be displayed above the report, as shown in the example:
<script type="text/javascript" src="http://localhost:8080/JsAPI/v3?reportUUID=c83357db-8aef-4ec7-ab72-fce34de9ee77&showToolbar=true"></script> |
If the parameter is set to false there will be no toolbar displayed:
<script type="text/javascript" src="http://localhost:8080/JsAPI/v3?reportUUID=c83357db-8aef-4ec7-ab72-fce34de9ee77&showToolbar=false"></script> |
showTitle
Determines whether or not the report name will be shown in the toolbar.
If the parameter is set to false then no title will be displayed in the toolbar:
![]()
<script type="text/javascript" src="http://localhost:8080/JsAPI/v3?reportUUID=c83357db-8aef-4ec7-ab72-fce34de9ee77&showTitle=false"></script> |
Default: true
&showTitle=true &showTitle=false |
showInfo
Determines whether or not the info option will be shown in the toolbar. The info option contains information about the report or dashboard that has been embedded.
The following information will be included:
- Report Name
- Report Description
- Folder
- Sub Folder
- Last Modified Date
With the showInfo parameter is set to false, the 'i' icon ![]() in the toolbar will be removed:
in the toolbar will be removed:
![]()
<script type="text/javascript" src="http://localhost:8080/JsAPI/v3?reportUUID=c83357db-8aef-4ec7-ab72-fce34de9ee77&showInfo=false"></script> |
Default: true
&showInfo=true &showInfo=false |
showFilters
Determines whether the filter option will be displayed in the report toolbar. This can be used with the filter[filterUUID] parameters to set a specific set of values for your embed link and not allow users to change any values.
With the showFilters parameter set to false, the filters icon ![]() will be removed:
will be removed:
![]()
Default: true
&showFilters=true &showFilters=false |
showExport
Determines whether or not the export option will be displayed in the report toolbar. Export options allow a report to be exported to an external file format such as csv, xls, pdf, txt and doc.
With the showExport parameter set to false the export icon ![]() in the toolbar will be removed:
in the toolbar will be removed:
![]()
<script type="text/javascript" src="http://localhost:8080/JsAPI/v3?reportUUID=c83357db-8aef-4ec7-ab72-fce34de9ee77&showExport=false"></script> |
Default: true
&showExport=true &showExport=false |
showShare
Determines whether or not the share option will be displayed in the report toolbar. The Share option allows a user to access the embed link for this piece of embedded content.
With the showShare parameter set to false the share icon will be removed:
<script type="text/javascript" src="http://localhost:8080/JsAPI/v3?reportUUID=c83357db-8aef-4ec7-ab72-fce34de9ee77&showShare=false"></script> |
Default: true
&showShare=true &showShare=false |
showDisplayToggle
Determines whether or not the chart and table toggles will be displayed. This toggle enables a user to change the view of an embedded report between the tabular report view and the chart view. If there is more than one chart associated with the report, then the report canvas is shown.
When showDisplayToggle is set to false the table and chart icons ![]() will be removed from the toolbar:
will be removed from the toolbar:
![]()
<script type="text/javascript" src="http://localhost:8080/JsAPI/v3?reportUUID=c83357db-8aef-4ec7-ab72-fce34de9ee77&showDisplayToggle=false"></script> |
Note: If the report has no chart then this option will have no effect.
Default: true
&showDisplayToggle=true &showDisplayToggle=false |
filter[filterUUID]
This can be used to set the values of individual filters on a report. The filter is identified by its UUID - "TheFilterUUID".
For example, you apply the values “Bargain Trips” and “Far Far Away Travel” to the filter “Company Name” which has the UUID “3aaf0e4-4b67-4118-9871-7dc98933e4e3”.
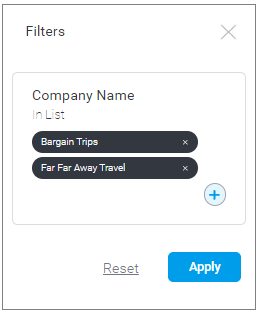
When retrieving the embed link through the Yellowfin UI, if there are filters applied to the report you are using, when opening the share menu the filter[filterUUID] values should already be populated.

<script type="text/javascript" src="http://localhost:8080/JsAPI/v3?reportUUID=c83357db-8aef-4ec7-ab72-fce34de9ee77&filterd3aaf0e4-4b67-4118-9871-7dc98933e4e3=Bargain+Trips%7CFar+Far+Away+Travel"></script> |
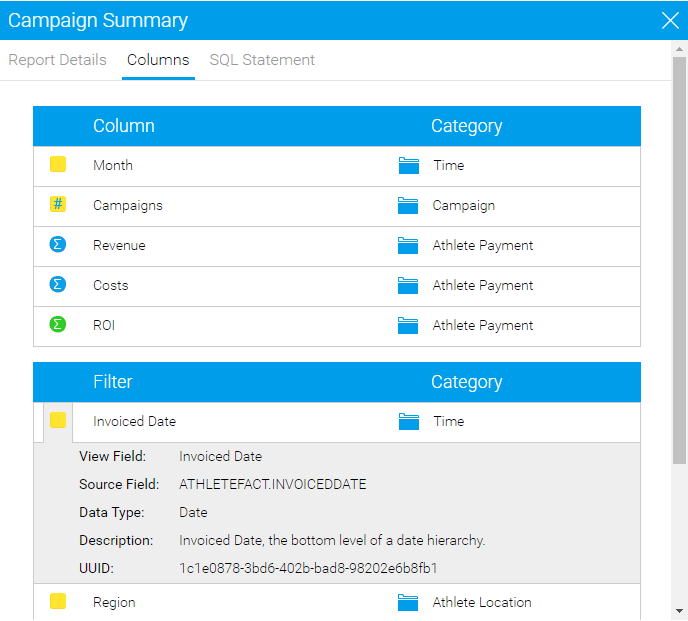
You can also retrieve the filter UUIDs by going to the Report Info popup and going to the columns tab.
| &filter[yourFilterUUID]=value |
If the filter is an "in list" or "not in list" you can separate values by pipes:
&filterTheFilterUUID=value1|value2|value3 |
If the filter you are trying to set is a between filter:
| &filter[yourFilterUUID]=value1|value2 |
Dashboards
When embedding a dashboard, the reports and canvas content within the dashboard will be scaled to the size of the container that it is embedded into. The content within the canvas will be scaled to match appropriately. Aspect ratio will be maintained when this scaling is applied.
The global content containers on a dashboard will be hidden by default when embedding a dashboard. Any filters that are within the dashboard will be added to the filter list that is located within the toolbar.
The following options are relevant when embedding a dashboard:
scaleCanvasTabs
Determines whether or not a canvas tab should be scaled. If this is set to false, then the canvas tabs will be rendered using the exact dimensions that they were created with. This setting has no effect on sub-tabs which don’t contain canvas tabs.
Default: true
&scaleCanvasTabs=false &scaleCanvasTabs=true |
showGlobalContentContainer
Determines whether or not to show the global content containers when rendering the dashboard.
Default: false
&showGlobalContentContainer=false &showGlobalContentContainer=true |
When the showGlobalContentContainer value is set to true the global content container will be displayed next to the main part of the SubTab:
<script type="text/javascript" src="http://localhost/JsAPI/v3?dashUUID=1e68d9cc-fa5a-44e2-816d-782aa40ceeae&showGlobalContentContainer=true"></script> |
width
Used to set the width the dashboard should render to. If no width is defined the dashboard's width will be 100% of its containing element.
| &width=200 |
height
Used to set the height the dashboard should render to. If no height is defined the dashboard’s height be 100% of its containing element.
| &height=200 |
filter[filterUUID]
This can be used to set the values of individual filters on a dashboard. The filter is identified by its UUID - "TheFilterUUID".
For example, you apply the values “Bargain Trips” and “Far Far Away Travel” to the filter “Company Name” which has the UUID “3aaf0e4-4b67-4118-9871-7dc98933e4e3”:

<script type="text/javascript" src="http://localhost:8080/JsAPI/v3?dashUUID=1e68d9cc-fa5a-44e2-816d-782aa40ceeae&filtere8eecb8c-1703-45d4-a28d-ebf17fed794b=Bargain%20Trips%7CBeyond%20Adventure%20Holidays"></script> |
When retrieving the embed link through the Yellowfin UI, if there are filters applied to the dashboard you are using, when opening the share menu the filter[filterUUID] values should already be populated.
| &filter[yourFilterUUID]=value |
If the filter is an "in list" or "not in list" you can separate values by pipes:
| &filter[yourFilterUUID]=value1|value2|value3 |
If the filter you are trying to set is a between filter:
| &filter[yourFilterUUID]=value1|value2 |
showToolbar
Determines whether or not the toolbar above a dashboard will be visible.
Default : true
Note: If this is set to false, showInfo, showFilters, showShare parameters will also be treated as false, as they are all children of the toolbar.
When the property is not defined or set to true:
| &showToolbar=true |
The toolbar will be displayed above the dashboard, as shown below:
<script type="text/javascript" src="http://localhost:8080/JsAPI/v3?dashUUID=1e68d9cc-fa5a-44e2-816d-782aa40ceeae&showToolbar=true"></script> |
If the parameter is set to false, there will be no toolbar displayed:
<script type="text/javascript" src="http://localhost:8080/JsAPI/v3?dashUUID=1e68d9cc-fa5a-44e2-816d-782aa40ceeae&showToolbar=false"></script> |
showInfo
Determines whether or not the info option will be shown in the dashboard toolbar. The info option contains information about the dashboard that has been embedded.
The following information will be included:
- Dashboard Name
- Dashboard Description
- Folder
- Sub Folder
- Last Modified Date
With the showInfo parameter set to false, the “i” icon ![]() in the toolbar will be removed:
in the toolbar will be removed:

<script type="text/javascript" src="http://localhost:8080/JsAPI/v3?dashUUID=1e68d9cc-fa5a-44e2-816d-782aa40ceeae&showInfo=false"></script> |
Default: true
&showInfo=true &showInfo=false |
showFilters
Determines whether the filter option will be displayed in the dashboard toolbar. This can be used with the filter[filterUUID] parameters to set a specific set of values for your embed link and not allow users to change any values.
With the showFilters parameter set to false the filter icon ![]() will be removed:
will be removed:
![]()
<script type="text/javascript" src="http://localhost:8080/JsAPI/v3?dashUUID=1e68d9cc-fa5a-44e2-816d-782aa40ceeae&showFilters=false"></script> |
Default: true
&showFilters=true &showFilters=false |
showShare
Determines whether or not the share option will be displayed in the dashboard toolbar. The Share option allows a user to access the embed link for this piece of embedded content.
With the showShare parameter set to false the share icon ![]() will be removed:
will be removed:
![]()
<script type="text/javascript" src="http://localhost:8080/JsAPI/v3?dashUUID=1e68d9cc-fa5a-44e2-816d-782aa40ceeae&showShare=false"></script> |
Default: true
&showShare=true &showShare=false |
Embedding stories
From Yellowfin 9.4, you can embed a story with the publish UUID of the story. The embed URL would look like this:
<script src="http://pathToYourYellowfinServer/JsAPI/v3?StoryUUID=A-Story-UUID">> |
This creates an element for the story to render into.
Note that although the code includes 'StoryUUID', this is actually the publish UUID. Using a story's StoryUUID is possible, but it points to a unique instance of the story, so if the story is edited, the embedded story would not be updated.
A number of options, such as story width and the display of the toolbar and other elements, can be added to the embed link. Please see the section below for further details.
Embedding Using the Advanced API
The advanced API provides developers access to a number of objects and functions that allow fine-grained control over the look and feel of the embedded content.
Here are some examples of what can be achieved by using the API in this way:
- Creating custom UI objects that can filter both Application and Yellowfin content, or that may have styling requirements that are not supported out of the box in Yellowfin.
- Creating a dynamic list of reports for each user based on their application profile, allowing them to select those reports and dynamically loading them in your application.
- Accessing the underlying data set associated with a report in order to execute custom processing such as selecting a value to display or passing data to a third-party API.
- Creating a custom navigation experience; for example buttons that jump to certain sub-tabs or reports or customized filter breadcrumbs.
Loading the API
Include the following somewhere in your HTML page:
| <script src=’pathToYourYellowfinServer/JsAPI/v3’></script> |
Using localhost:8080 as an example, it would look like this:
| <script src=’localhost:8080/JsAPI/v3’/></script> |
This will include the base Yellowfin JavaScript API, which adds a ‘yellowfin’ object to the window scope of your browser. This has a number of useful functions, including the option to load other APIs (Filter, Report and Dashboard).
It will immediately call the JavasScript APIs init() function which will start loading the API functions which depend on the Yellowfin server. The init() function returns a promise which will resolve once this loading has been completed. All events using the API should be run when the init promise has resolved.
<script src='localhost:8080/JsAPI/v3'/></script> |
Embedding stories with the Advanced API
From Yellowfin 9.4, you can embed a story with the publish UUID of the story, as described earlier on this page.
Using the Advanced API toolset expands the options available to you when embedding a story, so that you can adjust the look and feel of the story to suit your needs. You may wish to hide contributors or limit the width of the embedded story, and the Advanced API lets you do this.
Advanced API
A new object will be added to the yellowfin object, this will be stories
<script src="http://yellowfinServer/JsAPI/v3"></script>
<div id="myStoryDiv"></div>
<script>
    yellowfin.loadStoryAPI().then(() => {
        yellowfin.stories.loadStory({
             storyUUID: 'a-story-uuid', //This should be the story's publish uuid
             element: document.querySelector('#myStoryDiv') //The div to render the story into
        });
    }
</script>
yellowfin.stories
Currently, yellowfin.stories can only contain one function as shown above — loadStory — which will load the story. However, the loadStory function can take a number of options. The function and its options are outlined below.
loadStory(options);
Details
Returns: Promise
Promise parameters: _story_API
Description
This function loads the story associated with the passed options.storyUUID, and returns a promise that is resolved once complete.
The resolved promise will pass a storyAPI object.
The possible values that can be added to the options object are below.
storyUUID
Details
Embed link option: ?StoryUUID=uuid (This is the PublishUUID for the story to be embedded.)
Description
This option is required: if it is not passed, the loadStory call will fail.
element
There is no embed link option for this
The element that we wish to render the story too
showToolbar
Details
Embed link parameter: &showToolbar=true
Default value: true
Description
This option determines whether the JS API toolbar is shown for the embedded story.
showInfo
Details
Embed link parameter: &showInfo=true
Default value: true
Description
This option determines whether the embedded story's info dropdown is visible.
showExport
Details
Embed link parameter: &showExport=true
Default value: true
Description
This option determines whether the embedded story's PDF export options are visible to the story viewer.
showBannerImage
Details
Embed link parameter: &showBannerImage=true
Default value: true
Description
This option determines whether the embedded story's banner image is shown.
showHeader
Details
Embed link parameter: &showHeader=true
Default value: true
Description
This option determines if the embedded story's header is shown.
A story's header includes the fields for author and date, and the counters for likes and reads. To display any of these, first include this showHeader option, and set it to true.
showAuthor
Details
Embed link parameter: &showAuthor=true
Default value: true
Description
This option determines whether the embedded story's author is shown. Even if it's set to true, it will only be displayed if the showHeader option is also present and set to true.
showDateContainer
Details
Embed link parameter: &showDateContainer=true
Default value: true
Description
This option determines whether the embedded story's publication date is shown. Even if it's set to true, it will only be displayed if the showHeader option is also present and set to true.
showLikeButton
Details
Embed link parameter: &showLikeButton=true
Default value: true
Description
This option determines whether the story's 'Like' button is shown. Even if it's set to true, it will only be displayed if the showHeader option is also present and set to true.
showReadBy
Details
Embed link parameter: &showReadBy=true
Default value: true
Description
This option determines whether the list of people who have read the embedded story is shown. Even if it's set to true, it will only be displayed if the showHeader option is also present and set to true.
showStoryTitle
Details
Embed link parameter: &showStoryTitle=true
Default value: true
Description
This option determines whether the embedded story's title is displayed.
showFooter
Details
Embed link parameter: &showFooter=true
Default value: true
Description
This option determines whether the embedded story's footer is displayed.
The story footer includes contributors. To display the list of contributors, first include this showFooter option, and set it to true.
showContributors
Details
Embed link parameter: &showContributors=true
Default value: true
Description
This option determines whether the list of story contributors is shown when embedded. Even if it's set to true, it will only be displayed if the showFooter option is also present and set to true.
width
Details
Embed link parameter: &width=...
Default value: element width
Description
This option sets the total width of the embedded story.
storyWidth
Details
Embed link parameter: &storyWidth=...
Default value: 3/4 of width
Description
This option sets the full width of the embedded story's body. The width of most of the story's contents will be 200px less, unless it is set to display at full width (eg, an image in wide mode).
bannerImageHeight
Details
Embed link parameter: &bannerImageHeight=...
Default value: 300px
Description
This option sets the custom height that should be applied to the banner image container.
bannerImageWidth
Details
Embed link parameter: &bannerImageWidth=...
Default value: Value of width
This option sets the custom width that should be applied to the banner image.
loadStoryAPI()
Loads the StoryAPI so that we can load stories, returns a promise that is resolved when the API loads.
loadStory(options)
**This is just a pass through option for yellowfin.stories.loadReport the options that are passed to it should be the same, it just ensures that the stories is object is loaded before attempting to load a story.
Functions available in the StoryAPI
- likeStory()
- unlikeStory()
- toggleLike(shouldLike:boolean => Default inverse of current value)
- getCurrentLikeStatus(successFunction: function to call one the current status is received) => Get status from the server
- storyContributors()
- storyReaders()
Example:
src="<%=YF URL%>/JsAPI/v3?StoryUUID=<%=Story Publish UUID%>&showHeader=false&bannerImageWidth=500"></script>
Example Advanced API :
HTML:
<script src="<%=YF URL%>/JsAPI/v3"></script>

<div id="storyContainer"></div>
JavaScript:
window.yellowfin.loadStoryAPI().then(() => {
    window.yellowfin.stories.loadStory(
{         storyUUID: '<%=Story Publish UUID%>',          element: 'div#storyContainer'     }
).then((storyAPI) =>
{         console.log(storyAPI);         window.storyAPI = storyAPI;     }
);
});