Overview
Broadcasting allows you to send a report or dashboard to one or more users via email, based on a defined schedule and set of rules. A personal broadcast works the same way, except it can only be sent to the person who defined the broadcast.
Dashboards can be broadcast as a link or as a PDF attachment.
Reports can be broadcast as HTML, CSV, DOCX, PDF, TXT, XLSX or as a link to the report, depending on the content within.
If the PDF option is not available in the list or you experience any pagination issues, check that JavaFX is installed and that Yellowfin is configured correctly. More info on our Community page.
Before starting
The option to broadcast must be enabled for a user's role before they can use this feature.
- In the Admin console, find the user role that requires broadcast access
- If the user role requires the ability to broadcast reports, check the checkbox for Broadcast Reports under the Report Menu section

Once this box is checked, the Broadcast button will appear in the Report menu along the top of a report
- If the user role requires the ability to broadcast dashboards, find and check the checkbox for Broadcast Dashboards — under the Dashboard section

- Once this box is checked, the Broadcast button will appear in the top right corner of a published dashboard, where users can create broadcasts of dashboards using the same steps as they would for reports

When broadcasting or sharing reports with tabbed co-display content, first export the report into an XLSX file, then schedule the broadcast. You need not use the exported file, but simply create a copy.
Administrators must configure the sender’s email address for content scheduled for broadcasts. This is done via the Email settings on the Configuration page.
Broadcasting a report (or a dashboard)
The following steps show how to broadcast a report. A dashboard uses the same process, but the Broadcast button is located further right on your screen.
Choosing the broadcast type
- Ensure your report or dashboard is active (not in draft mode)
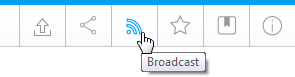
- Click the Broadcast button in the main navigation menu (or for broadcasting a dashboard, look further right)
- Click Create New and select the Broadcast option(to send to many) or the Personal Broadcast option (to send to yourself)

The Broadcast window will be displayed, with a number of options, described below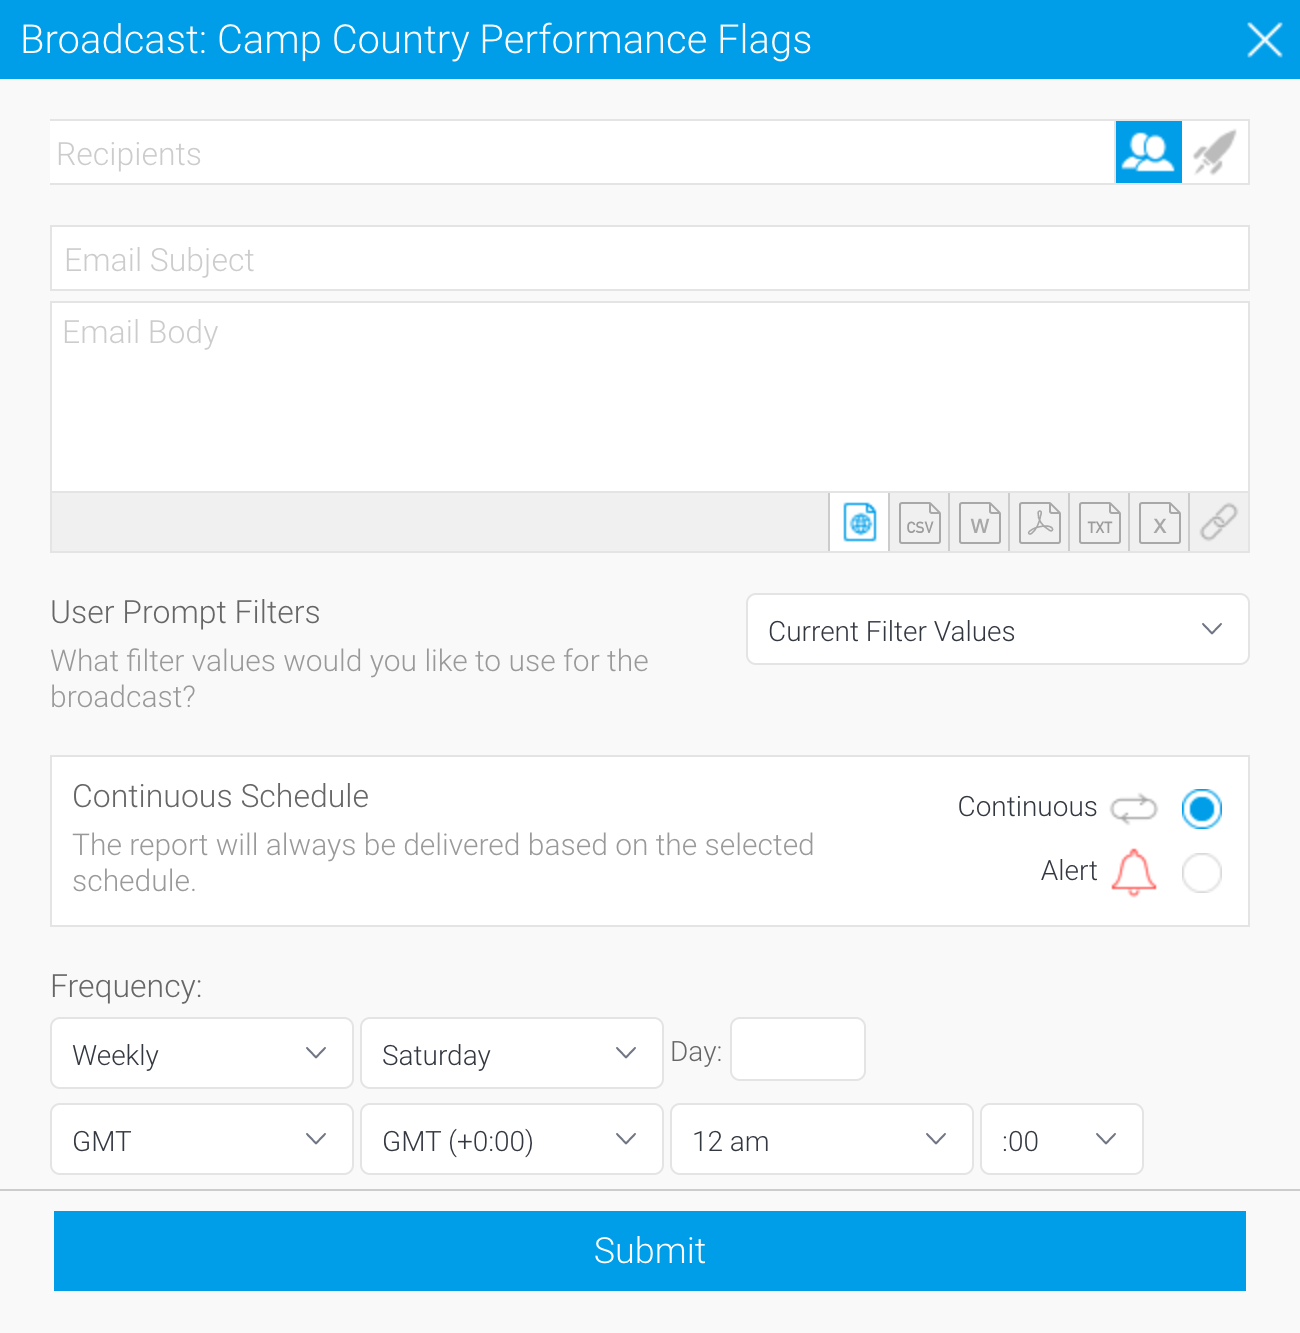
Adding recipients
A broadcast email can only be sent if recipients have been defined. One or more recipients can be selected for a broadcast. Note that this step is not available for personal broadcasts.
Recipients can include individuals and groups, as shown in the table below.
User | A person that is a registered user of Yellowfin. |
|---|---|
Group | A group of users that have been setup within Yellowfin. This option allows you to send a report to multiple users at once. |
Email Address | You can insert an external email address so that the report can be sent to external users. Ensure that it is a valid email address. Note that this function depends on your licence options. |
Report | You can select a report that already contains email addresses for broadcasting. The email addresses don’t have to belong to Yellowfin users. To fully customize the list of recipients, you can perform further filtering by clicking on the Advanced Note that the column that contains the email addresses in a report must be formatted as ‘Email’ to be displayed in the list. To do this: |
- Click in the Recipients field
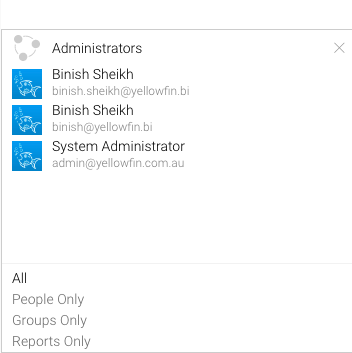
- Scroll through Yellowfin users, groups, and reports or type text into the field to filter the list. If you have a multicast licence, you may also type an external email address.
- Click on each intended recipient to add them to your recipients list
Useful information about recipients
Broadcast reports are run for each of the multiple recipients separately, taking into account their access filters, languages or other factors. However, to conserve memory usage and system performance, you can configure it so that each recipient’s report is delivered as soon as it’s generated (instead of waiting for all the recipients’ reports to get done before sending them together). See the configuration for this here.
- For multiple recipients that have access to the same data, you can set up a ‘carbon copy’ configuration. This allows a single email to be generated and sent to the first user, with the remaining recipients being sent a carbon copy. Note that all recipients will be visible to one another. See the configuration for this here.
Customizing your title with filters (for report broadcasts)
If you're using Yellowfin 9.6 or later, you can customize your title based on filter values. This might be useful if you send hundreds of emails from a single broadcast job that contains specific filter values. Rather than all of them having the same title, you can use filter tags to help identify different broadcast content.
For example, if you send a country-specific report weekly without a filtered title, the title would be the same for all reports (eg, "Weekly sales report for your country"). If you send that report with a filter tag for country, the title would be different for each country (eg, "Weekly sales report for United States", "Weekly sales report for Germany" and so on). This can reduce administration effort, making it easier to locate a sent email from a long list of emails if the titles are not all the same. From the recipient's perspective, they benefit from a more descriptive title.
Choose between two types of filter tags, depending on your needs. The table below provides some scenarios and examples.
and remember, you must have at least one filter value set for a filter for it to display any values.
| Filter | [filter] | [filterDetail] |
|---|---|---|
| Filter format | [filter:<filter title>] | filterDetail:<filter title>] |
| Filter example | [filter:Camp Region] | filterDetail:Camp Region] |
| Filter result if there is no filter for Camp Region | Camp Region In List | |
| Filter result if there is a single filter value (Australia) set for Camp Region | Australia | Camp Region In List Australia |
| Filter result if there are multiple filter values set for Camp Region | Australia, Europe, Asia | Camp Region In list Australia, Europe, Asia |
| Example of filter when used with title text | Weekly sales report for Australia | Weekly sales report for Camp Region In List Australia |
Useful information about filter tags
- Filter tags are intended for broadcast titles. They won't work in the body of a broadcast email.
- Filter tags work for broadcasts of reports/charts only. It does not work for dashboards or any other content with filters.
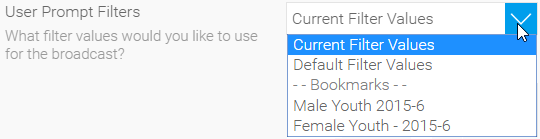
- When you select "Current Filter Values" for your broadcast, it will use whatever is set at the time of saving the broadcast: updating the user prompt filter values before the broadcast is sent won't update the values used for that broadcast.
- If the tag isn't displaying anything, check that you have a filter value set for the filter you're using in the tag.
Adding content
- Enter text to appear as the subject line
- Enter text you wish to use for the body of the email
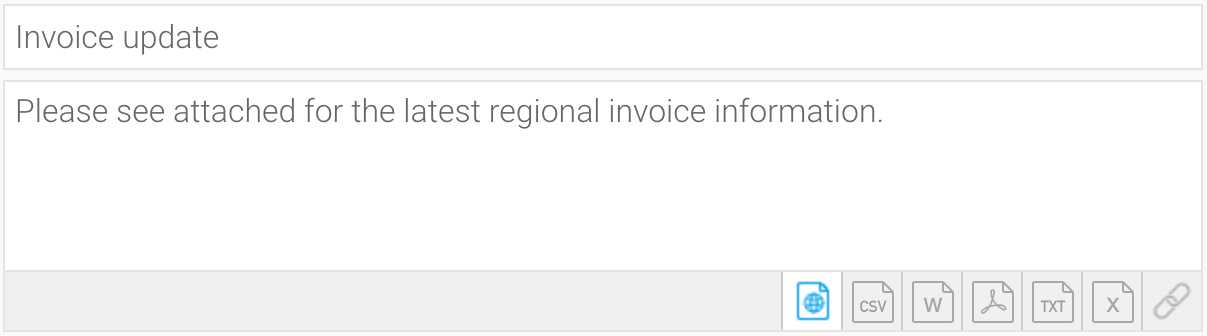
- Select the format for the report or dashboard by clicking on the icon
- If you choose a file format, the Append Broadcast Date checkbox will appear. Select it to include the current date in the document name
- When broadcasting a PDF file, a Secure PDF checkbox will appear
Use this to password-protect your PDF files. You can specify a password yourself, use the one created when exporting the file, or use a default one generated by Yellowfin. Learn more about this here.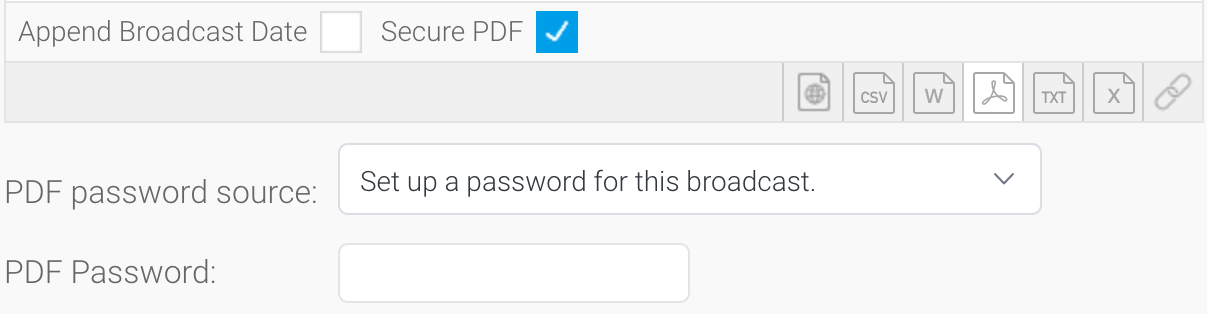
Applying filters (for report broadcasts)
If you're broadcasting a report and it contains filters, you can select which of these are applied to the broadcast.
The options include:
- Current Filter Values
- Default Filter Values
- Bookmarks
Source Filters
If your report uses Source Filters, the broadcast will also be filtered by the Source Filter, as well as whatever filters were defined above. If the report has been sent to an external email address rather than a defined Yellowfin user, the recipient will inherit the Source Filter from the user who defined the broadcast.
For a user to Broadcast a Source Filter report to recipients not defined in the source filter, they will require the following role permission to be enabled.

Defining delivery rules (for report broadcasts)
A delivery rule is used for exception reporting. If you would like to send a report based on a certain criteria (for example, if revenue is less than $100,000), you use this feature to configure the rules of your broadcast.
Broadcast delivery rules must be based upon either of the following Alert Data options:
| Option | Description |
|---|---|
| One or more rows must match | Select this option to build your rule based on a single parameter. For example, the broadcast will be delivered only if there is a transaction less than $1000. |
| Aggregate against entire result set | Select this option to build your rule based on an aggregated result set. For example, the broadcast will be delivered only if total sales are less than $100,000. |
| Applied to latest date | Check the checkbox to apply the delivery rule to the most recent date in your report, excluding all other dates. Uncheck to include all dates in your report for the delivery rule. This feature is optional, and only appears when a date field is added to your report. |
To create a delivery rule, follow the steps below.
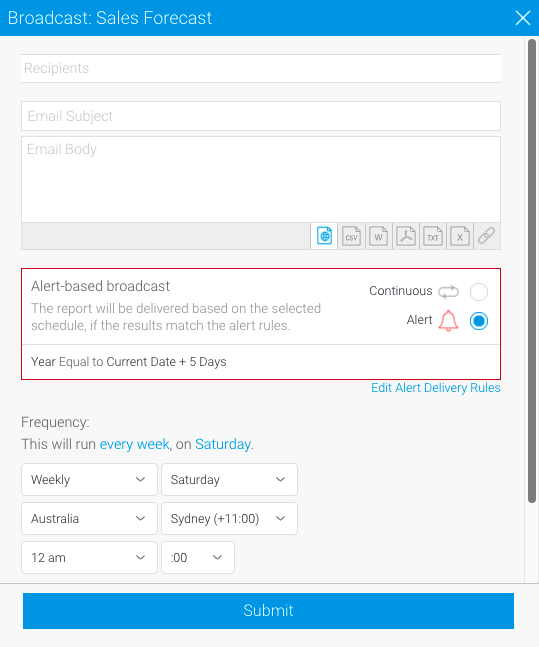
- In the Alert-based broadcast section, click on the radio button for Alert
- Click on the Add Alert Delivery Rules link
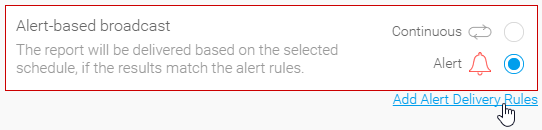
The Delivery Rules dialog box will be displayed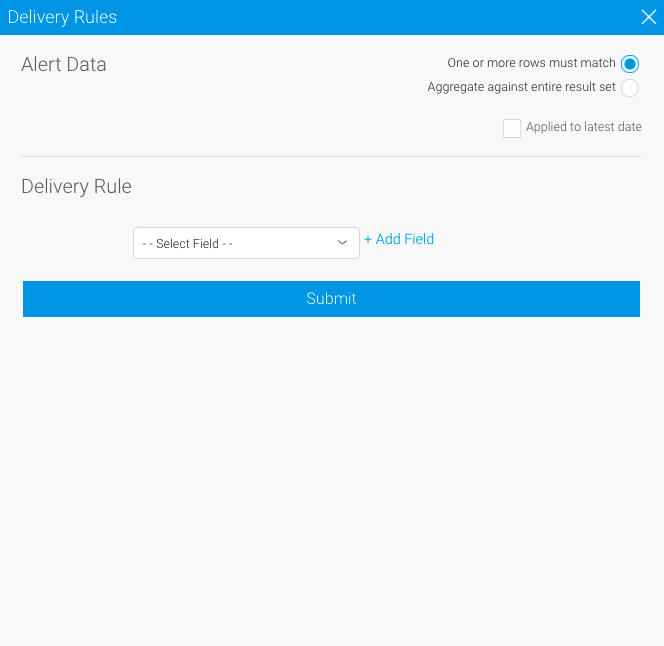
- Click the One or more rows must match radio button to select this option as the basis for your delivery rule
- Check the Applied to latest date checkbox
This box only appears when a date field is added to your report - Using the dropdown, select the field on which to apply the condition, then click Add Field to save that condition
You can add multiple conditions here if required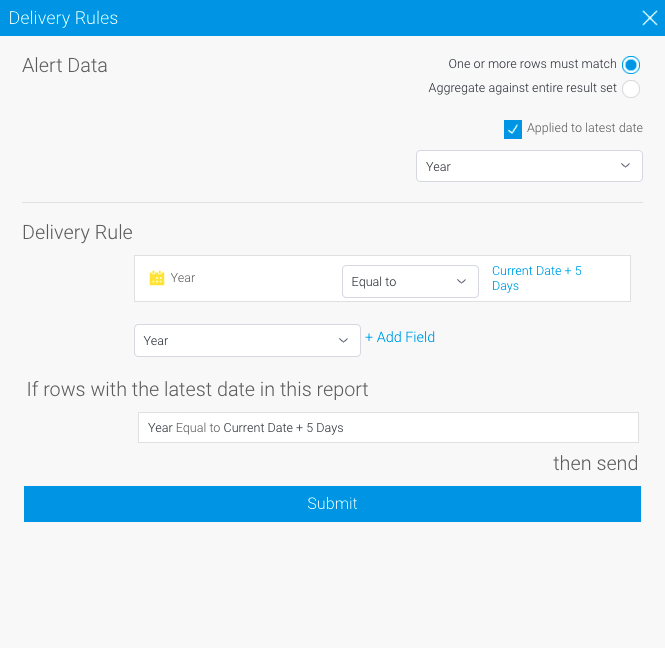
- Click on the Submit button to apply your delivery rule or rules
- Your rule or rules will now be displayed on the Broadcast dialog box
Creating a schedule
The last step is to define the schedule for your broadcast.
The send frequency is highly flexible. For example, monthly reports can be based on a certain day of the month, like this:

Or a certain day of a certain week within the month, like this:

Select 'Once' as the frequency to send out the broadcast as soon as possible.
- In the Frequency section, use the dropdowns to define when your broadcast should be sent.
Depending on the option selected here, you may be required to provide further details. For example, if Fortnightly is selected, you will be prompted to select either the first or second week of the fortnight to send in, as well as the day of the week.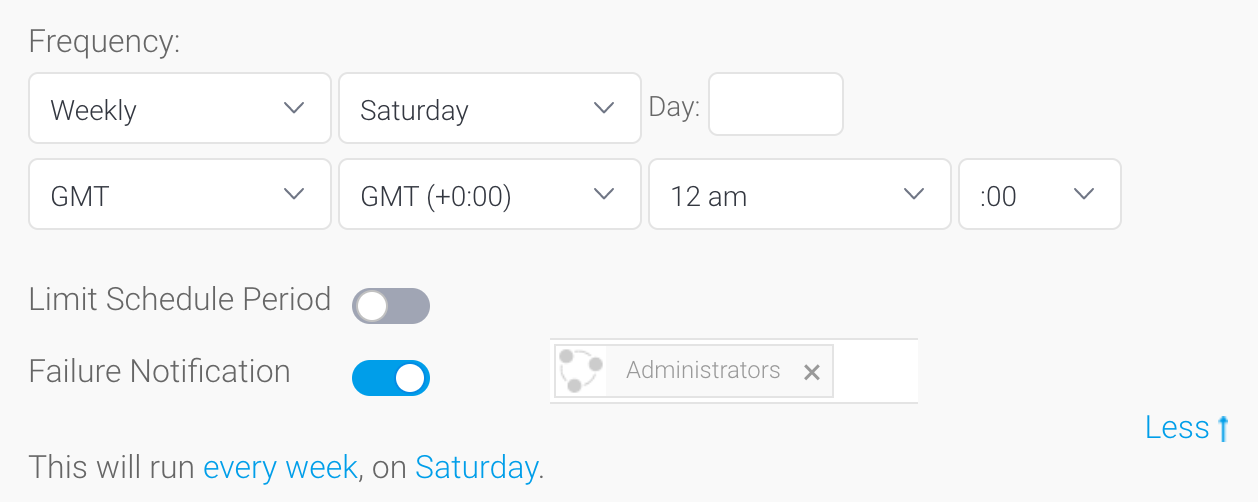
- Check the timezone is set correctly, and use the dropdowns to make any changes to zone, hour and minute.
- Toggle the Limit Schedule Period option to activate or deactivate a limited time period.
- Toggle the Failure Notification option to activate or deactivate any failure notifications. When active you can select any users to receive the notification.
Submitting the broadcast
- Click on the Submit button to finalize the broadcast setup
- You will now see your broadcast listed (the image below shows how it will look when expanded)
