Overview
This Data Transformation step utilizes the OpenCage forward geocoding API to extract longitude/latitude coordinates from a single text address column, or a combination of multiple address part fields, and then convert them into a GeoPoint value.
For more information on the OpenCage API: https://geocoder.opencagedata.com/
Set Up
In order to use this step, you must install the OpenCage Geocode plug-in in your Yellowfin environment.
Download the plug-in from the Yellowfin Marketplace. (You can find it under the Transform Steps panel.)
Install it on your instance of Yellowfin. Click here to learn how to do this.
It is worth noting that this step works with the Yellowfin 7.4 version that was released February 13th, 2018 or later.
Configuration Overview
These details will enable you to configure this step with ease.
Input Options
Basic configuration: Use this setting if the entire address is provided as a single column.
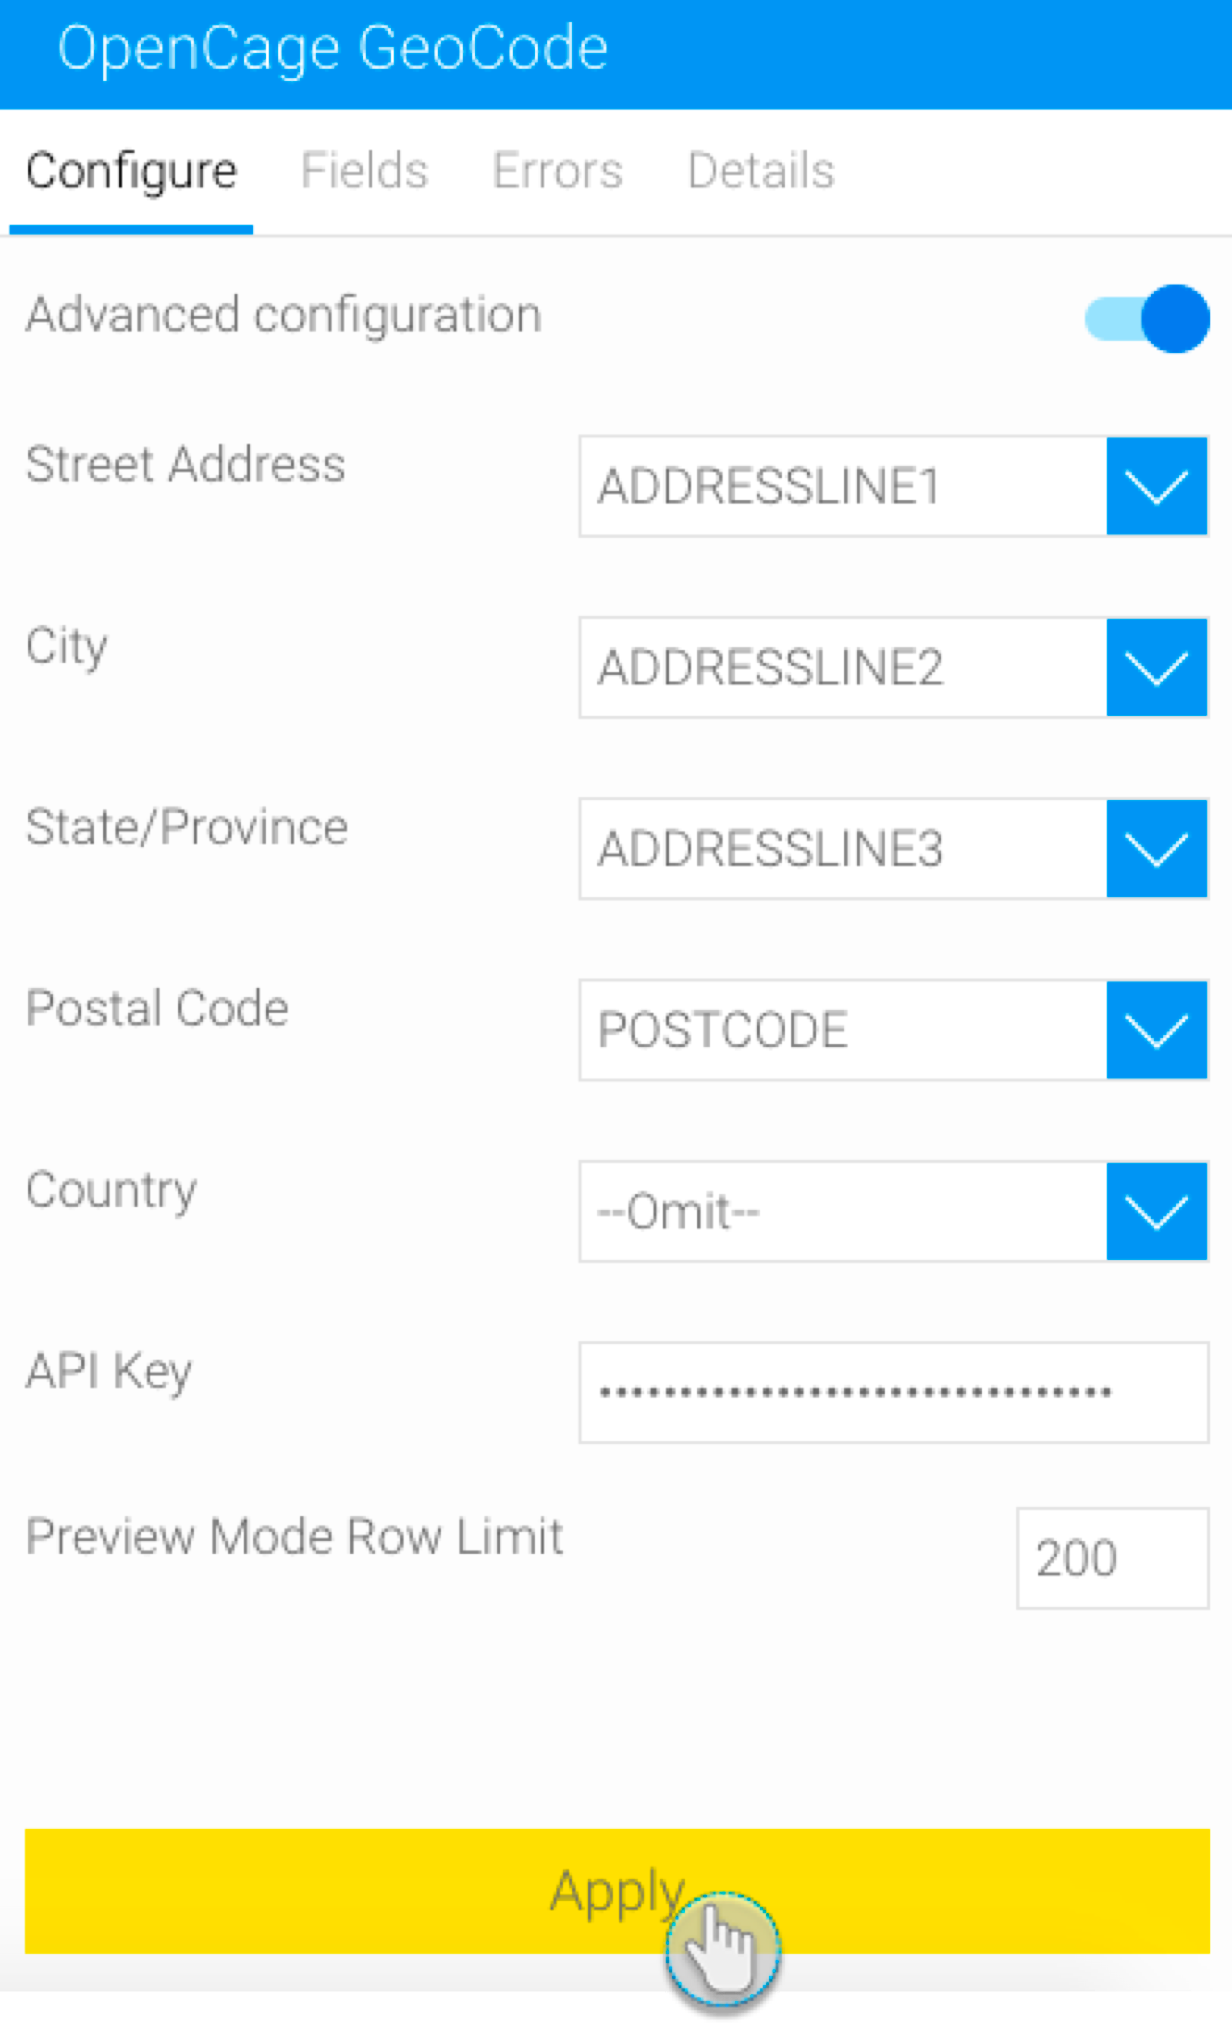
Advanced configuration: Switch to the advanced setting mode if individual parts of an address are specified. Any fields that are left blank, or values that are null will be ignored. As this is more specific it will tend to produce better results than the full address version.
You can also concatenate a split up address together by using the Calculated Field step, and stringing each field with a plus (+) operator.
API Key: OpenCage provides an API key which is necessary to run the geocoding step. To obtain this key, see: https://geocoder.opencagedata.com/
Preview Mode Row Limit: The API key has a usage limit to the number of times you can use the API, depending on your pricing package (see https://geocoder.opencagedata.com/pricing for more information). To ensure that you do not consume the usage limit too quickly during testing, this field can be used to specify the number of times you could use the key in a preview run. If this value is set to 0, then no limit will be applied. The number you specify here will affect the number of rows in the data preview panel. Note, however, that this setting will not be applied when the flow is published and run.
Step Output
The API will return a list of possible longitude/latitude coordinates, based on the level of detail provided for an address. This step will select the primary match from this list. If the API does not return any matches (which could happen if insufficient address details were provided), then a null value will be displayed.
The point returned will be a centroid for the level of match the API was able to make. For example, if a street address is provided and the API was able to match this to a real street address, the geopoint will be located at that exact address. However, if only the city was able to be matched, then the geopoint returned will be at a central location for that city.
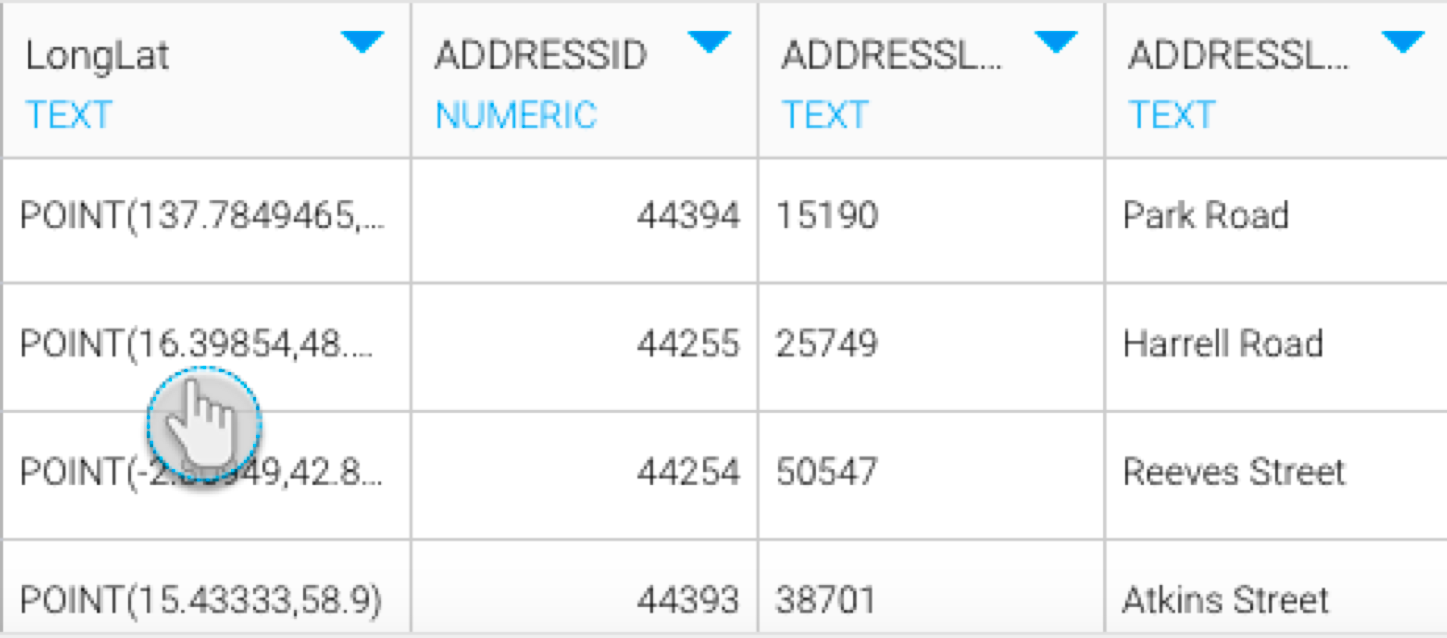
As not all databases can store geometry field types, the matched geopoint will be returned as a POINT(Long,Lat) text string, for example: POINT(-112.1234, 45.123). This value can then be converted to geometry objects for map display using database functions (such as SQLServer) or Yellowfin’s view-level Well Known Text or WKT converter.
Step Instructions
Navigate to the data transformation module. (Create button > Transformation Flow)
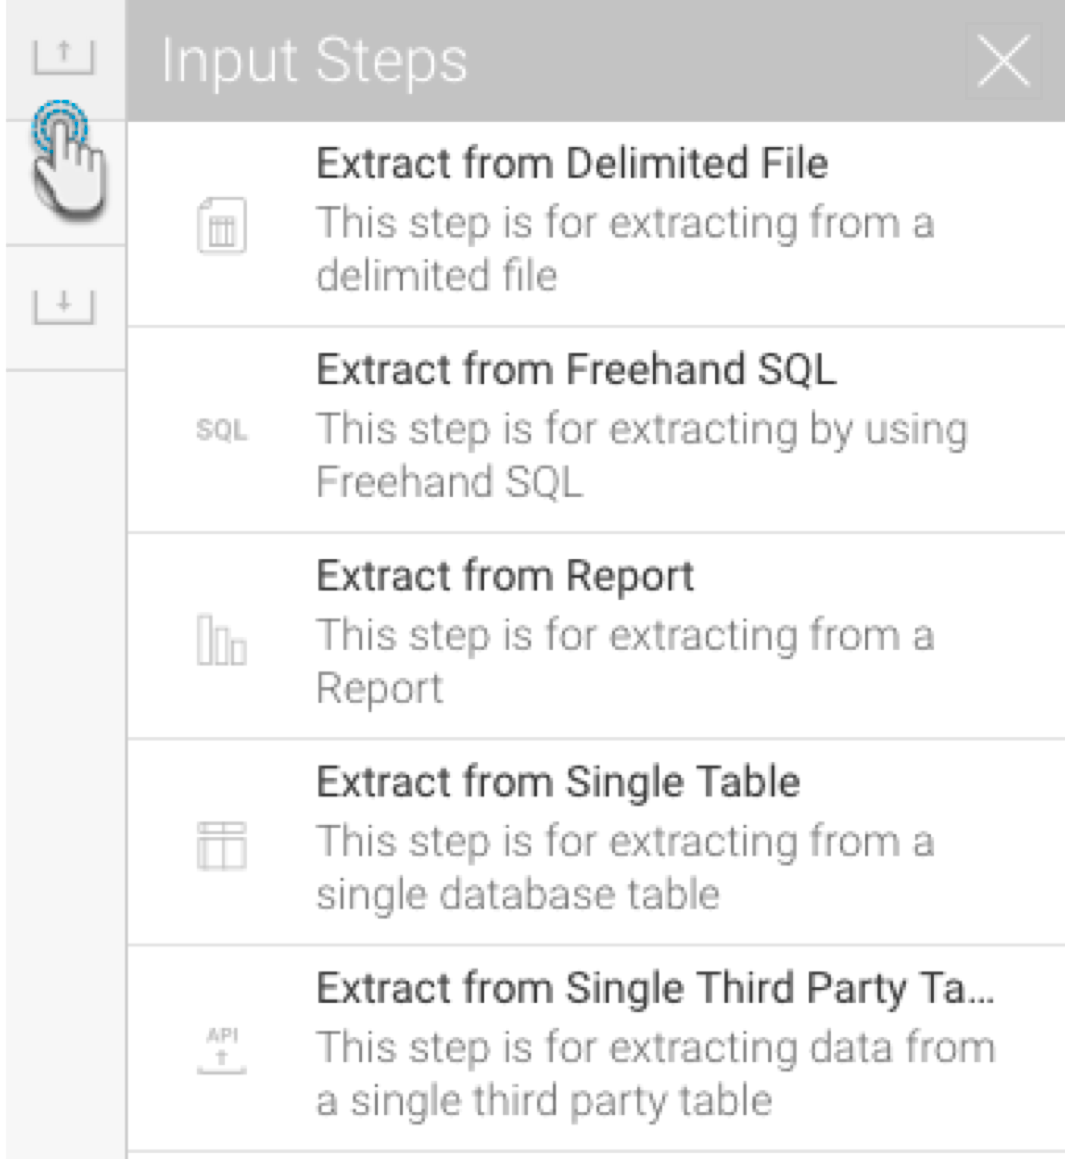
Access the input steps list and use a step to import data into the flow.
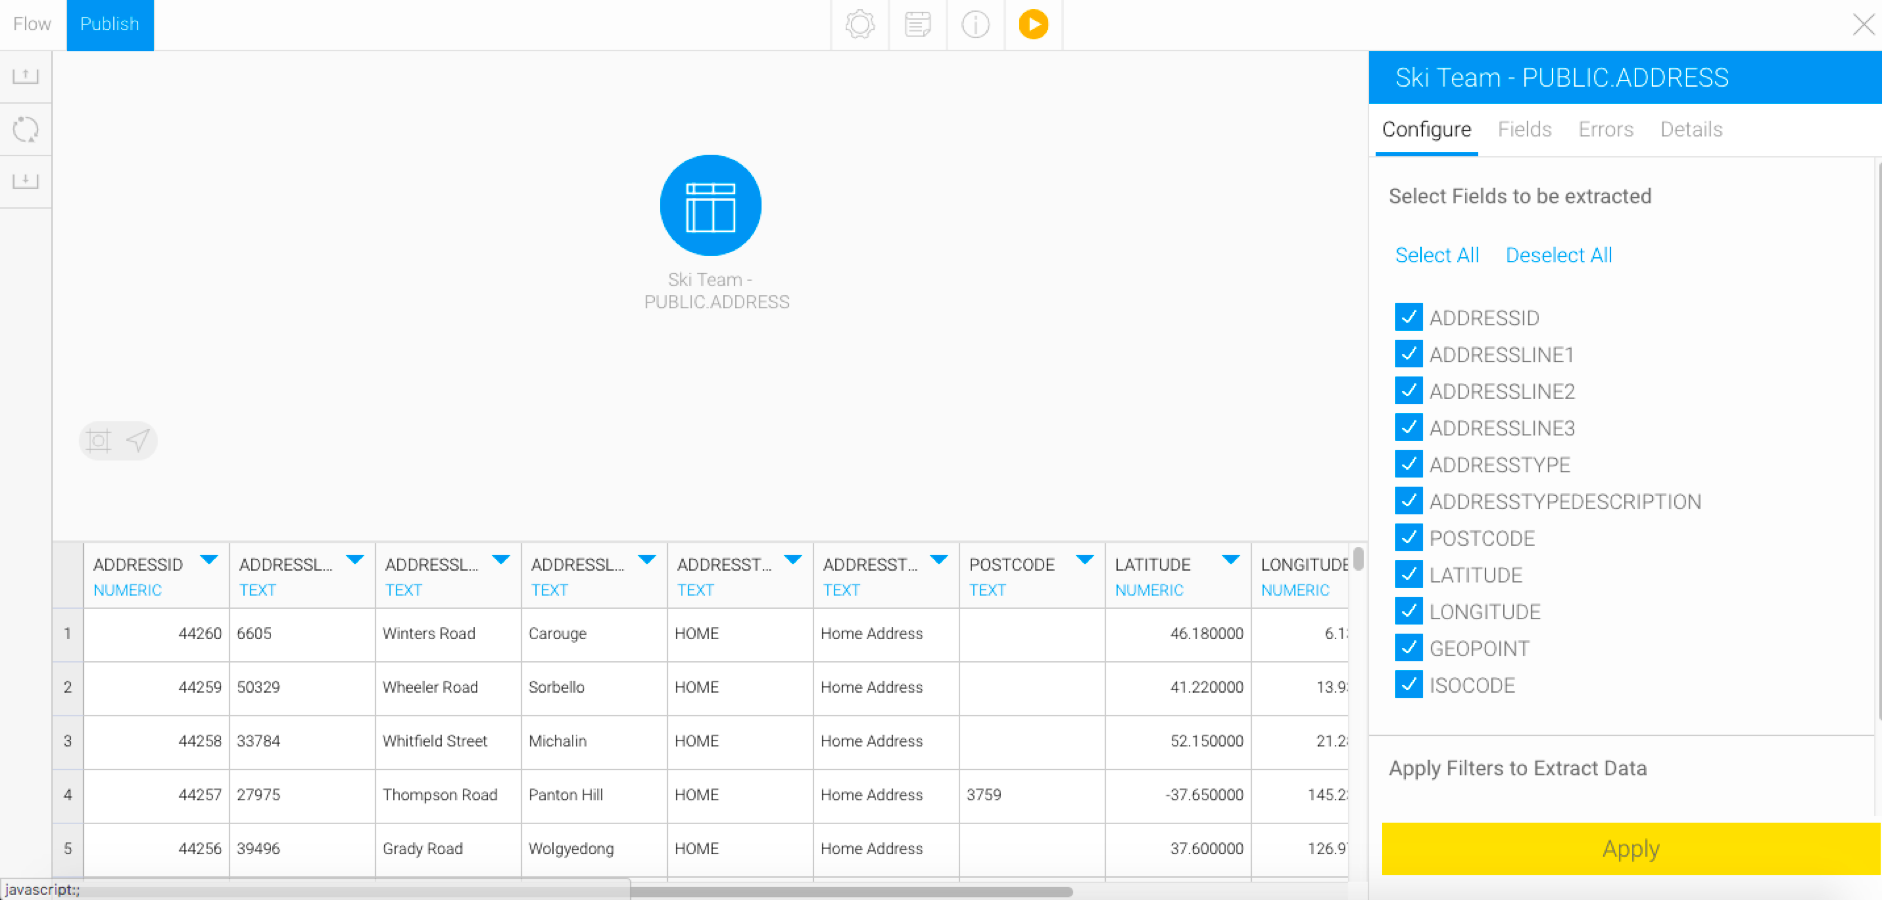
Ensure that your data contains address values that you wish to convert to geopoints. Our example shows address values stored in different fields.
Once you are ready to use the OpenCage GeoCode step, open the transformation steps panel, and drag the step into your flow.

Connect the previous step to this one.
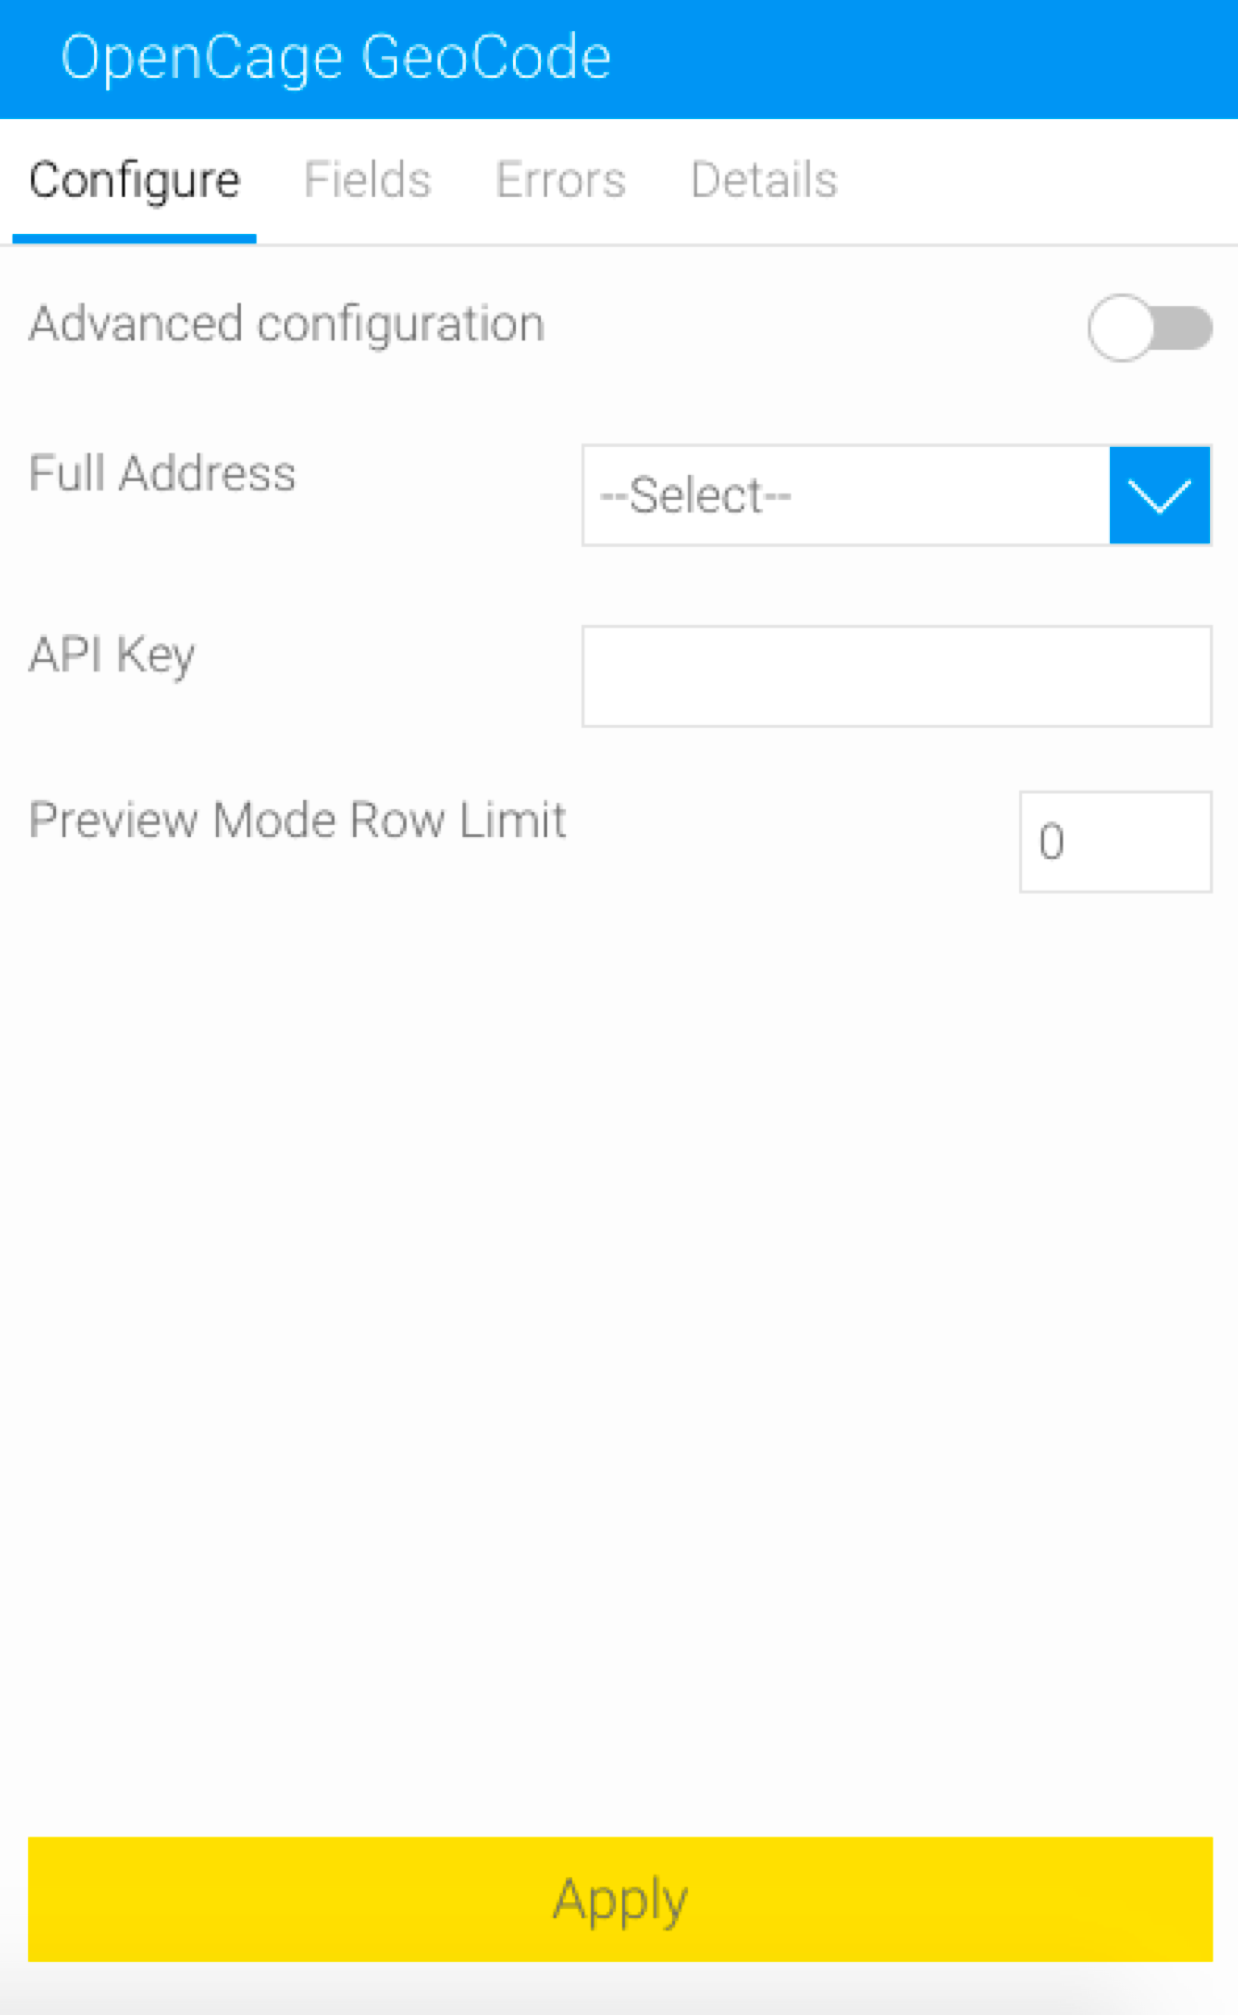
Click on this step to bring up its configuration details in the Transformation Flow panel. (Click here if you would like an overview of some of the step configuration details.)
You have two options to configure the address, as discussed below:
Basic configuration: Through this default mode, you can include a full address contained in a single field. Choose this field from the Full Address dropdown.

Advanced configuration: If your address is divided amongst various fields, then use this mode:
Enable the Advanced Configuration toggle. This will reveal additional setting options.
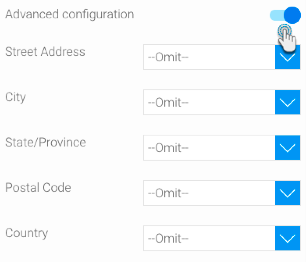
Select the various address values for their corresponding fields.
Enter the OpenCage API key. Yellowfin will save this key as an encrypted value.
Enter a limit to control the number of times the key will be used when executing the flow in the preview mode. This will control the number of rows that are processed, since one request is used for each row.
Once you have provided all the configuration details, click Apply.
Once successful, the step will generate a new column called LongLat, displaying the converted geopoints. This is the default column name of this output. You can always rename it.
You can continue transforming your data by adding more steps, or save the result by using an output step.
Troubleshoot
If your step has failed, it could be for a number of reasons:
Your API key limit has been exhausted (if using the free pricing plan). You will need a new key to continue using this step.
An incorrect API key was provided.
The input address fields you provided are incorrect (or do not match the column data type).