Overview
Translating Views
- Open the View you wish to translate by navigating to the Browse page, and selecting it from the list.
- Place the View in draft mode and open its View Summary page.
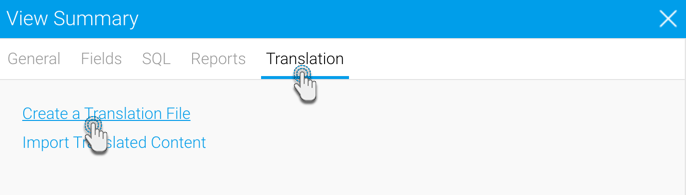
- Click on the Translation tab. (Note: This is only visible if the View is in edit mode.)
- Click on the Create a Translation File link.
- A CSV file will now be generated containing all the View related text. Follow standard browser settings to save and open the file.
- Update the CSV with the required translations.
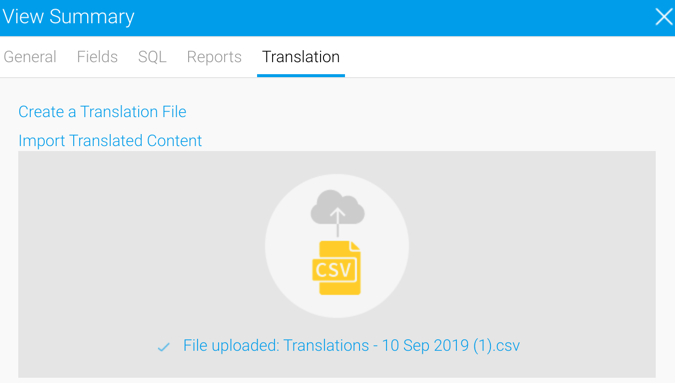
- Once you’ve updated the file, navigate to the Translation tab on the View Summary page if you have moved away, and click on the Import Translated Content link to import the file.
- Drag your translated CSV into the designated area. If successful, you will then be able to see a confirmation message.
Translating Reports
- Open the Report you wish to translate by locating it in the Report List.
- Place the Report in draft mode by clicking Edit > Format
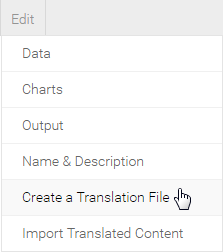
- Click on the Edit button again, this time selecting the Create a Translation File option
- A CSV file will now be generated containing all the customised Report related text.
Follow standard browser settings to save and open the file.
Note: when exporting report translations, only text that has been customised in the report builder (since the view) will be included in the file. The report will inherit all other text from the view and as such, the view should also be translated. If there are no translations available, the original text will be used. - Update the CSV with the required translations
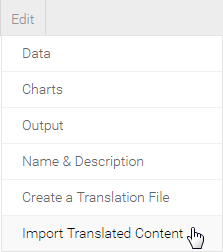
- You will need to navigate to the Report Preview page if you have moved away, and click Edit > Import Translated Content.
- Complete the import process, as defined on the Creating Content Translation page
Translating Dashboard Tabs
- Open the Tab you wish to translate by locating it on the Dashboard.
- Place the Tab in draft mode by clicking the Edit button
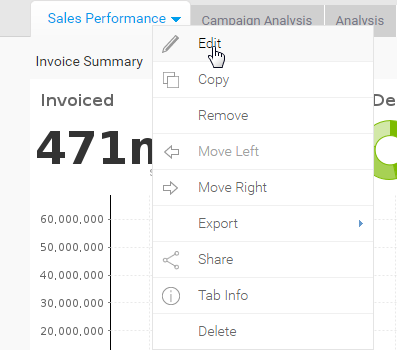
- Click on the tab drop down menu and select the Translate > Create a Translation File option
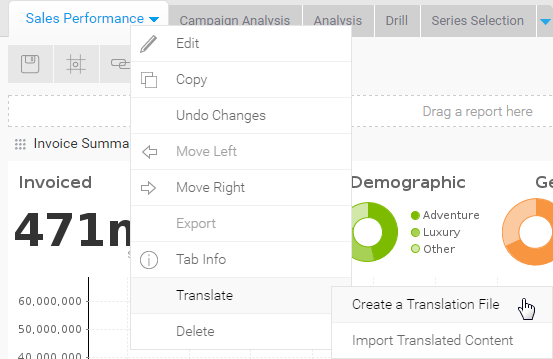
- A CSV file will now be generated containing all the Tab related text.
Follow standard browser settings to save and open the file.
Note: when exporting dashboard translations, only text that is specific to the tab or its filters will be included. The tab inherits text in reports which inherit from the view and as such, the reports and view should also be translated. - Update the CSV with the required translations
- You will need to navigate to the Tab if you have moved away, and click Translate > Import Translated Content.
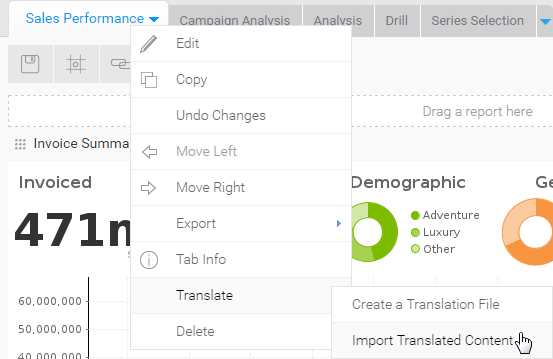
- Complete the import process, as defined on the Creating Content Translation page