Page History
...
The default content font selection is “Libre Franklin”, but this can be easily changed through the Administration module. Click here for the tutorial.
Custom fonts
The system also allows users to upload a custom font file. Administrators can manually import any fonts by dropping the font file into the Plugin Manager. Learn howYou can upload your own font files in either .ttf or .otf. format via manual import using the Yellowfin Plugin Manager. The steps are provided further down this page.
Along with this, any fonts added to the Java font directory are also supported within Yellowfin.
...
Adding Custom Fonts
You can also add any font file to the system to be used in import .ttf and .otf font types to Yellowfin. This section explains how.
...
- Always open each font file to see the font name inside the file, especially if the file was downloaded from the internet. This ensures the font file wasn’t saved with an incorrect font name.
- Besides the regular version of the font, remember to also import the bold and italic versions. Otherwise, bold or italic content will not be displayed.
- Font weights, such as light or medium, are currently not supported in the plugin manager.
- Navigate to Administration > From the burger bun
 in the top left corner, click on Administration, then Plugin Management.
 - Click on the Add button on this page.

- Drag your font file onto the draggable area of the popup that appears.
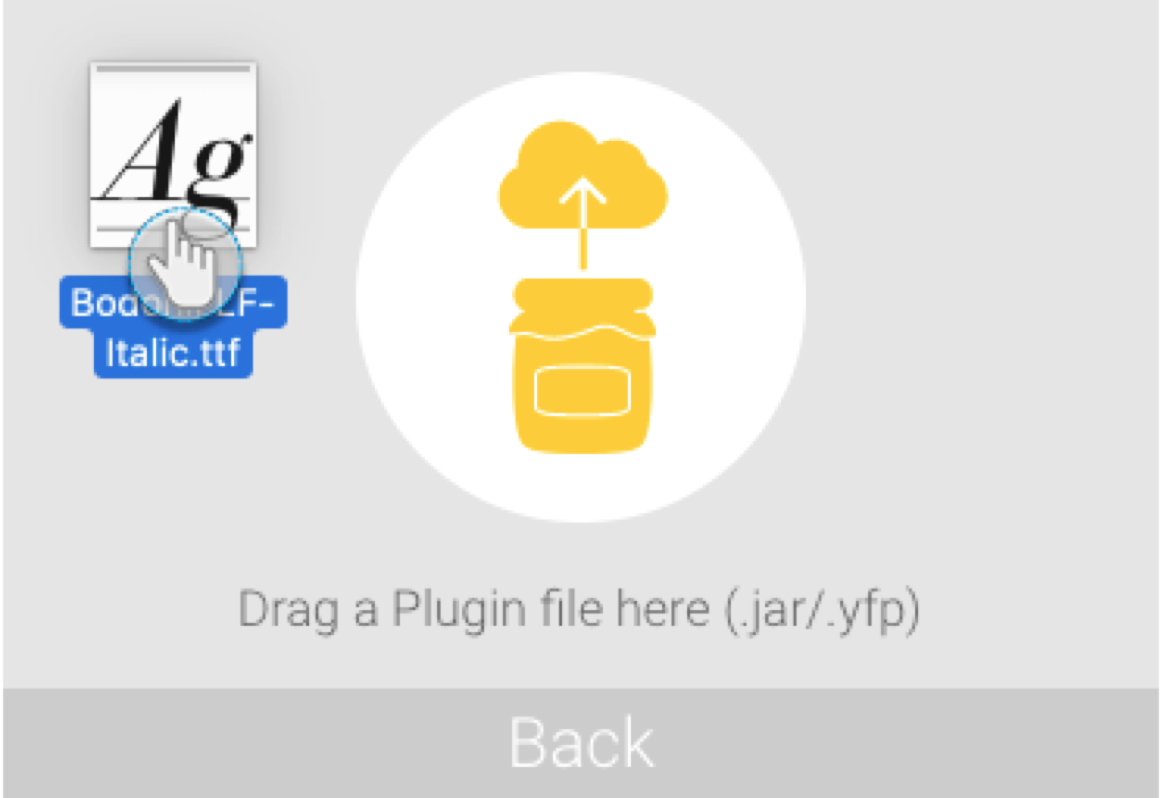
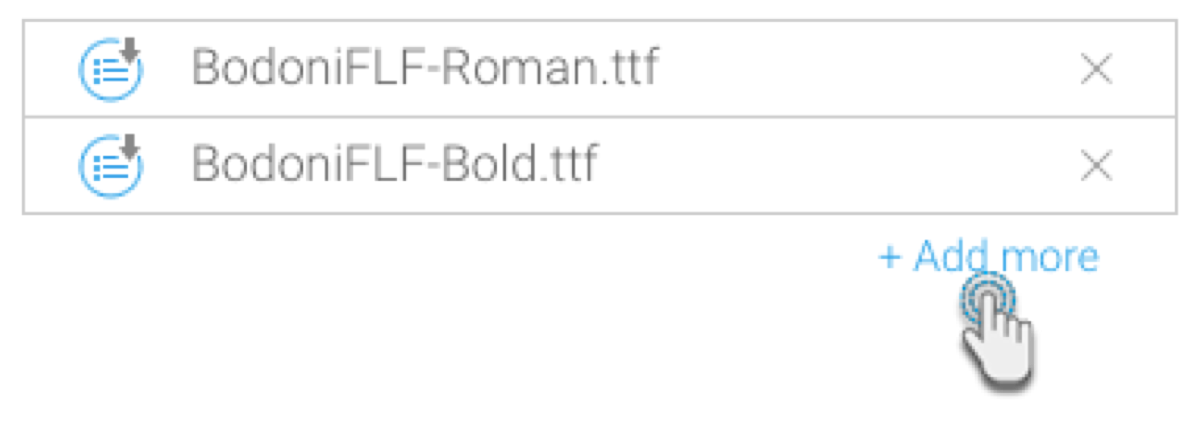
- To add more styles of this font, click + Add more, and repeat the above step.
- Enter a name and description of this font, and click Submit to upload it.
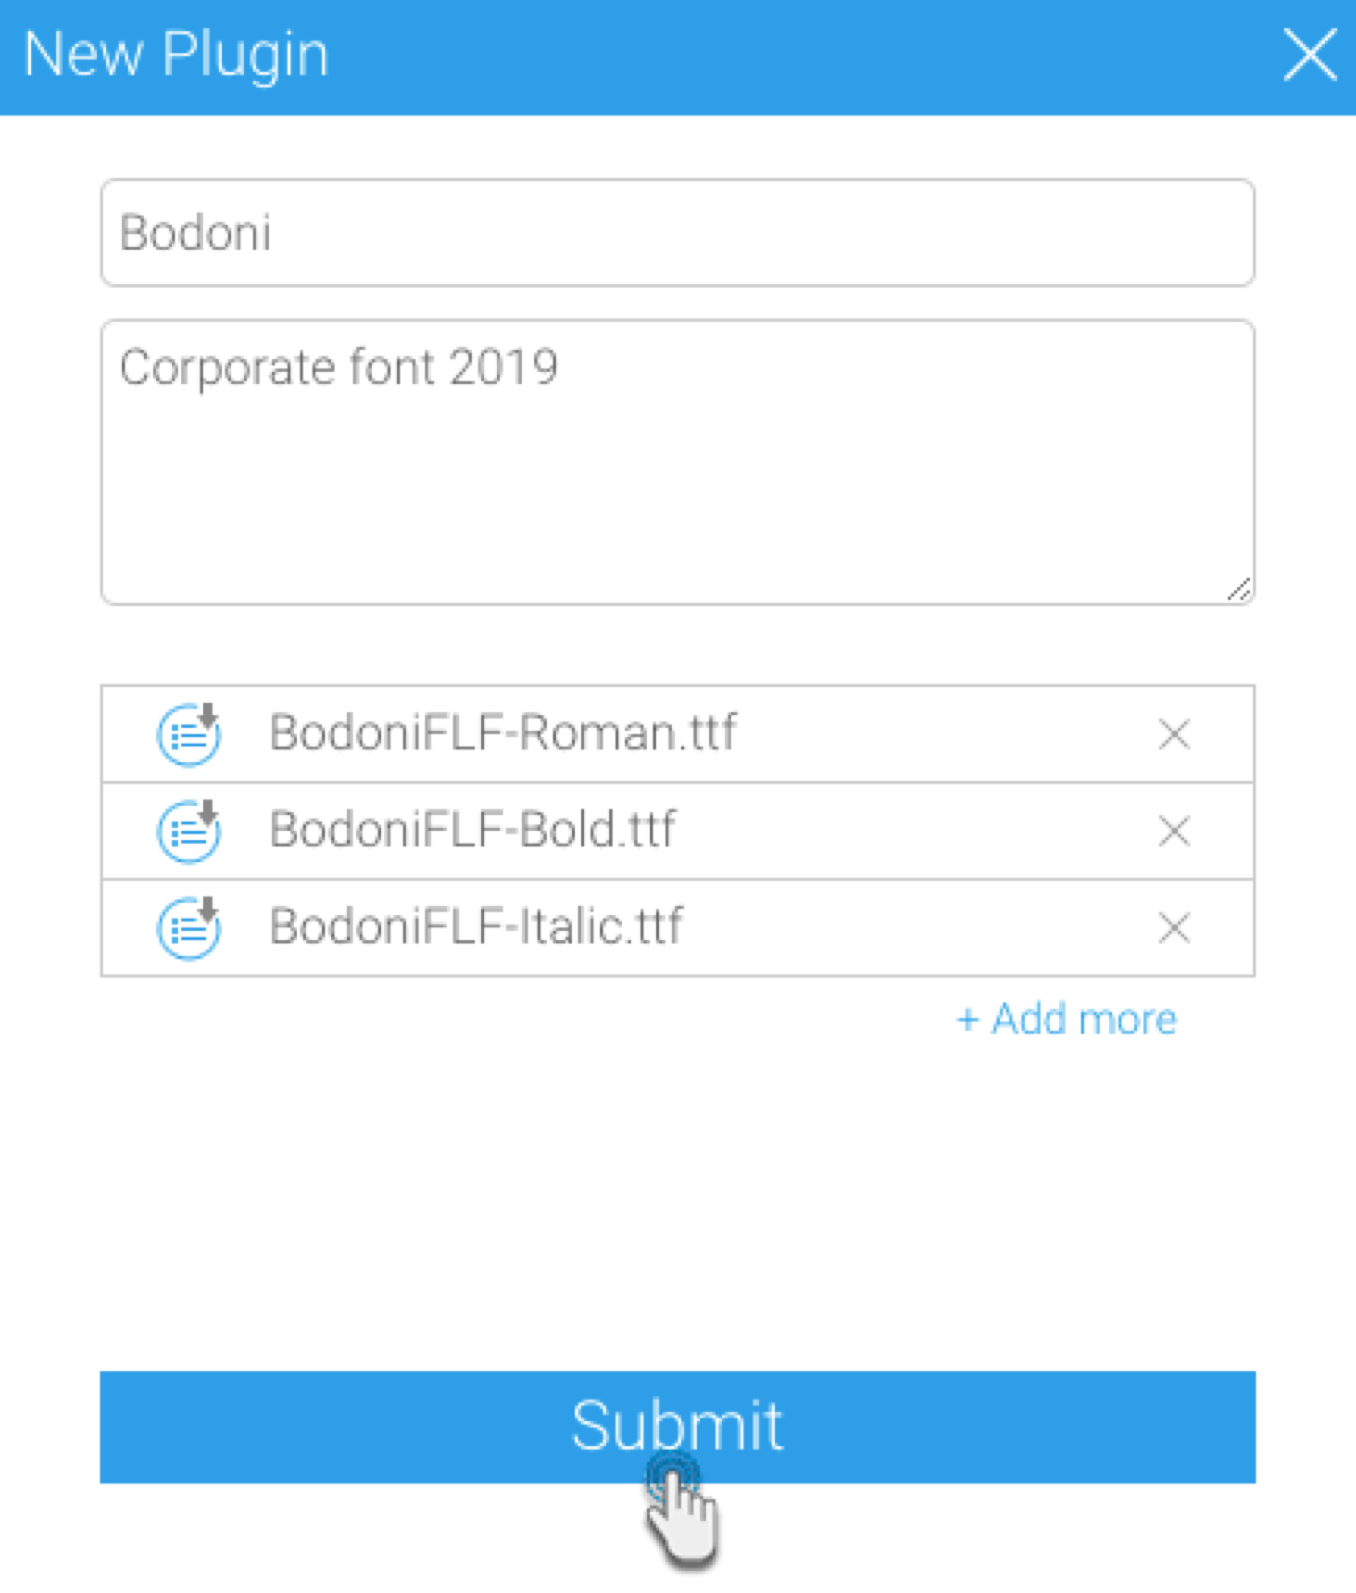
- The font will be listed on the Plugin Management page.
...