Page History
Presentations can be created by any Yellowfin user if their role permits it. When you create a presentation, you can select a default data set if you wish to include reports or charts from an existing view.
Yellowfin ships with a few themes that you can use as templates for presentations, but if these don't suit your needs, you can create your own themes. Let's start with creating a presentation from an existing theme. Note that slides are a fixed size that cannot be changed.
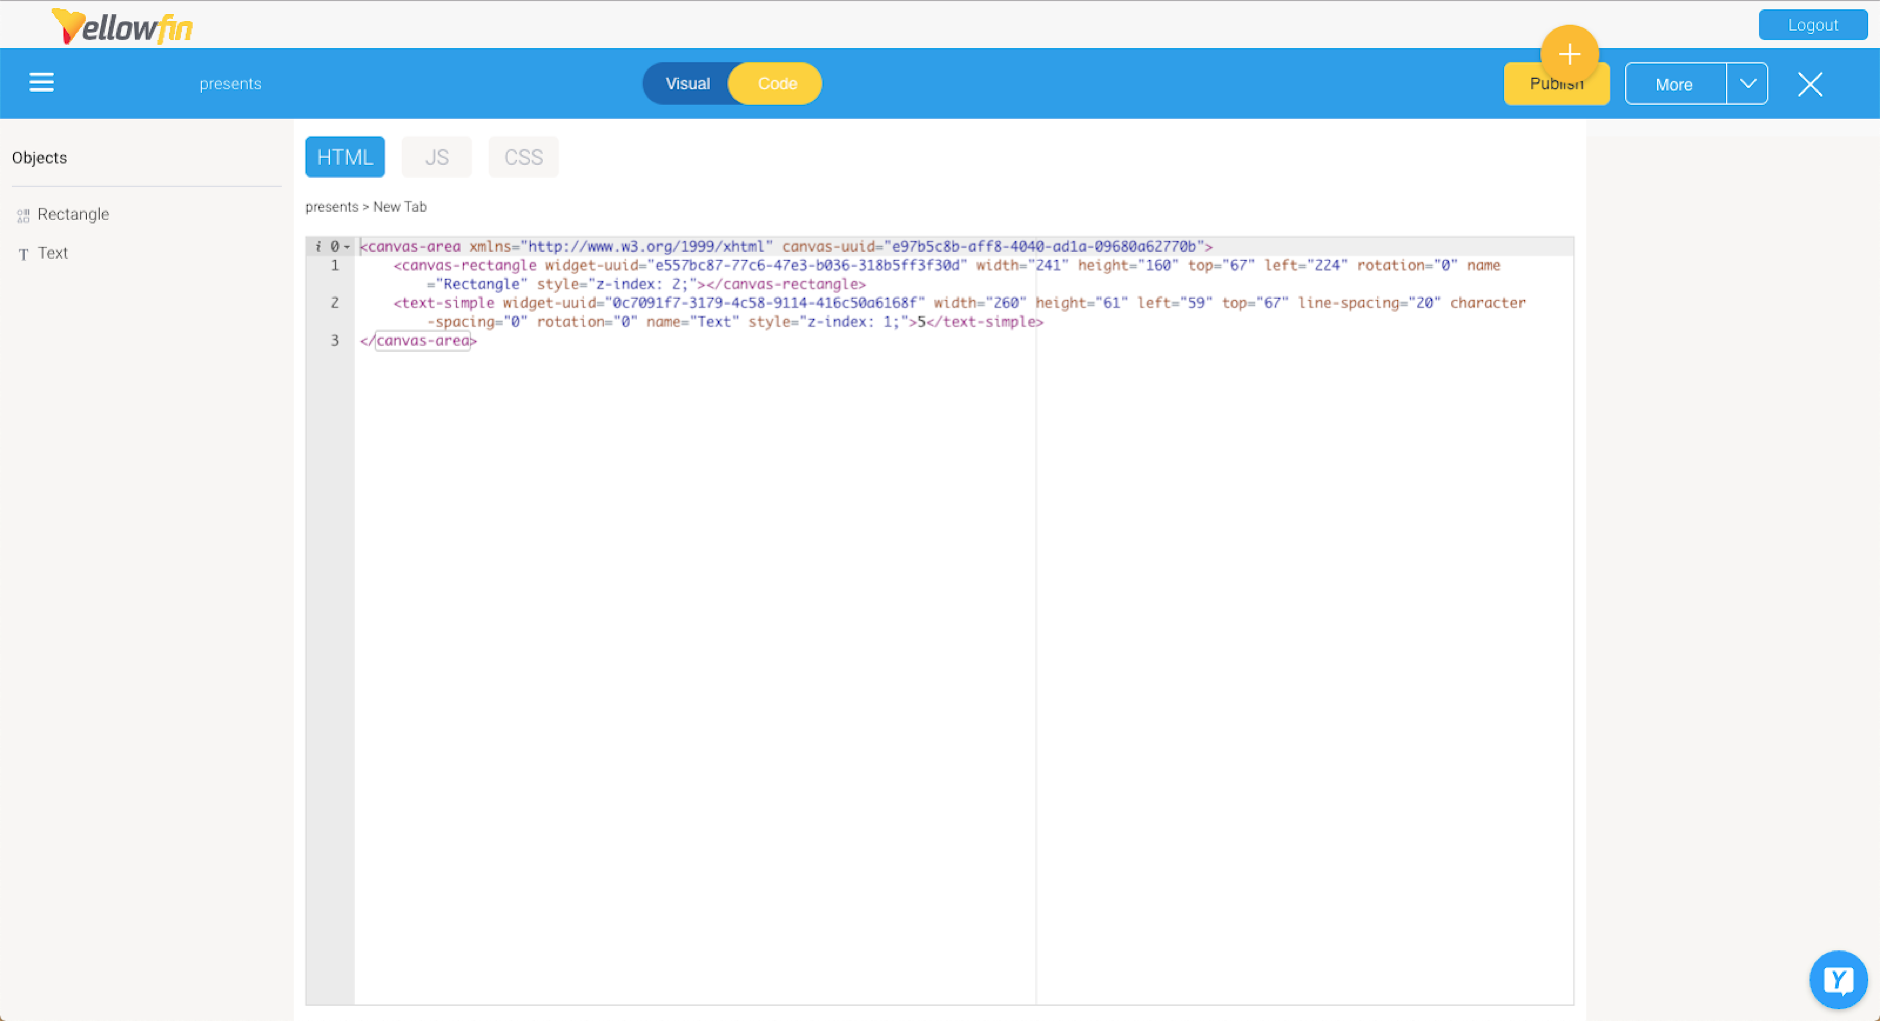
Code mode is also available in Yellowfin Present, which is useful to developers who wish to extend the functionality through custom code widgets.
Create a presentation
Like other Yellowfin content, presentations can be created from the top right corner of the Yellowfin screen.
...
- Click on the Create + button
 button in the top right corner, and select the Present option.select Present
The Create New Presentation pop-up will appear
- Enter a name in the Presentation Name field
If you intend to add charts or reports, click on the dropdown for Default Data Set and choose the appropriate view (or When the following popup appears, enter a name for the presentation.
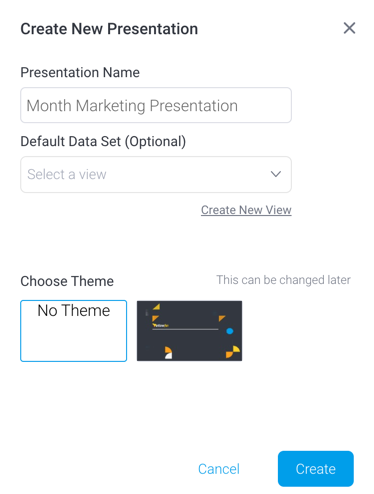
You may also select the default view or data set. Or click on the Create New View option to create a new view; this leads to will take you away from your presentation and into the View builder.)If you wish to use an existing To apply a theme to your presentation, select an existing theme. Click here to learn more about Present themes.click on the theme's thumbnail (otherwise, the Blank theme is used by default)

- Click on the Create button
- A new presentation will be created, ready to be edited in Visual Mode. The features of this Present builder are covered here.
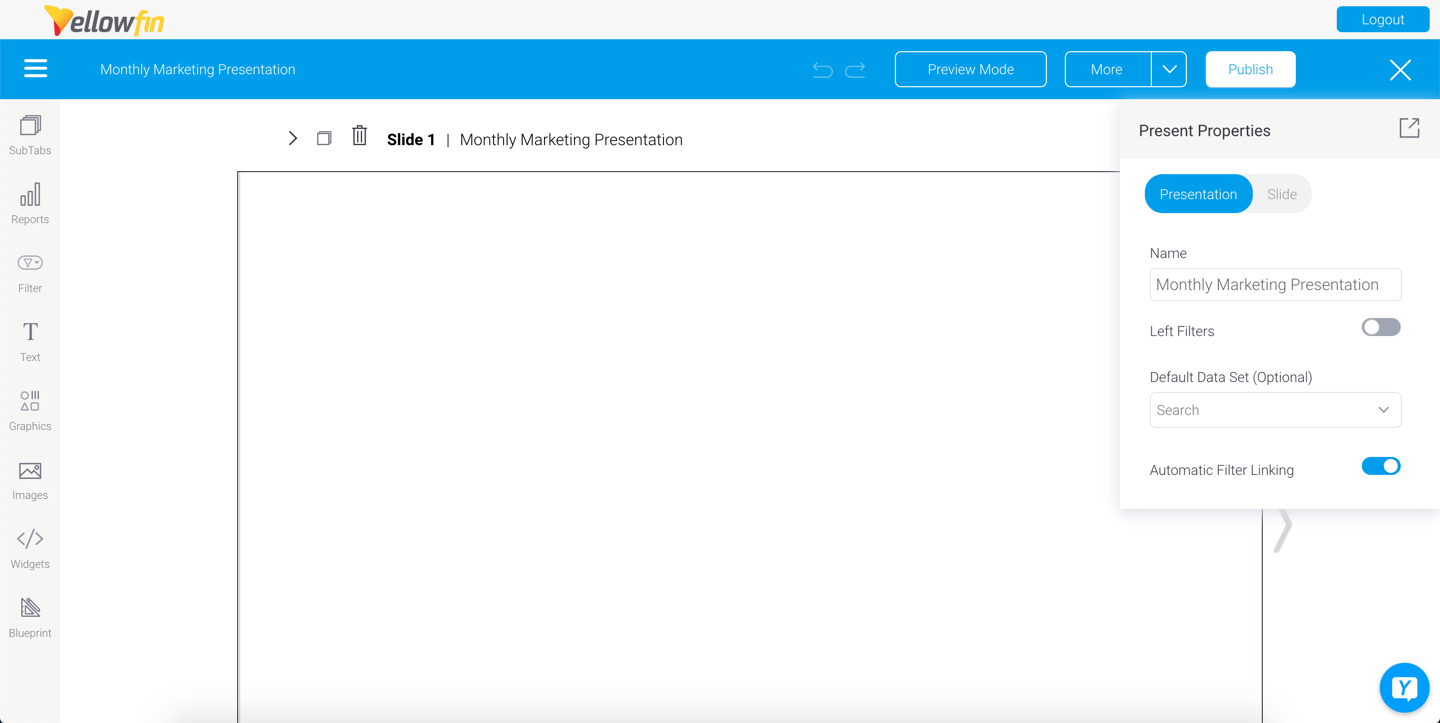
- You can now add multiple slides to a presentation through the sub tabs menu. Alternatively, you may also copy a slide using the
 icon. Add content to your presentation through the widget navigation on the left.
 - You can switch to Code Mode, and add further customization or enhanced functionality to your presentation.
- The presents builder autosaves the presentation as a draft as you edit it, so there is no need to manually save it.
- When you wish to publish and present your presentation, use the Publish button. This also allows you to share your presentation with other users.

You are able to edit or customize each slide and its content through its properties panel.
| Note |
|---|
Note that you cannot resize a presentation slide. Each slide is fixed to be of the same size for consistency. |
Adding content to a slide
...
- visual mode for easy editing
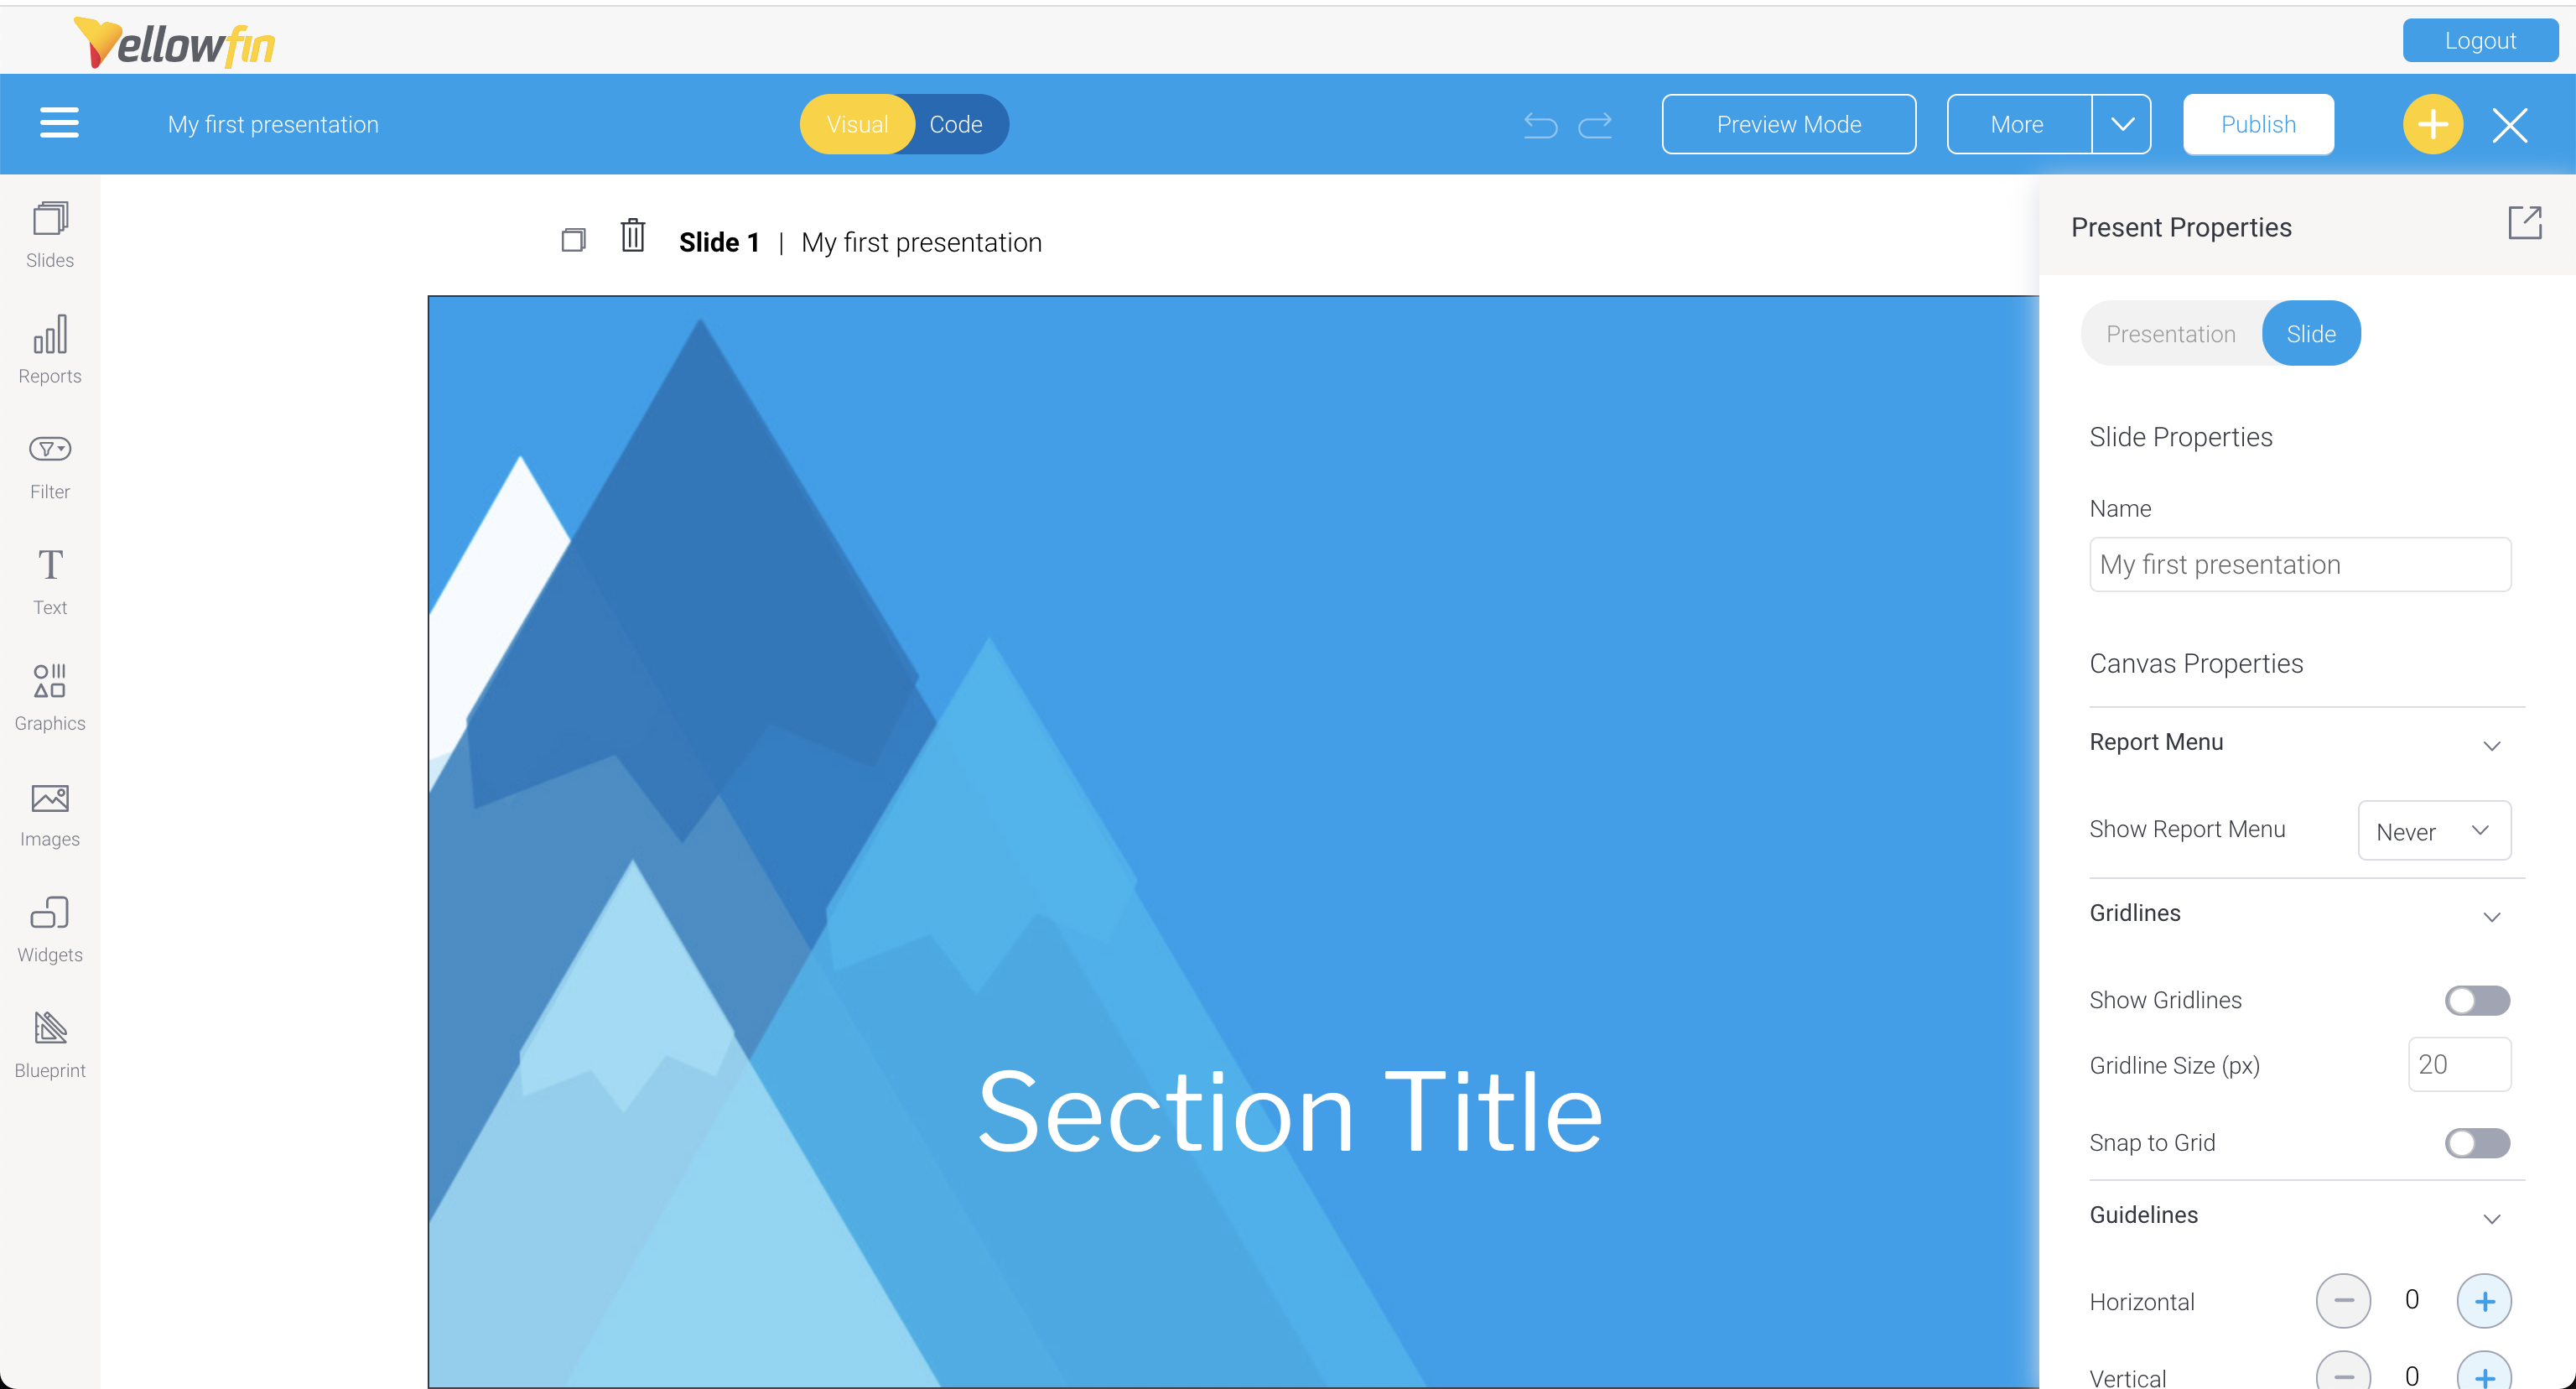
- Take a look at the Present Properties panel on the left to see how each slide and your entire presentation can be customized
- Use the toolbar on the left to add content to your slides (for more information on these tools, see our Present Objects page)
As you work on your slides, your presentation is automatically saved as a draft - When're ready to publish and share your presentation, click on the Publish button in the top right corner
| Tip |
|---|
If you'd like to save your presentation as a theme, see our page about Creating a Present theme for further information. |
...
Enhancing presentations with Code Mode
Similar to the dashboard canvas, Yellowfin Present also provides Code Modecode mode, and support for custom code widgets.
...
Authorized developers can extend presentation functionality within Yellowfin and create rich application experiences, using HTML, CSS, and JavaScript. Code Mode appears as an additional editing mode on the Present builder.
Learn more about Code Mode code mode here.
...
Custom Code Widgets
Developers can also add custom Code Widgets to be used in Present. These widgets are capable of supporting any type of functionality you could dream up, and are ideal if you wish to repeatedly apply the functionality to a presentation. Once imported through the plugin manager, they will appear in the Code Widget panel.
Tip: we recommend ‘testing’ the code widget functionality in Code Mode code mode before importing the code widget.
...