Overview
This step duplicates an input dataset to create identical output datasets. Under normal circumstances, a single step can only be connected to one other step. But using the split transformation step, you can connect one step to multiple steps. This step does not need to be configured, and you can split a step multiple times using this.
Splitting Data in a Transformation Flow
In this example, we will cover how to create a simple transformation flow that splits data from a . Therefore, this transformation will involve setting up two separate input steps (one for each of the data source), combining them by using the merge transformation step, and then storing the merged data into a database. You could always include additional steps in your own transformation flow.
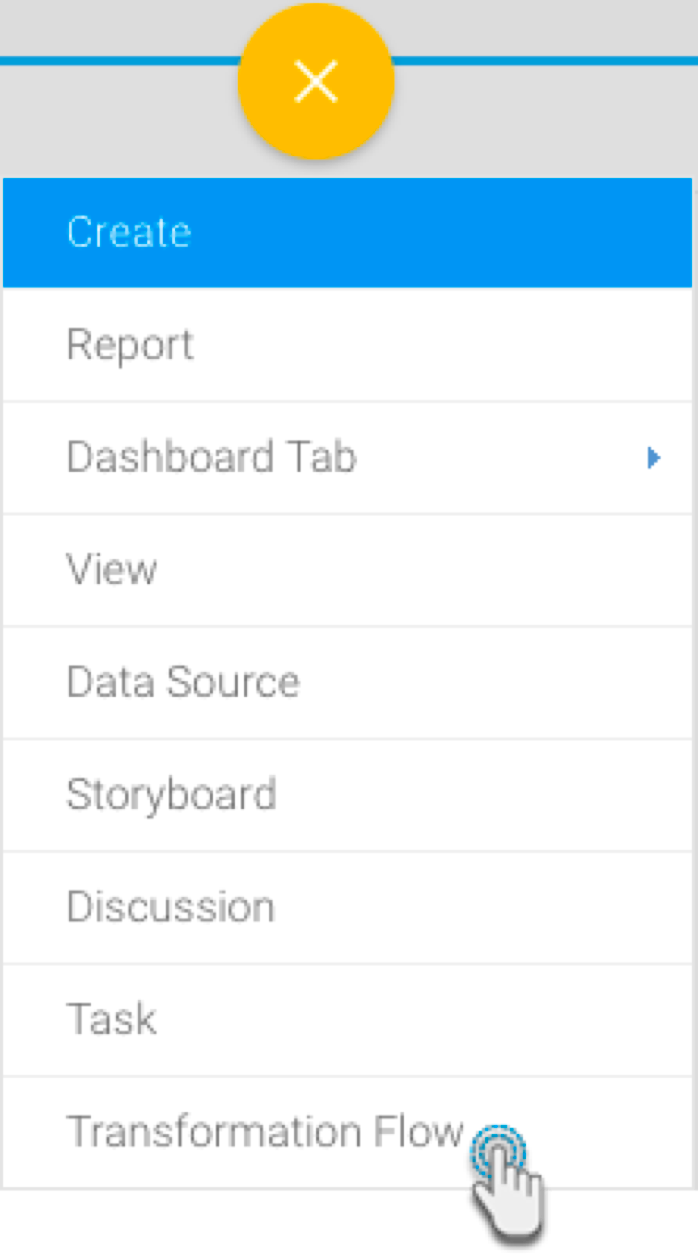
Click on the Create button in the top-right corner.
Then select Transformation Flow.
If you do not see this option, you may not have security access to transformation flows. Learn how to get access here.
You will be taken to the transformation flow builder.
Hover your cursor over the input steps button on the left side. A panel with a list of all data extraction steps will appear.
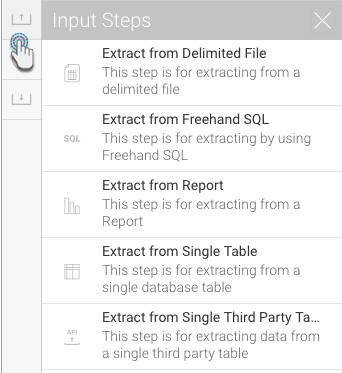
Drag one of these steps onto the canvas. For this procedure, we will first use the single table step as an example. (Click here to learn about all the different input steps.)
On doing so, a popup will appear to load data from a data source.
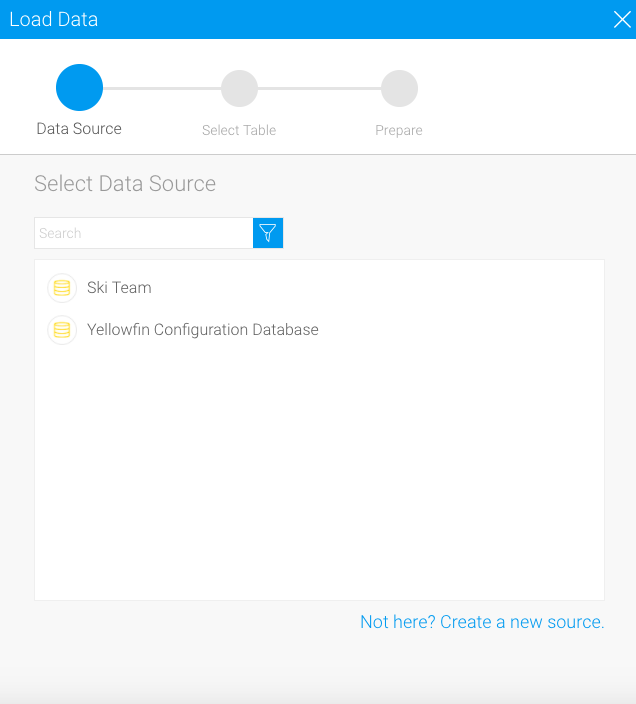
Click on the data source that you require.
Then choose the database table, and click on Submit.
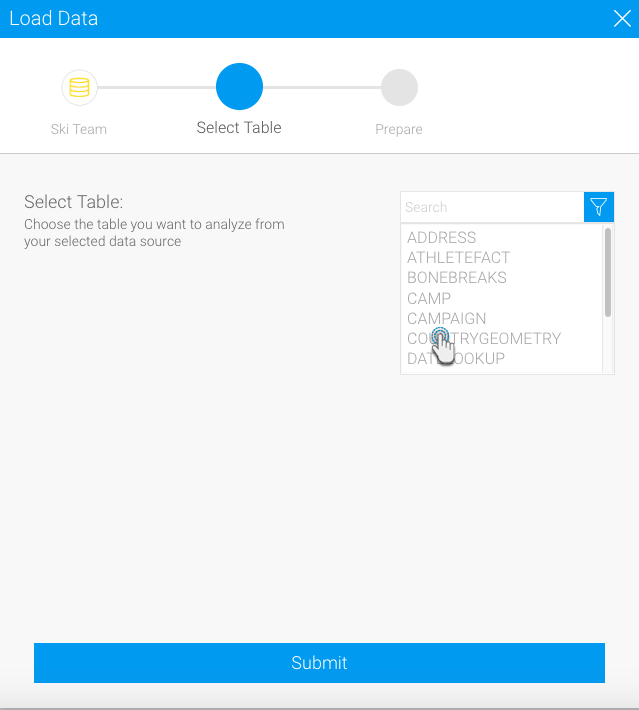
The selected table's fields will appear in the transformation flow panel to be configured.
Select only the fields that you want data to be extracted from.
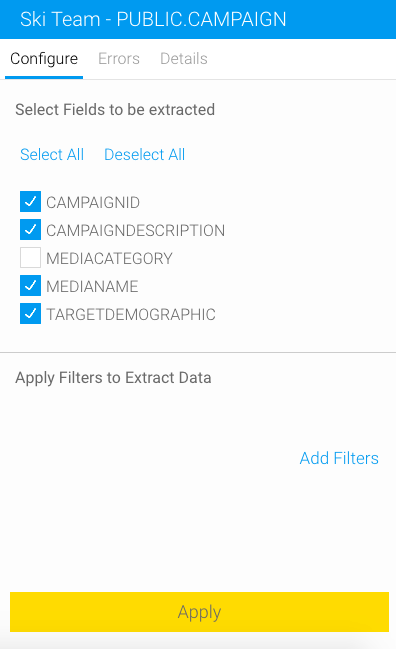
You can make further changes to the step, such as renaming it, adding a description, etc.
Once you’re done with the step configuration, click on the Apply button.
You must click on the Apply button to save the configuration details. Otherwise, if you click somewhere else first, you will lose the configuration details.
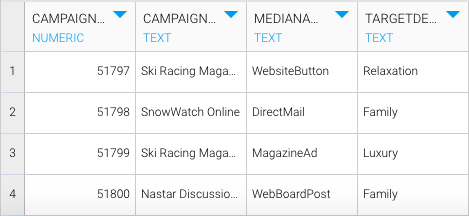
On doing so, the data preview panel will display the data extracted from the configured database table.
Now follow the below steps to add another input step to import and configure another data source, for example data from a report.
- Drag the report step from the input step panel.
- Then select a report by providing its name in the popup window.

When the report's fields appear in the next popup, click Add Report.

Click on Apply when configuring the report fields in the transformation flow panel.

The data preview panel will then display the configured report's data.
You can also apply transformations to fields directly in the data preview panel. Click here to learn more about this.
When you want to include the merge step in your flow, continue with the procedure below.
Expand the transformation steps panel by hovering on its icon in the step builder, and then drag the Merge step onto the canvas.
- Connect the database input step to the merge step.

- Similarly, create a connection between the report input step and the merge step.
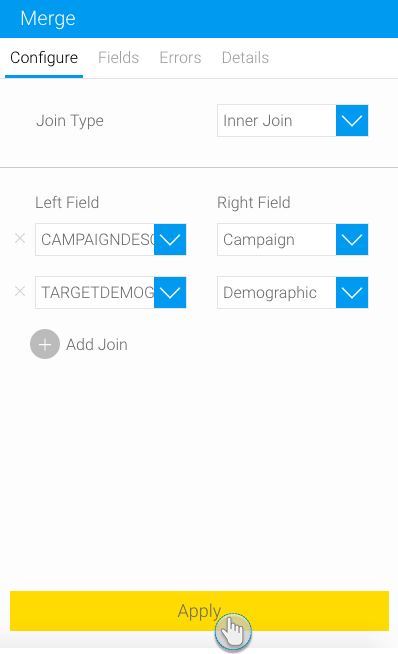
- Next click on the merge step to configure it. The tranformation flow panel will be updated accordingly.

- Select a join type. (See the table above for details on each of the types.)
Then map the left field (from the database input step) to its counterpart on the right side (from the report input step).
- To add more joins, click on the Add Join button, and repeat the mapping steps.
- You can even delete a join field by clicking on its delete icon if required.

- Once the joins have been added, click on Apply.
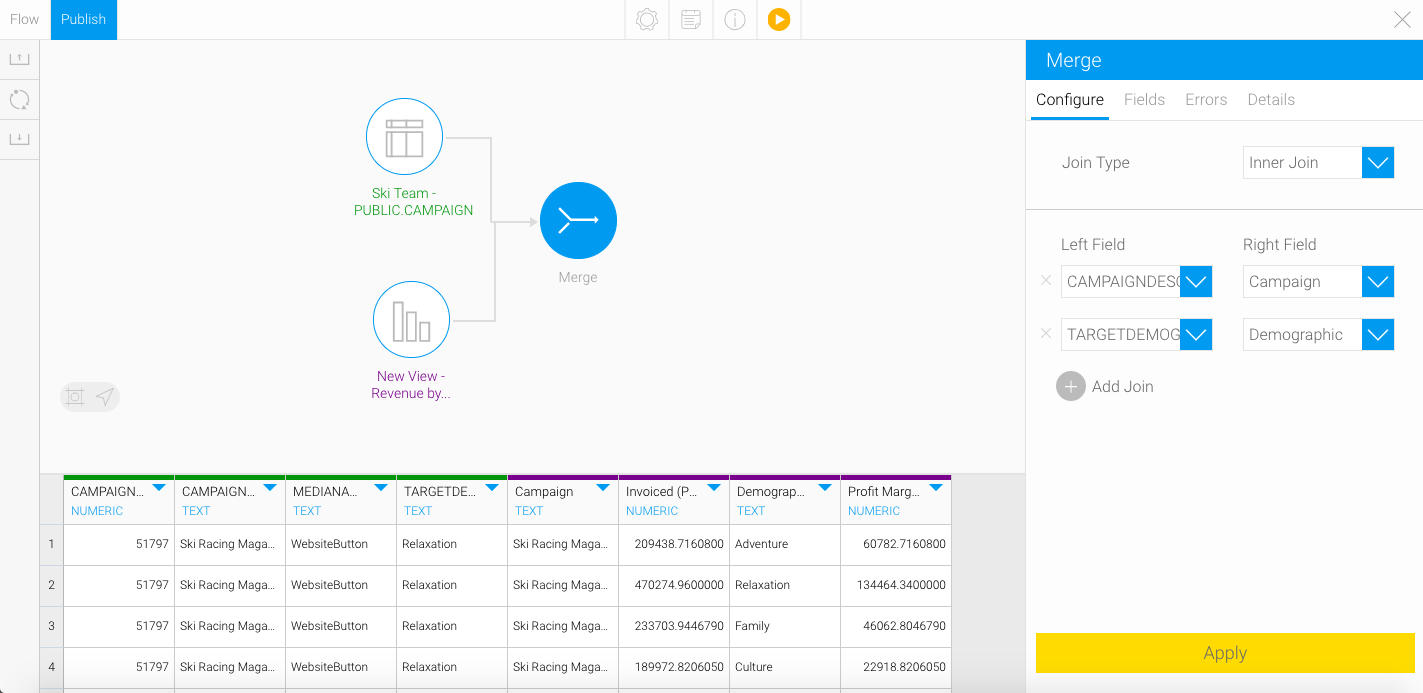
The data preview panel will display the result of the merge step. You will notice the fields are colour-coded according to their input steps to help differentiate between them.
You can continue to transform your data further by adding more transformation steps.
Once you are ready to save your data into a writeable database, follow the steps below.
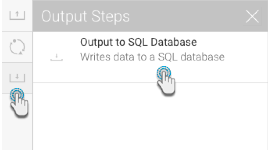
Extend the output steps panel by hovering on its icon, and drag the SQL database output step onto the canvas.
Connect the merge step (or the previous step in your flow) to the output step by creating a connection.
Note: By default, the output step will be highlighted as red to signify that it contains errors. This is because it has not been configured yet.
And then configure the output step through the panel on the right-side. Click here to learn more about configuring this step.
You can now execute the draft flow by clicking on the run button in the top header menu. (This does a quick execution of the data rows in the data preview panel.)

Or save the flow for a full execution. To do that, click on the Publish button.

Then provide details in the popup that appears, such as providing a proper name, and selecting rights to access the flow.

Finally, click on the Save button.