Overview
This type of transformation allows you define groups in your data, that can return combined values of the fields specified in the group. For example, in the data set below, people between the ages of 13 and 18 (inclusive) are grouped as teenagers.
| Age | Income |
|---|---|
| 15 | $1,500 |
| 17 | $750 |
| 21 | $1,600 |
Grouped data:
| Age | Income |
|---|---|
| Teen | $2,250 |
| 21 | $1,600 |
This is an inline transformation that can be carried out on any type of data, from directly in the data preview panel (or the step configuration panel).
This tutorial includes different instruction sets to define grouped data based on the data type.
Group Numeric Data
Grouped Metric setup has a different behaviour to other types of grouped fields, as Yellowfin will automatically create groupings for you, which you can then adjust.
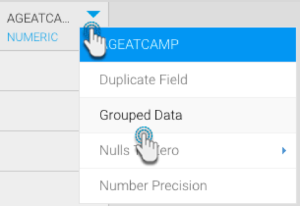
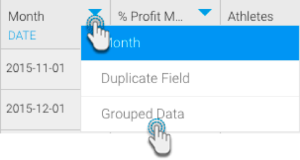
Click on the menu icon next to a numeric field’s name in the data preview panel, and select Grouped Data.
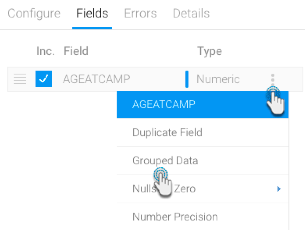
Alternatively, you can click on the menu option next to a numeric field in the Configure panel, under the Fields tab, and select Grouped Data.
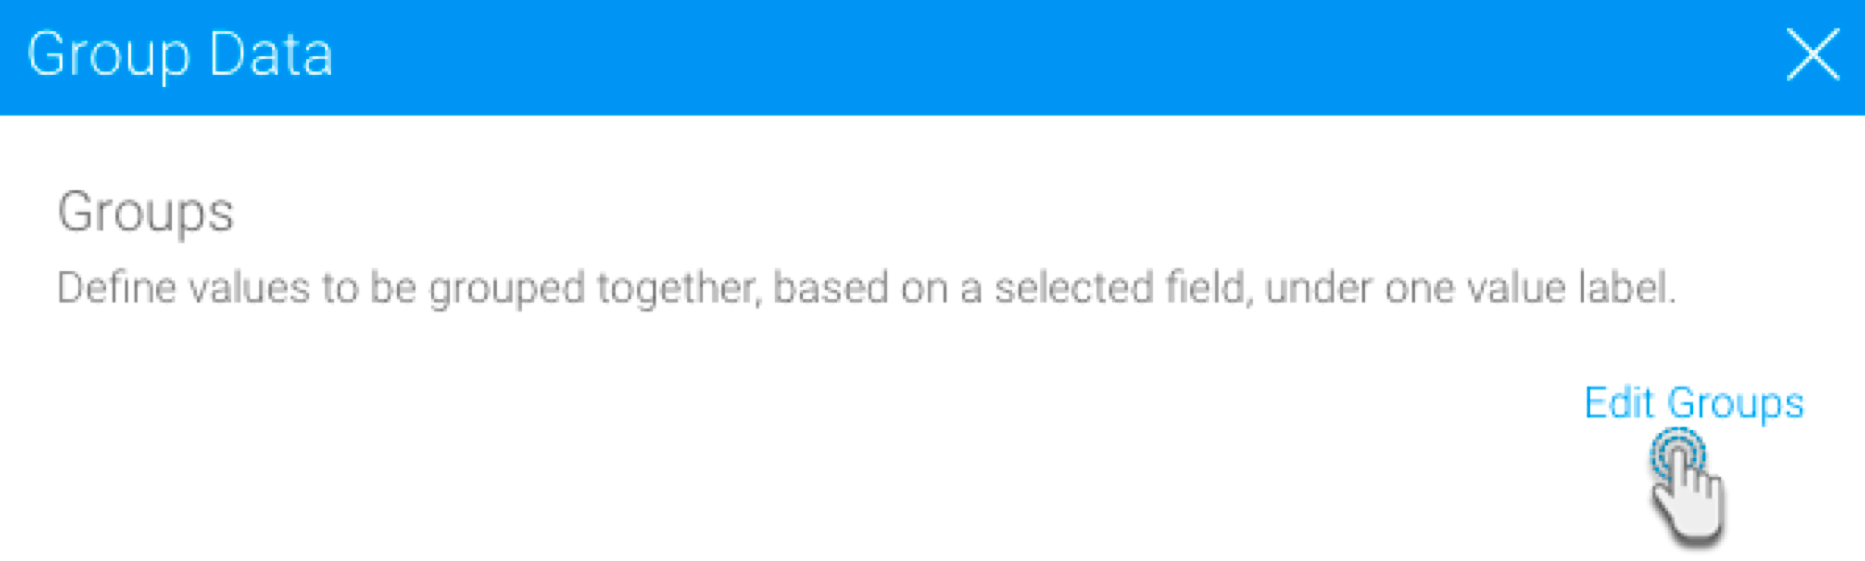
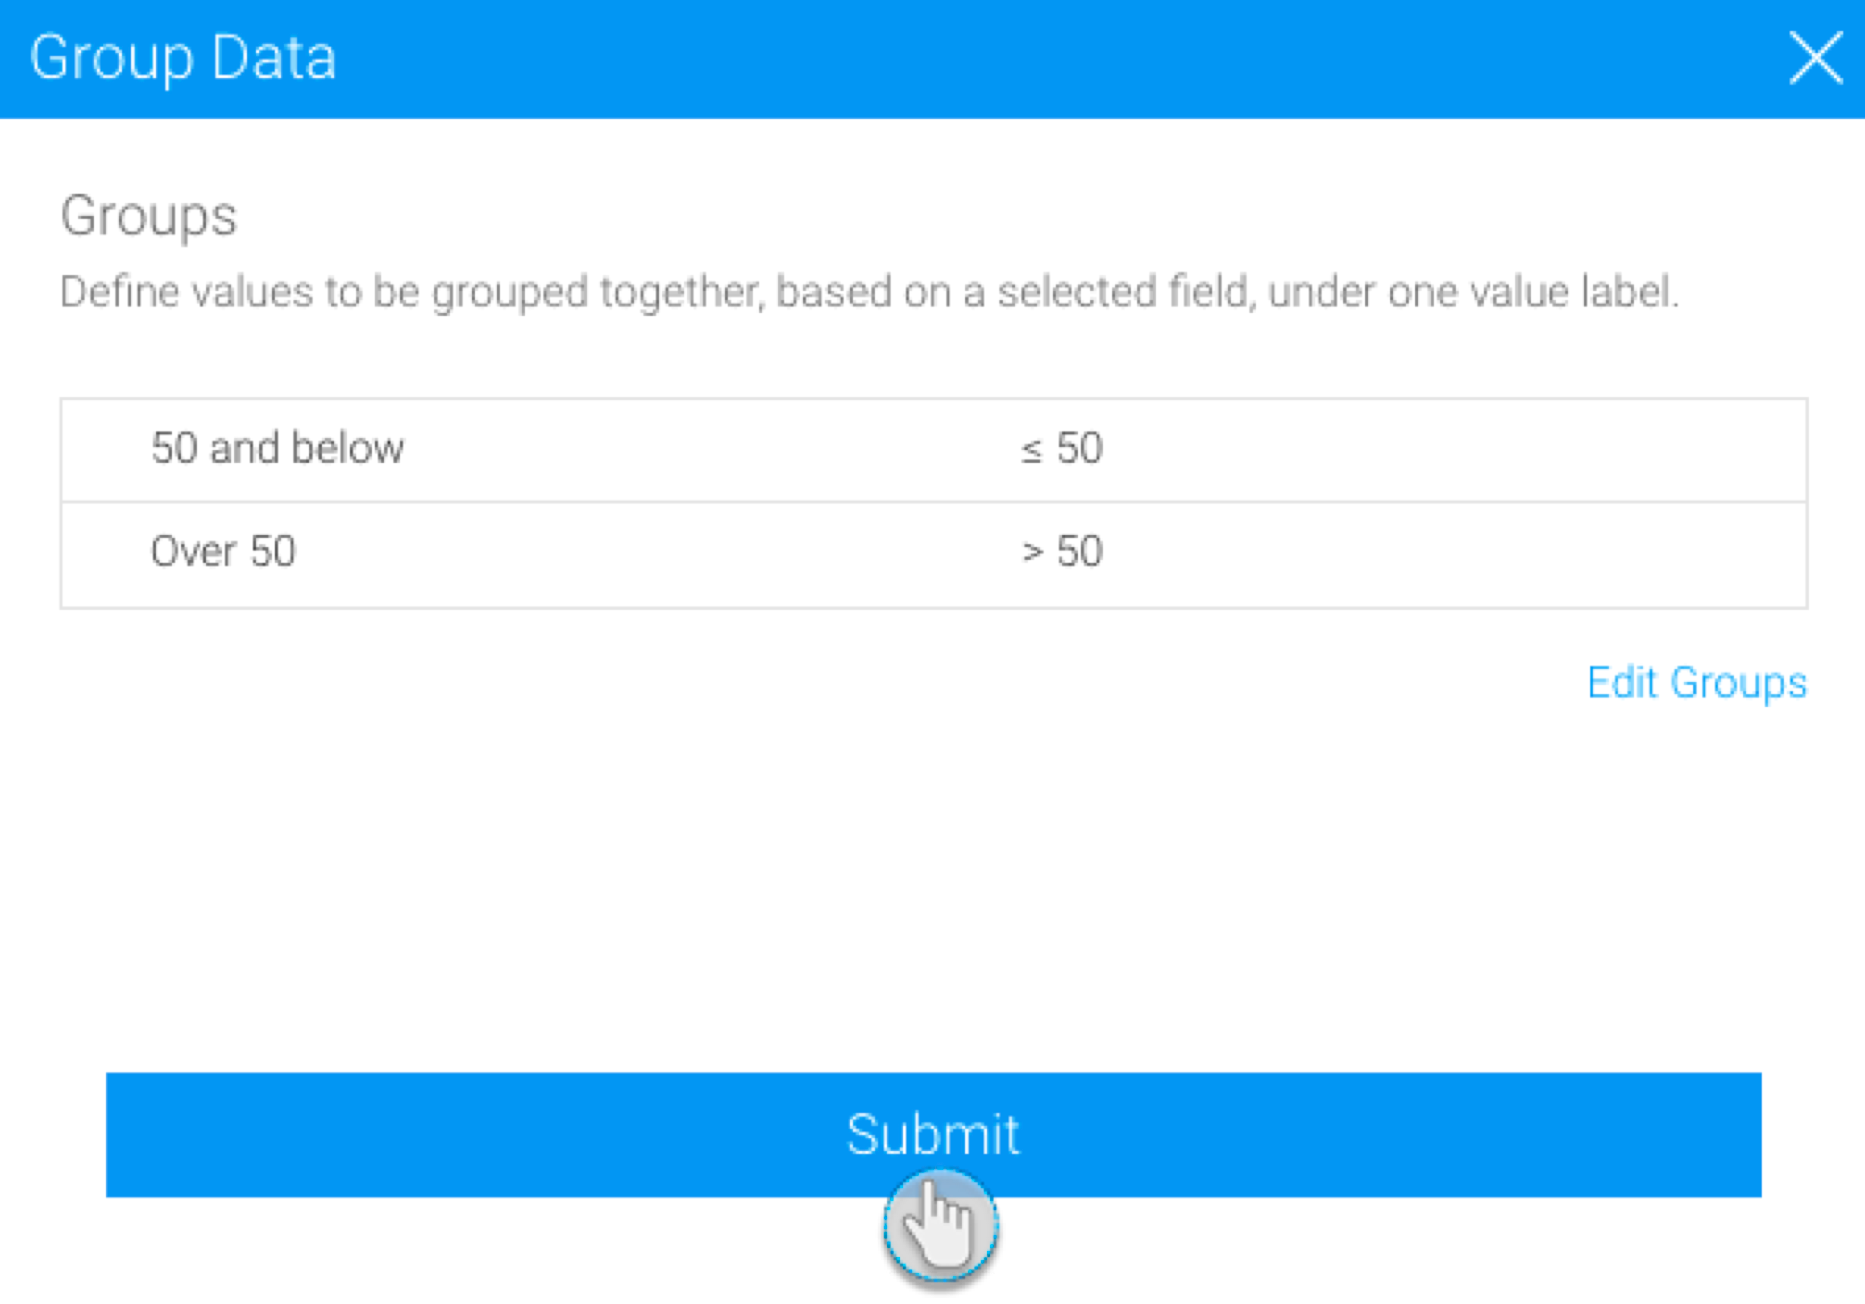
In the new popup, click on Edit Groups.
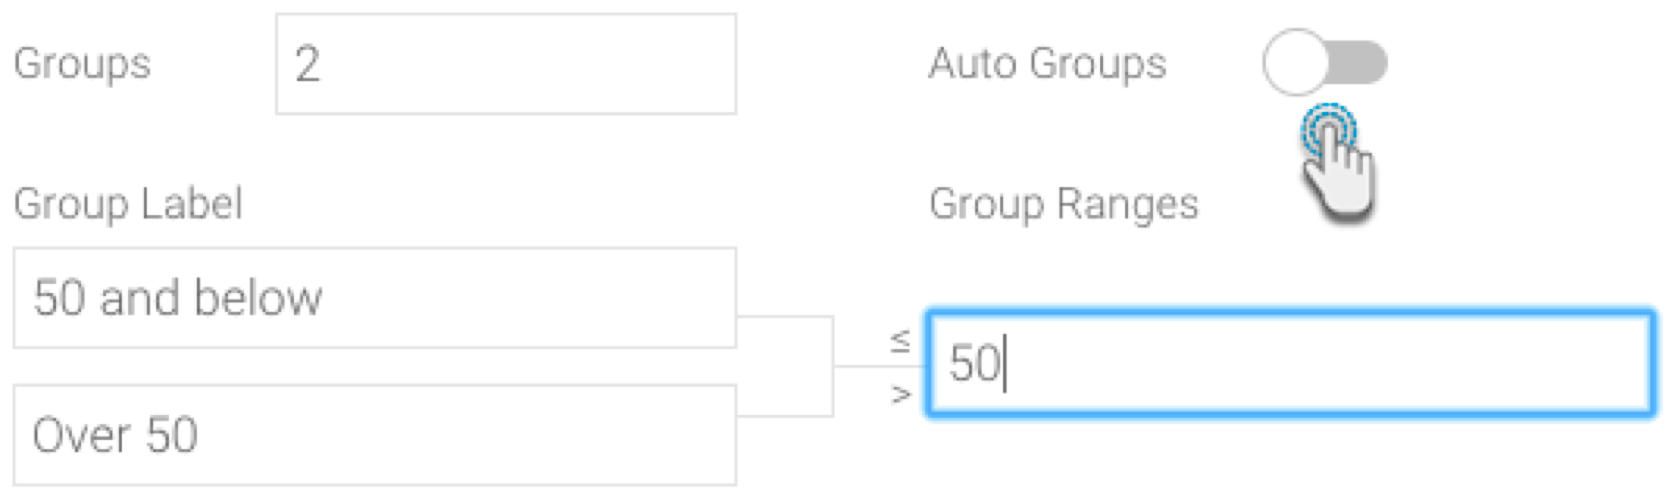
When it comes to numeric data, Yellowfin will automatically provide groupings, which you can then adjust.
Specify the number of groups you want to assemble your data into.
If you want to further edit the groups, disable the Auto Groups toggle. You will be able to adjust the group labels and ranges as well.
Once you are done edit, click Save.
You will be able to see the grouped data that was created. Click Submit to complete group definition.
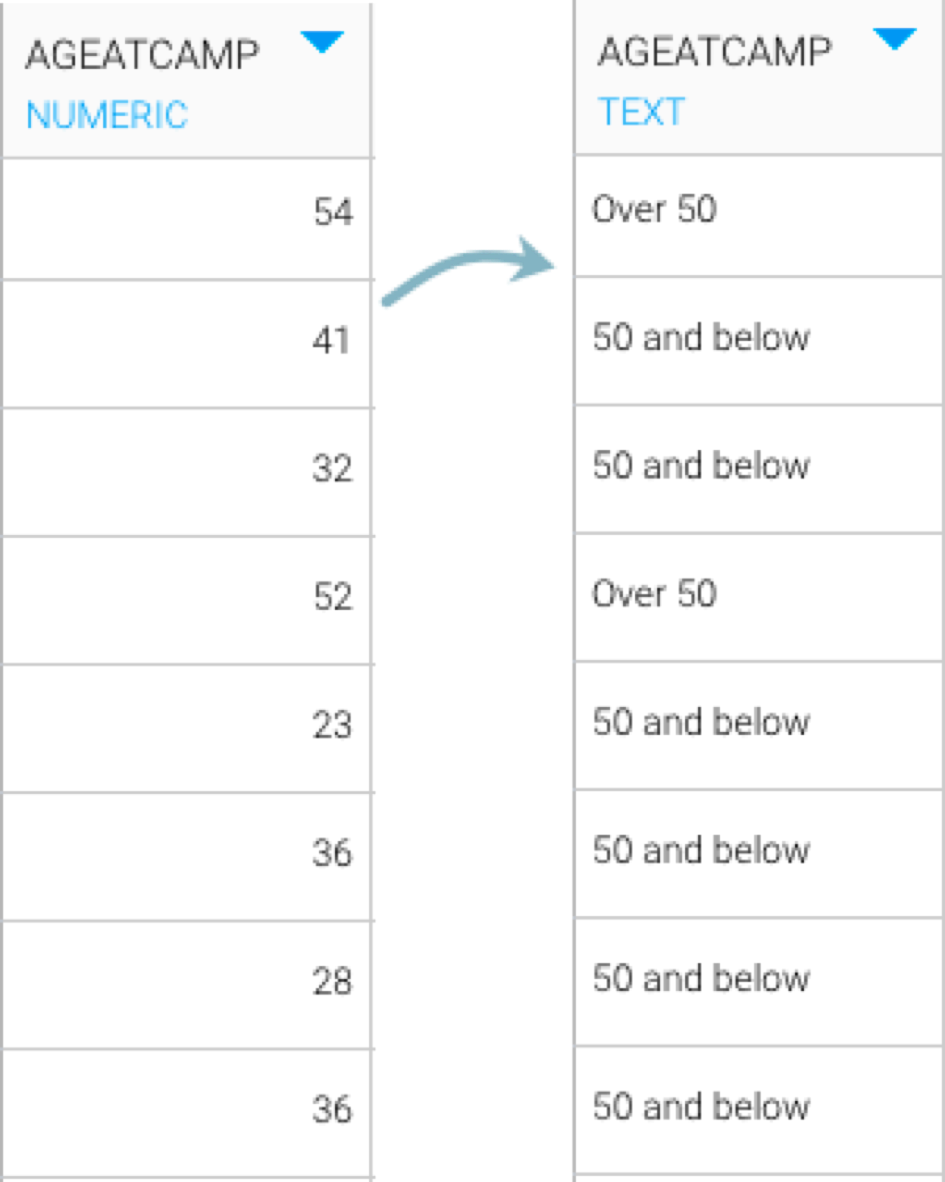
The data column in the data preview panel will be updated to reveal the grouped values instead of the original ones, as shown in the example below. You will also notice that the data type will be changed.
Group Text Data
Follow the instructions below to group text or dimension field data.
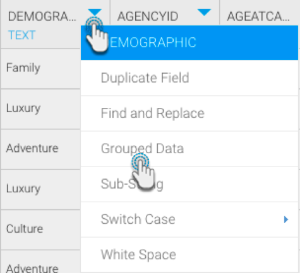
Click on the menu icon next to a text field’s name in the data preview panel, and select Grouped Data.
Alternatively, you can click on the menu option next to a numeric field in the Configure panel, under the Fields tab, and select Grouped Data.
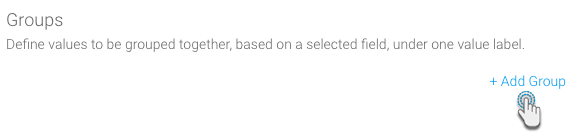
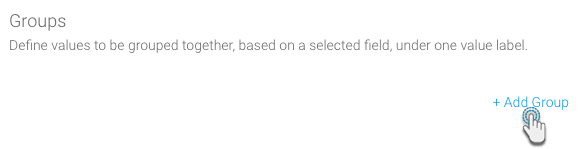
In the new popup, click on +Add Group.
A new screen will appear. Provide the label for the first group - this is what will be displayed instead of the grouped values.
Pick an operator for your grouping logic:
In List: Choose this to assemble the selected values into a single group.
Not In List: Choose this to assemble all the values not selected, into a single group.
Add the values to be included in this group by selecting them from the left panel, and adding them to the right. You can use the >> and << buttons to add and remove selected values.
The left panel only displays unique values fetched from the available data (that is, the rows being processed in the design mode, which is set to the first 10,000 rows, by default). Therefore, it may not reflect all possible unique values.
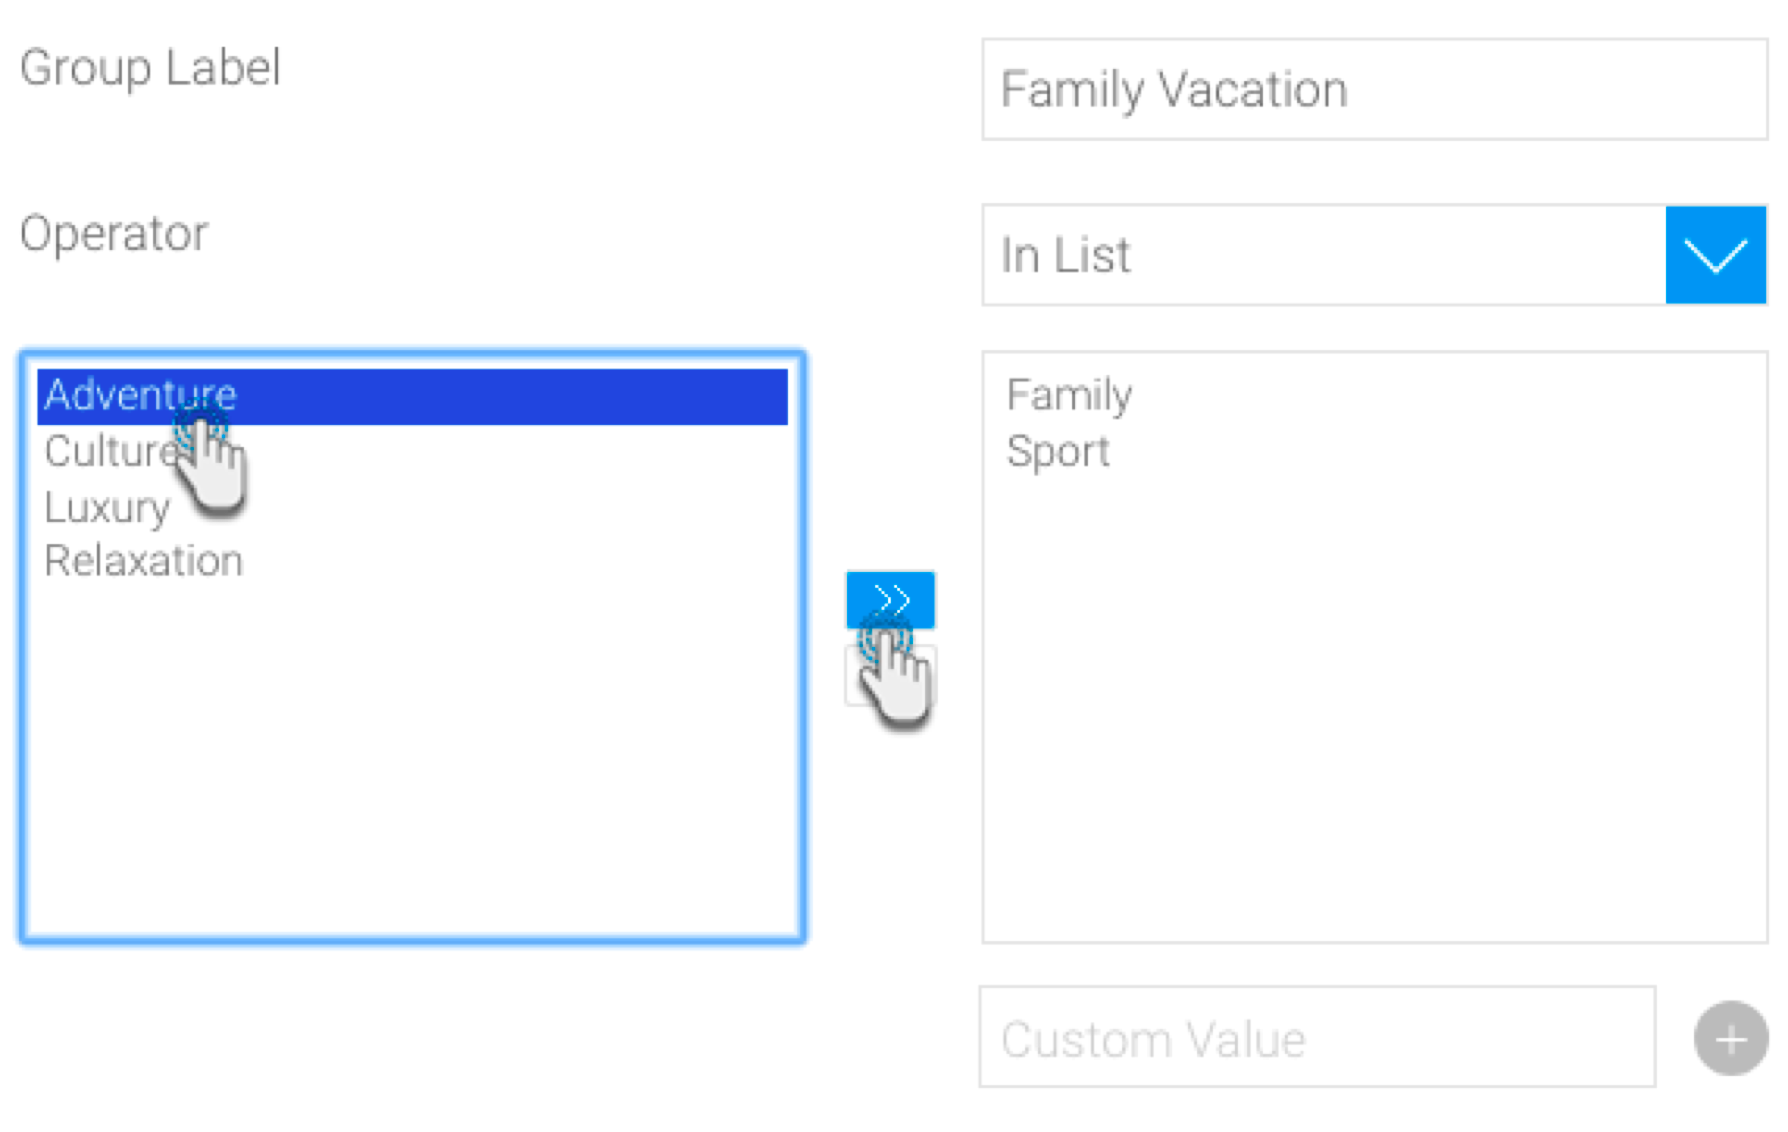
If there are any unique values that you are aware exist in the database, but are not displayed in the left panel, then you can add these manually. Simply enter the value in the Custom Value field, and click on the add (plus) button to include it in the group. Doing so will enable your flow to execute as expected in a full run.

Click on the Save button. You will be taken to the Group Data page, that lists all the already created groups.
You can create more groups with the remaining values by clicking on on the + Add Groups link. Simply repeat the above steps.
Once you have created the groups, you can even reorder them by using the
icon, or delete them by clicking the
icon.
You can also sort the order of these group as ascending or descending. Click on the Sort link and choose the order.
Finally, click Submit to complete your grouped data column.

Group Date Data
Follow the instructions below to group date field data.
Click on the menu icon next to a date field’s name in the data preview panel, and select Grouped Data.
Alternatively, you can click on the menu option next to a date field in the Configure panel, under the Fields tab, and select Grouped Data.
In the new popup, click on +Add Group.
Provide a label for your first grouping. This will be what's displayed instead of the grouped values.
Pick an operator for your grouping logic. The matched values will be included to the group.
Operator Description Equal To
The same as the specified date. Different From Different to the specified date. Greater Than A date later than the specified date. Greater Than or Equal To A date the same or later than the specified date. Less Than A date before the specified date. Less Than or Equal To A date the same or before the specified date. Between A date in between the two specified dates. Not Between A date outside of the two specified dates. In List A date the same as one in the list of specified dates. Not In List A date not found in the list of specified dates. Is Null A null date Is Not Null A valid date. Specify the date or time period for the group, either by using the date picker, or selecting Dynamic Dates.
Enable the Dynamic Date toggle to specify a time period without providing the exact date, but my simply specifying the exact days/weeks/months/quarters/years to be added/removed from the current date. For example, you can set the date field to add 5 weeks to the current date.

Click Save to save the first group. You will be returned to the Group Data page that lists all the group.
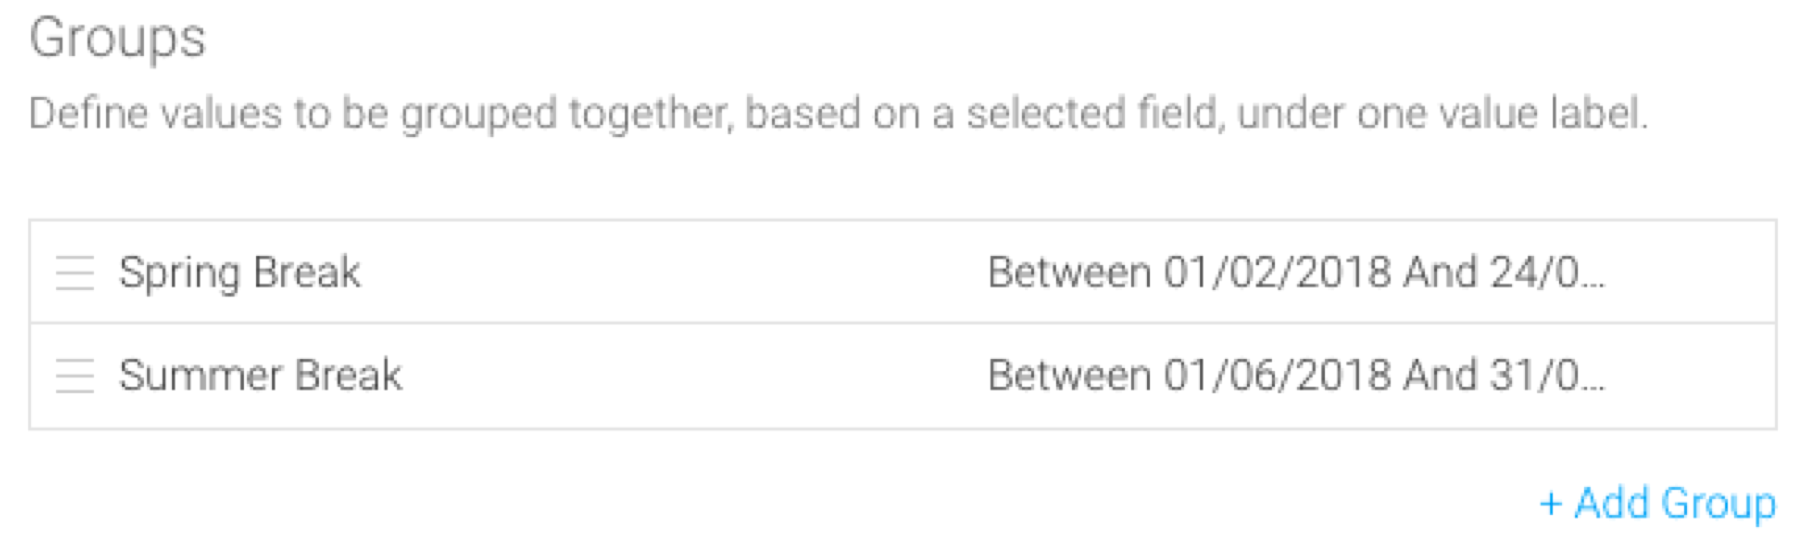
Click +Add Groups to create another date group, by repeating the above steps.
Once you have created the groups, you can even reorder them by using the
 icon, or delete them by clicking the
  icon.
icon.Finally, click Submit to complete your grouped data column.