Installing Yellowfin
Once you have all the required software and components ready, initiate the installation process.
See here for a list of prerequisites required to begin installation.
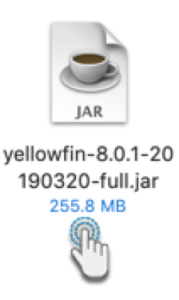
Step 1: Run Installer
Run the Yellowfin installer as an administrator from its copied location.
- On a Linux or Mac OS X platform, run the .jar file to start the installer. (As shown in the example image.)
- On a Windows platform, run the .exe file to start the installer.
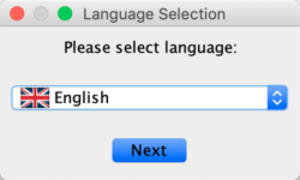
Step 2: Language Selection
Before you can begin you will be asked to select a language for the installation process.
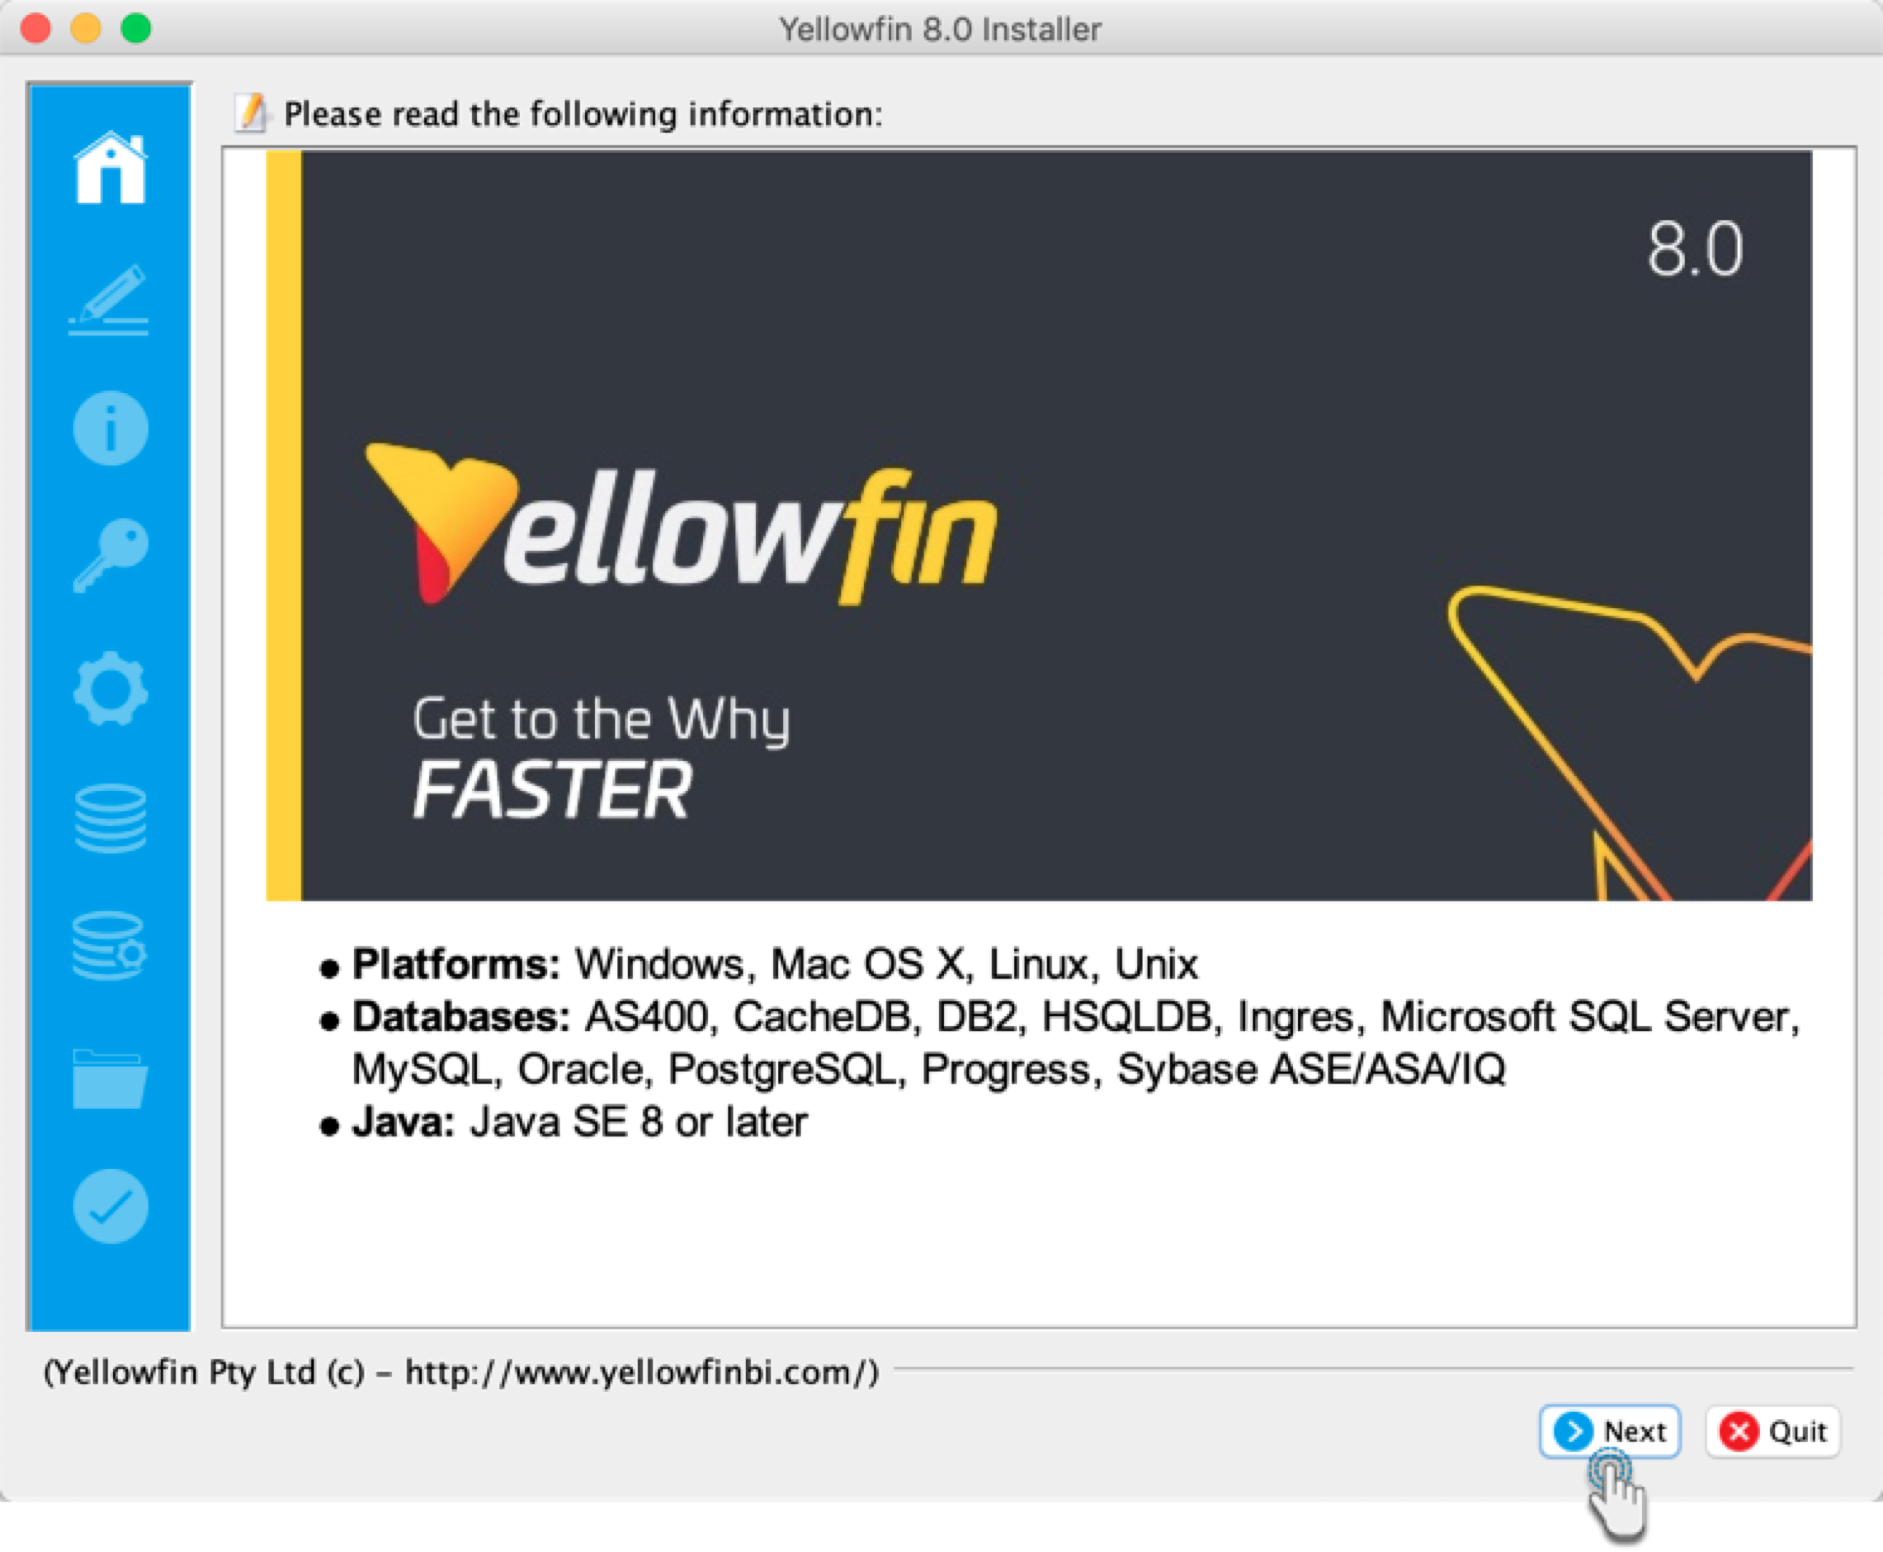
Step 3: Welcome Screen
The welcome screen mentions installation prerequisites and other information.
Review the platforms, databases, and Java information, and click the Next button to continue, or click the Quit button at any time to exit the installation process.
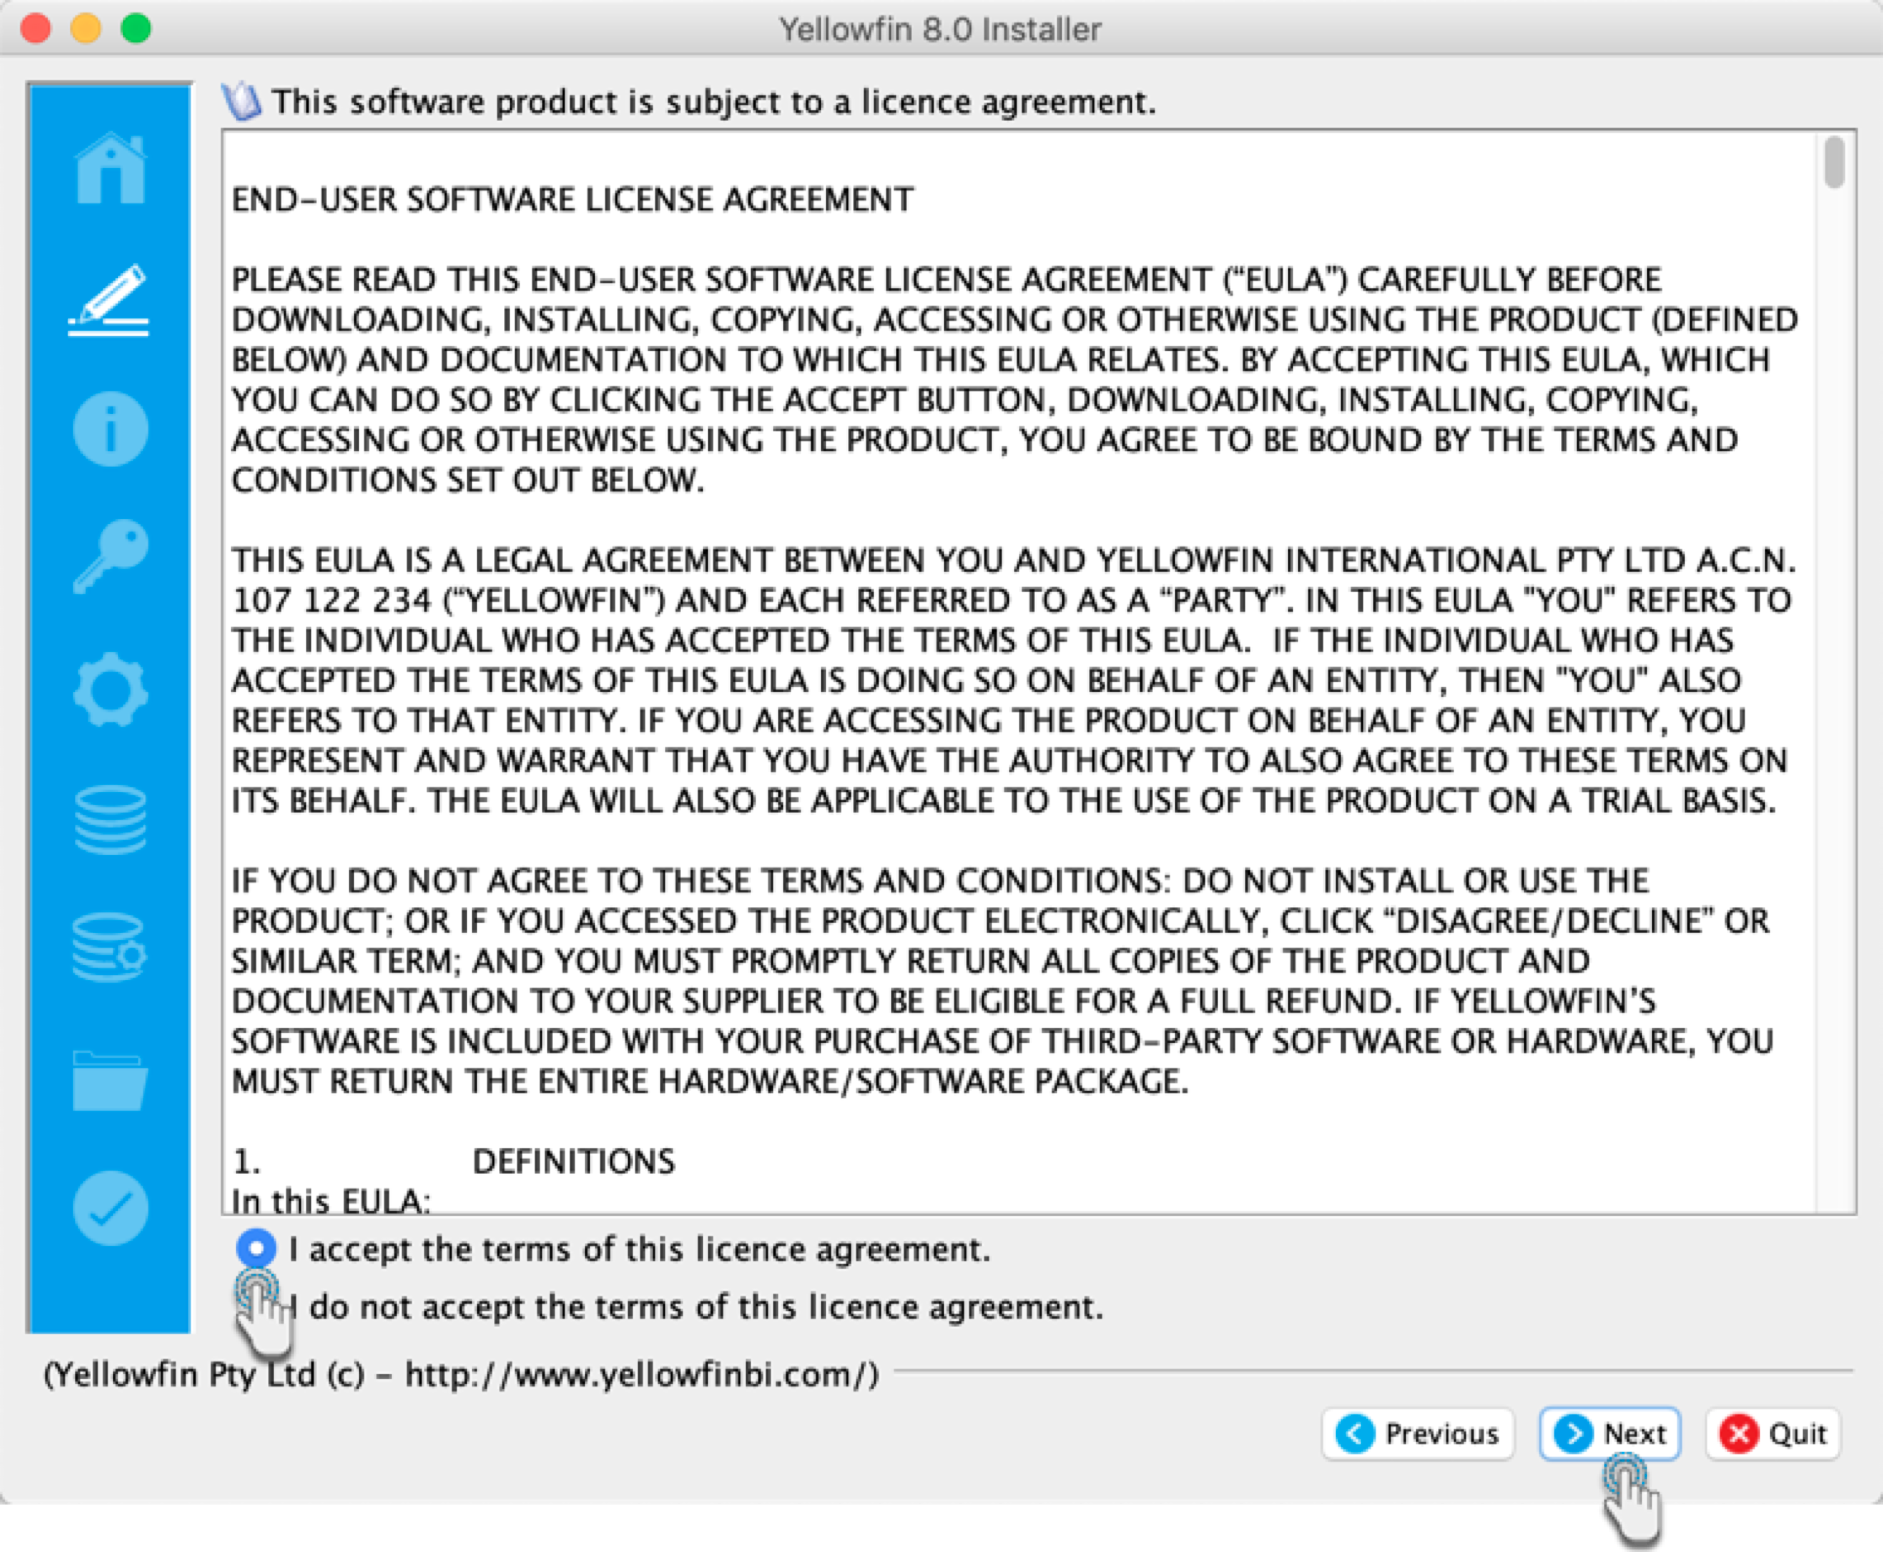
Step 4: Terms & Conditions
The terms and conditions page lists the Yellowfin Software License agreement.
The full text of the Yellowfin End-User Software Agreement can be downloaded in PDF format from here.
When you have read the license agreement, select the "I accept the terms of this license agreement" option to agree and click the Next button to continue.
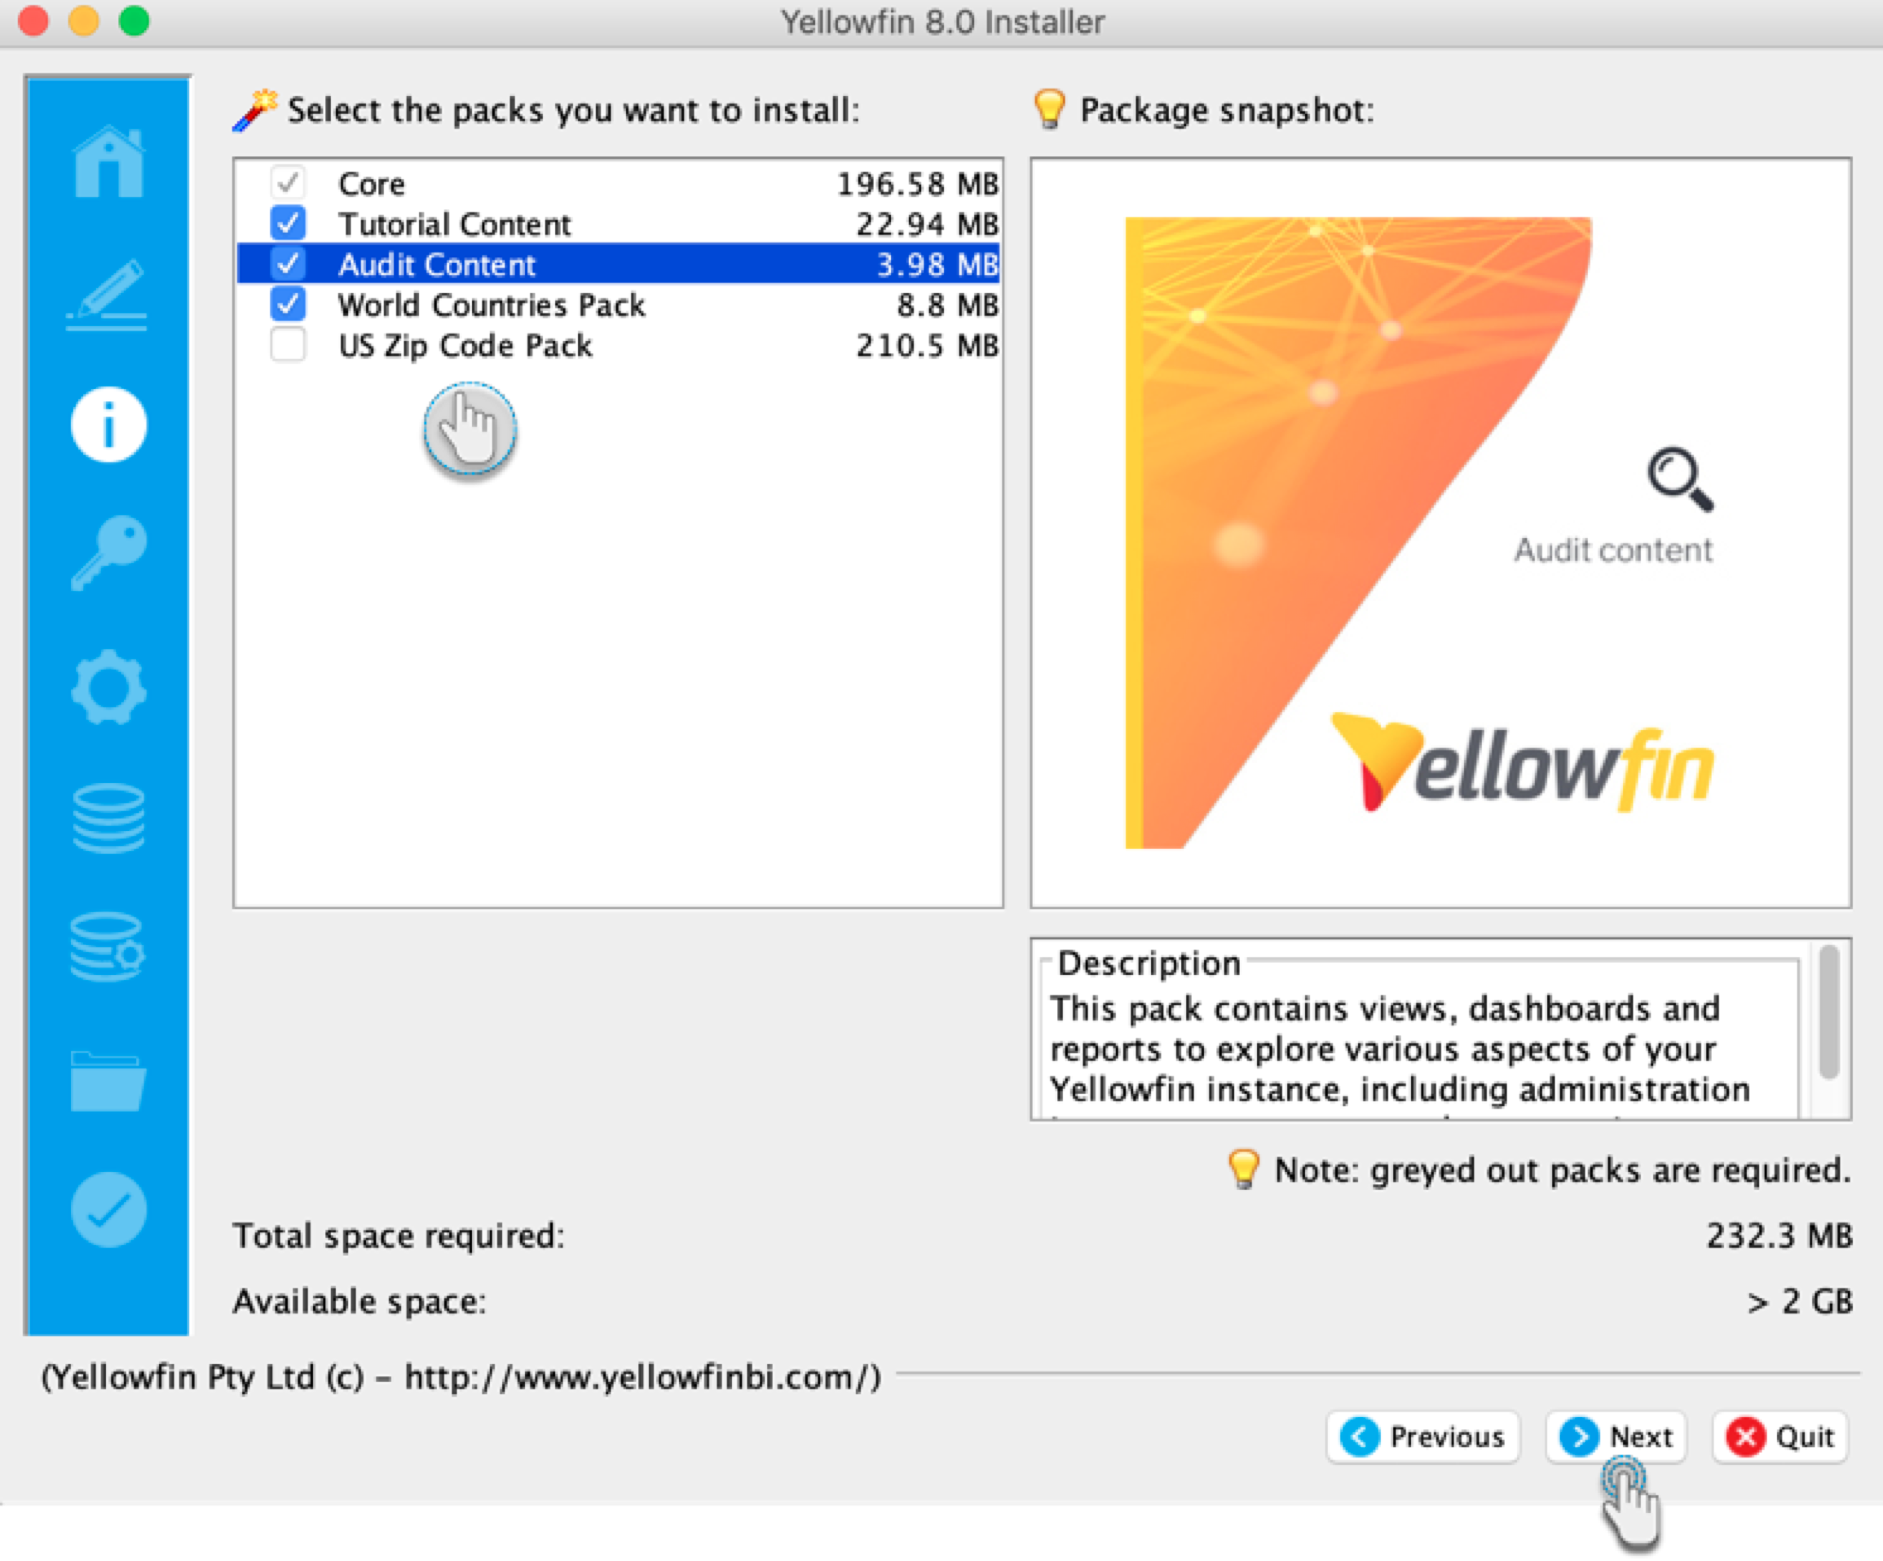
Step 5: Components to Install
On this screen, you can select the optional content packs to install. The available packs include:
| Pack | Description |
|---|---|
Core | This is the core software for Yellowfin that must be installed. |
Tutorial Content | This content pack contains Ski Team sample data, views, reports and dashboards that are used in the Yellowfin training and help documentation. |
Audit Content | This content pack contains views, dashboards and reports to explore various aspects of your Yellowfin instance, including administration items, content usage and user metrics. |
World Countries Pack | This GeoPack provides selected geographic data for every country on Earth. It includes a metric for country population estimates as of 2005. |
US ZIP Code Pack | This GeoPack provides selected geographic data for states, counties and zip codes in the United States. It includes census-derived demographics for population by age, as well as various demographics for area income, labour force and unemployment. Note: Due to the US Census Bureau's method of converting zip codes to areas there is not 100% correlation of postal zip codes to census collected data. As such there are zip code level land areas for which no data is available. |
You will have to install the core software for Yellowfin but you do have the option of installing the tutorial database, sample usage reports, and language translation files.
Tips:
- If you are installing Yellowfin in an evaluation and training environment, it is recommended that you install all content packs.
- If you are installing Yellowfin in a production environment, it is strongly recommended you install the Audit Content pack so you can more easily monitor the use and performance of your Yellowfin system.
After selecting components, click the Next button to continue.
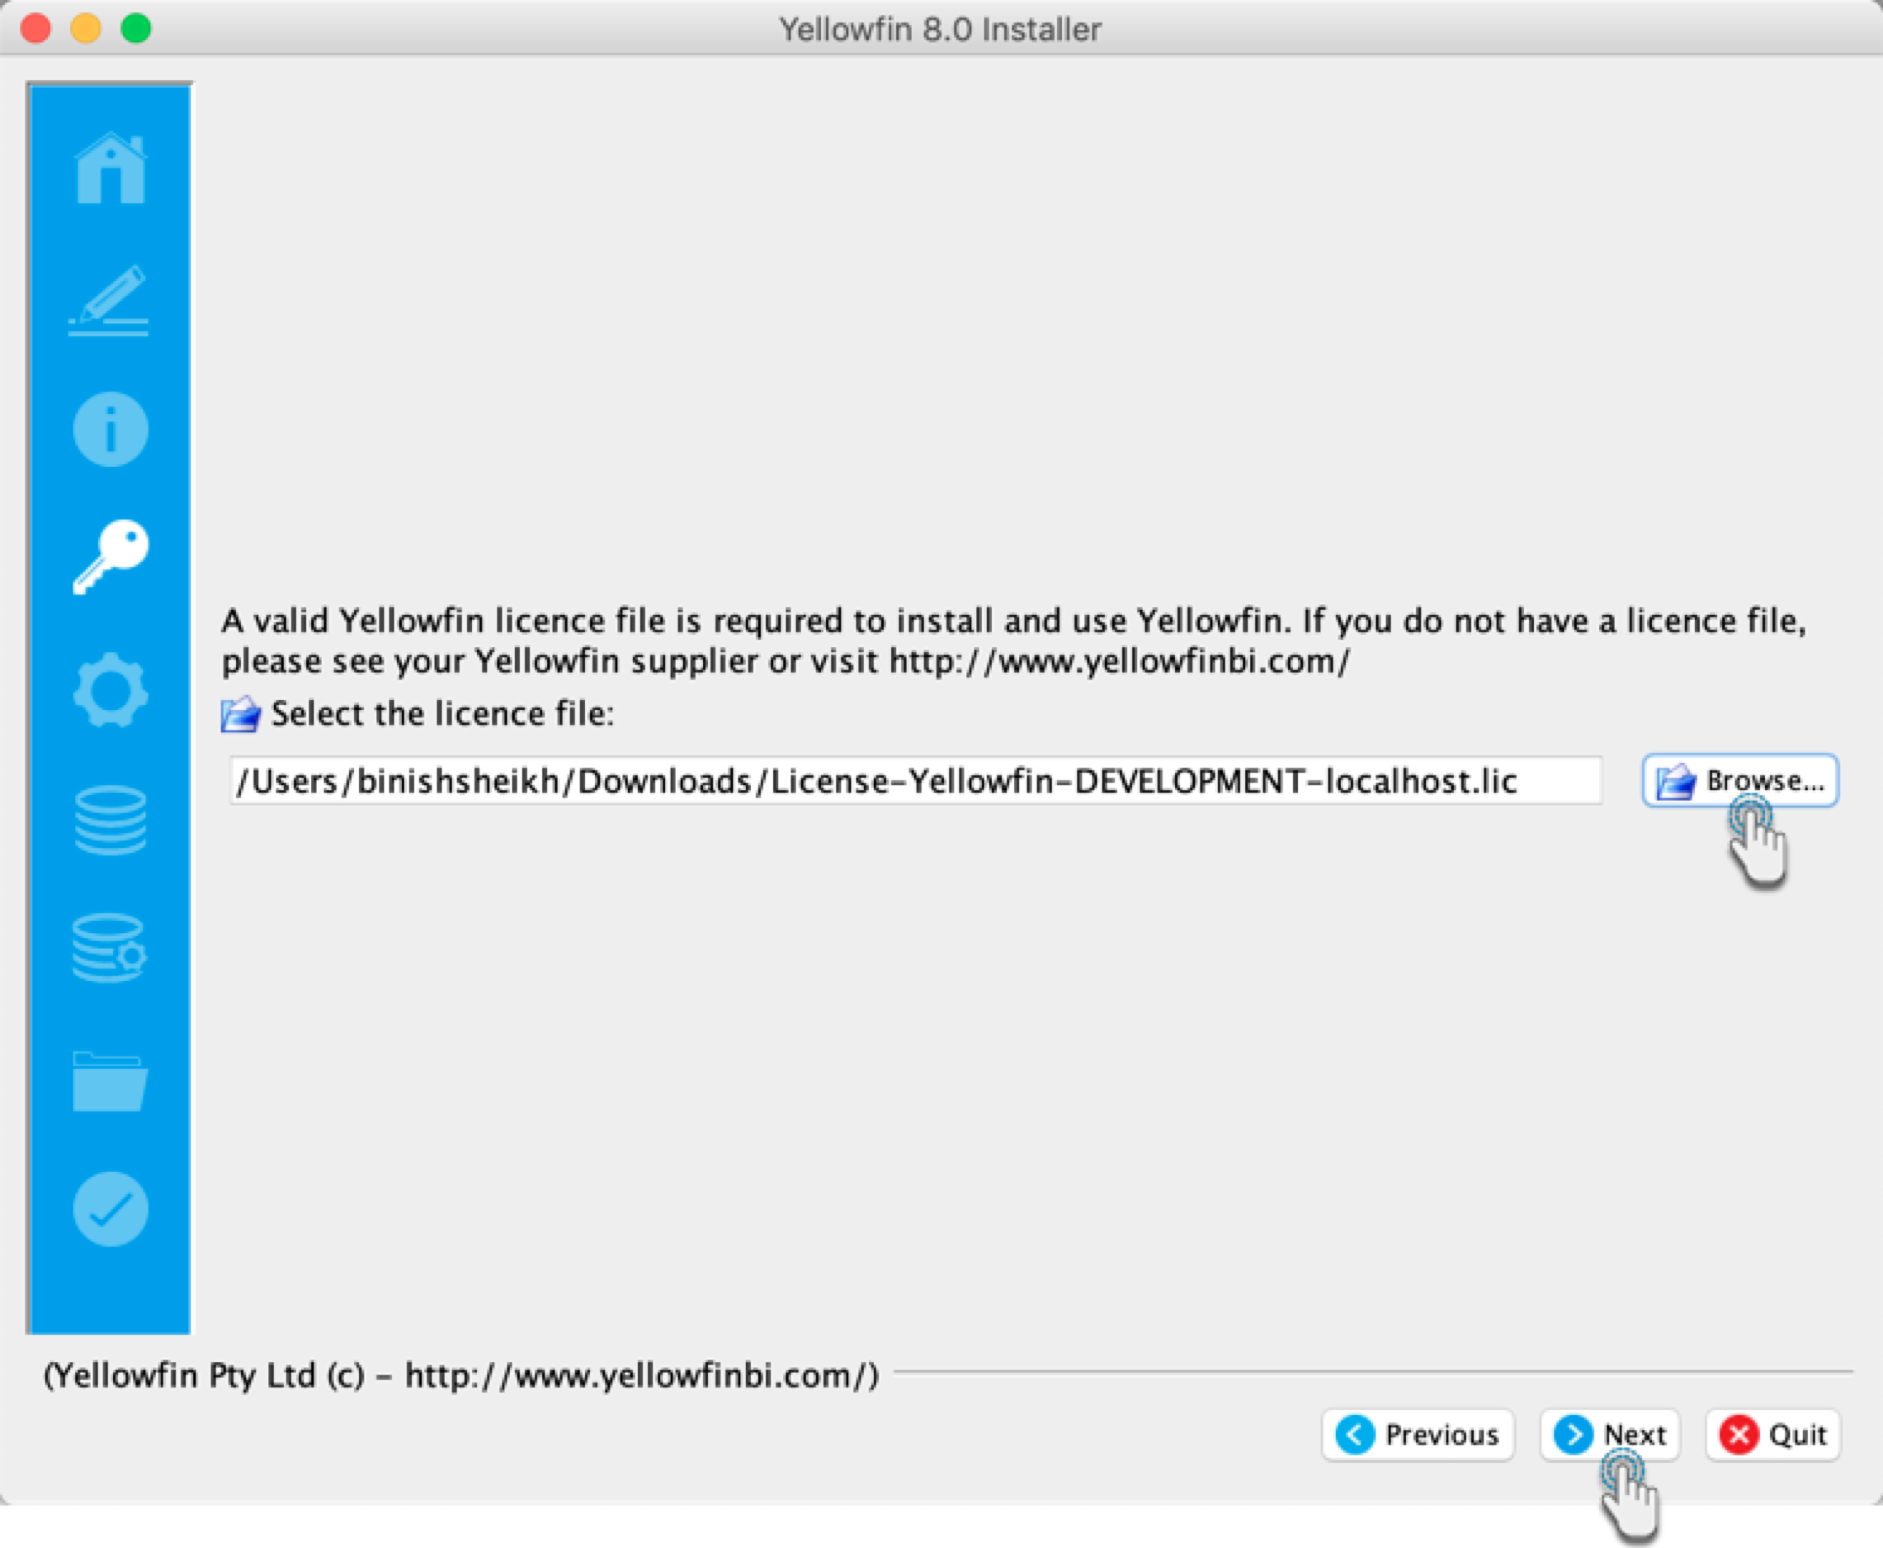
Step 6: License File
Next, select the license file that you received from Yellowfin by clicking on the Browse button and locating it. Once selected, click the Next button to continue.
You can skip this step and upload the licence file after installation, after logging in. See the License Management page for details on how to do that.
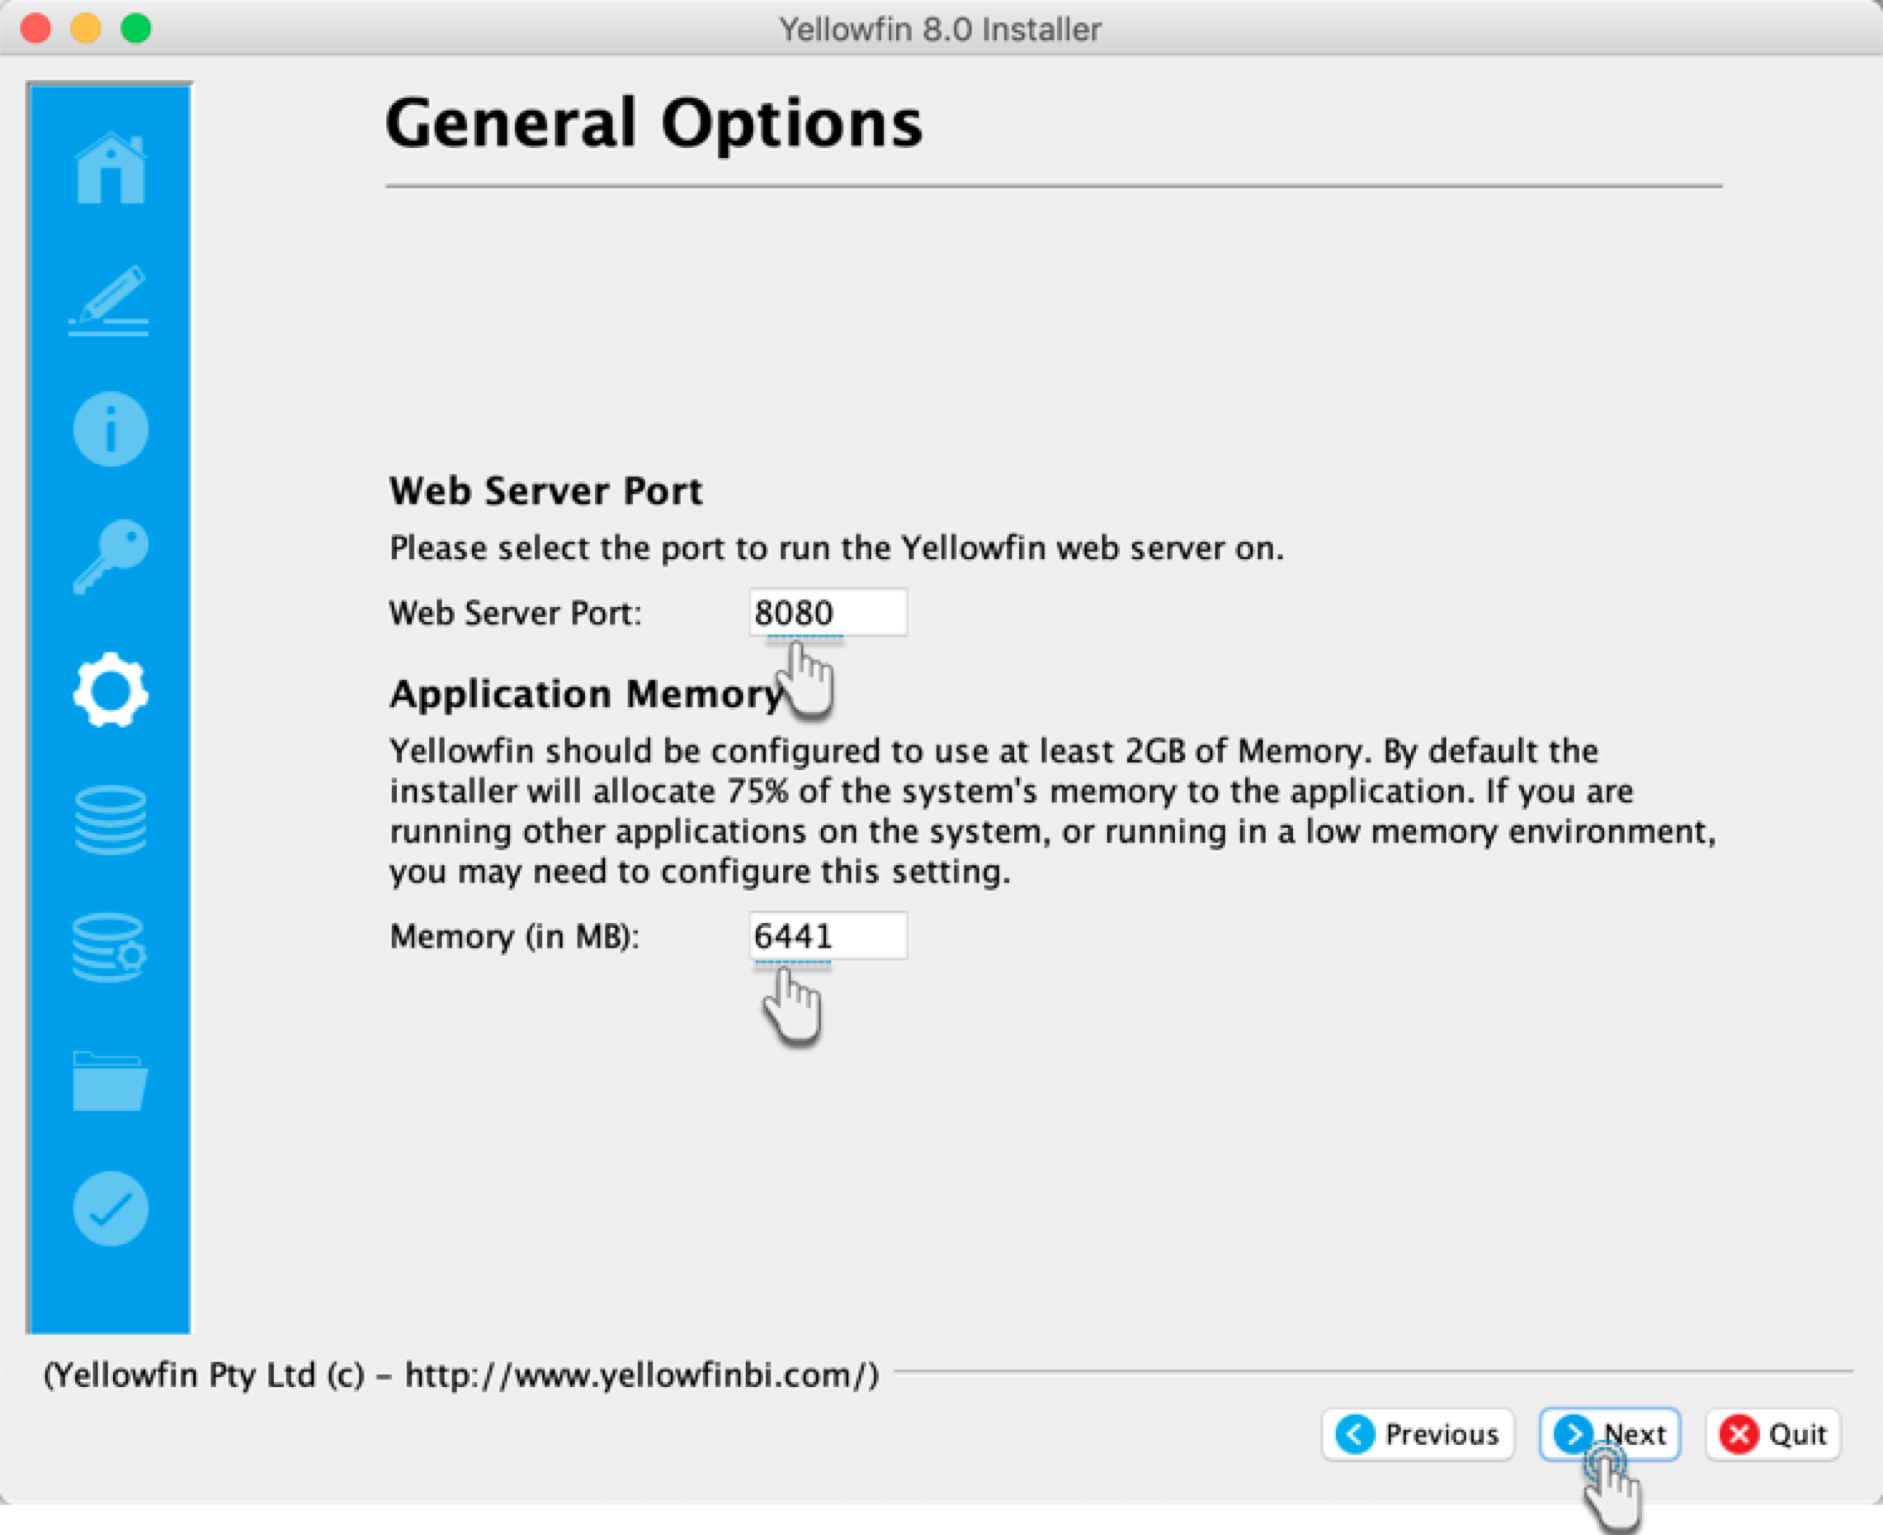
Step 7: General Options
This screen enables you to select main configuration options for Yellowfin.
| Configuration | Description |
|---|---|
| Web Server Port | This configuration option allows you to set the port number to which the Yellowfin application will listen for web browser requests. By default, all web browsers send requests using port 80. Select a port number which is not currently in use by another application on the machine. Port numbers like 8080, 8081 and so on are good candidate port numbers. If there are no other web servers on the machine that Yellowfin is being installed on, accept the default port number of 8080. If there are already web servers installed on the machine that Yellowfin is being installed on, then there may be port clashes and Yellowfin will fail to function correctly. |
| Windows Service | This configuration enables you to install Yellowfin as a Windows Service on the server. This means that it will automatically start up whenever the Windows Server is booted and save having to be manually started. Note: this option will only appear during installation on a Windows platform. |
| Application Memory | This configuration lets you specify a memory size (in MB) that should be used by Yellowfin. Yellowfin should be configured to use at least 2GB of memory. By default, the installer will allocate 75% of the system's memory to the Yellowfin, but this size can be changed here. |
After configuring these value, click the Next button to continue.
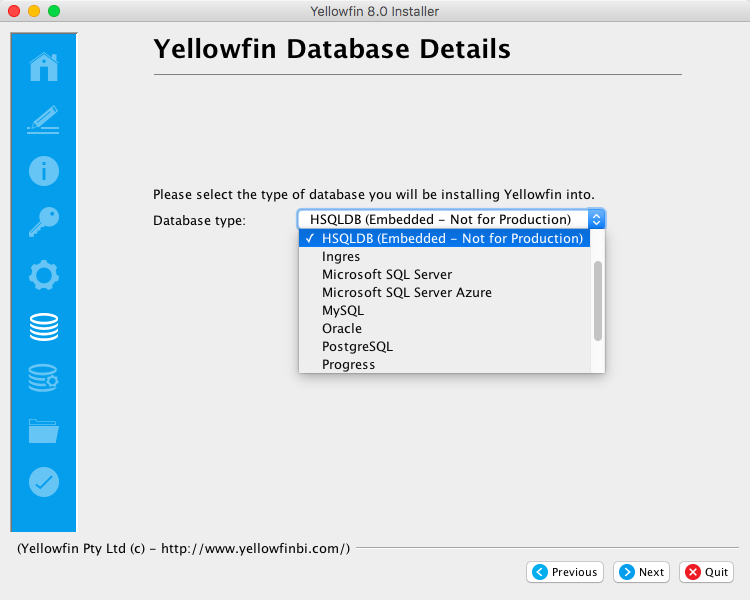
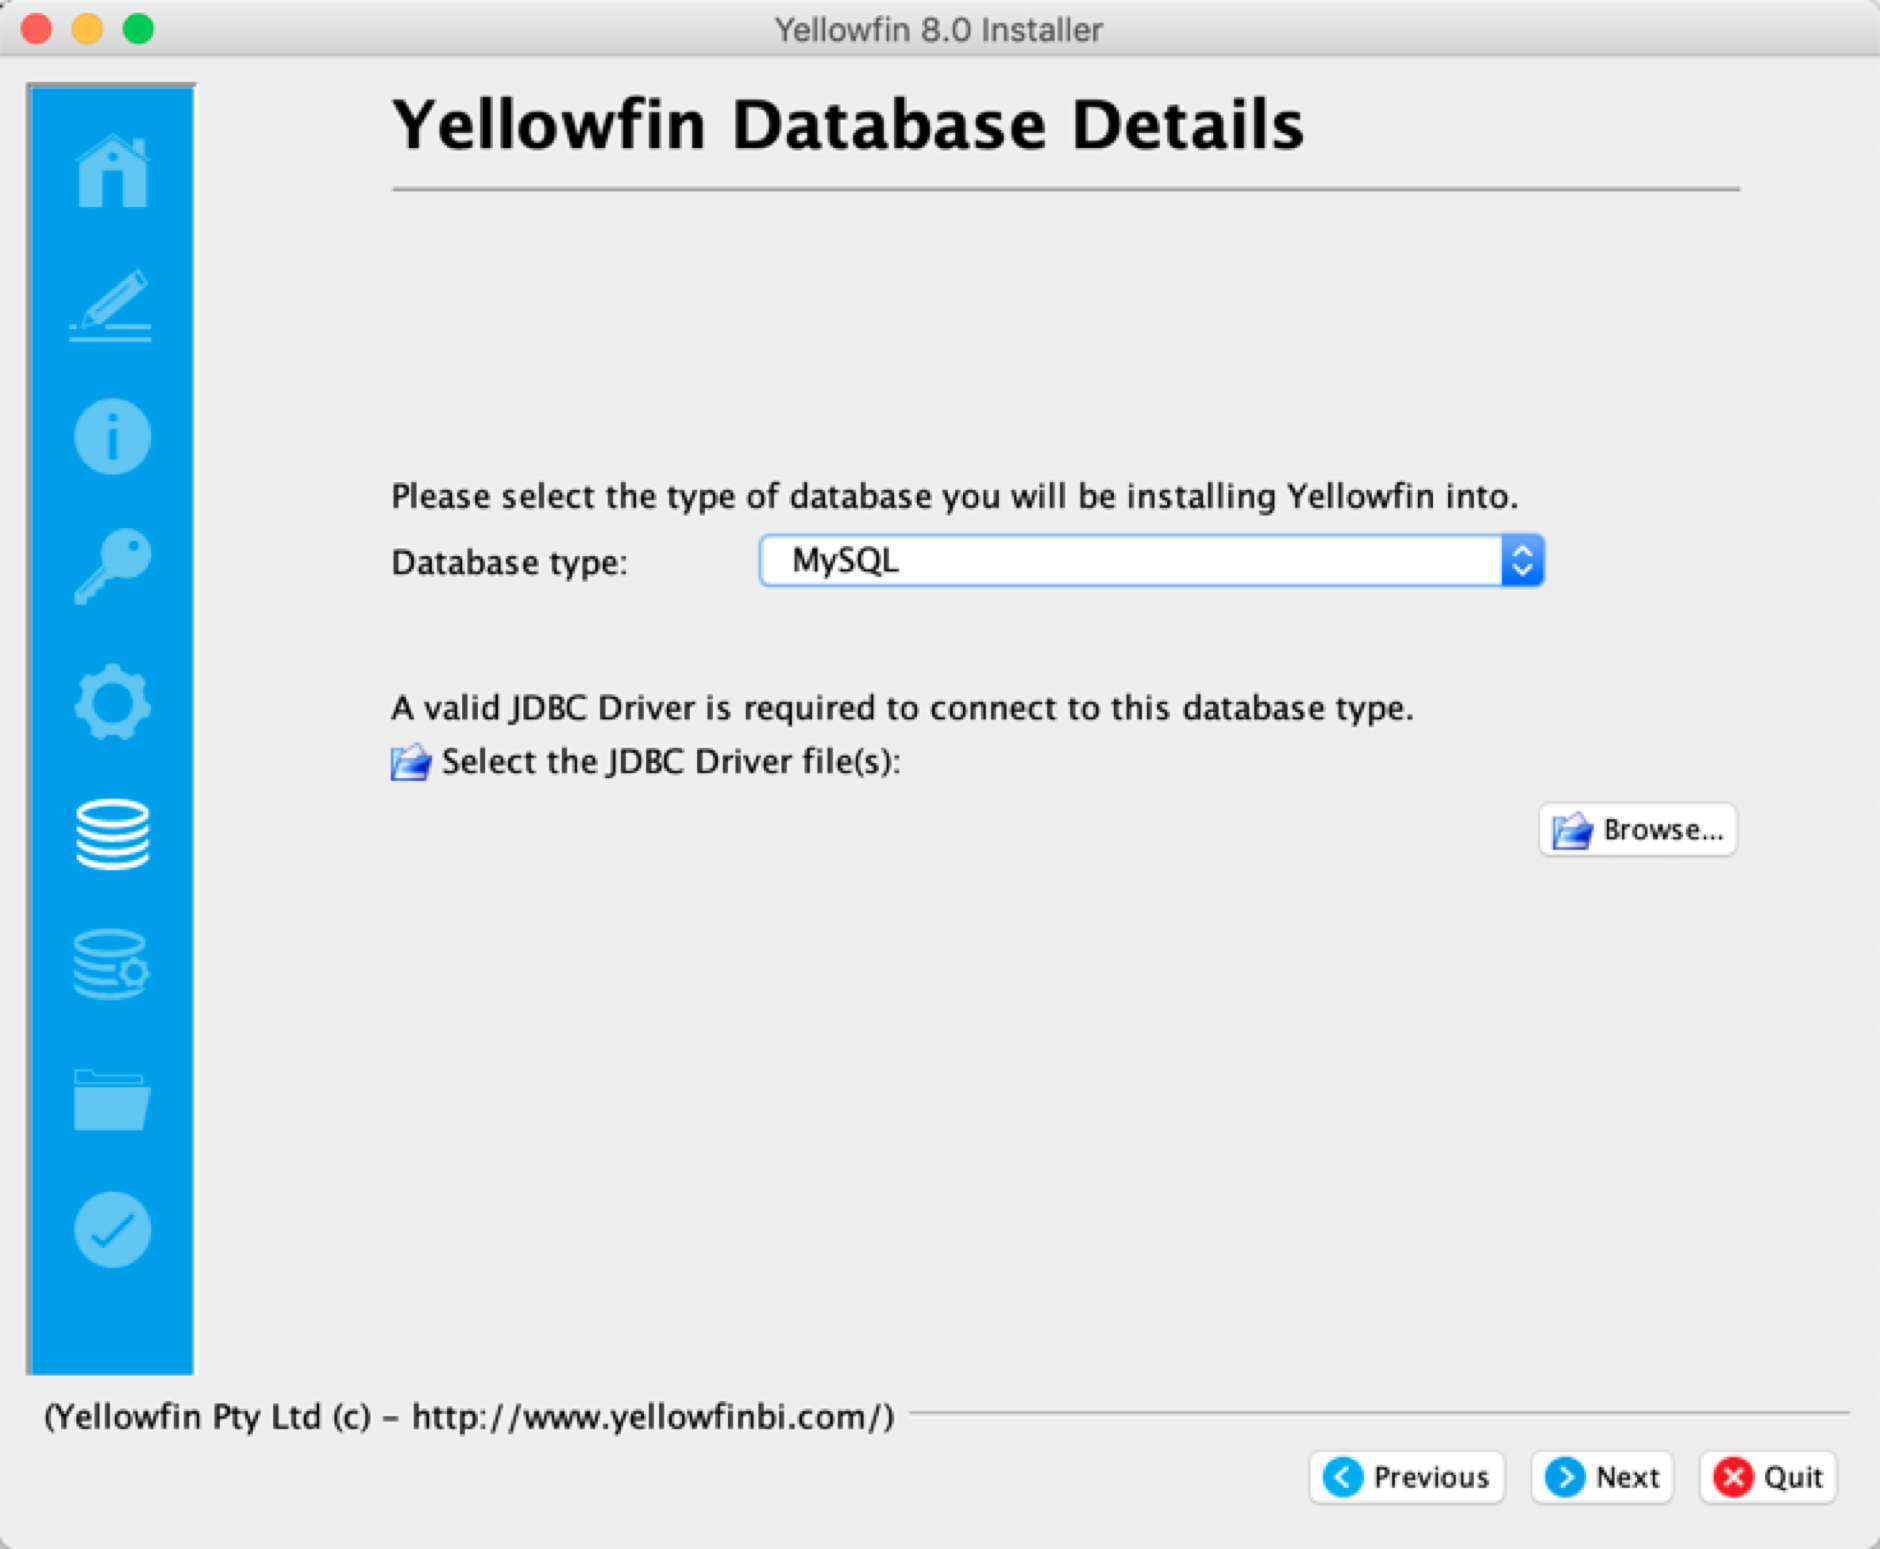
Step 8: Database Selection
Choose the database type that you wish to install the Yellowfin Repository database into. This selection is based on the database information covered in the prerequisites.
Based on your selection the next few steps will vary. Click the Next button to continue.
If the JDBC driver of your selected database is not packaged with the Yellowfin installer, then an additional step is required to upload the driver.
Click on the Browse button and choose the location where the driver is stored.
Step 9: Database Details
In this step, provide the configuration details for the database server this is hosting the Yellowfin database. This is the database that stores all the Yellowfin content definitions, configuration information, and event details. This database can be created before the installation or the Yellowfin installer can create it for you.
If you chose a database type of HSQLDB (Embedded - Not for Production) you will not see this screen because this database type has no configuration options.
As an example, if you selected Microsoft SQL Server, these are the options you would have to populate in order to set up the Yellowfin Configuration Database. If you choose another compatible database server the screen may look slightly different.
Database Server Location | |
|---|---|
Server Host | Enter the network address of the database server hosting the Yellowfin database. If the Yellowfin database is on the same computer as the Yellowfin application enter localhost |
Server Port | Enter the network port number of the database hosting the Yellowfin database. |
Database Name | Enter the name of the Yellowfin database. |
Create New Database | If the above database does not exist on the database server, tick this option to allow the Yellowfin installer to create a new database to host the Yellowfin database using the database name entered above. When you tick this option the Administrator User section will appear on the screen. |
Authentication Details | |
Authentication | This configuration is specific to Microsoft SQL server. Choose how the database users should be authenticated. Options include:
|
Logon Domain | If Windows authentication is selected, then specify a logon domain. |
Database User | |
Username | Enter the name of the database server user account that has access to the Yellowfin database. This database user must have full read and write permissions to the Yellowfin database. |
Password | Enter the password of the database server user account that has access to the Yellowfin database. |
Confirm Password | Re-enter the password of the database server user account that has access to the Yellowfin database. (This is only required if creating a new user.) |
Create New User | If the above database user does not exist on the database server, tick this option to allow the Yellowfin installer to create a new database user account to access the Yellowfin database. When you tick this option the Administrator User section will appear on the screen. |
Administrator User | |
| This section appears if you select the Create New Database and/or Create New User options. | |
Username | Enter the name of the database server user account that has administrator-level access to the database server hosting the Yellowfin database. |
Password | Enter the password of the database server user account that has administrator-level access to the database server hosting the Yellowfin database. |
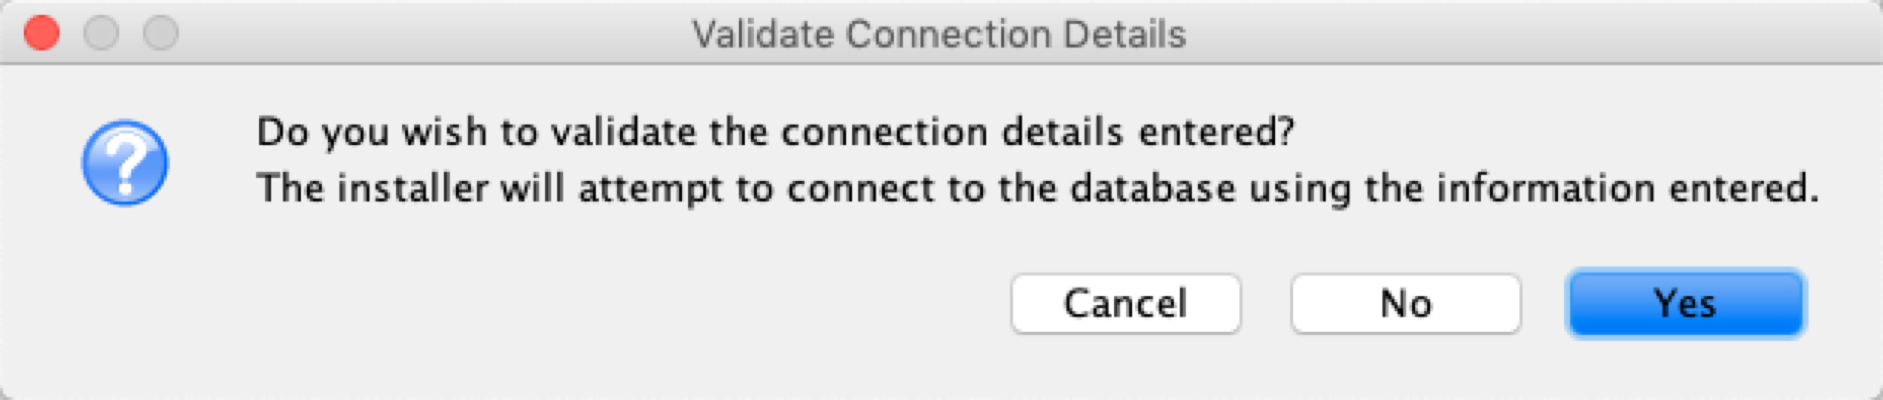
After providing the details, click on the Next button. You will have the option to get your database connection details validated. Click Yes if you wish to do so to confirm a successful connection, otherwise choose No. Proceed to the next step.
Step 10: Installation Path
Define the installation directory for Yellowfin. This will default to different directories based on the operating system you are installing to. For example, C:\Users\Administrator\Yellowfin 8.0.
You can change the default installation directory by directly typing in a new path, or using the Browse button to navigate the file system.
When you have chosen your installation destination, click the Next button to continue.
Notes:
- If the installation path does not exist just enter the required installation path and the installer will create the directory.
- If you select an installation directory in the path C:\Program Files then the Yellowfin application must always be run as an administrator.
- Windows users installing into a 64bit version will need to ensure they choose a path outside of the Program Files directory.
- Choosing an installation path without space or punctuation characters will make future advanced configuration easier.
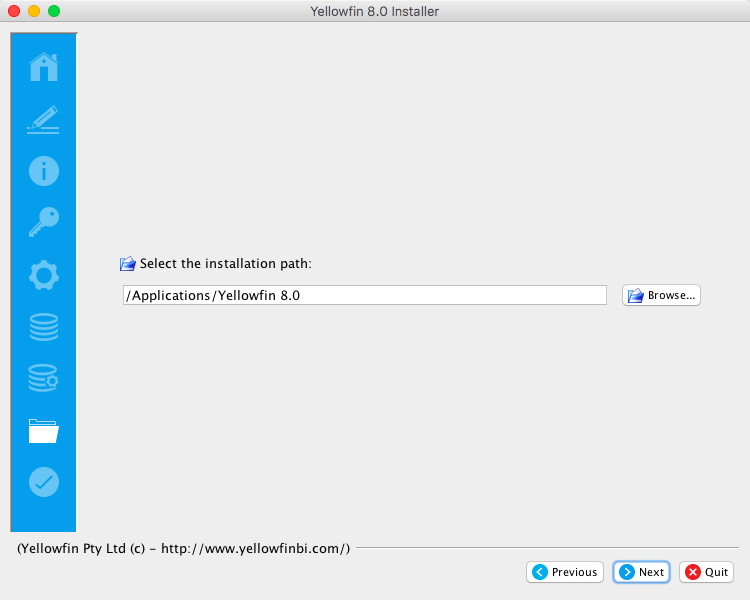
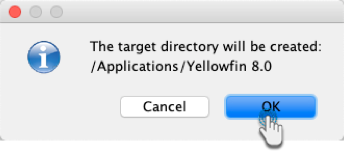
If the installation path is new, click OK to confirm that the new directory will be created.
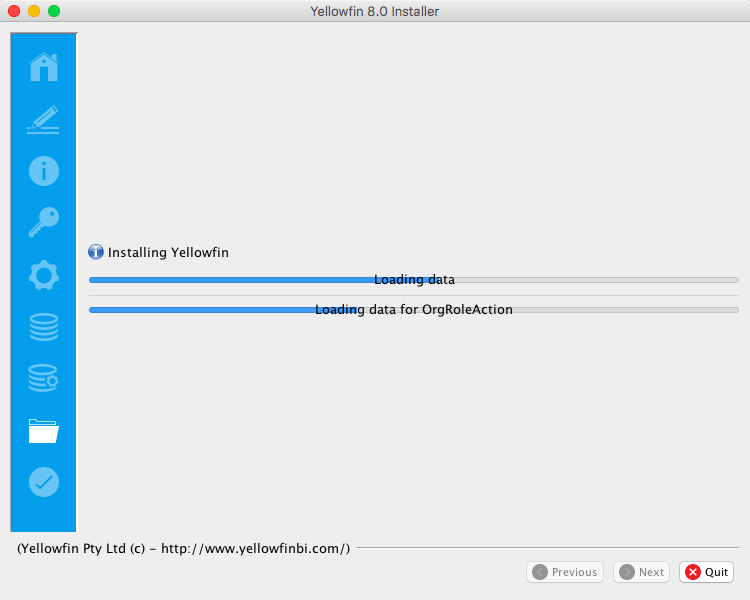
Step 11: Installation Progress
This screen will enable you to observe the progress of the software installation. Depending on the capacity of the computer hardware and the content pack you selected, this could take a few minutes.
When the installation is complete the Yellowfin installer will automatically move to the Installation Complete screen.
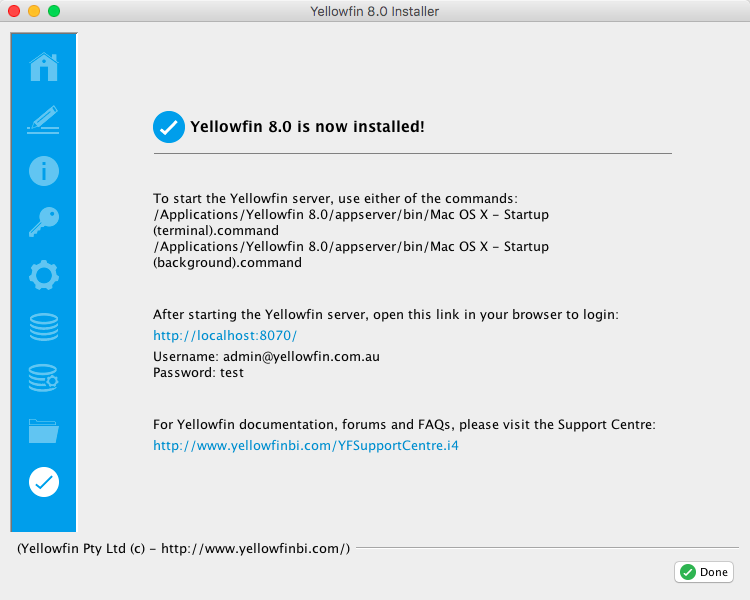
Step 12: Installation Completion
This screen will be displayed at the end of a successful installation of the Yellowfin Application Server. If you do not see this window, contact your Yellowfin representative or contact Yellowfin Support.
Take note of the information provided on this screen. This includes details of how to start the Yellowfin application, and the information you need to log in to Yellowfin from a web browser.
Click the Done button to complete the installation procedure.
An uninstall function has been created for you under the directory nominated in the database selection step.
Next, you must start Yellowfin to log into it. See our Post Installation section for more on this.
Troubleshooting
Most problems related to the Yellowfin application server installation relate to database connectivity and administration issues.
As mentioned previously, a log is kept of the database installation and can be found in $INSTALL_DIRECTORY\uninstall directory.
The most likely problem will be the incorrect setting or misspelling of the parameters entered in Step 7 Configure the Database Connection and User parameters eg. database name, port, IP address etc.
Customers using Microsoft SQLServer or Microsoft MSDE should ensure that the IP addresses and configuration are consistent with the parameter values entered. The Microsoft program svrnetcn.exe (SQLServer Network Utility) can be used to check that the SQLServer IP stack (including the JDBC port number) has been configured correctly. It can be used for both SQLServer and MSDE.
Example
Network error IOException: Connection refused: connect()
This error means that the installer cannot connect to your MS SQL server instance. This error occurs before authentication takes place. This means that either:
- SQL Server is stopped on the server you are trying to connect to.
- The connection details you entered were incorrect.
- You have a network problem that stops the computer you're running the installer on from connecting to the SQL server host (unlikely if you are connecting to your localhost).
Verify these settings on the Configuration DB Parameters screen on the installer.
- Database Server Name: This will probably be the "localhost".
- Database Server Port: This should be 1433.
- Database Name: This is the name of the database you want Yellowfin to install to. This should be "yellowfin". This is used for Yellowfin configuration and operational data. It is not the database you wish to report off.
- Create Database: Click this to create the new Yellowfin database. We suggest removing the Yellowfin database if your installation failed previously.
- DBA User: This could be "sa".
- DBA Password: This could be "sa".
- Reports UserId: Set this to "yellowfin_user".
- Reports UserId password: Set this to "yellowfin_user" or whatever you prefer.
- Create user id: Check this checkbox.
Contact Support
If the above posts do not solve the issues you're experiencing, please send an email to support@yellowfin.bi with a clear description of the issue, along with the following:
- Screenshots (if applicable)
- YellowfinInstallLog-date.log (this can be found in the Yellowfin directory)
- All log files found in Yellowfin\appserver\LOGS (if you have any)
Previous topic: Installation Prerequisites
Next topic: Post Installation