Like what you see? Have a play with our trial version.

Versions Compared

Key

  • This line was added.
  • This line was removed.
  • Formatting was changed.

...

Section


Column


Column


Number

Feature

Description

1

Drag filter panel

Click and drag this icon to move the filter panel to another location.

2

Filter properties panel

This button brings up the filter properties panel. Learn more.

3

Remove filter panel

Click on this button to delete the filter panel.

4

Link Filters

This button allows you to open set up for manually linking all or multiple filters. (A separate option is available to link individual filters.) Learn more. 

5

+ Filters

This button allows you to add user prompt report filters to the filter panel. Options include adding individual filters, or a filter group. Learn more.

6

Menu option

Click on this menu option to perform actions on this filter panel. Option includes:

  • Close: this option allows you to collapse the filter panel, maximising the amount of room allocated to the display of your report. The filters can always be accessed again by clicking on the left side navigation filter button.

7

Filter 

The filter(s) added to this panel. Select a filter value or ‘all’ using the toggle (see below).

8

Select all

Enables users to select all filter options in a list filter. This appears only if you have a list.

9

Re-order filter

Use the  icon to drag and move a filter above or below another.

10

Individual filter menu

Brings up a menu for the selected filter. Option includes:

  • Link To: allows you to manually link an individual filter to other reports on the presentation.

11

Present filter bookmarks

Allows you to bookmark a filtered presentations, or apply a saved bookmark. Learn more.

12

Refresh cached filters 

The button allows you to refresh Clicking this button refreshes the cached filter values, but it does not re-run the report (see Apply below). Note that this button will only appear if your filter contains cached values.

13

Reset filter

Removes selected filter values to reset filters to their default values or no selection.

14

Apply

Allows you to apply selected filter values.  

Note: Features 11, 12, 13, and 14 together make up the filter control. These always appear at the end of a filter panel, for the use of presentation users.


...

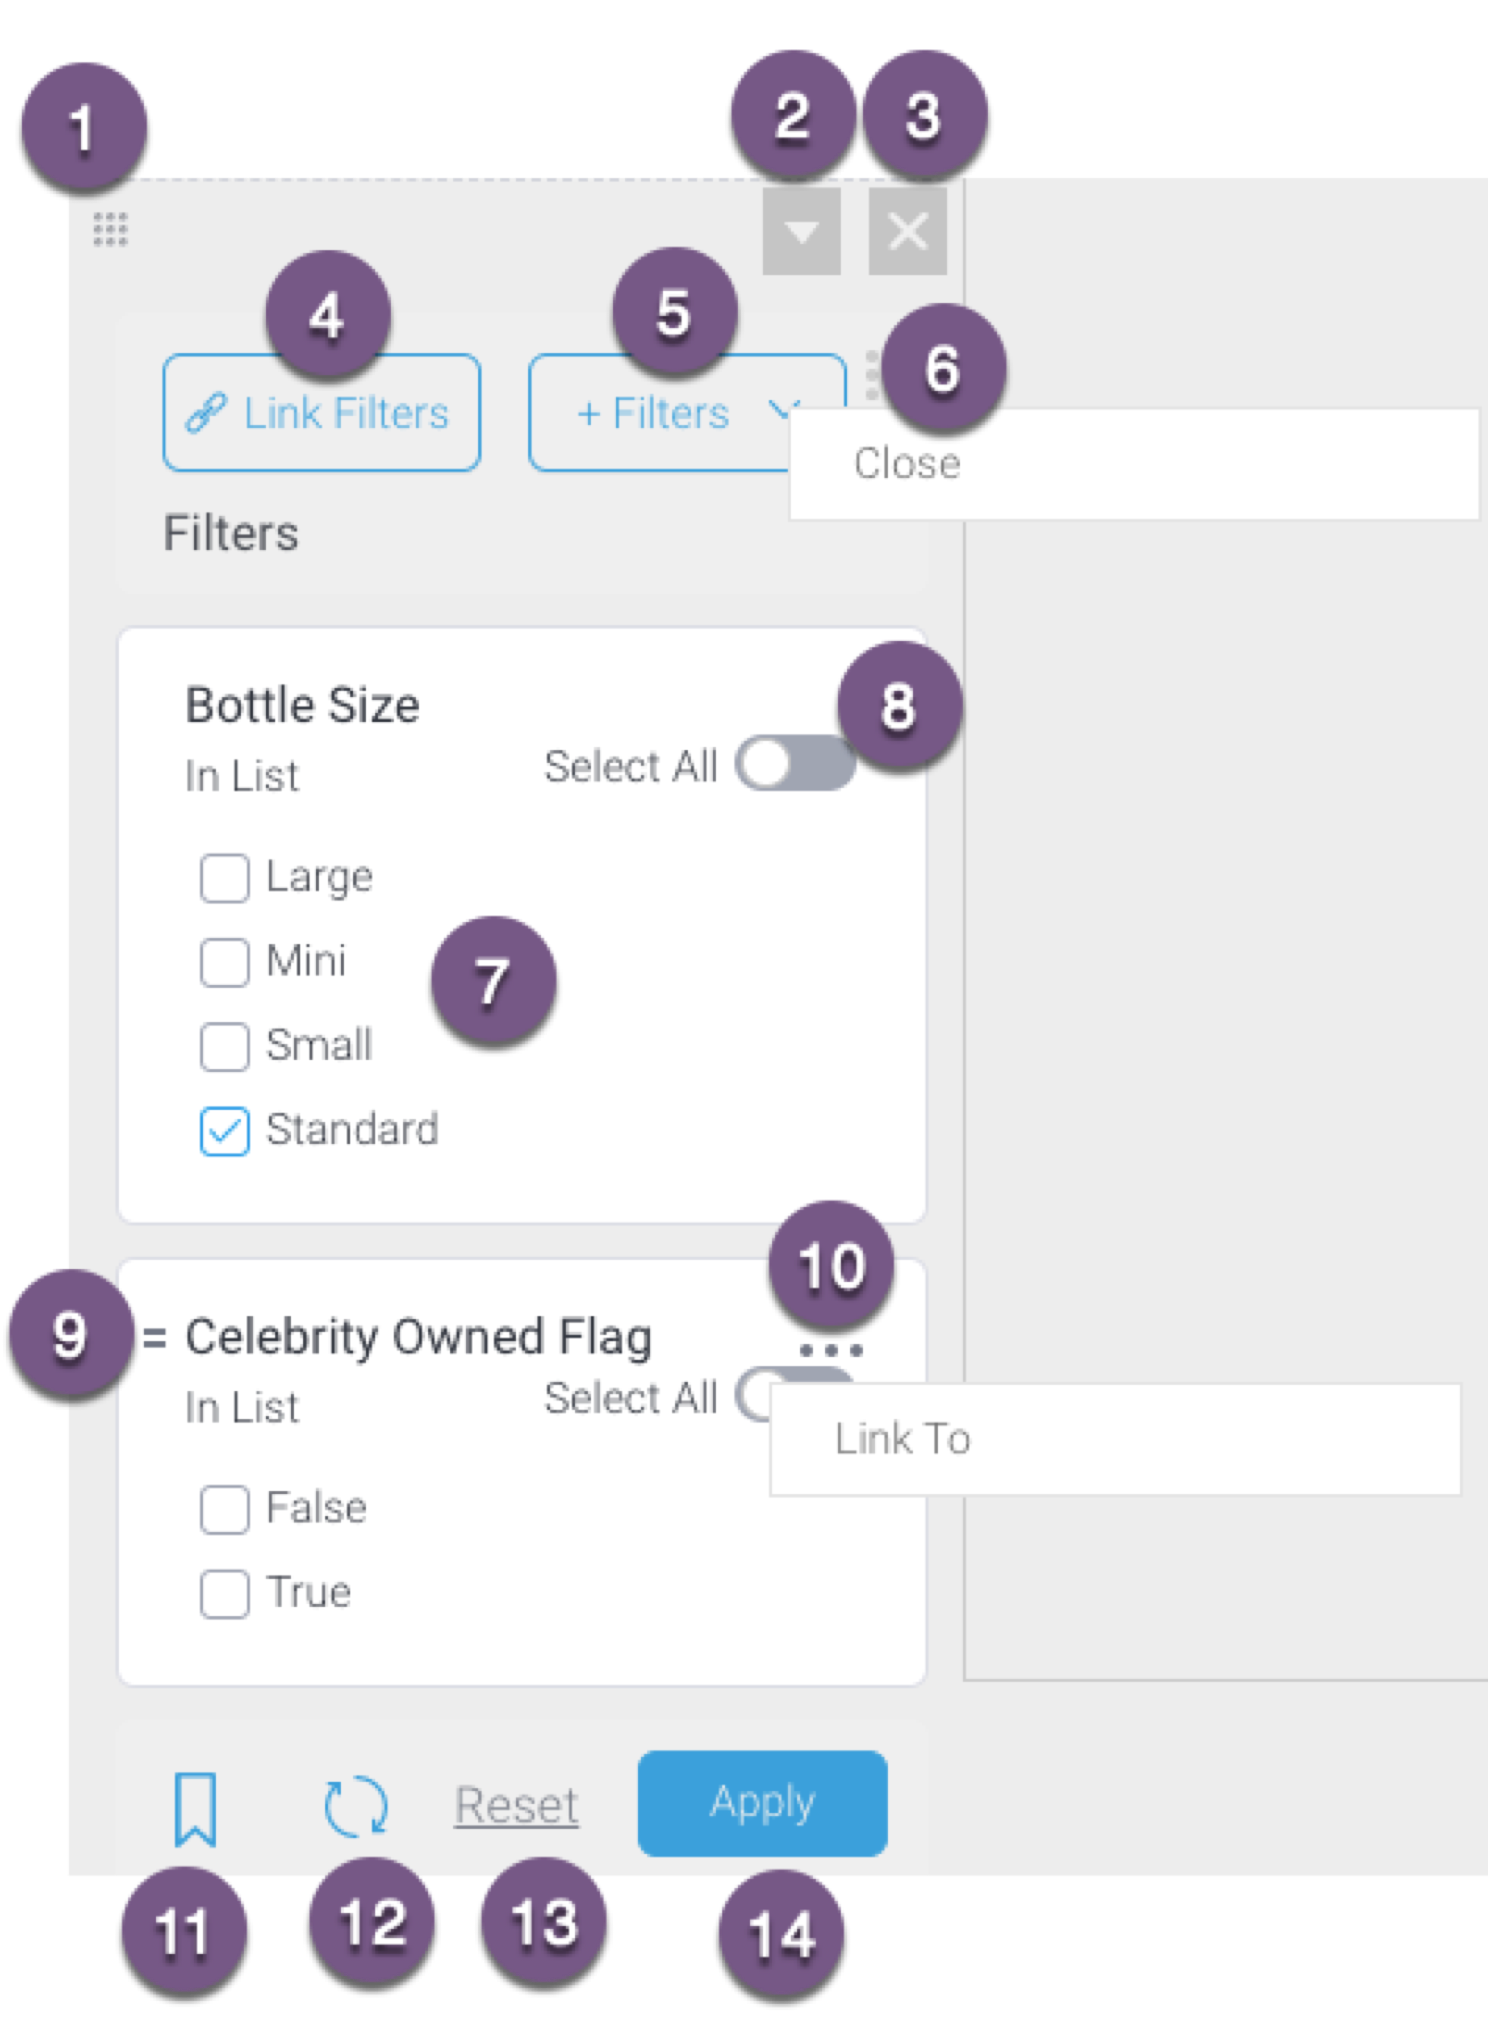
  1. Click on the Filters icon on your presentation builder to bring up the Filter Widget list.


  2. Then drag a Filter Widget onto the presentation at the exact location you would like to display the filter.
  3. A filter panel will appear on the location it was dropped. (Side note: click here for an overview of this filter panel). 
  4. Add report filters to this panel by clicking on the + Filters button.


  5. Choose Filter to add individual filters (you can add multiple as well), or Filter Group to add a filter group. (In our example, we will choose Filter.)
  6. A pop up displaying available report filters will appear. This allows you to choose which filters to add from any of the reports.
    Note: If none of the reports contain any filters, then the following notification will appear on this popup. Click on the Add a report link to open the Reports tab on the left side.


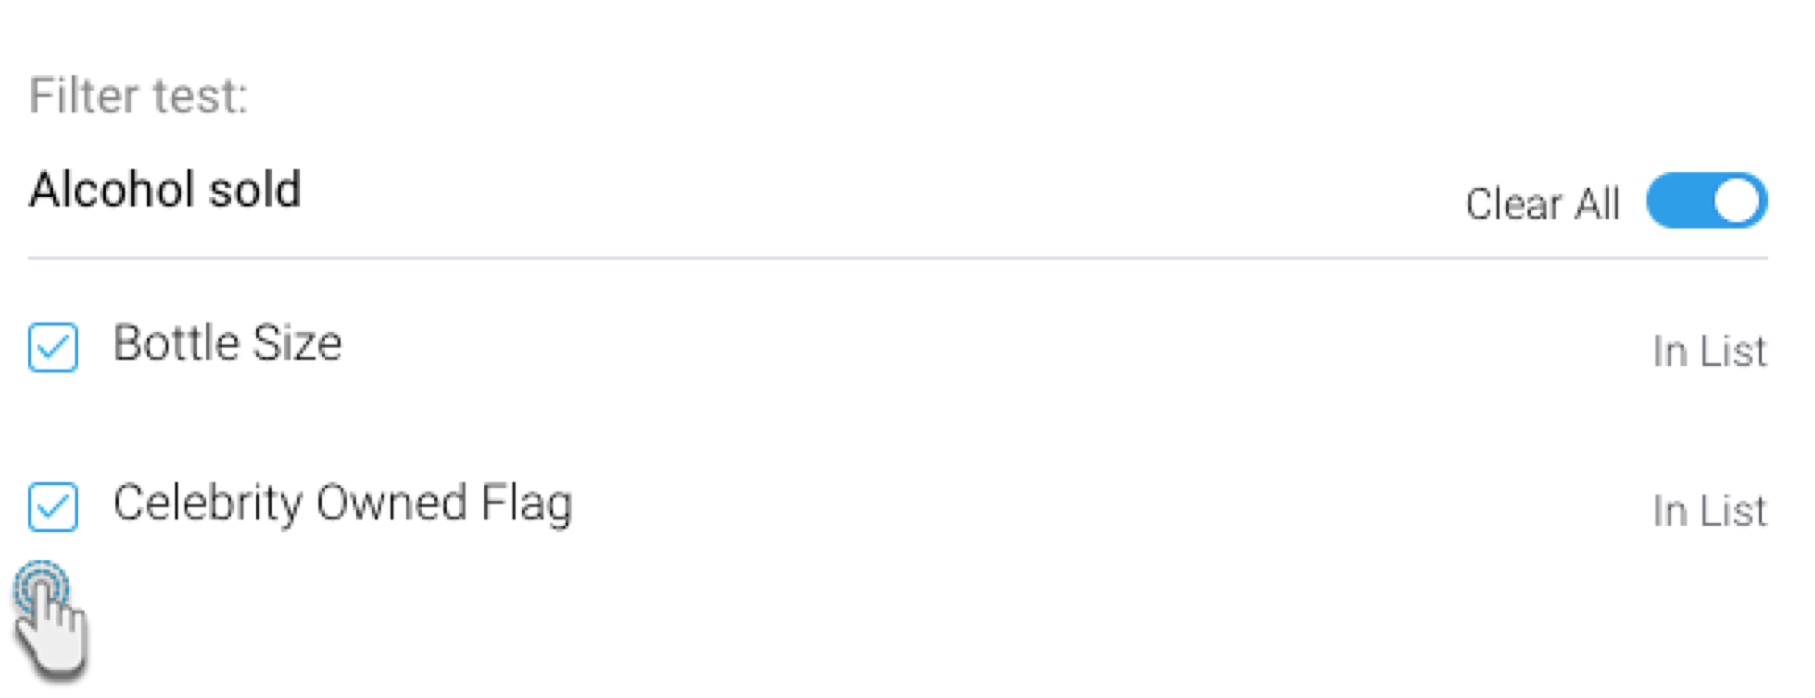
  7. Click on one or more filter checkboxes to select those that you want to add. Alternatively, enable the Select All toggle to select all the filters on this pop up. You can undo this selection by choosing the Clear All.


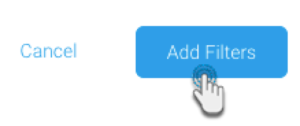
  8. Click on the Add Filters button on the bottom of this pop up to add the filters. 


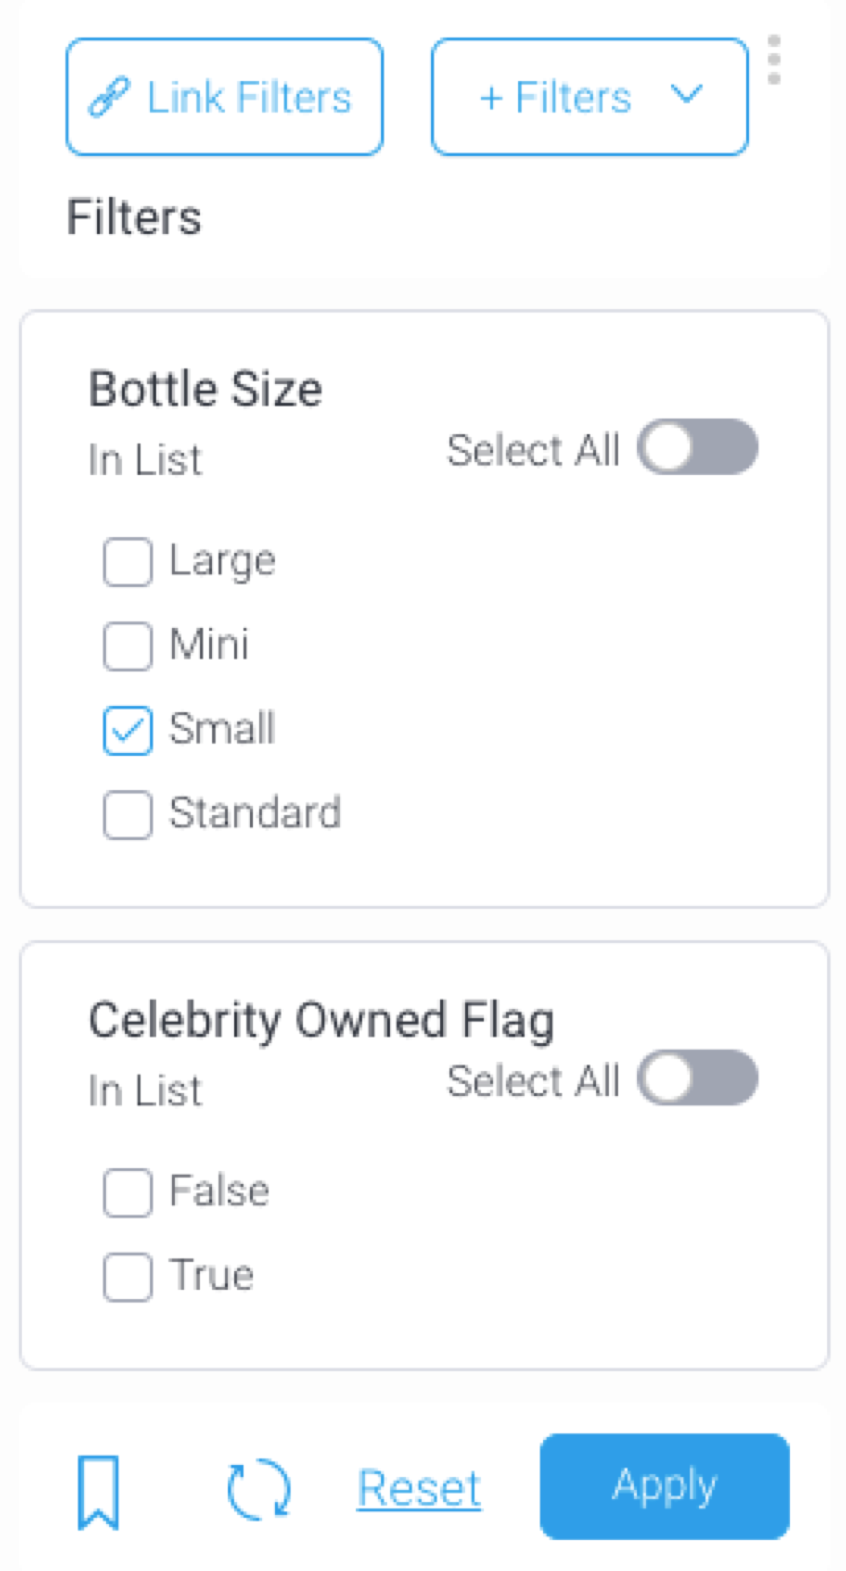
  9. The filters will then appear in the filter panel on the presentation, as shown in the example below.

...